How to make an organza flower
Beginners should not immediately start creating complex options. In order to make the simplest organza flower, you need:
- draw templates on cardboard in the form of 5-6 circles, each of which is 3 mm smaller than the previous one;
- apply patterns to organza;
- circle with a pencil;
- cut out;
- light a candle;
- carefully process the edges of the circles over the candle, holding them at right angles to the flame;
- put circles on top of each other;
- sew the petals with thread;
- fix;
- sew 2-3 beads into the middle of the organza flower or glue several beads using a glue gun.
To make the product more attractive, you can cut petals from fabric of several similar shades. In this case, it is better to make the largest circles from organza of a more saturated color, and gradually move on to paler ones.
Kanzashi hairpin made of three types of petals
DIY technology:
- Cut the 5cm wide peach strip into 22 squares. Cut the white 4 cm braid into 6 identical pieces.
- To create a large rounded petal, bend the yellow-red blank in the form of a triangle, the edges of which are bent to its top to form a rhombus. Bend it in half and grab the ends with tweezers. Cut the edges a little and solder with a lighter. Cut the bottom and also solder the sections. Execute so. 6 parts.
- To form a small oval leaf, take 2 squares (one large, one smaller), bend both in half diagonally and fold them together. Lower the corners of the resulting triangle to the top. Bend the resulting diamond in half and grab the edges with tweezers. Cut the ends so that all tiers are connected, and solder the sections with a lighter. Trim the bottom and fuse the ends too. Make 6 similar blanks.
- To make a sharp petal, take a large square and bend it diagonally, you get a triangle. Fold the part 2 p. in half. You will get a small triangle. Trim the edge and solder the cut. Trim the bottom of the leaf and burnish the cuts with a lighter. Make 10 pieces in the same way.
- Assemble the lower tier from round leaves, and the upper from double oval blanks.
- Connect both parts with glue. Glue a bead in the center.
- Glue two pointed green petals at the corners. Glue a third leaf between them. Repeat the same steps.
- Cover the base of the hairpin. To do this, cut a rectangle from a wide ribbon (5 cm), the length and width of which are 2p. more sizes of automatic hairpin. Singe the sections of the part, coat them with glue and glue them lengthwise. Cover the metal base with the resulting strip.
- For the floral base, prepare a peach piece 8 cm long and glue it in half. From the created square, cut a circle with a diameter of 3 cm. Scorch the edges.
- To assemble the hairpin, you need to glue the base you have made to the flower. Attach the finished decoration to the center of the product. Glue sheets of five pointed petals on all sides.
Roses
The flower queen will be more difficult to make. For this:
- circles of different sizes are cut out of organza;
- Using sharp scissors, make 5 neat cuts on each circle, not reaching the middle;
- singe the edges of all the blanks over the candle so that they bend inward;
- stack the circles with already processed edges on top of each other in order from largest to smallest;
- fix them in the middle with a thread.
Decorate the middle of the resulting rose to your liking with rhinestones or beads.
Large sheet with folds
We use 2.5 cm tape, 12 cm long; 1 sheet will require 2 pieces. Place the pieces together with the right sides facing inward. Cut the corner and melt the cut.
We will make 5 folds on both sides and secure them with pins. From the wrong side we sew both ribbons.
Fold the sheet at the base and melt it with fire. Iron the leaf so that the folds lie evenly and do not puff up. These leaves are more suitable for voluminous flowers such as chrysanthemums, asters or dahlias.
Craftswomen! If you still have questions about the master classes, ask them in the discussion under this post in any way convenient for you (via Vkontakte, Google+, FaceBook, Disqus). I'll be happy to help you.
These flowers will decorate your hair and create an unforgettable look.
Will decorate any hairstyle on the magical New Year holiday! MK on the website!
Braided ribbon is a new product of the season, with which you can emphasize your individual style
If you love roses, then this headband is for you. Inhale the blooming aroma.
Invented ten centuries ago, today these devices combine practicality and aesthetics. Make the interior different according to your wishes..
Party. Theater. Business dinner. This decoration is ideal in any situation.
The lotus is a color of mysterious antiquity, It burns like a lamp. It sends greetings to ancient centuries, It keeps the secrets of the East.
Beautiful elastic bands will suit any schoolgirl fashionista and will not leave anyone indifferent.
Interesting
How to create organza flowers with your own hands without using a candle
Carefully processing the edges of the workpieces so that they do not turn black is often quite difficult. This usually happens due to poor quality candles. In this case, the problem can be easily solved by replacing it.
In addition, in stores you can find special organza for making flowers and using them to create floral arrangements. It does not crumble, which makes the work much easier. If such fabric is not sold in your city, there is a way to create organza flowers without using a candle.
Satin ribbon lily for beginners
Necessary materials:
- satin ribbon 5 cm wide;
- fabric glue;
- sticky web;
- wire;
- iron;
- candle.
Step-by-step execution technology:
- To make leaves 7 cm long, you need to cut the tape into 14 cm pieces.
- Fold the braid in half and insert a wire with a cobweb inside one of the halves for the entire width. Place the metal piece in the center of the petal.
- Cover with the other half and iron with an iron so that the parts of the tape stick to each other.
- Give the leaves a shape. Trim the ends according to the pattern prepared in advance.
- To process the edges of the petals and give them waviness, you need to singe them in parts with a candle, while simultaneously stretching them with your hands.
- Make a rounded base for the craft from the same tape as the main product.
- Glue the leaves to the base in two rows of 3 pieces, or more if possible.
- Due to the fact that the petals are on a wire, they are easy to give the desired configuration.
Step-by-step instruction
You will get a beautiful, neat flower if:
- cut out 5 circles with a diameter of 11 cm and the same number of such blanks with a diameter of 13 cm from ordinary organza;
- carefully fold them in the shape of a semicircle;
- sew manually with a thread of a suitable color along the semicircular edge, retreating 5 - 6 mm;
- tighten and secure the thread tightly so that the workpiece takes the shape of a petal;
- collect petals of the same size into a ring so that you get 2 flower-shaped blanks;
- sew the blanks with thread;
- sew a large bead in the middle of the flower or stick a large rhinestone.
This flower can be attached to an elastic band using a glue gun. Then you will have a beautiful decoration for your hair.
Master class 1. Simple roses made of fabric in country style
If you like country, Provence, shabby chic or rustic decor, then this master class is for you. Below are examples of the work that you can do after mastering the technique of rolling roses from fabric.
Wreath of roses made of linen, lace and tulleSpring wreath decorated with fabric roses
You will need:
- Textile;
- Scissors;
- Hot glue gun.
How to make a rose from fabric:
Step 1: Cut the fabric into ribbons. To create one rose you will need one strip 50-70 cm long and about 3-5 cm wide. However, you can choose other sizes if you want to make the rose larger or smaller than in this project.
Step 2: Fold your strip in half and place a 1.5cm bead of glue on the tip (see right photo above).
Step 3. Start rolling the strip into a roll in a few turns.
Step 4. When the roll becomes sufficiently dense and strong, start forming the first “petals”: fold the ribbon diagonally to the outside as shown in the top photo on the right and wrap around the center of the rose.
Step 5. Continue forming the petals in the same order: fold the tape on the bias to the outside - wrap the workpiece - fold the tape on the bias to the outside - wrap the workpiece - etc. There should be approximately 3-5 bends of the ribbon per row of petals. From time to time, layers of fabric need to be fixed with hot glue. As a result, you should end up with a rose similar to the one in these photos.
Experiment with the number of folds of the flower and the density of the folding of the fabric to achieve a more casual or, conversely, more neat look for your flower
Step 6. Once the rose reaches the desired diameter, lower the remaining tail of the ribbon down and glue it to the base.
Step 7. Next, you can glue a round base cut from the same fabric, or better yet, felt, to the back of the flower.
In this project, the back side of the craft was covered with the remaining tail of fabric.
Step 8. Make the number of flowers you need in different sizes - small, medium and large.
This video presents a master class on how to make roses from denim with your own hands.
Manufacturing procedure
Like other organza flowers, poppies begin to be crafted by creating templates. They are 3 circles with a diameter of 10, 9 and 8 cm.
Further:
- cut out 4 pieces of different diameters from organza;
- each folded 2 times;
- cut the folds, not reaching 1 cm to the end;
- holding the workpiece by the uncut tip, round the corners;
- the petals are singed over the candle;
- move them apart and treat the area between the petals over a flame.
Required materials and tools
Jewelry using this technique can be made from pieces of silk, organza, satin, brocade, rep. Experienced craftswomen prefer to work with one material. For example, crepe satin makes beautiful petals, but is difficult to care for. Beautiful decorations with large elements can be made from organza. It is worth noting that it is free-flowing when cut.
It is better for beginning craftswomen to make kanzashi from satin or silk ribbons. It is imperative to take into account the density of the material: thick products are more pliable and hold their shape well. If you have to work with soft fabrics, then the finished product should be treated with hairspray.
Most often, such decorations are made from satin ribbon. This material is pleasant to the touch, pliable, easy to cut, and the edges are easy to process. After manipulation of the petals, the product does not change its shape and is not deformed. For different colors, you may need ribbons of different widths - from 1 cm to 5 cm. It is recommended to start with 5 cm, as these are more convenient to work with. A wide selection of colors allows you to realize any fantasies from satin. Moreover, you can work not only with plain ribbons.
Silk
Organza
Atlas
Brocade
Reps
On sale you can find special kits that contain the tools necessary for the job. They usually have patterns for making simple elements for beginners, as well as ideas for more complex colors for crafters. But, as a rule, experienced needlewomen use their own tools.
To start work you need to prepare a place. Making kanzashi involves many small details, so it must be carefully thought out. The surface of the table needs to be protected with a board, you can use a large tile, it is convenient to singe the edges of the tapes on it. For kanzashi you will need a certain set of tools:
- Scissors for cutting ribbons and threads. They should be sharp, with long blades.
- Tweezers for folding small elements of flowers, as well as for holding them when singeing.
- Metal ruler. You will need it to measure the tape. Many craftswomen do not need a ruler, as they use templates - squares of cardboard, the size needed for the petal. They are applied to the tape and cut out. If a lot of petals are required, then the last one is wound on a template, cut off and then pulled out.
- Glue. Transparent is desirable so as not to spoil the appearance of the finished product. Not only flower petals are glued, but also decorative elements: beads, rhinestones. A transparent “Moment” or a hot glue gun will do.
- Threads. Necessary for assembling the finished product, must be the same color as the ribbons. It is better to choose silk threads - such threads are stronger and thinner than usual.
- Needles, pins. You need several of the first, but they should all be thin and long.
- Candle. Needed for burning the edges of ribbons. Sometimes they use a lighter or a burner for this, but they leave only one hand free. Convenient to work with a soldering iron. Some needlewomen use it to cut the desired piece of tape and finish the edges.
- Beads, beads, sequins, rhinestones, balls, buttons, lace. All accessories are needed for decoration. This set depends on the imagination of the needlewoman.
- Simple hairpins, headbands, elastic bands, brooches. They will be needed as a basis for finished products. Pieces of cardboard covered with fabric can also be used.
Assembly
To make this process easier, you will need thick cardboard, or rather, a shoebox lid. Thread the needle and insert it with the eye down, so that the needle sticks out like a stake. Further:
- string the petals onto a needle, starting with the largest;
- straighten the blanks, giving the flower a beautiful shape;
- when all the petals are strung on the needle, pull out the needle, stitch through the middle of the flower several times and fix it;
- decorate the middle of the flower with beads;
- a circle is cut out of felt slightly larger than the length of a medium-sized safety pin;
- make small slits;
- insert a pin;
- fix it on the flower with glue.
Kanzashi leaf with folds
Cut off one melted edge of the workpiece and cut the base to create an open part.
We process the edges with a lighter and pull them out a little, resulting in a slight waviness. At the base we also melt the tape with fire.
We make several folds, first on one side, then on the other. We melt the bottom of the leaf and “flatten it” with our fingers so that the base is flat. These leaves look great with strawberries.
The next master class is dedicated to rose leaves, I will make them double using glue and wire.
Operating procedure
Making a beautiful snow-white flower for wedding decor is done like this:
- cut out parts from organza and satin using prepared templates;
- singe the parts along the edges over a candle flame;
- they collect a flower, placing the same one, but made of satin, under each organza petal;
- sew all layers together;
- decorate the middle with a large white bead.
Leather hairpin: flowers
Leather flowers can be made in the same way as fabric ones, by cutting out the petals and treating their sections with flame. It is advisable to collect leather leaves with a special needle with a triangular cross-section. By piercing the material, it will not cause parts to break.
To make a leather rose, you need to divide a rectangular piece into two parts with a longitudinal wavy cut in the middle. Each of the created flaps is a finished pattern. The wavy edge must be treated with fire, which will increase its volume. Then roll the resulting pattern into a tight tube and fasten it with invisible stitches on the straight cut side.
Kanzashi flower
This decoration will look very beautiful on your hair. To make it you need to take:
- a piece of organza in the form of a long ribbon 1.2 cm wide;
- bead;
- needle and thread;
- glue.
The work is performed in the following sequence:
- cut 6 ribbons 10 cm long;
- fold first in half along the length, then in the width and again along the length;
- the resulting petals are sequentially put on a needle;
- pull a thread through them;
- tighten it in a circle;
- fix;
- straighten the flower in a circle;
- form petals, adding volume;
- attach a bead in the middle.
Now you know how to make organza flowers with your own hands. The master classes presented above will help you create compositions and decorative items that you can use to please your friends, sisters, daughters, decorate your home, or simply lift your spirits.
Methods for forming bows and design options
There are several options for how to make a beautiful organza bow with your own hands, subjecting the material to minimal impact. Lush decoration is created in different ways, and you can combine different materials to increase the attractiveness and design of the product:
- assembling a bow from individual elements with their subsequent fastening and fixing; you can use the kanzashi technique, combining different shades or textures of materials;
- tying a bow, this technique requires additional fastening of the product, it can come undone after a certain time and the product will lose its shape;
- sewing together a single strip or blank, in this case you can get an original and lush decoration with folds; they can be additionally decorated with any chosen decor.
Organza takes any shape, so you can make products of different designs and styles from it, adding decor to it. Before you start making crafts, you need to carefully think through the idea and choose a sketch, focusing on the future intended use.
Bird
You will need an interesting feathered patch purchased at a craft store. You just need to complement it at your discretion, starting with the rhinestone eyes.
We decorate the silhouette using beads and glass beads, giving the picture convexity and brightness. Such a piece can be made in the form of angels, bunnies, beetles and other characters.
Topiary - all roads lead to Rome
What do the topiary bushes in the park and the charming tree in a pot on the chest of drawers have in common? It turns out there is a common history that goes back to Ancient Rome. It was there that “topiary” slaves created figured hedges. The Italian Renaissance was also reflected in landscape fashion: gardens were decorated with original bushes in the shape of animals and political figures.
Since the 17th century, France has become a real trendsetter for beautiful parks, the basis of which is the art of curly pruning of green spaces. And over the following centuries, it became a sign of good taste to use the capabilities of topiary in shaping the landscape.
In the world of storey buildings, having your own garden or park is problematic. But anyone can afford to create a piece of man-made nature. This is how unusual trees migrated into the home interior.
Airy organza
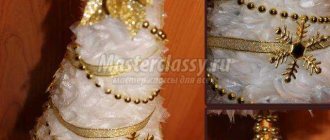
Organza fabric is perfect for forming a crown. It is combined with bugles, beads, and denser fabrics. Soft and easy to process, airy material does not require much time and is accessible to beginners.
Organza topiary theme:
- wedding;
- Valentine's Day;
- beloved friend;
- for women's interior.
Inserts of bright elements will make the tree magical, complement the composition, and create a plot. The fabric is responsible for the mood and airiness of the topiary.
Read about: little secrets of painting on fabric with acrylic paints
What does topiary consist of?
Any topiary consists of four main parts:
- The basis. The shape of the base reflects the theme of the product. Traditionally it is a ball, but it can be a square, a cone or an animal figure, the outline of a letter, or a heart. The choice of material for the base depends on the technique: if the decorative elements will be stuck in, a soft one will do; for stickers it is better to use a hard surface.
- Crown. The main element for fantasy. To create it, any fabric, beads, sequins, beads, shells are suitable. The crown is even decorated with nuts, coffee beans, colored pasta and cereals, and sweets.
- Trunk. A crown-shaped base is attached to this part. The main requirement is that it must be strong and easy to decorate.
- Stand. Traditionally, a regular flower pot is used for the stand. However, there is no limit to imagination. A small, miniature tree can easily be fixed in a small shell or coffee cup. For a larger topiary, any container decorated in accordance with the general idea is suitable.
Before starting work, you need to think through each element. They must be combined with each other functionally and thematically, forming a complete image.
Clover
All materials are green. The instructions on how to properly make a brooch with four leaves are very simple. We apply the image to the fabric. We place a rhinestone trimmed with beads on the bottom leaf. We also use it to follow the silhouette lines.
We decorate the right half with satin material, forming folds. We randomly scatter any decorative items. After cutting off the remaining edges, we add leather with a fastener from the inside.
Decorations can be humorous, playful, or romantic in style. This kind of handicraft brings real pleasure.
This is not a time-consuming and exciting process that helps emphasize personal individuality and develop creative thinking.


