All modern fountains are installed with pumping equipment. Or not all? Of course not, since there are several ways to make water flow and even gush without forced action units. These methods can also be used in the construction of Heron’s country fountain from bottles, which will function without a pump.
If the height of the structure is large, you can get good pressure
Stylistic design
There are several design options applicable to decorative fountains:
- Classic option. The installation can be made in the form of an asymmetrical bowl made of ceramic, plaster or stone with a stream of water falling in the shape of a bell or jet.
- Fountain in English style. In such designs, the bowl has a non-standard shape and is necessarily supplemented with stucco.
- The design is in the form of a sculpture with gilding or decorated with bronze elements, made according to all the rules of such colorful styles as Baroque or Rococo.
- Installation in eco-style. This fountain is made in the form of a natural waterfall, giving it the most natural look. An installation that is a container buried in the ground complete with a nozzle disguised with stones, associated with a rock from which streams of water fall down, can best cope with this role.
- Country style fountain. A structure made from an ordinary wooden barrel or cart will be an excellent decoration for a personal garden.
- As part of the Provence style, you can use romantic sculptures made in the form of angels or sophisticated girls. Moreover, the sculpture can be specially made slightly flaky or cracked, which will give it a special flavor.
Streams and waterfalls
The nymphaeum easily turns into a fountain-waterfall, pos. 2. It requires a special, low-pressure and high-performance pump. Unfortunately, it will not be possible to convert a household submersible pump for a waterfall; you will have to buy a branded one.
Nympheas are most often launched in cascades, and there is no limit to the imagination here, pos. 3-7. But the most common performance of the nymphaeum is a stream fountain, pos. 8. This is where a craftsman can get his hands on pumping and filtering equipment. However, we will return to fountain pumps later.
The nymphaeum practically does not splash and, with its small size and proper design, does not over-humidify all the air in the room. The freshness zone of the nymph is quite clearly demarcated and the smaller it is, the sharper the border. Therefore, nymphaeums are often made into tabletop indoor fountains, pos. 9.
Interesting hybrid
Fountains-boulders
Fountains-boulders in Fig. on the right can conditionally be called refrigerant humidifiers. Due to the fact that the flow of water in a thin film on the polished surface of a round, i.e. with the largest ratio of surface area to volume, the stone slows down, lengthening the time of its contact with air and, accordingly, evaporation. But the area of the water film is much smaller than the total surface area of the jet spray, so boulder fountains refresh very economically. The size of their freshness zone is larger than that of nymphs, and the border of the zone is more blurred. The water consumption for evaporation is also somewhat greater, but much less than that of a splashing fountain. In general, garden boulder fountains are more suitable for areas with hot, dry summers and lack of water, which is why they can often be seen in Mediterranean countries; land there is very expensive, and it’s difficult to carve out a place for a pond with the average income there.
Step-by-step installation of the water element
A do-it-yourself fountain without a pump on your personal plot is quite possible and quite simple. This model will not consume electricity for its operation; it is a completely autonomous system, the installation of which does not require special skills or expensive tools and materials.
https://www.youtube.com/watch?NR=1&feature=fvwp&v=vVMhO6rcJqE
To work you need to prepare:
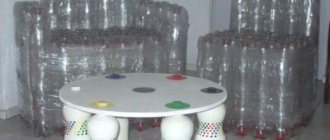
- Three plastic tanks;
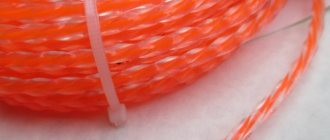
- Special tubes;
- Sealant;
- Adapters;
- Tools for work (suitable for plumbing work);
- Decor for decorating a ready-made fountain.
So, to create a water masterpiece without a pump, we follow the following stages of work:
- First, we decide on the size and type of the future fountain, which we will make with our own hands. There is no need to make it very large, as the water jets can be very weak and ineffective. It is recommended to make a sketch that will clearly demonstrate the appearance of the fountain itself to facilitate further work. We prepare the installation site, which should fit organically into the surrounding landscape;
- Now let's start designing. The simplest method is a design created on the principle of communicating vessels, the basics of which are taught in school. The essence of this method is that two vessels located at different heights, which are connected by tubes, can exchange water flowing from one vessel to another, from the one located above to the bottom.
However, this method is a little primitive, it can be easily improved. Two prepared tanks of the required volume are installed at the same height, connecting them with tubes. Next, the tubes are connected to a T-shaped plumbing adapter.
- The operating principle is as follows: water entering the vessels can flow freely through the installed adapter. Now all that remains is to ensure a constant flow of water into the reservoirs so that the water can flow into the fountain basin;
- It is best to take water containers that are plastic and of the same volume. The tube connecting them is recommended to have a small diameter to ensure a longer operating time. Tubes are excellent for ordinary kitchen or household filters. Now it is necessary to drill holes in the bottom of the vessels with a diameter smaller than the diameter of the tubes.
Now we insert the tubes into the prepared holes and treat them with sealant. It is best to generally treat these areas using cold welding. Now we will need the third prepared vessel. Its volume should be twice the volume of the already connected tanks.
We install a T-shaped adapter in the middle of the bottom of this vessel. Next, you need to make two more holes at the bottom, through which two hoses from the upper smaller vessels will be threaded. They are also hermetically sealed. Here is the base for the fountain with your own hands and it’s ready.
Now you can prepare to strengthen the resulting structure in the selected location. At the same time, we remember that the top ones must be higher than the large vessel in order to ensure the supply of water. It is advisable to make the fountain removable, which will allow you to pour water from the bottom to the top.
First stage
To get started, you need a brake chamber. It doesn’t make sense to buy it, because when you start making your own pump, you want to get all the ingredients yourself. Similar devices are used on trucks with an air braking system. You may not find this in your own garage; you can ask your neighbors or just see what they throw out of a car service center; as a last resort, you can visit a car dismantling shop.
Having received the much-needed item, we disassemble it. But it’s better to start by washing the camera in soapy water or gasoline. After all the components are removed from it, you need to plug all the holes, leaving free the one intended for the rod. It will be at the top of the product. (Fig. 1)
Popular articles Rosa Rugosa: planting and care in open ground
After the extra holes are eliminated and the top is marked, we move to the opposite side. There we drill 2 holes for the valves. The brake chamber can be put aside for a while.
Copper pipes were prepared; they are required to be of short length and with thick walls of about 1 mm. There is also a metal ball, its size should exceed the inner diameter of the tube by 0.5 mm, a little less or more, the main thing is that it does not fall inside.
Now we clamp the pipe in a vice, select a drill equal to or slightly larger in diameter than the ball, and drill the object halfway.
Let's start creating the intake valve. The ball is placed in the pipe, and a small piece of wire is soldered to the end. It is done. The valve functions in the simplest way: when water is drawn into the pump, the ball rises - the path is clear. But she cannot go out, as she will press him to the bottom. The soldered wire ensures free movement of the ball, preventing it from jumping out of the pipe.
The next task is to make the exhaust valve. The process is not much different from the construction of an inlet. The difference is that a small spring must be placed between the ball and the tube blocking it. The intake and exhaust valves operate in a similar way.
The pipes with balls are fixed in the holes of the brake chamber. Then they are filled with glue for strength. After this, the structure is left to dry. Epoxy resin sets completely within 24 hours; during this time it is better not to touch the product, even if it seems that everything is ready.
While the adhesive mixture is drying, you can work on the tire tube. To find it, dig around in the garage, it’s not a fact that it will be there. You can ask your neighbors for help or stop by the nearest tire repair shop. A whole chamber is not required, so you can use a substandard one. Taking scissors, preferably powerful ones, cut off a circle from the rubber equal to the diameter of the brake chamber. We make a hole in the center of the cut out one. Then take 2 metal washers and glue them on both sides of the hole. We wait for the glue to set.
Screw the nut onto the prepared pin. We insert the threaded side of the metal rod into the hole with the washers. We tighten the structure with the second nut, applying maximum force.
The cut circle with the rod is glued to the brake chamber, the rod should remain in the upper hole.
Decoration of the structure
It is not so important where the homemade fountain will be located:
- country house;
- garden plot;
- apartment or house.
It should still look attractive. In its original form, this design looks very unsightly. Therefore, it is advisable to take care of decoration.
If the fountain is planned to be installed on a site (as happens most often), a small recess needs to be made in the planned location. About thirty centimeters will be enough
It is important to level the bottom of the hole so that a couple of eggplants can be installed there. The recess itself at the end can be covered with pebbles or similar decorative material. On the contrary, you can lay out a pile of stones above the elevation, and place a decorative fountain bowl on it
You need to try to direct the flow of water correctly - so that it flows directly onto the hill. It will look much more impressive this way
On the contrary, you can lay out a pile of stones above the elevation, and place a decorative fountain bowl on it. You need to try to direct the flow of water correctly - so that it flows directly onto the hill. It will look much more impressive this way.
To add variety to the design, you can create a backlight for the water. To do this you need to use LED lamps. You can even have different colors.
In the end, you can completely make your task easier and choose special decorative tanks that simply do not need to be hidden from prying eyes. Otherwise, everything depends on the imagination of the master.
Design Tips
Worth knowing! If you take a mesh with a minimum cell size, you will need fewer pebbles or stones for decoration. The most enjoyable stage is decorating the fountain.
To give the design a natural look, you do not need to expressively indicate the boundaries of your creation.
It is best to make the border fuzzy, and plant unusual plants along its edges.
An important point that must be taken into account!
The base of the tank must be built below the soil level. This way, you will completely eliminate the possibility of soil being washed away next to the container.
In the immediate vicinity of the edge of the surface, it is worth making an emergency drain; it will not allow the water to rise above the prescribed level.
Do not forget about the main requirement that must be applied to the materials used:
- they must have high strength characteristics,
- withstand large temperature changes.
Decorating a fountain for a garden: tips
After the bowl is ready and the hydraulic system is installed, you can start decorating the fountain for your garden. It all depends on the owner’s imagination, but there are some tips:
- It is undesirable to use decorative elements made of wood: moisture will cause them to swell and become deformed.
- If there is no other choice, and you need to use wooden elements, then at least use protective impregnation and varnish.
- It is best to make the decorative part removable so that it can be dismantled for the winter.
The design of the fountain should not interfere with its regular cleaning of leaves and other debris. Otherwise, not only will the pump clog, but the water will also bloom.
Selecting a location
The selection of the site on which the homemade fountain will be placed depends on the type of design adopted, landscape features and aesthetic feasibility. To place decorative cascade fountains for a summer residence, it is more profitable to use an artificial or natural break in the relief that logically coincides with the direction of water flow.
The pressure structure will decorate the open space in the garden, giving it the missing three-dimensionality. A decorative fountain with a cascade will add dynamics to a static landscape, emphasizing the beauty of nature with the play of light on the water surface.
Place the fountain in a quiet, shaded area, allowing you to appreciate the flow of streams and freshness on a hot day.
airy joy
Today it is difficult to imagine a celebration without decoration with balloons, be it a wedding or a children's birthday. Balls are used to make beautiful arches, figures, entire compositions and, of course, fountains!
We think about the color and shape of the future composition in advance. Here you can give free rein to your imagination, taking into account the theme of the upcoming holiday. For example, if it is a child's birthday, you can even use children's shaped balloons.
The composition should resemble jets of water gushing upward. To do this, we tie ribbons to the inflated balls and place them on the central string, one below the other at 2/3 of the height. It is advisable to avoid chaos and disorder, but it all depends on the design you come up with. The main thing is to achieve a feeling of lightness and swiftness.
Next, we tie the resulting structure to a previously prepared load. You can use a small ball filled with water as a weighting agent. If the figure turns out to be large, then prepare several of these balls. The main thing is that the weight holds the composition well.
Related article: Do-it-yourself mosaic panels for the kitchen and bathroom with photos
Methods for fastening balls together:
As the base of the fountain, tie round or long thin balloons by the tails, and tie thin balloons with helium on a string inside to create the impression of drops flying up.
- helium-filled balloons tied with their own ribbons.
- make a string of the desired shape and tie the balls by the tails.
Attach the balls to the string using weaving. An example is garlands from which you can make a fountain.
Construction of the fountain bowl
A common type is a garden fountain with a recessed bowl, designed in the style of a small pond or swimming pool. It performs several functions, being:
- decorative element;
- a tank for circulating water feeding the pump;
- masking equipment installed below the surface level.
Depending on the design of the adjacent site, a country fountain can match the natural landscape using wild stone, an entourage of parts of trees, and natural plantings.
When fitting a decorative fountain into a landscaped area, they adhere to its characteristic style or rely on contrast, for example, wooden flooring is combined with noble stone, and ceramic or artificial stone coverings are combined with wooden elements.
When creating a small fountain in the garden, that is, in a natural environment, you can limit yourself to the simplest techniques. Having dug a pit less than a meter deep, its bottom is covered with a waterproof film, for example, for waterproofing swimming pools. It is quite strong, durable and easy to use.
The device of a simple fountain
Thanks to the demand for small garden pools, many construction networks offer a good selection of bathtubs installed in the ground and suitable for creating decorative fountains for the garden.
Typically this is molded fiberglass with appropriate polymer impregnation or coating. It is stronger than film, perfectly retains its desired appearance, and is undemanding to the underlying soil. The variety of shapes and sizes allows them to be used as fountain molds as a base. At the same time, individuality is easily imparted by finishing elements.
A little about how to make a fountain at your dacha with your own hands. This will require installing an underlying layer of compacted sand in the pit, creating curved formwork and reinforcement. After laying the concrete, you need to wait a few days until it gains initial strength before proceeding with further work on waterproofing and finishing the stone fountain with your own hands.
Scheme of the original fountain
But such a structure will be extremely strong and reliable; it can be installed under a pedestrian path or built into a platform to create a “dry” fountain. A model of the fountain, made to scale, will help you correctly evaluate the design, and the coloring of the fountain will allow you to better navigate the selection of finishing materials. For an example of arranging a fountain in a dacha with your own hands, see this interesting video:
The concrete base is finished with any suitable materials, creating a stone fountain:
- ceramic tiles;
- artificial stone;
- natural stone.
Painting a garden fountain for a summer house on a plastered surface looks good. At the base of the concrete structure, holes must be provided for the installation of drainage pipes and, if necessary, a supply system.
Stationary or submersible?
A fountain in a country house, in a pond or by itself, technically in general can be implemented in two ways: stationary or mobile with a submersible pump. The design of a stationary fountain can be very diverse: a classic multi-tiered bowl with a cascade of nymphs (see below), pos. 1 in Fig, also a classic nymph pose. 2, modernist laconic bowl combined with sculpture, pos. 3, something primitively rough, pos. 4, mobile (oscillating, rotating) spout, from technogenic-futuristic to rustic, pos. 5 and 6.
Stationary fountains
But all of them, and many technically similar options, have one thing in common - the fountain spout is in the form of a sculpture, in the order of routine maintenance of the fountain, it is non-removable and non-removable. Therefore, for a stationary fountain you need a coastal pumping station, pipelines for supplying water to the spout and pumping it out of the bowl. In general, a stationary fountain is an expensive and complex structure. Nowadays even fountains in squares are made with submersible pumps right in the thicket.
Construction of a wooden fountain
In the vast majority of cases, the own fountain on the site is made submersible and mobile. The weight and dimensions of its electro-hydraulic system allow it to be placed both in a pond and in the thicket of a separate garden fountain. The diagram of the mobile fountain is shown in Fig. on right:
- Mobile fountain diagram
The water intake consists of a filter 1, a supply regulator 1a and a flexible supply pipeline 1 b. In a pond, it is placed in shallow water, this sharply slows down the siltation of the reservoir with an acceptable frequency of filter cleaning.
- Horizontal submersible pump 2 is placed deeper, but not in the pit itself, on a stone or gravel bed.
- The pump outlet is a telescopic pipe 3 for depth adjustment, ending with a diffuser 4. Together they form the fountain spout.
This scheme is very flexible, because the supply pipeline can be up to 10 meters or more in length. If, for example, you first build a fountain in the garden and then dig a pond, then the filter is simply transferred to the pond, the supply pipe is extended, and the outlet from the fountain bowl is discharged into the pond through another pipe. Both pipelines can be flexible, and there is no need to bury them; they can be laid in a shallow trench, because The fountain is emptied in winter.
Features of operating a water pump
A home-made pump is suitable exclusively for artificial small fountains located in separate bowls. They are not installed in open ponds and reservoirs, since the mechanism is sensitive to dirty water and quickly becomes clogged.
The blades are small, so if small stones hit them they can break and fail. It is important to change the water in the bowl from time to time and clean the device. Also, when immersing a homemade device, you need to equip a place on which it will stand
It is enough to place a small brick at the bottom of the bowl, and the pump can be held with the help of a few pebbles
Also, when immersing a homemade device, you need to equip a place on which it will stand. It is enough to place a small brick at the bottom of the bowl, and the pump can be supported with the help of a few pebbles.
When installing, it is important to consider that the electrical cable is also a sensitive element. Therefore, it can be further protected
In winter, the pump should be removed from the water and stored indoors.
Heron's diopter
Heron's diopter
If any of you studied at the Faculty of Construction or Forestry Engineering, then you were required to be taught how to use a theodolite, which is so necessary for geodesy. But this instrument was also invented by Heron! He called his device dipotra.
The main component of the diopter is a ruler that rotates in a circle and allows you to mark the horizontal and vertical positions. A plumb line and level were also attached to the device. Using these tools, as well as mathematical techniques and rectangular coordinates, Heron was able to solve many construction problems:
- measured the distance between two points when one or even both are not within sight;
- drew a straight line, perpendicular to another line, which was inaccessible to the eye;
- found level differences between two points;
- measured areas without even going to the place he was measuring.
Diopter
The water supply system on the island of Samos was considered one of the wonders of engineering in the time of Heron. The design of this water pipeline was invented by Eupalinus. This project brought water to the city from the Mount Castro spring. To speed up the work, it was decided to dig a tunnel from both sides at once, but the problem is how can the workers definitely not miss and connect at one point? This project required enormous engineering competence. Nevertheless, the water supply system was built and surprised Heron’s contemporaries for a long time. Herodotus also mentioned this miraculous water pipeline, thanks to whom the world generally learned about the existence of the Eupalina tunnel. True, no one believed for a long time that this was true. It was believed that the ancient Greeks did not have sufficient technology to build such complex objects, but in 1814, having studied the works of Heron on the diopter and the construction of the Eupalina tunnel with its help, doubts came to naught, and at the end of the 19th century the tunnel itself was found.
Modern diopter (theodolite)
How to make a fountain pump yourself: step-by-step guide
To improve the visual appearance of small decorative ponds, fountains are installed.
The main element of the fountain is a water pump, which increases the pressure, thereby producing a jet pressure of a given value. It is possible to use ready-made fountain offers or create a pump for a fountain yourself, using basic tools, most of which are available to everyone. This article will discuss the principle of operation of the pump, and also describe step-by-step instructions for assembling a basic structure. If you have all the tools necessary for assembly, you can make the unit in a few hours.
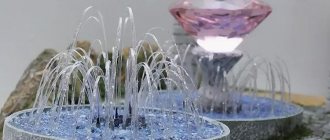
Heron's Fountain: how it works
If we use clever terms, the operation of the Heron Fountain is based on the principle of hydropneumatics - the work of pushing water upward in a stream is done by air and the liquid itself. Naturally, this cannot be done without gravity, thanks to which the necessary pressure is created in the fountain system. This fountain consists of at least three containers.
- Bowl. Let's call it the starting point - the start from which the liquid begins its movement in the system of Heron's fountain. This is an ordinary open container made like a bowl or plate. From it, water flows through a thin tube into an empty container located at the very bottom of the fountain.
- Bottom empty container. It serves two purposes. First, the water flowing from the bowl compresses the air contained in it and thereby creates the pressure necessary to push the water upward in a stream. And, secondly, water collects in it, which creates this pressure (that is, the water that flows down). Here it remains until the next recharge of the fountain.
- The upper container – when charged, it contains water. It is this liquid that is pushed out in the form of a thin stream of water. It is pushed out thanks to compressed air - the pressure formed in the lower flask. This air enters the upper flask through a thin tube, displacing liquid from there, which, pouring out like a fountain, again enters the bowl, from where, again, it flows into the lower flask.
Fountain of Heron: principle of operation photo
As you understand, such a fountain will work until the liquid in the upper container is used up - after which a recharge is required, due to which this system has nothing in common with a perpetual motion machine or an endless source of energy. Recharging Heron's fountain is quite simple - a full flask (the one that was bottom) is installed instead of an empty container installed on top, which, in turn, is placed instead of a full container. After recharging, the fountain will need to be started - you will need to add some water to the upper bowl.
As you can see, everything is quite simple, and even the principle of making Heron’s fountain with your own hands is no exception. In the elementary version, it is assembled from plastic bottles and transparent tubes - naturally, you will need a bowl, a mounting structure and various little things, which we will deal with as we study the question of how to make a Heron fountain with your own hands?
Do-it-yourself gravity fountain
A fountain without an electrical connection and a pump is a realistic task. The model does not consume light, being a completely autonomous design. In addition, creating a device does not require special skills, expensive materials or specific equipment.
Work algorithm
The main task of the master is to specify the dimensions and choose the type. It is irrational to build a large pyramid, since Heron’s technology involves a smooth transfusion of liquid. After determining the location, get to work.
Step-by-step instructions on how to make a fountain with your own hands at your dacha without a pump:
- A simple design method is to organize a “perpetual motion machine” by creating communicating vessels. A similar principle appears in the school physics curriculum. The essence of the technique is to place containers at different heights and have tubes for connection. Water exchange is carried out through the transfusion of liquid from one reservoir to another.
- Place the tanks in stages and connect them with pipes using a T-shaped adapter. Water entering the upper container moves without obstacles to other parts of the structure. The user's task is to ensure a continuous flow.
- In the bottoms of two bottles, drill holes with the diameter of slightly prepared tubes. Install the channels into the holes made and seal them. Cold welding or repair aquatics will help increase the reliability of the structure.
- Take a third tank with a volume twice the size of the first two bottles. Attach the adapter in the center of the bottom. Make 2 additional holes - stretch the tubes from the upper vessels through them and treat the joints with sealant.
- Install a finished fountain on the site.
Heron’s technology is imperfect, because it does not allow obtaining a “perpetual motion machine” - the user needs to control the presence of water in the structure. The system can be improved by removing the third tank. Connect two containers with a short and a long tube. In this case, the first one should not reach the bottom of the bottle - the water flows down. Place the second one as close to the bottom as possible - the liquid will rise along it. The result is a closed chain.
The stated principle of an endless fountain works without external energy sources with proper sealing of the vessels at the joints. Otherwise, the containers will leak, reducing the smoothness of the overflow. To drain water, use a drainage system or access to the beds for watering plants and flowers.
Decoration
The fountain can be placed in the center of a small pond
When decorating a fountain without a pump with your own hands, take into account the location of the structure - cottage, garden or house. Despite the homemade design, its appearance must correspond to the landscape design. Experts recommend using decorative elements that echo the overall ensemble of the country cottage and site.
If the installation of the fountain takes place on a plot of land, then a small hole ~30 cm in diameter is made in the indicated place. The depression is leveled and covered with fine crushed stone or pebbles. Above the towering part, stones are laid in the shape of a rock or other natural landscape. A decorative bowl is also located here.
Use the following ideas for design:
- planting flowers;
- arrangement of aquatic plants in containers;
- organization of LED lighting;
- garden figurines;
- wooden scaffolding.
More fountains for the home
Aquarium micropump
Above it was said about the most powerful aquarium pumps. And the smallest ones, at 50-100 l/h from water to water, are the size of a couple of matchboxes, see fig. They are inexpensive, they consume so much electricity that the disk of an electromechanical meter does not move. The electronic meter, however, senses them. Pressure at “drip” flow – up to 30 cm; regulated by the weakest and cheapest thyristor regulator or simply a 4.7-10 kOhm 15 W rheostat. But keep in mind that in this case the regulator will be 220 V!
Indoor mini fountains
By placing a rigid tube on the outlet of the micropump, we get an indoor mini-fountain with a jet, pos. 1 in Fig. left; the bowl, of course, can be filled with anything that does not rot, does not rust, and does not float. And with a flexible tube you can build a tabletop mini-pond with nymphs. Aquarium varieties of arrowhead, lemongrass (in this case it is not a Far Eastern liana, but an aquatic plant), dwarf papyrus, etc. will grow in it. amphibian plants.
Scheme of the fountain-phytotron
Home gardeners will find a phytotron fountain from the same pump just right. Actually, a phytotron is a miniature greenhouse with an air conditioner and lighting, but a small fountain-boulder will create a microclimate around itself in which the most fastidious plants, even high-mountain ones, will take root. In a phytotron fountain, it is sometimes possible to root cuttings of exotic conifers (for example, araucaria) or casuarinas without heteroauxin. The diagram of the fountain-phytotron is on the next page. rice. on right.
Types of free-flow fountains
Diagram of Heron's Fountain
The organization of a fountain without electricity is based on ancient knowledge about hydro- and aerostatics. The technology developed by Heron of Alexandria is still popular in the 21st century.
There are two types of fountains in which water circulates without the use of pressure equipment. Both options involve the installation of three containers located at different levels. The difference lies in the provision of fluid flow:
- In the first case, the movement of water is ensured by manual filling of the upper tank. From the main reservoir, the liquid smoothly moves through the tube to the lower sections. The overflow time depends on the volume of the main container.
- To create the second option, a decorative mill is required. Due to the movement of the blades, water is supplied to the structure. However, in this situation, you must manually fill the top compartment.
The main disadvantage of such fountain schemes is the mandatory formation of a branch at the lower level or independent liquid transfusion. However, at the dacha this minus can easily be converted into a plus. For example, the structure can be used to irrigate flowers. Proper organization of the system will supply the fish pond with oxygen.
How to conduct an experiment
Start by blowing up a balloon and ask your child, “What's in the balloon?” Release the ball and talk about what is happening. After this, take an empty bottle and ask your child, “What is in the bottle?”
Reinflate the balloon and place it on the empty bottle, being careful not to let out too much air. Ask your child: “Why doesn’t the balloon fall?” If your child can't answer this question yet, explain that the balloon won't go down because the bottle is filled with air, so the air inside the balloon has nowhere to go.
Now you can make a fountain from a water bottle
Carefully poke a hole in the empty bottle large enough to fit a straw and seal with caulk or play dough. (This is the hardest part and is best done by an adult
If the bottle is wet, the material will have difficulty sticking to it).
Ask your child, “What do you think will happen if we pour water?”
Pour water into the bottle so that the water is above the hole (make sure that your straw is pointing upward and that the water is level with the very top of the straw as you fill the bottle: remember the principle of communicating vessels from school physics). Repair any leaks if found.
Inflate the balloon again, carefully so as not to release the air prematurely, place it over the neck of the bottle. Now let the air escape from the balloon: water will flow out of the straw. And now you have a real fountain ready.
Why French children behave well: eight ways to raise them
“We are still friends”: Derevianko commented on the breakup with his wife
Lost weight: what Sofia Tarasova sacrificed for the sake of “VIA Gra” (new photos)
If the child does not guess on his own, explain that the air from the ball affected the water and caused it to rise up the tube.
How to make water flow without outside interference
If you attended school physics lessons, you should already have an idea of what force is easier to make something move. Of course, we are talking about gravity or, in other words, the force of gravity.
To activate it, the item must be raised to a certain height and released. The same thing happens with water. If the tank with it is raised above the ground and the cap is opened, it will flow out after some time.
Go ahead:
- We now attach a tube to our hypothetical container that will go down - there we will direct the water strictly to a certain point.
- If this tube at the bottom is bent upward, then water will begin to fly out of it with pressure. This is, in principle, the simplest structure of a fountain.
- The higher the water tank rises, and the wider the diameter of the pipe, the stronger the pressure will be. Pressure in this case is expressed in the height of the water column.
- In a similar way, you can organize a fountain for your dacha if there is some source from which the main container will be constantly replenished.
- For example, you can use a stream. In this case, in addition to supply, you should also worry about drainage.
But you can also use other sources to fill the tank - the same summer water supply. However, somewhere far away, water is also pumped into it by pumping equipment.
For this, gravity alone is not enough. The solution to the problem lies in its combined action with pressure. The ancient fountain of Heron works on this principle.
Pros and cons of creating
A decorative fountain is primarily an element designed to decorate the surrounding space. It has several key advantages:
- >Bright and elegant appearance. The fountain will transform and refresh any design, perhaps becoming its main element.
- The fountain will do an excellent job as a source of coolness and will be able to maintain fresh air in any place where you install it.
- Falling water is a very beautiful action. The sight of a seething stream or streams of water rushing down promotes relaxation and helps to distract from bad thoughts. Additionally, the sounds of water allow you to achieve harmony and unity with nature.
- If you choose the right location, a fountain can help give your area a complete look. Such structures can help hide unattractive objects, for example, utility rooms.
When installing an open type system, you will have to think through the water supply system, control of its level, drainage and disposal. You can, of course, use the fountain’s reservoir as a container for heating water before watering, and use the bowl to distribute it throughout the garden, but watering is not needed around the clock, and the fountain can operate in this mode.
A plastic container, and the pump is located at the bottom, right in the place where the pipe sticks out of the water
In the simplest version, to make a small-sized fountain, you need some kind of sealed container and a submersible pump. Any container can be used - a special plastic one for a pond, a barrel, an old bathtub, a basin, a cut tire covered with film, etc. With pumps it’s a little more complicated.
Fountain pumps
Fountain pumps are sold specially, with built-in filters. To make it easier to make a fountain with your own hands, you can buy such models. It’s very easy to work with them: put them in a container, secure it so that it doesn’t move, fill it with water, carry out the starting manipulations (described in the instructions) and turn it on.
Fountain pumps come in different capacities and raise the jet to different heights. Often the kit comes with replaceable nozzles that change the nature of the jet. They are powered by a 220 V network; there are models powered by solar panels. They are made hermetically, so there will be no problems when connecting, no step-down transformers are needed. The only thing that won’t hurt is an automatic machine and an RCD on the line to which the pump will be connected. This is just in case, to increase security. The price of the smallest and lowest-power fountain pump is $25-30. Productive models cost several hundred or more.
You can use any submersible pump for the fountain. But you need to buy or make a filter for it (you can make a sand filter) and a step-down transformer. A security group from a machine gun and an RCD on the line will not be out of place here either. This circuit is worth tinkering with if you have an old pump that is not currently being used.
How to do it without a pump
Is it possible to make a fountain without a pump? It is possible, but it is open type. For example, bring a water supply pipe into the pond - central or supplying water from a well or borehole. The water coming out under pressure will produce a jet of some height. By installing a tip on the pipe, we can change its shape. But with such a construction, it is necessary to figure out where to divert the water. You can go back to the well or to the river, to the irrigation area, etc. Although with such an organization there is a pump, it pumps water into the house, and the fountain is only one of the flow points.
Scheme of organizing a fountain without a submersible pump
The second option is to place some kind of container at a height, supply water to it, and from there it is supplied through pipes to the fountain located below. To create a more or less decent jet height, the container must be raised 3 meters or higher. But the question remains: how to supply water there. Again using a pump, but no longer submersible. They are cheaper, but require a filter. You will also need a pit in which the equipment is installed. A system of pipes connects it to the bowl of the fountain.
Features of installing pumping equipment
At the installation stage, you need to decide on the type of pump. If the tank capacity is not too large, choosing a submersible model would be an excellent option. Due to its design features, the device must be installed on a special frame that prevents contact of the device with the muddy bottom.
Bricks work well for such purposes (sometimes you can use an inorganic material, such as plastic). It is strongly not recommended to weld a metal substrate, as constant exposure to water will lead to rapid oxidation and the structure will collapse.
Popular articles Transplanting gladioli
In the manufacture of submersible pumps, materials are used that resist corrosion and water column pressure
The upper part of the device should be connected to the pump with a rubber or plastic tube. There are models with a corrugated hose to avoid deformation. Under no circumstances should you install pumping equipment in winter. Freezing damages the device and can lead to forced repairs or even ruin it forever.
Care must be taken when installing a submersible pump and monitor the water level. Intensive drainage of a natural reservoir can lead to serious damage
This is primarily due to insufficient water levels. The equipment is designed in such a way that idle operation often leads to irreversible consequences.
For example, in the absence of a fluid that acts as a lubricant for the moving parts of the mechanism, the contacting parts will quickly wear out. Consequently, the pumping station will not last long if it is not immersed deep enough in the reservoir or operates without immersion for longer than the period allowed by the manufacturer.
Like any electrical equipment, the pump needs to be grounded. When organizing power supply, take care of the correct connection of the power harnesses. It is better to do this under the guidance of a person who understands electrical appliances.
The diagram shows that the power source may be located indoors. To avoid voltage surges, it is better to use a transformer with a fuse (+)
Ideally, it is better to contact the service center of the company that directly installs the equipment. Of course, this option is much more expensive, but you cannot skimp on safety.
Submersible and external type pumps: differences
The consumer is faced with the question: what type of pump to choose for arranging a fountain. If the pump works correctly, the fountain will function properly. There are two types of water supply equipment: submersible or surface. Both types have their advantages, application features, and characteristics.
Submersible installations have the following differences:
1. The equipment is installed under water.
2.pumps have an affordable price.
3.Easy and quick to install.
5.silent during operation.
Surface equipment has its own characteristics:
1.devices are installed on the ground.
2.Easy to maintain and repair.
3. installation work is more complex.
5. create noise during operation.
There are many models of pumps of different types. In addition to differences in design, when choosing, you should pay attention to the level of power and performance of the devices. Electricity costs depend on the required number of watts to operate the pump. The performance level allows you to judge the amount of water pumped by the pump over a period of time.
Video description
More details about self-construction of the cascade are described in the video:
At the end of construction, the fountain is decorated by planting moisture-loving plants around it and installing garden sculptures. Don't forget to set up a relaxation area nearby with comfortable benches or a hammock.
Before you build a fountain with your own hands, you need to think about its parameters: the size and depth of the bowl, the height to which the water column should rise, the method of decoration. Then you can buy or build a water tank yourself and select a pump. To install a finished bowl, just dig a pit under it and add a layer of sand. A homemade pond is waterproofed with geotextiles and film. To install a fountain, you can purchase a submersible pump and install it at the bottom. Surface mechanisms are placed on the shore and a suction and pressure pipeline is connected to them.
Necessary materials
Creating a fountain pump is not so difficult, but we must not forget that a homemade design has low power, therefore, it is used for decorating small-sized products. It is unrealistic to enhance the power parameters and make a full-fledged water recovery system that can operate at a pressure of 1 point or more in the conditions of our own production - it will be more economical to purchase a ready-made version.
Before assembling the water unit, you should carefully study its functionality.
A standard fountain pump consists of a housing. Inside there is a motor and blades, reminiscent of elements of a modern ventilation device. 2 pipelines are connected to the body: one for collecting water, the second for supplying it. The blades rotate using a motor.
To assemble the pump you will need the following items:
- Small motor;
- 3 plastic lids for any drinks;
- 2 small tubes of different diameters, made of waterproof material (you can use the body of a ballpoint pen, marker, etc.);
- A small piece of plastic (a mayonnaise cap, an unnecessary bank card, a disk, etc. will do);
- Gear;
- Power unit.
The motor used will be the main part of the system, thanks to which the rotation of the blades will be carried out. The micromotor can be purchased at any radio market or removed from a children's car, an old cassette recorder, DVD player, etc.
It is important to understand that motors, based on their power, can come in different shapes and sizes. In our version, we consider an example with a device taken from a children's toy. The dimensions of the housing should be selected based on the dimensions of the motor. In our example, the body will be made of 3 bottle caps; if the micromotor is larger in size, then you can use a resealable shaving foam can.
The body of the ballpoint pen is used as a discharge and supply pipeline.
The return wall and blades for the pump, which will be attached to the gear, are made of plastic materials. A small fan will be glued to the motor element, the action of which will cause rotation.
Tools and additional tools that will be useful during the work:
- Super glue, hot melt glue or universal type waterproof glue;
- Wire cutters;
- Knife or sewing awl;
- A small piece of sandpaper for sanding;
- Soldering iron, metal file or grinder with attachments for cutting, stripping, drilling, etc.
Any glue can be used. Classic Moment glue has a quick action, and alternative options take longer to dry.
A piece of sandpaper and tools will be needed for processing the edges and grinding surfaces, and a knife for making holes.
Waterfall at the dacha
Of course, in the conditions of a country house you cannot build any grandiose elements, but it is still possible to implement a small meter-long waterfall. We have already described above how a foundation pit is made for a fountain bowl, so we will not dwell on this again.
In our case, a waterfall is being built, and therefore if your landscape does not provide for any elevation, then you will need to do it yourself!
Moreover, it is quite convenient to create an embankment on the site while digging a pit. To do this, you just need to dump the excavated soil at the place where you are going to place the future slide, followed by compaction. At the same time, do not forget to make a small groove in the embankment and the wall of the pit, where the hose will be placed in the future.
As soon as the embankment and pit are completely ready, we proceed to installing waterproofing material on the walls and bottom of the future reservoir. PVC film is great for this, but you can also use other materials. It is necessary to place the canvas so that the material, in addition to completely covering the walls and lower part, also protrudes approximately 50 centimeters on the sides.
Be sure to place the tube for pumping water into the upper section in advance, then bend one side 30-40 centimeters up.
Since a fountain-waterfall is considered a permanent structure on the site, it would be more correct to concrete the created thicket. To do this, carefully unfold the metal mesh along the bottom of the pit. In this case, it is impossible for the waterproofing material to be accidentally damaged during the work. After this, the concrete mixture is poured to create a 12-15 cm layer.
The next step is to prepare the walls of the reservoir. A mesh is placed, which is then fixed in the still liquid concrete. After this, the walls are filled with concrete and the most complex construction process will be completed. You can return to creating a waterfall fountain in a day, when the concrete has hardened.
After a day, you can move on to decorating the artificial pond. Steps are created right there on the compacted hill. 3 will be quite enough, and the width of each should be at least 25-30 centimeters!
Pebbles, sandstone or some other material that you like best is placed on ready-made flat surfaces. The remaining components of the waterfall fountain are decorated with marble, crushed stone, cobblestones or just stone. The same applies to the film that remains around the perimeter of the reservoir.
In the end, you just have to start the pump and wait until the container is filled with water. In this way, you will create a beautiful composition in your dacha, where the flow of water will fall steadily onto the steps of the structure, giving the area a pleasant murmur.
Schemes and drawings
To create the design there will be the necessary drawings.
Small fountain
You will need a container to collect water and a pump. Various decorative details, such as stone slabs, are put on the tube coming from the pump. A hole is drilled in the center of each stone and strung onto a pipe in decreasing order, forming a pyramid.
To prevent water from leaving the container, a drainage system is provided. A pipe is inserted into the container, the free end of which is taken to a suitable place.
Fountain installation diagram:
- Dig a hole into which a large flower pot without holes is placed.
- Bricks are placed on the side walls. They will give stability and strength.
- A pump with a pipe is fixed between the bricks.
- Fill the container with water.
- Holes are drilled in the center of the prepared tiles and placed on the pipe.
- The free surface is covered with pebbles.
Indoor and tabletop
Small fountains have a low power pump. To make it you will need bamboo, which you buy at a flower shop:
- Bamboo up to 72 cm long is cut into three unequal parts. An oblique cut is made on one side of each part.
- Place a pump in the container, put on the largest piece of bamboo, and attach the other two pieces to it.
- The container is decorated with sprigs of growing bamboo.
- The surface is filled with pebbles, water is poured in and the pump is turned on.
Pebble
The work involves performing simple sequential actions:
- a container is placed in the depression made;
- a pump with a pipe is fixed in the center of the container;
- the bowl is covered with a metal grid;
- then install a mesh with small cells made of strong wire;
- Pebbles are laid on top of the mesh.
Near the wall
The water jet coming from the wall back into the bowl looks beautiful. In the center of the bowl there is a pump that pushes water through a pipe of various lengths to a given point.
Fountain-cascade
With this design option, water flows from one reservoir to another. The fountain is easy to make from any available materials. Buckets, watering cans, carts are suitable. The operating principle of this design is simple:
- the selected containers are attached to each other so that water flows freely from one container to another;
- below, under the containers, install the main, large bowl;
- a pump is mounted in the main tank;
- attach a hose to the pump that will pump water into the uppermost container.
Tiffany
The design is a combination of a fishtail (several pipes for the outlet of a stream of water) and a bell (one powerful pipe is installed in the center for the outlet of water). Thick jets fall in one or more directions.
Tulip
A powerful pump with a pipe nozzle is installed in the center of the bowl. At the upper end of the nozzle there are spherical disks. The water stream is applied at a slight angle, forming a flower shape at the top.
Ring
Install a strong pipe, bent in the form of a ring. Holes are made in the pipe at equal distances from each other. Guide nozzles are inserted into each hole.
Singing
A musical fountain will decorate any landscape. The design consists of a bowl, a music control system, a water filtration system and a jet height control.
From a bath or other available materials
You can choose any container for storing water; it is not necessary to line the foundation pit with film. The main thing is that the container is without damage, cracks or chips. An old bathtub, barrel, flower pot or basin is suitable.
The fountain from the bathroom is made according to the following scheme:
- a bathtub is installed in a dug hole, sealing the drain holes hermetically;
- Smooth, oval stones are placed at the bottom;
- fix the pump;
- fill the container with water.
Making a home fountain
Nowadays, it has become very popular to have a small fountain in your home.
According to the laws of ancient Chinese teaching, fountains are specially placed indoors to provide its owners with prosperity and abundance. In addition, the sound of flowing water has a calming effect, promotes relaxation and rest. Is it possible to make a home fountain with your own hands? Of course - yes!
Required purchase:
- regular aquarium pump;
- silicone tube for pump;
- glue – sealant;
- a base for a fountain in the form of a vase, flowerpot, flower pot or ordinary small basin (the main condition is tightness);
- decorative stones of large and medium sizes, shells and other elements to your taste;
- upper reservoir. It is used in specially prepared (that is, drilled) jugs, plates, etc.;
Manufacturing method:
install an aquarium pump into the bowl of the future fountain using glue or special suction cups that come with the pump; insert the silicone tube into the pump in a strictly vertical position; lay out the prepared decorative elements in the form of a slide, leave the end of the tube open; attach the upper decorative tank to the tube; pay special attention to sealing and structural strength (due to glue).
Regardless of the type or shape, any decorative fountain made by yourself will delight you and everyone around you.