A hundred years ago they were choosing goods. Today they choose manufacturers. The best manufacturers, experts in their field.
One way to secure your expert status is to conduct a master class on behalf of the owner, director or any other business representative.
Advantages of conducting MK:
- close contact with the target audience and increased brand loyalty;
- the opportunity to stand out among competitors;
- reaching an audience that cannot be reached via the Internet;
- content for other communication channels (photo, video, news feed, case);
- the opportunity to receive free brand mentions on printed posters and in the events section of city portals;
- public speaking skills training.
All other things being equal, I will choose the car service whose owner carries out MK car diagnostics. And that coffee shop where young baristas are trained. And you?
A master class can be conducted by any person who knows and can do more than the target audience of the master class. Since everyone knows more in their field than others, everyone is capable of carrying out a microcircuit.
Why am I telling you about this? He spent more than 8,000 hours on stage and became a third-degree laureate of the international oratorical competition “Ciceronius 2017.” He taught public speaking and acting. I have completed 50 trainings and 200 educational events. I consider myself an expert in public speaking. Let me make a reservation: an expert is not the one who knows the topic best. But someone who has something to learn from.
General conditions of publication
- The author provides his own, independently developed, material for publication. It is permissible to generalize the work of colleagues who have published their findings on the Internet or in print.
- It is forbidden to insert photographs of people, real names (can be replaced with: “Student 1”, “Student 2”, etc.).
- We subscribe the author to receive new materials from our site, as well as information about the progress of the review of the material. At any time, the author can click the “Unsubscribe” button in any letter.
- Age of authors: adults, teenagers. Language of publication: Russian. Authors' place of residence: no restrictions.
- For each published material, an electronic certificate of publication on the pages of educational media Vektor-uspega.rf is issued for free.
How to create your own MK
How to make master classes with your own hands? MK in PDF format can be created in various programs. I have chosen two for myself that are available to anyone.
- Word text editor . It is installed on almost every computer.
- Canva, online editor . Free service for designing graphics.
You will need minimal skills to work either in Word or in Canva. I give as much detail as possible about which buttons to press so that everything works out for you.
At the end of this article you will find links to mini-course lessons with descriptions of the topics covered.
Requirements for master classes and photo recipes
- Text volume: from 1500 characters without spaces.
- The uniqueness of the text is from 70% according to text.ru or ETXT anti-plagiarism.
- Number of photos: at least 5 (maximum - unlimited). If the recipe is simple, then you can send fewer photos, but be sure to send a photo of the finished product.
- Photos must be clear and at least 500 pixels in width. It is advisable to take photographs in good lighting, during daylight hours. Be sure to look at the background: the background of the photograph should not merge with the color of the product. It is advisable to use a single-color material, a sheet of Whatman paper, a book or something else as a background. It is advisable to exclude old tables and desks as a background.
- Photos can (and preferably) not be compressed, but sent directly from the camera, as is.
Plan
You have analyzed and understood for whom and what you will create. In order for the perfect master class to turn out, you need an action plan so as not to deviate from the intended goal.
Make a list of steps to achieve your goal for 1 year, 6 months, 1 month, 1 week, every day. If you are planning a large training course, then describe how you will prepare for it and what you need. What knowledge, programs, tools, materials. What else do you need to learn (for example, when creating a video you need a camera and a processing program, as well as skills that come with experience).
When you have a plan in front of you, you need to stick to it and be sure to complete the tasks that you have planned. Otherwise, you can prepare and think for a long time, but never start.
For example:
- In the first month, sign up for the first free or paid course.
- The second month is to create pages for him or gain the first thousand subscribers.
- The third month is to sell for the first 15,000 rubles.
And you break each point into smaller stages. Thus, knowing the problem for the month, you will need to look for its solution. We have almost all information tools. Training courses, videos, tables, cheat sheets, tips, support in the club, you will find all this in the catalog. .
What can you use for planning?
I’ll share what I use myself:
- Evernote service – integrates with all operating systems and phones, allows you to store notes, photos, screenshots and other data.
- Maind master service, where I have now made a mind map so that you can now structure information using such a system. Up to three cards are free, for the rest you can buy a paid package. An indispensable tool for me.
- Regular Google Calendar . Write down all your tasks there and work on them. You can use any program you like to plan all your activities.
How to add photos to text?
1. Click the mouse in the place where the photo should appear.
2. Click the button under the full text input field Insert picture . Select a photo from your computer. Next, the photo will appear in the desired place in the text.
3. Next, click the mouse in the next place where the photo should be and upload the photo again. This is how you insert all the photos. It is advisable to insert no more than 50 photos (since the system is currently in debug mode). Attention : If suddenly the system displays a 503 error in a pop-up window when loading a photo, please do not close or reload the page so as not to lose what has already been written. After about 20 min. go to the next tab to the main page of the site https://21vu.ru/ - if the site is working, then you can continue adding photos, if it’s not working, then wait a little longer. But we hope that you will not have such errors.
- Tags are keywords. For example: salad, ham, holiday dish. Obligatory field.
- Time spent - how long it will take a person to complete operations.
- Time to fully prepare a dish or craft - the time spent on execution + the time required for drying, baking, etc.
- Sections - then select the sections to which the material belongs. In each block you need to select at least one checkbox. If there is nothing suitable, choose something else.
- Certificate of publication - for all master classes and recipes you can get an electronic certificate of publication for free, in this case you need to select an electronic certificate. If you need a paper certificate, then select the appropriate item
Depending on the selected document type, you must also provide additional information:
- Full name in the dative case (issued to whom). For example: Natalya Konstantinovna Ivanova.
- Position/class . For example: teacher/student of grade 10 “B”
- Place of work/study . MBOU "Secondary School No. 18 of Orenburg".
- The name of the mentor is filled in only if the work of a child under 18 years of age is published.
- Comment - any questions, wishes, comments for the person who will review the application and publish the material.
Next, check all the boxes (after reading and agreeing) about the processing of personal data, subscription to the newsletter and consent to publication of the material. You can unsubscribe from the mailing list at any time in each letter. It comes out as new materials appear on the site, approximately 1-4 times a month.
Next, click the button Send material for review .
Criteria
Does the person use the method or does the method use the person?
Slawomir Mrozek
There are many ways to achieve a goal. Ice cream can be purchased at any of the 20 stores in the area and online. MK on running technique can be carried out in a hundred ways with dozens of different theoretical data or put people on a treadmill.
To limit the options for achieving a goal and select the best ones, we use criteria. The criteria are how we will move towards the goal and how we will understand that we have achieved it. They limit the ways to achieve a goal.
There are criteria of circumstances and criteria of choice.
The criteria of circumstances are dictated from the outside, and we cannot influence them, or it is difficult and irrational. As the name suggests, we choose the selection criteria.
Now about the criteria using an example.
Business: bakery.
Problem: we purchased a large batch of premium tea, there is no demand.
The goal of MK: to introduce customers to new products, change their attitude towards the premium tea segment, and collect contacts for SMS distribution.
Circumstances criteria:
- own premises;
- on Sunday morning the highest average bill;
- the worker Masha gets along well with people and is not afraid of the public;
- in a week there is a city holiday;
- Nearby are the offices of a small IT company.
Criterias of choice:
- duration MC 60 minutes;
- There is a teaware store nearby, and we can cooperate with them;
- Not all Mashenka buns are sold on Sunday; we can offer some for free for tea to MK participants;
- at the end of MK we will offer to exchange contacts for a discount and will send the discount via SMS;
- since rain is promised, it would be nice to negotiate with the taxi company about a discount for MK participants, and we will sign them up as sponsors for this;
- At the end we will conduct a quiz for the best knowledge of our tea and reward the person with a gift set.
Attention, the criteria are not a plan, but restrictions and ideas on how you want to conduct your master class. With their help, a plan is created, in our case the structure of the microstructure.
Review your criteria as you prepare. It often happens that over time, some criteria cease to be relevant, and others appear.
Award materials and publication documents
For each material that meets the conditions of the promotion, an electronic certificate of publication is issued free of charge . To receive an electronic document, you do not need to pay anything or submit an application; the documents are sent by the site secretary after reviewing and publishing the material within a few days.
Paid paper documents are sent to the author by registered mail, after sending the postal identifier of the shipment is sent to the author.
The author, at his discretion, can order:
- paper certificate of publication on the pages of the media with a “living” signature and seal - 150 rubles. When publishing a student’s work, the mentor’s full name is included in the certificate.
- paper certificate for the author about publication on the pages of the media with a “living” signature and seal - 150 rubles.
- paper certificate of the mentor about the publication of the student’s work on the pages of the media with a “live” signature and seal - 150 rubles.
- paper thank you to the author for filling our site when publishing 3 or more materials at different times - 150 rubles. The number of thanks given under this condition is limited. A “live” signature and seal is placed on the document.
- paper thank you to the mentor for filling our website when publishing 3 or more student materials - 150 rubles. The number of thanks given under this condition is limited. A “live” signature and seal is placed on the document.
Sample thank you design. The author can choose any design from the forms available at the time of order.
Product
Now let's talk about a specific product. We found an idea, who will be the author and what you will record the course about, we decided, there is a demand in the market, and so does the audience. What format is best to record in?
There is no clear answer. Test it.
Start with simpler ones, they will cost less, but are also easier to make. Then master videos, live MKs, and individual work. If you don’t know which format is right for you, get to know the various approaches, download a cool step-by-step diagram + video “36 types of information products.”
I’ll now talk about several options, but in more detail it’s better to study the video and table that I mentioned above.
Submission of information
This can be a step by step guide from A to Z. For example, “How to knit a toy from A to Z”, “How to draw in oil in such and such a style from A to Z”, “How to design a VK group from A to Z”.
Main questions and answers. Collect the maximum number of questions at the idea stage, see where you have expertise and where you don’t, upgrade and create a product with answers to these questions. One big one, or many small ones, which will really be useful.
In the Yandex Wordstat service, look at what queries are most often searched for. And they will buy your course with their hands and feet, because you have discussed many issues in detail. This is the beauty of what people give money for - ideas are all around, you don’t need to invent anything.
Chips. A collection of secrets, tips, tricks, cute things, some links. These can be either free or paid products. For example, free ones - 10 links, 10 resources, or a ready-made paid product - 50 Internet resources and plus you will also make a video on how to work with them.
Advanced level. You can make a creative course for advanced people, put your secrets there, which will be useful only to those who are already in the subject.
For example, “How to sell your paintings at a high price.” Your audience is not beginners, because they are already drawing, they are those who are already in the subject, already masters, and you are making some kind of advanced program for them.
If you have experience, then you can already teach this. For example, how to make money in your niche, how to sell your first product, “How to sell for the first time” or “How to sell your first product.” If you are already selling, then “How to sell soft toys for 10,000 per month.”
Action program to achieve results. Step by step. An easier and faster way of doing something, “How to do something easily and quickly.” Faster, easier than everyone else.
An interview or series of interviews that can be compiled into an information product.
There are many approaches and formats, choose what is closest to you. Pay attention to what other artists are doing, not just in your niche. Take ideas and try to implement them yourself. I have a cool article “50 ready-made ideas for blog articles”, it’s about topics for articles, but... based on these ideas, you can find wonderful topics for video lessons, PDFs, and master classes.
Information packaging formats
Mini cheat sheet:
- E-book - can be made in Word and translated into PDF or in the online service Canva.
- Audio course - from video to audio or simply record an audio lecture.
- Video course: live video on camera, slide show, screencasts from the monitor screen, online master class or recorded separately.
- Recordings of broadcasts, webinars, master classes, conferences can be uploaded either in full or in separate pieces to the channel, using it as a free product for a subscription.
- Distance learning course with and without verification - you can give lessons without checking homework, or you can give them with verification and feedback. The cost will vary. Nowadays, personal feedback is more valuable. Such an automated system for issuing assignments, without the ability to download your lessons, can be done on your website using the Memberlux plugin. This is what I use on our site in the closed section. You can register your personal account for free. On the top right there is a “My Account” tab.
- A series of consultations, paid or free. For example, the first consultation is a trial, but a set of consultations is for money. Recording of these sessions can be added to the cost.
- An interview can also be an information product. Gather cool experts, record interviews with them with interesting questions, and your product is ready.
Programs
Programs that may be useful:
- Word - for creating text documents and converting them to PDF,
- Excel - for creating tables,
- Audacity – for recording audio,
- PowerPoint – included in the office package or use online presentations on Google drive,
- Camtasia Studio – for recording video, audio, screencasts. The program is paid, but there are similar ones.
- Photoshop is a program for working with graphics and design. For working in this gorgeous program, I have a step-by-step course “Photoshop for a business needlewoman.”
Decide on a task, write it down in your planner, select programs, and set tasks to study what you don’t yet know.
Art studio “Colors of Life” (CAO)
Address: metro station Baumanskaya, Novaya Basmannaya st., 28 Website: https://kraski-zhizni.com Phone: Cost: from 1290 rub. per lesson
Advantages of the creative workshop “Colors of Life” Painting master classes are conducted by experienced teachers who work using their own unique methods that have proven effectiveness. Classes are held in small groups, the teacher has the opportunity to devote enough time to everyone, show, explain, and convey the essence.
For classes, students are provided with:
- Free materials for work - you don’t have to buy anything yourself;
- Practical skills and theoretical knowledge – 90% practice and 10% theory;
- Fragrant coffee and delicious cookies during breaks;
- A guaranteed result, which is expressed not only in the knowledge gained, but also in the drawings created during the lessons;
- A creative atmosphere and a community of like-minded people.
- The potential listener can only choose the painting master class that interests him and a convenient time. If you have any questions, please contact the studio consultants. They will explain everything in detail and help you choose one of the courses.
Basic wool felting techniques for beginners
Felting provides a fun opportunity to create lush accessories, toy additions, and clothing embellishment options, among many other things. At the moment the wool is felted, the fibers adhere to each other due to the scaly structure, and a dense felt is formed. Felting techniques are usually divided into two types: dry and wet.
Dry felting
During dry felting, it is possible to prepare a three-dimensional base for toys and various accessories. This technique is best suited for beginner needlewomen. It consists of several stages.
- Separate a small part of the non-woven wool from the main tape, then rub it between the palms. This will allow the fibers to tangle faster.
- We roll the workpiece into a cylinder. Make sure it is as elastic as possible.
- Then, we stick a special needle for felting into the middle and begin to turn it evenly to get a round shape of the workpiece.
- As soon as the product becomes elastic enough, you need to change the needle to a thinner one.
Dry felting is best done on foam rubber for better adhesion of the fibers PHOTO: livemaster.ru
It is impossible to determine by eye whether the workpiece is dense enough, so it needs to be pressed a little. If after a few seconds the original form returns, it means the process was carried out correctly.
If you spray the finished product with hairspray, the fibers will not crumble PHOTO: yandex.by
Wet felting
Wet felting technology is very successful in our time. It is used to create paintings and warm clothes. In other words, it is used exclusively on large items. The process itself consists of several simple steps.
- We take a small piece of wool and moisten it in a previously prepared soap solution (hard and liquid soap are suitable for this).
- Carefully roll up this piece in your hands. We give it the shape that is necessary.
- You can continue rolling in your hands, for example, to obtain a voluminous piece, or switch to flat felting.
- The wool can be spread evenly on a bamboo mat. Don't forget to soak it in soapy water.
- Then cover the workpiece with cling film and roll it up. It is necessary to roll for a long time, gradually increasing the pressure.
As a result, you can get a thin fabric made with a smooth transition of shades. Typically, this method of felting resembles a marble structure. After preparing the base, you can use it to sew interesting accessories, slippers, bags and wallets. In a word - what is enough imagination?
Mixed felting technique
Dry and wet felting can be used to produce any accessory. In this way, finishing accents are often made in toys. For example, flat ears, cheeks, and more are attached to a voluminous body. When using these techniques together, the result is the most effective. An ordinary accessory turns into a masterpiece.
It is important to be able not only to felt wool, but also to fantasize about creating PHOTO: decormania-spb.ru
Modern technology: felting in a washing machine
To create such blanks, all you need to prepare are pieces of non-woven wool and nylon socks (tights will also do). This option is more suitable for creating voluminous accessories.
- Take pieces of wool of the required volume.
- We push them one by one into the nylon stocking, and then tie a knot.
- We do this with each piece of wool.
- We throw everything into the washing machine, you can throw a terry towel along with the workpiece.
- We select the half-hour mode and set the temperature to 50ºС. This will be enough for the fibers to bond together.
You can glue the fragments together using hot glue PHOTO: pinterest.ru
As a result, you will get a significantly reduced model of the parts. Therefore, if you need a medium size of pieces, you should use twice as much raw material.
Related article:
Paintings from wool : necessary tools and materials, methods of painting with wool, additional nuances, tips on creating paintings from wool for beginners, detailed master classes - in our publication.
Painting Studio "Paints" (SZAO)
Address: metro station Panfilovskaya, st. Marshala Rybalko d2k6 Website: https://www.kraskistudio.ru Phone: Cost: 2500 rub. per lesson
Master class in oil painting for all skill levels for adults and children from seven years old. You will choose what you will write in class from a large collection. You can bring your own reference images and pre-coordinate them with the teachers. You will be guided throughout the entire session by an experienced teacher. You will be able to paint a finished painting in just one lesson and without experience.
The Studio has a large collection of works of varying complexity; 95% of the works posted on the site were written in one lesson. If the work you choose or bring will be difficult for a beginner to complete in one lesson, you will be informed about this. The Drawing Studio has a flexible subscription system.
Teaching painting from scratch for adults and children from 7 years old.
Tips for a beginner master
When in contact with moisture, the wire used to make a panel, wreath, hairpin, bracelet or brooch may darken and the product will lose its attractiveness and shine. In addition to insulating and floral tape, a thread that matches the base or leaves will help hide the wire from prying eyes. When making crafts, a novice craftsman should take into account the following technical features:
- the ability to use low beads;
- imitation of rose, tulip, chamomile, orchid, lily;
- weaving “dew drops” inside the flower.
The cost of consumables is paid off by a beautiful item made according to an individual project, as well as by the pride that unique jewelry is made by yourself. Constant practice of needlework gradually improves the beginner's skill, develops perseverance and accuracy of finger movements.
Where and how to use kanzashi style flowers
Often women dream of making original flowers using the kanzashi technique for their hair. This is the ideal solution - make a hair clip and a small beautiful kanzashi flower to pin to your hair.
You can also make a flower on an elastic band. The hairstyle will have some zest and a completely unusual look. A hair flower can be made specifically to match the hair color or, on the contrary, the complete opposite.
Products with several different flowers of different types will look original.
Art studio Anna RA (VAO)
Address: metro station Sokolniki, st. Sokolnichesky Val, 48 Website: https://anna-ra-studio.ru/master-klassi/ Phone: Cost: from 3900 rub. per lesson
Art studio Anna RA invites you to attend entertaining oil painting master classes for adults and children from 3 years old. The level of preparation does not matter, because anyone without drawing experience will be able to paint one gorgeous picture from scratch in three hours under the guidance of our professional teachers.
Studio advantages:
Experienced teachers. Active artists, members of the Moscow Union of Artists and the Union of Artists of Russia
Preparation for admission to art universities in Moscow
Unique master classes. Painting gingerbread with glaze, do-it-yourself postcard, toys using decoupage, decoupage, ebru techniques, painting on glass and ceramics.
Draw your story. During the classes you draw one of the 300 provided paintings of your choice!
Where to start with patchwork?
The easiest and safest way to start the patchwork technique is to master - sewing from old things -. Old men's shirts, jeans and dresses - everything can be useful for your first experiments. Ideally, fabrics should be ironed and steamed well, not stretch and not require additional processing of seams. This means that all cotton fabrics fit this description.
An iron is an indispensable tool for patchwork sewing. All elements need to be smoothed not only before work, but also after each machine stitch. And not just use the iron, but steam it at high temperature.
For one product you need to select fabrics of the same thickness and density. Adopt another life hack from the professionals : fabric blanks need to be wetted and starched, and then ironed.
If you are planning to master patchwork sewing from jeans, then you will definitely need a sewing machine that can be used to make a zigzag seam.
Scope of application of the ganutel technique
Flowers created by human hands have always been extremely popular. We can say that to some extent they are universal and are an excellent option for decorating hats, outfits, for creating jewelry and other accessories; they add sophistication to the interior, and are also an indispensable attribute of various holidays and celebrations. As for the latter, recently there has been a significant increase in the popularity of ganuteli in wedding fashion: this technique is used to make openwork unusually elegant wreaths and tiaras for brides, as well as pendants, earrings, brooches and various decorative elements for wedding dresses. You can decorate gift wrapping with ganutel flowers, or you can give them as an independent gift. Such flowers look great as interior decoration. Agree, almost everyone loves fresh flowers, but their successful growth requires certain conditions and care, which we are not always able to provide them with. And if we remember allergy sufferers who, despite all their love for flowering plants, cannot inhale their aroma, then it becomes quite clear why we so often use artificial flowers to decorate our homes, which are sometimes no worse than their living counterparts in bringing additional colors to the interior , place accents and soften its lines. So why not choose a ganutel for this purpose? Moreover, using the ganutel technique you can create entire paintings, especially if you consider that recently the “authority” of handmade paintings has literally grown before our eyes; just remember the paintings embroidered with a cross. Or you can simply decorate the frames of photographs or the same paintings with flowers made using the ganutel technique, or create exclusive souvenirs - it will turn out very lively and extraordinary.
Sources:
- https://1igolka.com/rukodelie/ganutel-rukodelie-dlya-vseh-master-klass-i-sovetyi-novichkam
- https://draw-paint.ru/vyshivanie/ganutel-dlya-nachinayushchih.html
- https://art-fashn.ru/mylo/ganutel-master-klass-shemy-i-tehnika-dlya-nachinayushhih.html
- https://three-needles.ru/rukodelie/pletenie/ganutel/ganutel-osnovy/
- https://sdelala-sama.ru/podelki/738-ganutel.html
- https://HobbyLaby.ru/raznoe/tehnika-ganutel.html
- https://netigor.ru/ganutel-shemy-svoimi-rukami/
- https://yakrasotk.ru/ganutel-texnika-maltijskogo-rukodeliya.html
- https://www.remontpozitif.ru/publ/sdelaem_sami_svoimi_rukami/raznye_aksessuary/ganutel_maltijskaja_tekhnika_pletenija_cvetov/75-1-0-1039
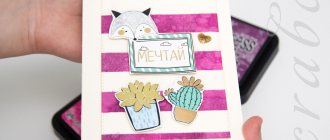
Examples of completed MKs
Below you see examples of master classes based on my lessons in Word. At the start, participants had different understandings of how to create their own MK. The level of knowledge of the program varied, but everyone had excellent results.
| Master class by Marina Vaiciskauskas. Marina took a prize in the Marathon and received free participation in the Turnkey Video MK training. | |
| Master class by Margarita Revonenko. A very high quality MK, like all of Margarita’s works. | |
| Master class by Elena Bogatskaya. Despite the fact that Elena’s master class was not about needlework, all the recommendations were followed and the final document is ready for publication on the Internet. |
Which option to choose: Word or Canva is up to you.
If there is a lot of text, then it is better to master Word. If there are a lot of photos and text is not important, then it is more convenient to work in Canva.
Where does the creation of a master class begin? Write a master class (text), add photographs, beautifully design (font, frames, etc.). That is, we start with the text.
Let's look at what should be in your master class, without which it will be “short” and unfinished.
How to make your MK high-quality
What should be in a master class on almost any topic to make the author look like a professional?
Ganutel - handicrafts for everyone
Ganutel is a handicraft technique using mainly two materials: wire and various threads. If desired, you can use more items: beads, buttons, glue and other crafts, with the help of which the finished product will acquire individuality and unique beauty.
Crafts using the ganutel technique are often made in the form of flowers and earrings. They can be used as interior decorations or as a fashion accessory in combination with clothing. Or you can combine flowers and earrings and make voluminous earrings using the ganutel technique. Below in the article is the technology for making flower elements, microcontrollers for making earrings, diagrams for products and a photo gallery with ready-made samples.
The popularity of this art is due to the fact that you don’t need to be a genius or have any special gift to understand how to make wire flowers at the proper level. Moreover, all the necessary materials can be found in almost every home.
Very often an orchid is chosen as a flower, but why limit your imagination when you can come up with your own unique and original flowers?!
This is what an orchid looks like:
And these are designer flowers using the ganutel technique, the difference is obvious. A hardworking needleworker, having studied all the intricacies of the ganutel technique, will be able to give master classes within a few months after studying, which, in turn, can lead to additional income.
I would like to note that in the world of art there is such a thing as “panel”.
In the ganutel technique it does not come across so often, since the panel is a decoration for the walls. For panels, more “flat” works are more suitable, for example, paper crafts or paintings. However, the hand of a master is able to combine these two directions in the art of needlework.
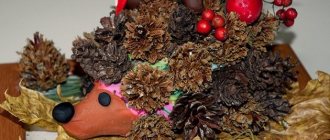
Gallery: ganutel needlework (25 photos)
A little history
Ganutel originates before the 17th century in the South American country of Brazil. It all started with the fact that local residents wound the roots of aquatic plants and various algae on some twig, then dried it and received simple decorations.
These were not yet flowers made of thread and wire, but over time the technique was improved and developed until it acquired a modern look.
This craft was especially popular in the Maltese Islands, in particular in monasteries. The nuns were probably bored because they couldn’t pray from morning to night, so they found a way to pass the time and decided to make decorations for their monastery. Later, crafts using the ganutel technique reached the residence of the Pope: flowers decorated the altar, giving it a softer and more pleasant appearance, which the clergyman himself undoubtedly liked. That is why this craft has become widespread throughout the world.
The word itself was most likely formed from the Italian word canutiglia, which translated means “twisted thin thread.” What does Italian have to do with it? Italy is located next to Malta, so they “inherited” it in history.
And in the Russian language there is a consonant word “kanitel”, meaning a thin gold or silver thread. However, this word in colloquial speech is also a synonym for the word “chaos”.
Gel nail extension technology
The easiest way to extend gel nails is with tips. If you use a form - special stickers - then at the beginning you cannot avoid unevenness and adjustments.
Nail extension with tips:
Tips are plastic templates with markings that follow the shape of the nail. They are glued onto your nails and covered with gel on top.
- It all starts with hand disinfection (client and technician). This step cannot be skipped either in the salon or at home.
- Then you need to select the tips of the required size. Tips must correspond 100% to the width of the nail plate.
- Then you need to remove the cuticle, as with a regular dry manicure - with an orange stick or a pusher
- The nails are given the required length. The free edge should be about a millimeter. The file must be held at an angle of 90 degrees
- The top layer of the nail plate is cut off. The file should be highly abrasive, about 180 units. You need to hold it parallel to the nail plate
- Glue the tips
- We adjust the length, sand it to a matte color
- Degrease
- Apply primer to your nails
- Apply a thin layer of gel using rubbing movements and dry for 2 minutes.
- Then the top of the nail is covered with a layer of gel, starting from the stress zone. You need to put a drop of gel, let it spread a little and spread it over the surface of the nail, slightly retreating from the nail folds. Things are a little different if you build up your French hair. This technology is carried out in a different way
- Place the nail in the lamp for 3 minutes
- After all the nails are extended, start modeling
- degrease
- Then you can start applying varnish and decorative elements
- Apply top