Lure
The main goal of proper bait is to collect fish at the fishing point and keep it there throughout the fishing period. This can be achieved by taking into account:
- depth at the fishing site;
- the strength and direction of the current;
- the type of fish you plan to catch.
To catch perch or ruffe in shallow water, it is enough to periodically throw small pinches of bloodworms into the hole. It will attract fish with its smell, and the constant appearance of a new portion will not allow it to go to another place.
At great depths, the same effect is achieved using micro-feeders on dump trucks. But in this case, any large fish can clear the entire bait table in one go, and at the same time disperse the stripers.
At depth, bream, roach, bluegill, rudd and other types of white fish are most often caught. If there is no current at the fishing point, the bait is lowered to the bottom by a dump truck directly into the working hole. If there is a current, feeding is done through a hole drilled a little higher upstream.
After formation, the bait balls must be kept in the cold for several minutes. After this, they will erode to the bottom a little slower, gradually releasing their nutritional components.
The bait itself can be bought in specialized stores and mixed directly on the pond, adding attractants. But you can cook it yourself. But summer complementary feeding options do not always give the desired result in winter. In some cases, a popular base of cereals such as rolled oats, millet or pearl barley can turn into a paste-like mass in cold standing water. Such food will only scare the fish away from the point.
In winter, groundbait with the addition of animal components works well. Chopped worm, food bloodworm or canned maggot. This is especially true when the same baits are used as bait. When looking for pieces of a worm or small bloodworms at the bottom, the fish will not miss a delicious bunch of the same delicacy placed on a hook.
When fishing for roach in mid-water, it is better to form a bait pole that will attract fish. This can be done using the same dump truck feeder. In this case, not dense balls, but crumbly bait are placed in the feeder. The feeder does not open at the very bottom, but just above the horizon, where the fish is standing at that moment.
The composition of the bait mixture must be selected depending on the type of fish. Bream responds well to semolina and corn. Roach - into pieces of shrimp. Rudd - for pearl barley, corn and breadcrumbs. The bluenette simply loves rolled oats. But all of them will not swim past bloodworms, maggots, dung worms or bark beetle larvae. Even carp or carp can respond to well-prepared and correctly delivered bait.
Precise feeding using a dump truck feeder can significantly increase your catch and provide an enjoyable winter fishing experience.
Advantages of using feeders for winter fishing
Depending on the conditions of the fishing site, you can use different types of winter feeders. Their variety is small, and the dump truck feeder can be called the most universal. It is used both in currents and in still water. It is useful for catching bream, roach, rudd and other white fish at great depths. Regular feeding balls can become saturated with water and disintegrate before they reach the desired point. They are not perfectly round, and it is difficult to achieve this with your hands in the cold; they will certainly leave the trajectory when falling. It will be possible to feed a vast area at once, but the fish will not walk directly under the hole. The feeder will ensure that the bait gets into exactly the place where the greatest effect will be.
Read also: Riddles and secrets of history
Winter feeding technique
The best option among universal baits is a small live bloodworm. It is quite popular among fishermen as it can be used for different types of fish. Most often, they are used to feed perch and ruff. When catching “white” fish species, it is better to combine bloodworms with bait from plants and herbs.
The main nuances - in stagnant water, the bait should be more crumbly, and if it is, then the bait should have more mass.
Fishing on the current
- When fishing in a current, even if it is not very strong, you need to take into account that the bloodworm is not very massive, so it can easily be carried away by the current. To prevent this effect, motes must be mixed with river sand and delivered to the bottom of the reservoir using a feeder. In this case, the bloodworm will not be carried away even by a very strong current. In some cases, it is better to make a hole for complementary feeding at the beginning of the flow. In this case, the effectiveness of the bait will increase slightly.
- There is one specific feature when feeding “white” fish. In order for the bait to function correctly, it must lie on the bottom of the reservoir immediately after leaving the feeder. This can be achieved by weighting the bait. You need to form a large lump of bait, put it in the feeder and open it at the very bottom. The lump is made so that the lump of bait immediately sinks and does not float up. The second effect often occurs when mixing in cold weather, when the bait freezes and absorbs water very poorly.
At great depth
If there is no current, then the bait can be lowered directly into the hole, but at great depths this is only effective when the fish are found above the bottom, since the bait will be scattered gradually with the movement of the feeder. In order to prevent this, you can make balls from complementary food and water from the reservoir and lower them into the hole.
Such lumps sink to the bottom of the reservoir quickly, but deviate slightly from the trajectory and move away from the hole. It is enough to fashion only two or three such lumps of bait, not very tightly, so that when moving they gradually collapse, forming a cloudy cloud in the water column.
The most effective method at great depths is to use a feeder. Since in this case, the bait is placed exactly at the casting point and all the fish are concentrated there. You need to open the feeder at a distance of at least one and a half to two meters from the bottom.
During the second feeding, the feeder should be opened a little further from the bottom than the first time, otherwise the fish will bite less willingly. Bloodworms should only be used when using a feeder.
In shallow water
At shallow depths, it is best to use the “pillar” bait technique, throwing the bait in powder form directly into the hole or squeezing it a little into a lump so that it dissolves immediately when it hits the water. With this approach, the smell from the bait dissolves and spreads very quickly, and the cloudy spot immediately attracts fish. To do this, the bait used should not be very heavy.
In this method, bloodworms are used directly “by hand”, or by opening the feeder directly under the ice. During the spring thaw, bloodworms and “white” bait can be scattered right next to the hole in a small mound. In this case, during any of the postings, a small amount of bait is thrown into the hole. With this approach, the fish rises for such bait close to the ice.
This article will help novice fishermen in proper fishing in winter. Namely, in the manufacture of different variations of feeders and their proper use. Happy fishing and good catch, beginner fishermen!
Commercial samples
- Eheim Twin. Expensive automatic feeder with a volume of 160 ml. Equipped with a fan that prevents food from rotting and forming lumps under the influence of moisture. There are two compartments for different types of food. Powered by 4 AA batteries. The feeding process is completely customizable.
- Eheim Feed Air Digital Automatic. Another sample from Eheim. Digital feeder with fan and feeding fish up to 4 times a day.
- Tetra. The device will provide the fish with food up to three times a day. Food is protected from exposure to light, moisture and air. There is a convenient mount with height adjustment. The volume of the food compartment is 100 ml. Food in the form of flakes, chips and granules is suitable.
- Ferplast Chef. Battery-powered feeder with a capacity of 100 ml. Powered by two batteries, it provides three meals a day for fish with precise dosage of food.
- The drum-type device will feed your pets twice a day. Weighs 300 g, container volume – 100 ml. Used to feed small fish that consume small and medium pellets.
- The feeder runs on two batteries and holds only 14 g of small food. Suitable for feeding young fish. Serves food to the fish twice a day.
- Fish Mate Automatic Feeder. The feeder has 14 compartments for storing food. It is possible to set up automatic feed supply up to 4 times a day.
Which form is better
The feeder feeder can be made in various geometric shapes, the main requirement is the possibility of a useful volume that can accommodate the amount of complementary food required for the conditions of introduction, the provision of aerodynamic qualities that allow you to feed the product over a long distance without any extra effort, and a shape that provides stability when the accessory is at the bottom of the reservoir with certain current forces. It is difficult to unequivocally answer the question about the best form of adaptation, since this parameter directly depends on the structure and type of the reservoir and its bottom, as well as the activity of the fish.
Products in the form of a parallelepiped and a cylinder are considered classic forms, but products in the form of a pyramid, cone, spherical shapes and a ball are also used. The advantages of cylindrical types are the speed of filling the accessory with a mixture of any fraction and high aerodynamic properties, but such forms are unstable in currents and are subject to rolling, which often frightens cautious fish approaching the bait. Rectangular types are more difficult to fill with bait, and their aerodynamics are much inferior to a cylinder, but they are much more stable on all types of soil and look more natural than other geometric shapes. The feeder method and similar products are natural in appearance, but due to their design features they do not allow delivering bulk mixtures to the fishing point.
Based on these considerations, we can confidently say that there is a variety of types of feeders, which allows you to cover any fishing conditions with one or another advantage in a certain current situation.
How to choose an automatic feeder for an aquarium
Let's start with the fact that most modern models of automatic fish feeders provide for the supply of only dry food. If you are used to feeding your fish with live food or frozen minced meat, then an automatic feeder is not suitable for these purposes. However, even if until now the fish ate exclusively live food, during your absence they can easily get by with dry, granular or flake food.
To be fair, we note that the constant use of an automatic fish feeder can lead to problems with the inhabitants. The fact is that it is impossible to get all the necessary nutrients and vitamins from dry food.
Therefore, it is important to take into account that automatic feeders are intended for extreme cases when it is not possible to feed the fish yourself. When you return home, take the trouble to provide your fish with a balanced diet.
Moreover, automatic feeders are not designed for feeding fry.
As for choosing an automatic feeder, the modern market offers a huge number of manufacturers of this accessory. As a rule, all automatic feeders have the same operating technology, but differ in the presence of some additional functions. The essence of an automatic fish feeder is to use a mechanical mechanism to supply food from a special “pocket” to the aquarium at certain intervals. Of course, fish food must first be poured into the “unit” and the required time must be set.
Today, automatic feeders with a rotating hopper and a control unit are especially popular. Some automatic feeder models also have a digital display that shows the portion size program. It is possible to set two or three meals a day. The most popular models with display and power programs are from the manufacturing company Hydor.
An equally popular manufacturer of automatic fish feeders is the Eheim company. Models from this manufacturer are equipped with a rotating hopper. A fan built into the system supplies air to the hopper, which allows the feed to remain fresh and not damp. These models also have programs for selecting the feeding mode and the period of time until the next feed.
Summarizing our conversation today, we can come to the conclusion that an automatic fish feeder is an indispensable accessory for travelers who are forced to stay on long trips. However, it is not recommended to use an automatic feeder too often in order to preserve the health of the aquatic inhabitants of the aquarium. Also note that automatic feeders are only suitable for home, small aquariums and dry food.
DIY winter feeder
For the convenience of making a winter feeder with your own hands from thin cardboard, we will cut out a template, for now in the form of a closed circle. By cutting off part of the circle towards the center, we obtain a cardboard imitation of the blank for the side wall of a winter feeder.
The width of the conical base of the bait device is up to your taste, but I can give you a hint. If we take half a circle as a sector, then the diameter of the conical base of the finished winter feeder will be equal to its height. The device turns out to be somewhat wide.
Once, for winter fishing on the last ice on the lakes, I needed to make three similar feeders with my own hands - for myself and a couple of friends, one of whom turned a wooden cone on a machine to bend the side wall of the fishing device. Therefore, I boldly cut the round sheet of tin into three equal parts, shown in the drawing on the right.
Read: How to properly salt fish for drying
Before starting to make a tin feeder, you can cut the cardboard sector wider, and then, if necessary, trim it. After this, roll the cardboard into a cone and secure the joint in 3-4 places with glue.
If you are satisfied with the dimensions of the cone, then we will begin making a feeder from sheet metal with our own hands, but, having cut out a sector of the required width, first drill (punch through a nail) small round holes in the metal, as in my drawing.
Although I foresee some difficulties for some fishermen with the bending of the tin side wall of the winter feeder into a cone. They can glue the layout in the form of a tetrahedral pyramid. But then, to make the side walls of a homemade winter feeder, you will need to cut out a sector about half the size of a circle.
Making your own side wall of the feeder
To make your own ice fishing feeder for one person, all you need is the tin of the side wall of an instant coffee can. If some difficulties arise with bending the metal, they can be significantly reduced if you anneal the tin.
Then we bend the thin-rolled metal according to the recommendations suggested above, not forgetting to first cut out the top of the sector, shown in the drawing with a black line. Again, we solder the joint of the side wall of the winter homemade feeder with our own hands and place the base of the device on a flat surface.
Surely, you will notice a gap under the cone of the feeder, which can be removed with sandpaper laid on a flat plane.
Next, we solder a loop of millimeter wire into the hole at the top of the cone. At this point, the manufacture of the side wall of the feeder for winter fishing can be considered complete.
Winter feeder cover
Along the perimeter of the base (round or square) from tin, cut out the lid of the feeder for winter fishing, taking into account the sides three to four millimeters wide and the protrusion of the bracket for tying an elastic band. Level the plane of the lid with a mallet.
You can make a hinge (only a narrow one) according to the recommendations disclosed in the article: Homemade piano hinge for a butterfly. Then solder the hinge to the lid and side wall of the feeder. Don’t forget to solder a loop into the top of the cone to tie the feeder to the fishing line for winter fishing.
Feeder lid swivel joint
By the way, a very simple, self-made hinged connection between the lid and the side wall of the feeder will look like this.
Along the edge of the lid opposite the place where the elastic is attached, two holes are drilled (punched) almost next to each other.
The same two holes at the same distance from each other are drilled at the bottom of the base. Then the top of the feeder and its lid are connected through these holes by winding or homemade copper soldered rings.
Even such a structurally simple hinge joint will be quite reliable in connecting the lid and one of the side walls of a winter fishing feeder.
Why are there holes in the feeder?
Regarding the side holes in the feeder. They must be drilled without fail. Otherwise, with a tightly fitted lid in real winter fishing conditions, the feeder simply cannot be drowned.
Our fishing feeder can sink only after it is filled with water to a certain volume, of course, if it is not filled with fragments of sand-lime brick as food.
In addition, when lifting the fishing feeder shown in the picture, streams of water from the surrounding water space will rush into the holes. They will create additional pressure on the lid of the feeder with the existing one. After which it has no choice but to open slightly and relieve the water pressure in the cavity of the cone, throwing off part of the bait along with the water.
By controlling the speed at which the winter feeder rises, we can sprinkle the feed not all at once, but in parts, in doses. This is the main function of the rubber shock absorber on this feeder.
Operating principle of an automatic feeder
Often such devices are used in offices and other similar institutions, since on weekends and holidays it is necessary to feed the fish as usual. Timely nutrition allows pets to grow and develop healthy and active; there are some types of fish that require a special diet.
The automatic system allows you to dose feed
Automatic feeders will help ensure regular and timely feeding of the small inhabitants of the aquarium. As a rule, they are adapted for feeding already adult individuals and only with dry food. Each model of automatic fish feeder has its own mounting method and power supply system. Some types are mounted on the glass of the aquarium, while others are mounted directly on the lid.
First, it’s worth understanding the basic principle of operation of these devices. The fish feeder is designed to pour a portion of food from its body into the aquarium at a certain time. The mechanism of action for all models is the same; their differences lie in additional functions, container sizes, power supply system and the internal feed supply device itself.
Conventionally, they can be divided into 2 types:
- Electronic. This is the most convenient, reliable, but also expensive aquarium feeder. It works from the network, and thanks to the internal electronic device, a program is set that calculates the time of feed supply. At a certain time, the container opens and part of the dry food falls directly into the water.
- Rotating. The principle of this device is to move a special container filled with food, and as soon as it enters an empty compartment, it is filled with dry food. There are several varieties of this type, but the principle of operation remains the same.
Each such feeder in an aquarium with fish is equipped with a timer, thanks to which an equal period of time is set between feedings. More expensive models equipped with an electronic program allow you to set a clear time for each feeding, thanks to which the food may not be supplied at night, but only during the day.
Of course, this device still has some disadvantages:
- This type of feeder cannot be used to feed fry.
- It is intended exclusively for feeding dry food. Many fish do not accept this type of food; they are fed frozen or live food. Those who are involved in aquarium farming know that you cannot keep fish for a long time exclusively on dry rations: for their health it is necessary to receive food rich in minerals and other useful substances.
Therefore, it is possible and even necessary to use this device, but only under certain circumstances, and do not lose sight of live communication with your pets.
Installations with spring feeders
Each angler has his own preferences when choosing a mounting design for fishing with springs, and there are really a lot of options. We will offer the most catchy rigs for catching carp or crucian carp, working on our reservoirs.
It must be said right away that the number of leashes with hooks is selected depending on the type of bottom in the reservoir, the baits used and the angler’s own preferences. A rig with 2-3 hooks does not always work better than one, but the psychological factor is present and it seems that a multi-hook rig provides a better chance of getting a bite.
Therefore, the easiest way is to have in stock rigs with different numbers of hooks and already on the pond decide which ones “work” best. To make a multi-hook mounting with a spring you will need:
- a piece of fishing line 50 cm, for tying installation;
- 2 swivels;
- float stops;
- loaded feeder spring;
- 2-3 leashes with hooks.
How to do the installation:
- a swivel is tied to one of the ends of the fishing line;
- a stopper is attached to the fishing line and pulled to the swivel assembly;
- then put on the feeder;
- At a distance of 20 cm from the swivel, another limiting float stop is placed;
- a second swivel is tied at a distance of 25 cm from the swivel;
- a loop is made at the free end of the fishing line to connect to the main fishing line;
- Leashes are tied to the swivels.
If more than 2 hooks are used, then instead of the lower swivel, a rocker arm is knitted under two hooks. A stopper is placed between the spring and the lower swivel because otherwise, when fishing, the spring will hit the swivel assembly and, in the end, break the tackle.
The top leash is tied to the swivel, and not directly to the main line, so that it does not twist and has free movement. The length of the leash varies depending on the attachment used; if the attachment is floating, then the length of the leash is 3–5 cm, and it is knitted from soft leash material.
For sinking baits, leashes 10-15 cm long are used. The hook size is selected according to the bait from 6 to 12 numbers according to the European classification. This installation is used with rods for carp fishing, but they are also equipped with casting rods and even feeder rods.
How to build a device
A do-it-yourself automatic fish feeder is made from scrap materials that are easy to find. There are two ways to build a fish feeder with your own hands.
First way:
- For the construction you will need a plastic bottle and an unnecessary telephone that receives incoming calls. The container is cut into two equal parts, then the lid is attached to the neck so that there is a gap between the neck and the cap. After this, the bottle is filled with food and a mobile phone is inserted inside.
- The principle of the device is simple - food enters the aquarium due to vibration, so you just need to call the phone and food will pour out to the fish. The amount of food is regulated by time - while the mobile vibrates, food arrives.
The second manufacturing method is more complex than the first and requires more materials. A do-it-yourself aquarium fish feeder made using this method will work autonomously, and the owner will not need to regularly “call” the pets. For construction you will need:
- Alarm clock with light weight.
- Plastic tube.
- A thick plastic glass with a lid.
How to make:
- A hole is made in the bottom of a plastic glass. The size of the hole should be slightly smaller than the diameter of the tube.
- The tube is inserted into the hole made so that the tip of the tube does not touch the wall of the glass.
- The container is filled with food and tightly closed with a lid.
- The protective glass is removed from the alarm clock, and the drum is attached to the clock hand with tape so that in 24 hours the tube is turned towards the reservoir twice with its outer tip.
The essence of the device is that the amount of food thrown into the aquarium is controlled by the size of the tube. The thicker the hole in the tube, the more food the fish will get. Before use, the device is tested for 2-3 days.
Automatic fish feeders are devices designed to make the aquarist’s life easier and prevent underwater inhabitants from starving. Devices for feeding feed can be purchased at the store, or built at home, but in the second case you need to make sure that the feeder is working properly.
Manufacturing process
Self-opening winter feeder at the bottom
This design of a winter feeder for feeding fish is very easy to implement and facilitates the automatic opening of the feeder near the bottom, without tugging on its cable, which will avoid spooking the fish and not creating turbidity in the reservoir.
When the weight reaches the bottom of the reservoir, the lid of the feeder opens and the bait spills out to the bottom. In this case, you do not need to jerk the feeder, which does not frighten cautious fish so much; this is most important in the dead of winter and will not create much turbidity in the water column.
It is also easier to move with such a charged feeder, since there is no fear that the bait will spill out onto the ground.
The manufacturing principle is as follows:
- We take a cable, the length of which we select based on the depth at which you need to empty the feeder
- We tie its end to the lid, on the opposite side of the hinge. The lid itself should not be secured, otherwise the feeder will not work.
- We pass the cable first through the two upper loops, and then through one on the hinge side
- We tie the weight
- Thus, the lid of the feeder will always be closed, but when the weight reaches the bottom, the impact on it will stop and it will open freely.
Micro feeder with magnetic latch
This hand-made microfeeder is suitable for use in winter and is not difficult to make.
To make it we will need:
- A syringe for twenty cubes (if desired, you can take even more) A centering washer made of steel, the diameter of which is eighteen millimeters
- Lead bottom for syringe size
- Magnet with a diameter of six millimeters (suitable for a phone earphone)
- Epoxy plasticine (epoxyline). Epoxylin “Moment” is best suited.
The weight of such a feeder is no more than twenty grams; it sinks immediately when immersed in a pond. The opening force of the feeder is ≈ 50 grams, it is changed using a non-magnetic gasket located on the side of the magnet.
Most often, one layer of electrical tape is enough for this. The stopper prevents the lid from opening during sudden immersion in water; it is adjusted once during manufacture; it does not need to be moved during use.
This feeder quickly fills with water, for this it needs about 30-40 centimeters in free fall to a depth. When moving in the water column, it does not open spontaneously, but this can be easily achieved with a little shaking.
Read How to attach a carabiner and bait to a fishing line
There can be many variations with magnets, but this type of feeder is as convenient as possible for the fisherman. When storing it, a hand-made reel is placed inside the feeder so as not to lose it during movement.
Content:
- 1 Design of a feeder for winter fishing
- 2 What is better: buy or make it yourself?
- 3 The process of making a feeder with your own hands 3.1 Self-opening at the bottom
- 3.2 Micro feeder with magnetic latch
- 4.1 Fishing on the current in winter
You can easily make a feeder for winter fishing yourself, using available materials. Most fishermen make such consumables with their own hands: on the one hand, it’s interesting, and on the other hand, it’s cheaper.
Features of fishing with a feeder on the current
The feeder used in strong currents not only has a number of features in the assembly of equipment, but is also characterized by a unique fishing technique and installation. But before we begin to consider these factors affecting the comfort and efficiency of fishing, the angler should be aware of the reasons that force the use of changes and deviations from the classic feeder equipment.
Current equipment includes feeders with increased masses that help stabilize the installation on the bottom. But not only excessive weight affects the quality of fishing, the shape is also considered an important criterion. In shape, a well-chosen feeder, due to the large areas of contact with the soil, is not subject to drift by the current and clearly keeps the feeding point in working order, holding the fish in the right place. An important element of equipment is the main cord, namely its thickness. In currents, they try to use threads that are as small in diameter as possible, the result of which is considered to be a decrease in flow resistance.
At the same time, the tip must withstand the high masses of the thrown feeders. Carbon fiber material fits these parameters well. The rods themselves are chosen from 3.5 to 4.5 meters in length, which indicates the long-range and reliability of the gear used in difficult fishing conditions. Speaking of reels, fishing practice shows the rationality of using middle-class spinning rods in feeder sets, ranging in size from 3000–4000 units and preferably with a baitrunner, which allows you to leave the tackle without control and supervision, even for a long period of time. The length of the leash depends on the type of fish caught and does not have specific recommendations for fishing currents; it is selected during the fishing session based on the activity of the trophy.
Aquarium automatic feeder
10 Reviews 35 order(s)
Product Description:
Feeding your fish while you're away is easy with the NICREW Moistrue-proof Automatic Fish Feeder. When you need to travel out of town, your fish will still feed up to 5 times a day, right on schedule. The moisture-resistant system keeps food fresh and accommodates most types of food, including flakes, granules or crumbs. You can adjust the feed lever to adjust the amount of food dispensed, and you can choose to do single, double or triple feeding each time.
Moisture Resistant System Integrated ventilation system keeps food dry and fresh. Adjustable Food Dispense You can adjust the feeding lever to regulate the amount of food, and you can choose to do one double or triple feeding each time. Easy to read LCD display. Manual and automatic feeding Press the "M" button to manually start the rotation of the container. Then, after setting up automatic feeding, you will also be able to feed them manually by pressing the "M" button whenever you want if you are worried that your fish do not have enough food. Feeds many types of food Ideal for most types of food for both freshwater and saltwater fish.
Battery Powered Two AA batteries are included, so you can install and start using the Automatic Fish Feeder right away. Tip: Take out the food container first before removing the battery compartment to insert batteries.
Easy to install Mounting Bracket fits aquariums with a top width of 0.1 to 0.8 inches.
Specifications: Material: high hardness plastic Battery: 2 * AA batteries (not included) Feeding frequency: maximum 5 feeds per day, up to 3 cycles for 1 feeding (Auto) Fish food: flakes, granules and crumbs Hopper capacity : 150 ml Product weight: 323 g Package includes: 1 * automatic fish feeding machine 1 * User manual Price: RUB 1,134.77
Feeders
Classic English bottom tackle is also used for catching carp, especially small fish weighing 2-3 kilograms. A sensitive fishing rod will allow you to fully enjoy fishing, unlike carp fishing forms, on which such a catch is practically not felt. Feeder feeders are quite simple to make, you can fit a lot of them in a backpack, they provide feeding at the right point, so you can save a little on this consumable material.
Curlers as a manufacturing material
There is a widespread belief that the first feeder options were made from them. The manufacturing procedure is extremely simple, the same winter automatic feeder is much more complicated:
- Trim the curlers to a suitable length.
- The load is made of lead plates, which are crimped with pliers for fastening to the body and, if desired, additionally glued (epoxy resin works well).
- A fishing line mount is made from wire.
Important! To prevent the line from twisting, it is worth adding a swivel to the loop. After painting them in a camouflage (usually black or green) color, homemade feeders are ready for carp fishing
After painting them in a camouflage (usually black or green) color, homemade feeders are ready for carp fishing.
From construction mesh
Do-it-yourself fishing gear for carp is impossible without good feeders. With proper skill, finished products from construction mesh will be almost the same as those manufactured at the factory. A simple fishing recipe for creating feeders is as follows:
- From a galvanized steel mesh with cells 6x6 or smaller, you need to cut a workpiece of the required size.
- Give the future feeder the required shape.
- Secure with rivets or solder the body to a pre-prepared strip of lead, which serves as a sinker (you can solder a swivel to attach the main fishing line).
From a piece of plastic bottle
The cheapest option, given the availability of materials. The step-by-step sequence of making such a feeder is as follows:
- You need to cut a rectangular piece from the bottle that matches the dimensions of the future feeder. In this case, it is better to take transparent options - the painted ones warp more, become deformed and emit an extremely unpleasant odor when the holes are melted.
- Give the desired shape using paper clips (a regular stapler).
- Pour the required amount of lead into a pre-prepared plaster mold. Drill holes in the resulting workpiece - two for rivets, and one for the winding ring.
- A riveter is used to install rivets that secure the body of the feeder to the sinker. After making holes and painting, the product is ready for fishing.
Important! The number and diameter of the holes changes the depth where the bait will be washed out. The more there are, the closer to the surface of the water this will happen.
And vice versa, from a closed feeder the bait will be washed directly to the bottom of the reservoir. For carp fishing, the latter option is preferable.
DIY options
At first glance, making an automatic feeder with your own hands is not easy. But it only seems so. If you use your imagination a little and understand the principle of supplying food at a strictly defined time, you can figure out that for this you need 2 main things: a table clock (an ordinary alarm clock) and a light box that will simultaneously play the role of a feed hopper and dispenser.
Such a box with a lid can be made, for example, from light transparent plastic. In the container (with the lid on), near one of the corners, you need to make a smooth hole through which the food will pour out.
Then the cover is removed, and a partition is glued into the body so that it separates the space with the hole from the main part. In appearance it resembles the entrance to a labyrinth when viewed from above.
A round hole is carefully cut in the center of the case to fit an improvised aft compartment onto the clock axis. Dry food is poured into the box in a vertical position to a level below the central hole.
There is a clock mechanism: it is the alarm clock itself with the glass removed. A homemade camera is placed on the hour axis and attached with thin tape to the hour hand. It is necessary to choose a position so that 2 times a day, at a certain time, the slot of the box is at the bottom.
The food will slowly fall out until the hour hand travels a certain path along the dial. All that remains is to secure the homemade automatic feeder near the edge of the aquarium lid, above the water.
How long will such a unit last?
It’s hard to say for sure, but enough time to go to the country for a couple of days or to visit friends for the weekend
It is important that the box is not very heavy, and that the batteries for the alarm clock are new. By the way, instead of a plastic box as a container for food, some home craftsmen use a large round pencil sharpener
Bottle and smartphone
You can try one more option. Very funny, but extremely simple.
A plastic bottle is cut in half and the top half of the bottle is turned over with the cork facing down. The cork must be unscrewed and attached to the neck of the bottle so that there is a small gap between it and the neck.
A little small dry food is poured into the bottle; It doesn’t matter if some small part of it spills out first. Soon this process will stop by itself. A mobile phone with the “Vibration” mode set is placed inside the bottle directly into the food.
You need to install a homemade feeder on a tripod above the water and make a call to the phone number. It begins to vibrate, and the vibration causes the food to fall out in exactly the same dose as the duration of the telephone operation.
An original solution, isn't it? Surprisingly, it works!
Naturally, each such option should be tested in field tests.
Undoubtedly, when you have to leave home often and for a long time, it is better to purchase a branded electronic automatic feeder and entrust it with the process of feeding your favorite fish. If such absences are episodic, short-lived, and you don’t want to spend money on expensive equipment, homemade devices will not leave animals without food.
Video about creating a simple automatic fish feeder using your phone:
Homemade feeder for long casting
Long-range accessories are prepared according to the first or second principle in a purely cylindrical shape, which has great aerodynamic properties. Loading with a lead plate of a formed shape is not carried out; for this purpose, a rigid wire structure of three or four mustaches 2.5-3 cm long is installed at one of the ends of the cylinder, to which a lead weight cast in the form of a bullet is attached. The wire whiskers are attached to the mesh, soldered with tin solder. In the bullet itself, even when casting metal into the shell of the casting mold, antennae of the required size are inserted in advance, introducing them directly into the molten metal.
The fastening element, in the form of a winding ring with a swivel, is placed at the end of the workpiece opposite the bullet. Due to the center of gravity concentrated at a certain point, the bullet feeder for the feeder has a high degree of aerodynamic characteristics, which allows the tool to fly over particularly long distances, sometimes covering distances of more than a hundred meters.
Basic criteria for choosing a feeder
When choosing a fish feeder for your aquarium, there are several important criteria to consider.
Main selection criteria:
- Simplicity and ease of installation.
- High quality material.
- Available operating modes, frequency of feeding fish and dosage of portions, taking into account the type of living creatures living in the aquarium.
- Waterproofness of the product. The food in the drum should not get wet or stick together.
- Volume of the feed container.
Also pay attention to the power source of the automatic feeder - batteries or mains operation. If you choose the second option, check the length of the cord so that you can freely connect the device to the outlet without using an extension cord.
Metal feeder for feeder
Homemade feeder feeders made of metal mesh are also common in fishing. For the most part, accessories are made of parallelepiped geometry with open or closed ends. To produce such a homemade product, you will need to purchase a metal mesh and preferably a galvanized version with a cell no larger than 5x5 mm. To make a dozen products you will need no more than one square meter of mesh fabric.
Weights, as in the previous version, are used from a set of lead plates as needed for the conditions of the reservoir. From a canvas cut with metal scissors, a shape of the required size is formed by bending the sides of the figure using a mallet. The connection point is soldered with tin or fastened with a wire broach. The lead plate, processed over the area of one of the faces of the figure, is attached through a bolted connection and a spacer washer to the mesh base. A hole is formed on the plate for the fastening ring.
If necessary, the ends are sewn up with a mesh with a smaller cell or a solid sheet of tin. Burrs are ground along the edges of the mesh, preventing all kinds of tangling of the product with the cord, while eliminating its undercuts and deformations. The filed structure is ready for use in strong currents.
The best homemade feeder for the feeder, which I took as a basis for donk fishing
Next I will talk about this easy-to-make type of feeder.
Its distinctive features:
- ease of manufacture;
- availability of source material;
- excellent aerodynamic characteristics, which manifest themselves both with precise casting even against strong winds, and with rapid immersion in a large layer of water;
- quick ascent to the surface of the reservoir when reeling in with a reel.
In other words: thanks to the favorable location of the center of mass relative to the center of pressure of the surrounding air during flight or the layer of water during diving and landing, it provides all the tasks that I need to solve.
The technology for its production is shown in his video “Dream Feeder” by Alexander Milkin. I recommend watching it.
I took these ideas as the basis for making my gear, but slightly changed the technology. I show all this further.
Parameters of fishing feeders
The function of bottom feeders is to deliver food to the fishing point. This takes into account the casting distance, the current at the fishing spot, and the test of the rod. Since it is impossible to put all the properties into one product, different types are produced. The main parameters are as follows:
- volume;
- weight;
- form;
- material (plastic, metal);
- type: closed, open, feeding;
- classical, flat method.
Depending on the fishing conditions, the angler chooses one or another modification. For example, fishing is carried out on a standing reservoir with a soft bottom. In this situation, the flat method is suitable, which will not bury itself in the mud when falling. Then the food will remain on the bottom surface.
The situation is absolutely the opposite when you have to fish on a river with a fast current. Here you will need not just heavy feeders, but ones that cling to the bottom. That is, there is a combination of two parameters - weight and shape. Here is an example of such a solution.
With spikes for fishing in the current
Feeders usually have a standard set of feeders that they take for fishing. This is true in cases where the fishing session is held in an unfamiliar place. In this case, it is wise to use a special handbag with compartments of this type.
Sets of avid feeders
Having assessed the fishing conditions, a person selects the appropriate equipment and feeder.
When to use plastic and when to use metal?
As mentioned above, feeder feeders have a metal and plastic body. What is the difference and what is the purpose of these types? Plastic is beneficial in cases where there is no strong current. During reeling, such feeders easily float up, which is very convenient when you need to overcome the grass carpet at the bottom.
Read How to make equipment for carp fishing for different fishing conditions
Metal products are suitable for fishing in strong currents. Such feeders are not carried away by the current away from the fishing point. However, they lose to plastic when exhausted. If they float up after several revolutions, then the metal ones often go in the water column, which additionally loads the reel. With them it is more difficult to overcome steep edges, especially those overgrown with grass. Another drawback is that such models can corrode with prolonged use.
Weight value
The most important parameter. The casting distance and stability at the bottom depend on it. A classic feeder consists of a body, a lead weight and a fastening element. The load can be in the form of a strip, like rectangular or round ones, or in the form of a puck, drop or sphere, like a bullet. Manufacturers indicate the weight in grams on the product so that a person can immediately select it.
Weight is indicated directly on the feeder
The angler must take into account the test of the rod and the weight of the feeder + feed. The feeder form indicates the maximum weight that he can throw.
Feed capacity
The main task of the feeder is to hold the fish at the point in the maximum quantity. To be able to do this, the fisherman sends food parcels one after another to one place. The result is a kind of bait table. Since feeder fishing involves frequent casting, the angler must correctly calculate the amount of feed. So that it is enough to attract fish, and on the other hand, so as not to overfeed it. For these tasks, products of different sizes are used.
To keep the fish in one place, the angler chooses a larger feeder. While fishing, you can reduce the size, or fill not the entire volume.
Classification by size
Manufacturers mark products by size. Above is a line of 7 positions. This set is enough for a full fishing session with different conditions.
For current and still water
For fishing in the current, heavy feeder feeders weighing 100–150 grams are used. Feeders with a metal mesh body with lugs. According to the manufacturers, they cling well to the bottom. They are often labeled as River. When the current leaves no other options for fishing, this is the optimal solution.
The inscription River means - river
When fishing in still water or in reservoirs with minimal current, it is wise to use light method feeders weighing up to 40 grams. Due to the wide sole, they do not sink into the silt, and all food is washed out to the bottom surface.
Method for standing water
How aquarium feeders work
Automatic feeders for aquarium fish, regardless of the device model, operate on the same principle. The essence of the action is that food is dropped into an artificial reservoir in the specified quantity, at the time set on the device timer. After the fish treats are thrown into the water, the drum rotates and the food compartment is refilled with food. The volume of food is controlled by a plate, which multiplies or decreases the weight of the portion, and the serving time is set using a control unit.
The device for serving food operates from a battery or electric current. If the owner is away from home for only a day, then it is better to choose the first type, and if he goes on business trips, then the second.
Bottle fishing feeder
To make such a model yourself, you will need the plastic container itself, a marker, scissors, a ruler, a soldering iron, sheet lead and flexible wire.
The work is carried out in several stages:
- The neck and bottom of the bottle are cut off. The resulting cylinder is cut across and unbent.
- The locations of future holes are marked with a marker. It is recommended to place them in a checkerboard pattern approximately every 2 cm.
- The workpiece is folded back into a cylinder with some overlap. The edges are connected using glue or a stapler. Alternatively, the planes can be heated and joined with a soldering iron.
- The previously marked holes are made with a hole punch, drilled with a drill, or burned with a heated metal rod. To avoid deformation of the material, it is better to perform the procedure using the first two methods.
- A lead plate is adjusted to the shape of the circle of the edges of the workpiece. A reinforcing ring is formed, the edges of which are tightly pressed around the entire perimeter of the plastic.
- If a semi-closed feeder for fishing is required, the sides of the basket are tightened with wire.
Popular models of automatic feeders
The aquarium market is full of accessories from various brands, each of which has its own differences, advantages and disadvantages. The price of a device directly depends on the amount of electronics in it - the more, the more expensive.
We will highlight the most popular models and brands to understand the differences between them:
Eheim. A German manufacturer that produces first-class aquarium equipment, including automatic feeders. The product is equipped with two 80 ml food compartments. They work independently of each other, and therefore dry and vegetable food can be loaded into the compartments and programmed for different times. The feeder runs on AA batteries with a lifespan of 4 months;
Hagen. Also a German company that released a mini feeder. The device weighs only 140 g, and the food compartment holds 14 g. The main task of the feeder is to give food to the fry, in very small doses, twice a day at the appointed hour. Hagen is powered by 2 batteries;
Juwel. Once again, the German manufacturer pleases consumers with devices for convenience. The device weighs 300 g, but also runs on 2 batteries. It is programmed to dispense portions of food twice a day. Does not require special care and maintenance, simple and easy to operate;
Ferplast chef. The device is of Italian origin. Even though the power comes from two batteries, they last for an incredibly long time. The feeder very accurately doses food, dispensing it three times a day;
Tetra. Popular German company. The feeder dispenses food up to three times, and also has a manual feeding button (so that the food falls out now). It has a compartment with a volume of 100 g, which reliably protects food from sunlight and moisture.
DIY fish feeder
If the aquarium is already running and the feeder has not yet been purchased, you can always make it yourself. For production you will need the following materials: 1. Plexiglas;2. Foam;3. Flexible rubber tube;4. Plastic.
A foam feeder can be completed in a few minutes. This is the simplest, cheapest and most reliable way. You need to take a piece of foam plastic, 1.5-2 cm thick. Having chosen the appropriate length and width, the middle is cut out of the foam so that a frame remains. To prevent the edges from crumbling, they are carefully rubbed with sandpaper. The foam feeder is ready! However, it has its drawbacks - fragility and absorption of dirt and odors.
A rubber tube fish feeder is made as follows. We take a tube with a diameter of 1-1.5 cm and securely glue the hollow ends together to make a ring. This device is much stronger, more durable, and is not afraid of moisture and dirt. Like the foam version, it is suitable for dry food.
In order to make a product for live food, you will need plexiglass or plastic. Having cut out 4 identical strips, several mm high, you need to glue them together in the shape of a frame. Plastic with holes is placed inside and secured with glue.
Do-it-yourself fish feeders are not aesthetically pleasing, and the price of a purchased product is not much higher than the cost. Therefore, aquarists resort to craftsmanship only in cases where they want to enjoy the process of handicraft on their own, or the nearest pet store is too far away to go there to buy a feeder.
Types of feeders
There is a huge variety of feeders. They all perform the same function, but differ in place and conditions of use. Some work better in calm, standing water, while others cope well even with strong currents. Let's look at some of the most popular types of feeders.
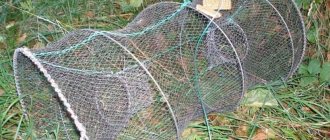
Mesh feeders
Mesh feeders are a small cage that is filled with bait. Each such cell is equipped on one side with a metal plate-weighting agent. Different types of mesh feeders differ in shape and size.
In form there are:
- square;
- round;
- triangular;
- rectangular;
- semicircular.
Different shapes of feeders are used in different conditions. For example, round ones perform best in calm water. For places with strong currents, it is better to use square or triangular ones.
There are also cage feeders:
- open (best suited for fishing in calm waters, food is consumed faster);
- semi-closed (used in strong currents, ensuring slower flow of bait).
Spiral feeders
Round-shaped spiral feeders cannot be used in currents, but they are quite simple and fly excellently over long distances. The fishing line is passed through the central rod, and the entire structure of the feeder moves freely along it.
Spiral feeders
Spiral bait can be considered the initial version of this type of feeder, and Method-Feeder is their further improvement, a hybrid of a feeder and a fixed sinker for catching carp and bream.
- Behind. A simple bait spiral
is a classic unloaded feeder for bait that has a fine consistency (not suitable for large grains). The fishing line runs inside the rod of the feeder, so its replacement is possible only with a new installation of the equipment. - Zb. Wide bait spiral:
the line passes through an elongated lead “olive”. Thanks to the weight, this spiral can also be used on rivers. - Zs. Bait bomb.
This feeder has a weight located at the lower end, so it is convenient to cast it far. Attached to the main line by the upper end using a swivel or locked using a ledger stop. - 3d + Ze. Two Method-Feeders
. Such special bait “spirals” were invented in England, where this method is used to catch carp and large peaceful fish.
Special feeders
These feeders are designed for special situations.
- 4a. Feeder with lugs
for fishing in strong currents. Thanks to wire lugs and a very large load, it is used even on rivers with rapid currents. - 4b. Sponge for maggots
. It is placed in a jar with maggots, and the larvae crawl inside the sponge. Unfortunately, some of them remain there forever. - 4s. Attractant feeder made of microporous material
that can absorb liquid attractants and then release them very slowly. - 4d. Eel feeder
. The nylon mesh is filled with strips of fish, chopped worms or grains. - 4e. Wire feeder
. It is quite bulky, so it is difficult to throw. Used for feeding very large quantities of bait or in strong currents.
How to make an automatic feeder for an aquarium?
The process of making an automatic feeder with your own hands is very simple and does not take much time. For work we will need the following materials:
- small analog clock with alarm;
- plastic transparent container;
- a transparent plastic tube with a diameter of about 7-8mm.
Now let's look at the instructions for making an automatic feeder for an aquarium with your own hands.
- We make a hole in a plastic container with a slightly smaller diameter than the diameter of the cutting and insert the tube. Then you won't have to use additional glue.
- The drum does not need to be fully loaded. It is enough to fill it two-thirds, then the food granules will not fall out all at once under their own weight. In addition, the clock hand can withstand a certain weight and should be loaded experimentally gradually, and we will attach the container to it.
- How does a do-it-yourself automatic fish feeder work?
- A container with food pellets is attached to the clock hand. Since the container makes two revolutions in 24 hours, granules will spill out of the hole in the tube twice a day. This is quite enough for feeding.
- The size of the hole in the tube of the self-made automatic feeder will determine the number of pellets that will fall out at a time. The larger it is, the more food will enter the aquarium.
- The automatic feeder for an aquarium with your own hands is ready and now you can safely use it in practice.
Choosing a place for the feeder in the aquarium
It is up to you to choose what you will use - an automatic fish feeder or a conventional one that requires manual manipulation. However, you should remember one rule: carefully choose the place where you will have it, preferably where there is no aeration system and heating devices. Ideally, it is advisable to turn off the aeration system during feeding so that the feed does not spread over the entire surface of the water. However, as you can imagine, if an automatic fish feeder is used, this item may not be feasible.
Feeder functions
Such designs are very useful when using live and dry food. It is they who prevent food from spreading over the entire surface of the water, ending up in hard-to-reach places where it will safely rot. In this regard, an automatic fish feeder is a real lifesaver. When using live food, the feeder is also very important. It allows you to keep heavy worms on the surface of the water, preventing them from getting lost under rocks at the bottom, where they are likely to rot.
In what cases can you not do without an automatic feeder?
A working aquarist always has to solve the problem of regularly feeding his pets. Being away from home all day, this can be quite problematic. When you go on vacation for half a month, you can’t take an aquarium with you either, so a lifesaver like an automatic feeder comes to the rescue.
Nowadays, as was done in the days of our grandparents, there is no need to “reinvent the wheel”, because given the demand for automatic feeders for aquariums, some manufacturers of pet products have adopted them. These devices have a variety of designs and are programmed for feeding hours and feed volume.
How to make a fishing feeder with your own hands at home?
Delivering food to the fish's fishing spot is the main task of the feeder.
You can make these types of feeders while sitting at home quite quickly:
- Using wire mesh you can assemble a feeder. A round weight is cast in the inverted bottom of an aluminum can. Make the feeder semi-closed and tighten one side with wire. The result is a strong feeder.
- For the basket, use old and unnecessary curlers. The weight is secured with wire. The downside is the fragility of the plastic itself; due to the flow, it can crack. It is advisable to use such feeders in standing water.
- A common way is to create a feeder from a plastic bottle. This material is biologically hazardous because it does not decompose in water.
- A more complex model of the feeder is the spring. It is necessary to cast a cylinder of the desired size. Use a drill to make a hole through which to thread the ends of the wire under the weight and hide them.
- A closed feeder is made for live food - worms and maggots. Use a Kinder Surprise or film box. Savvy fishermen infest the shoe sponge *JOKINGLY* with maggots. At the bottom of the reservoir, maggots crawl out of the feeder and become a tasty bait for fish.
Principle of operation
All types of automatic feeders dispense a dosed portion of food at certain time intervals. The structure can be different; power is supplied from the mains and from AA batteries. The second type is much more common.
Types of feeders for aquarium fish:
- Drums. The most common among commercial devices.
- Screw. The amount of food in such units is controlled by a rod with a screw surface.
- Feeders with a valve. The feed is supplied with the opening of a special valve.
- Disk. Disks divided into compartments. At the right moment, the contents of the compartments are poured into the aquarium.
Advantages and disadvantages
The advantages include:
- clear dosage of food;
- constant feeding at the same time;
- attaching the feeder to suction cups in a suitable area of the aquarium;
- portability;
- the fish will get used to getting food in a certain place.
There are also disadvantages:
- feeding only adult fish;
- inability to use live and frozen food;
- high price.
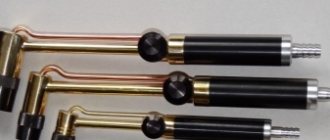
Making river feeders
Stages of creating this type of feeder:
- Two tie rods and two conical bases are installed on an iron plate with holes. The iron plate is also made independently; its shape can be any.
- Parts of the springy wire are installed inside the mold. A wire is threaded through the passages in the base and the spacer. The entire surface of the mold is treated with oil or lard. The spacer is installed in the middle of the structure, 1 piece of wire is inserted into the grooves.
- One base of the mold is filled with lead or tin, and after hardening, the opposite side is also poured. After cooling, the central wire is straightened with pliers. The form itself is disassembled and the resulting model is taken out.
How to install a feeder in an aquarium
It should be comfortable and safe for the fish to get food from the installed feeder, so the owner needs to think about which place will be optimal for fixing the product.
The feeder should be installed away from filtration and aeration systems. The flow of water can wash away food and prevent the fish from eating properly.
Also, do not install the feeder next to heating appliances. It is better to choose the most distant corner from all aquarium equipment systems.
Installation of the structure
Installing homemade feeders is quick and easy. If you use the option with a cut-off barrel, then just tie a rope, pour in the food and lower it to the bottom. Tie the end of the twine to the bridge/tree. When the fish empty the container, it will float to the top.
When using a structure that floats on the surface, it is also necessary to fix the feeder and lower it into the water. After this, scatter the food over the surface of the surface. This way, the food will always be in one place and will not pollute the pond.