The process of metal etching has been known to people since the 16th century. The most famous masters lived in Italy and Germany. Today, anyone in the world can do knife etching at home. The availability of reagents and many methods allows you to do this without special experience. But it’s definitely worth studying the topic of knife etching.
Etching a design on a knife at home.
The essence of the method
The key factor is the effect of acidic environments on the metal. Due to the interaction of the aggressive environment and the product, a chemical process called etching occurs. To apply a pattern to the blade, areas of the surface not intended for etching are covered with a protective layer.
It must be resistant to the etching substance. The depth of metal dissolution depends on the time of exposure to it. Since the 16th century, several effective methods for etching knives have been identified. They will be discussed below.
From old to new - remaking a rusty ax found at the dacha
Many men are racking their brains over what to give their brother, best friend, father for a birthday or other significant holiday. After all, a gift should not only be functional, but also bright and memorable. Banal things are completely inappropriate here. A good idea for an incredibly beautiful men's gift was suggested by the author of the YouTube channel Vityok Sanko. And the basis for its implementation was an old ax rusted from time to time, which was given a second life.
Metal etching methods
Acids in the etching technique are used depending on the type of metal. A certain alloy requires its own aggressive substances. The speed and quality of the process depends on this. There are several ways:
- a process using an electrolyte with current passing through it. They call it electrochemical. Its features are: precise drawing, saving time and working fluid solution. No harmful fumes;
- a process that does not require complex equipment and is incredibly simple - chemical . But the use of liquid acidic solutions is characterized by emissions of fumes harmful to human health into the air;
- production method requiring expensive equipment - ion plasma method. Used in dry environments in the field of microelectronics.
The first two methods are widely used for etching knives at home. The components are commercially available and do not require complex manipulations.
Actions during a chemical reaction
During the reaction, a plaque forms, which will become more and more numerous. It slows down the whole process, so you need to periodically wash it off with water. You should not do this using various brushes, brushes and other tools, because you can damage the paint. But it seems to hold the entire design, and it would be a shame if, while etching a knife, for example, you inadvertently damage the design on it. This is a very delicate work that requires a steady hand and patience.
Read also: Safety precautions on a screw-cutting lathe
The depth of the pattern directly depends on the time during which the metal remains in the solution. There are no exact criteria, so each master must observe the progress of the chemical reaction himself. And only after doing this several times will it be possible to say with confidence how much time is needed to develop the desired pattern to the intended depth.
Preparing metal for drawing
It is necessary to prepare the blade for drawing and for the etching process itself. If the knife is collapsible, be sure to disassemble it. Freeing the blade will make it easier to work. In a one-piece product, the handle must be insulated.
It doesn’t matter what material it is made of, an acidic environment will harm anyone. Electrical tape as an insulator will work perfectly. The surface of the blade to be treated must be thoroughly wiped with acetone. The intended design will fit well on a degreased surface. We try not to touch the workpiece with our fingers.
Stencils for etching on axes and rules of procedure
Getting a design on an ax for your own pleasure or for a spectacular gift is so simple that anyone can do it. Electrochemical etching of the head takes a few hours.
Drawing a design on an axe.
- Peculiarities
- Patterns for graphics
- Current source
- Solution
- Copper plating process
- Conclusion
Drawing methods
A pattern made from various materials serves as a protective layer; the metal not covered with it will be etched. There is a similarity to a film negative when a photograph is developed. There are plenty of options for protection: electrical tape, stickers, nail polish, vinyl, metal marker and many other polymers.
Nail polish
A popular material among amateurs. But professionals don’t disdain them either. Good resistance to aggressive environments makes it a leader in use. After applying it to the product and letting it dry, it is possible to correct the design with sharp cutting objects. Achieving a clear pattern and smooth lines.
Primer or bitumen varnish
The product is completely covered, then the contours of the design are transferred over the layer with a marker or brush. Having sharpened a thin wire, you need to scratch the sketch down to the metal. The primer is used GF 021 or XB 062. When scratching a sketch, there is a risk of chipping off the dried primer or bitumen varnish. This is a disadvantage of this method.
Glossy paper
It is a good method that is gaining momentum among masters and has many positive aspects. The required sketch is printed in real size on glossy paper using a laser printer. Applying the side with the pattern to the surface of the blade, you need to iron the paper.
After the product has cooled, it is placed in water. Having brought the paper to a soft state, it peels off, and the toner from the printer remains on the product. You just need to treat the surface around the design with nail polish. The method allows you to transfer the smallest details of the image.
Large butcher's ax - how to etch a drawing with salt
It’s not difficult to make a big butcher’s ax into a masterpiece with your own hands. Today you will learn how to etch a pattern with salt.
It took two evenings to create these masterpieces. If you think metal etching is difficult. I answer. After watching this video to the end, many will do similar metal etching the first time. I've already done this - subscribers should remember. But then I didn’t have a big butcher’s ax. But as it turned out, it was a little more work. We will divide the whole process into two stages. Metal polishing and etching. And if anyone has questions, ask. I not only read comments, but also always answer. Polishing one ax can be done with one grinder in an hour. I removed heavy rust and old paint with a stripping disc. In some places the rust penetrated quite deeply, so it was necessary to clean it down to bare metal. Having cleaned three axes and a small ax, I suddenly remembered that somewhere there was a brand new butcher’s ax bought 10-12 years ago. Here he is. It is almost three times the size of standard axes. And visually in excellent condition - it was even in salidol. Using a cleaning disk, I began to remove the top layer of metal and after a couple of minutes deep holes became noticeable. Which I'm unlikely to be able to remove. It took three times as long to clean the butcher's axe. After the cleaning disk, there were some rough spots on the ax that could be smoothed out with a flap disk. It is more difficult to remove the irregularities on a butcher's ax, so I tried to do it with an orbital machine. Sanding wheels on clean, flat metal sat down in just a minute. And for me, the stripping synthetic disc that I once bought at the car market was a discovery. In China, similar discs sell for 320 rubles. In general, such a disc can smooth out small irregularities in metal, remove scratches and polish the surface. Metal polished with such a disk can be etched. And it doesn’t matter that there are irregularities on the plane. After etching, these defects are almost invisible. Polished axes look impressive even without a design. To bring the metal to a mirror state. You can walk a little with thousand-grit sandpaper, and sand a little by hand with two-thousand-grit sandpaper. The final polishing was done on a felt wheel with Zh3 automotive mastic. Just a few minutes and the axes are ready. And you must agree they look cool. At the second stage, for etching the metal you will need a DC power source with a voltage of 5 volts. A computer power supply is ideal for these purposes. You will also need salt at the rate of a kilogram per 4 liters of water. And stencils made on vinyl self-adhesive film. Those who want to make their own stencil designs can watch a training video - the link to the video is on my website. If you like my stencils, you can download them there, on my website. Link in the description under the video and in the pinned comment. I placed all the layouts on an A3 sheet. What to do with the stencil layout? You put it on a flash drive and take it to the nearest printing studio. Where do you ask for plotter cutting on vinyl self-adhesive film? You can also buy mounting film there. In extreme cases, the mounting film can be replaced with masking tape. At home, we will divide the sheet into separate stencils. My sheet is a little larger, because in addition to axes, I prepared stencils for caps and T-shirts. So…. How to transfer a stencil to metal? Take a stencil with text. Let's say I want the text to shine after etching the metal. In this case, use a knife or needle to remove all the self-adhesive film around the text and inside the letters. Only the text remains on the background. To transfer the sticker to metal, glue the mounting film onto the stencil, smooth it out and carefully remove it. The stencil was transferred to film. Degrease the ax with solvent or alcohol, and try to glue the stencil the first time. Smooth it thoroughly and, bending it strongly, slowly pull off the mounting film. Simple stickers in the shape of leaves or stars can be glued without mounting film. The main thing is not to touch the adhesive base with your hands. Single-layer etching will look good, but double-layer etching creates the illusion of depth in the design. It's easy to do. First, we glue all the stencils that should shine. After that, we glue stencils on top, which will appear in the background. Now let's prepare the saline solution. Add a kilogram of salt to 3-4 liters of water. It is very important to observe the temperature regime. The temperature of the solution should be the same as the temperature of the ax 25-30 degrees. If the temperature difference is more than +- 20 degrees, the stickers may fall off during etching. At temperatures below twenty and above sixty, stickers can also come off. Next, you need to connect the power. Each computer power supply has rails for 3.3, 5 and 12 volts. And the higher the current strength of the 5-volt bus, the better. You can find a video on remaking and starting up a computer power supply on my website. Next important point. We will screw the positive wire from the power supply to the ax that we will etch - this is the anode. We will screw the negative wire to some kind of tin resembling the shape of an ax - this is the cathode. If you mix up the polarity, it will not be the ax that will be etched, but the tin. We lower the ax and the cathode into a plastic bowl... Make the distance between the cathode and the anode 3-5 centimeters. If the cathode is placed a centimeter from the axe, the solution may boil and, as a result, due to the difference in temperature between the axe and the solution, the stickers will come off. In addition, if the distance between the cathode and the anode is small, the load will increase and the unit will turn off and go into protection. I used to think that the current strength of my power supply was enough to etch any objects. But when etching a butcher’s ax, the power supply went into protection until I moved the cathode away from the ax by 5 centimeters. This is because the ax has too large a metal etching area. Copper wires with a cross-section of one and a half squares were heated under load so that the insulation melted. The larger the area of the anode and cathode, the higher the load. And one last thing. Every time before the main etching, I do a 20 minute test etching. If I like the result, I proceed to the main etching. I etched the axes for 15 minutes on each side. And there is no way to speed up this process. First we etch one side. Then we turn the ax over and poison the other one for the same amount. Then, using a soft brush, trying not to damage the sticker, wash off the iron oxide under running water. Let the ax dry and remove the top layer of stickers. Try to remove it so as not to accidentally lift the bottom sticker. There may be traces of glue left in some places. Remove the glue using a solvent. If you use too much solvent, the stickers may come off. After removing the glue, put the ax in the solution and start etching each side for another 10-12 minutes. Once etching is complete, wash off the oxide and remove the stickers. And at first glance, the etching does not seem expressive. But if you take six-hundredth or eight-hundredth sandpaper and clean everything up, the pattern begins to appear. After six hundredth sandpaper, we will go through the mirror areas with thousandth and two thousandth sandpaper. To make the design mirror-like, sand it a little with a felt wheel. You can even do it dry; after felting, the design will become more expressive and effective. I like the result. If you like it too, give it a thumbs up. The axes turned out to be truly unique and very beautiful. It would be possible to wear ax handles. But there is a nuance. The metal is not protected in any way and may tarnish or rust over time. Therefore, in the next video we will bluing all axes in the most successful way. By the way, now subscribers of my Telegram channel and VKontakte group can see photos of new homemade products a couple of days before the video is released on YouTube. As for bluing, I have no doubt that the coating will be wear-resistant and moisture-resistant. I'm more interested in how impressive the axes will look after bluing. Don't forget to click on the bell so you don't miss new videos.
The principle of etching using electrolysis
For metal products, two methods are used: acid (liquid) and electrochemical. They are used to remove scale and oxide films. Compliance with the etching rules: holding time and solution concentration are the key to a successful process.
Electrolysis process.
It is important to thoroughly degrease the part. A small greasy stain will render all the work of the master unusable. When working with varnishes, you must be careful; they are highly flammable. This also applies to the process itself. In any form, it is unsafe. It must be treated with caution and care.
Solutions used for pickling steel
The process for different alloys requires different etchants. Based on the atomic structure of the metal lattice, a specific solution is selected:
- alkaline solutions etch aluminum and its alloys well;
- nitric, sulfuric, hydrochloric and phosphoric acids are used in the etching of copper and its alloys. To increase the reaction rate, chromium and nitrogen are added;
- For durable titanium, a double etching method is used. Initially processed in alkaline solutions, then in high concentration acidic solutions;
- an aqueous solution of hydrogen peroxide and formic acid is ideal for nickel and tungsten;
- for other solid metal compounds, mixtures of nitric and acetic acids are used;
- A mild sulfuric acid solution works well on cast iron.
A favorite for etching a knife at home is nitric acid. Sometimes salt is added. They are highly active and must be handled with care.
Basic archaic engraving techniques
Incisive engraving
The first of three types of engraving that we will talk about today. Its historical name is bulino, after the name of the main cutter used in the Italian school of engravers. Of course, now a larger number of tools are used to implement it, but the principle itself has remained unchanged: the master conveys the texture of the depicted object and the play of light and shade, cutting the surface of the metal with pressure of varying strength and at different angles. Moreover, working with a thin needle is even preferable here than with a regular cutter: it allows you to more accurately depict small details that are common in hunting themes - for example, the texture of animal skins.
Sample of incisive engraving. It is rarely found on the blade itself
Once upon a time, the cutting technique was used mainly to decorate guns (this is how it happened historically), and then it was mastered by masters of knife art, and so well that it is now associated, first of all, with bladed weapons, and not with firearms. It is applied mainly to metal parts of sheaths and handles: bolsters, crosshairs, rivets, etc. Although occasionally this type of engraving is used on the blade holomen themselves.
There are three types of this technique: dotted, linear and mixed - from the names it is clear what one or another type looks like. Each master decides for himself personally which technique to work in, but for the most part he has to combine them.
Planar engraving
If you have come across real hunting knives more than once (especially the old type, and even made in a single copy), then you have probably noticed how often floral patterns are used when engraving them. This is no coincidence: once upon a time, each depicted plant had a deep sacred meaning. The lotus symbolizes immortality, the laurel - glory, the oak - power, the palm tree - peace and victory, the vine (pictured below) - the sacrament of communion. It was precisely these ornaments that were most often made using the technique of planar engraving: there was no particular need to create the texture of the same wool or feathers in them.
Planar engraving with floral patterns
What is its difference from the previous type? If in the first case, grooves are cut out on the surface (in long lines or dotted lines), then here we create two or more planes, using different pens to achieve the correct shadow effect. For example, an inscription or ornament will seem to protrude from the surrounding surface or, conversely, will be recessed into it.
In the production of edged weapons, such a technique on blades is less common, as a rule, for decorating the device and sheath.
Plate engraving (chasing)
Embossing is half sculpting a rough shape, half finishing the workpiece with the help of hammer cutters (bolshtihels, flachshtihels, spitzshtihels). True, now it is almost impossible to find it; it has been almost completely replaced by casting. Exceptions include, perhaps, the original weapons of the peoples of Transcaucasia.
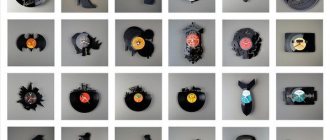
In the photo below you can see how a roughly cast tiger head is transformed into a highly detailed image on the pommel of a hunting knife.
The head of a tiger on the pommel of a knife: in the first two photos - a newly cast mold, in the last - processed by cutters
***
For incisive engraving (all three of its types), craftsmen use a diamond-shaped cutter, also known as a grabstichel, as well as a spitztichel with a cross-section similar to a triangle with rounded edges, a steel needle, dyes and auxiliary tools - pencils, whitewash, magnifying glasses and microscopes, a sharpening stone, steel ruler. For other types - the same, but with a wider range of gravers.
As for the materials themselves for engraving, a variety of steels and alloys are suitable (however, here you need to take into account the degree of hardening of the coating on which the work is done), titanium, aluminum, as well as non-ferrous and precious metals.
Performance technique
- Before applying a design to the surface, the master first grinds and polishes the surface, then coats it with white.
- The drawing is applied with a mechanical pencil with a lead no thicker than 0.3 mm in cross-section*.
- The master uses steel needles to outline the contours of the future design. Now the white can be removed.
- At this stage, the engraving work itself begins: with precise movements, the master carves out the desired ornament with dots or lines. For planar engraving, the background is also processed - with special notches that visually add volume. For embossing, the background, as they say, is lowered and processed with a pearl cutter.
- To emphasize the contrast, varnishes or oxidizers are used to darken the carved grooves, and with the help of polishing agents, areas not touched by the engraving are highlighted.
- Burrs that arise during operation are removed using grinding devices with the finest grain that can be found.
In fact, of course, there are several other ways to transfer a drawing to a surface (using plastic film or tracing paper), but drawing with a pencil is the most common option, especially for cutting techniques.
Interesting and useful information about old school engraving
- Engraving, whatever one may say, violates the integrity of the product; if it had corrosion protection, it should be restored. Most engraved products are hardened - this makes the steel more resistant to corrosion; If gold and silver incisions were made during engraving, then after hardening they will look even more beautiful.
- After engraving and hardening, the product is often coated with printing ink - it enhances the contrast of light and shade.
- Most truly worthwhile hand-engraved knives (that is, elite edged weapons) are created by members of the Guild of Gunsmiths, and the products themselves are classified as objects of cultural value by the Ministry of Culture. On November 1, 2002, the State Duma adopted an amendment to the law “On Weapons”: along with civilian, service and military weapons, a fourth category appeared - weapons of artistic value.
- Engraving is also divided not into three, but into two types: line engraving (which in this article is divided into incisive and planar) and armored (plate or embossing).
Etching a knife in Coca Cola
The method is unusual in its solution. According to some experts, the following drinking solutions are suitable: Coca Cola, Sprite and Pepsi. The listed drinks contain phosphoric acid. A reasonable question is why not find it in its pure form?
Expected effect of long-term etching in Coca Cola.
If you are engaged in etching blades, the question will not arise. They sell it in canisters of 16 kilograms. Phosphoric acid is an excellent rust inhibitor. Treated metal surfaces are protected from damage for a long time.
The process of etching a knife in Coca-Cola sounds a little incorrect, but bluing a knife in Coca-Cola sounds more accurate. During the process, a layer of iron oxides is formed on the surface of the blade, which gives the product a dark tint and protects it from corrosion.
The acid concentration in Coca-Cola is low. It is easier to buy the drink in small quantities. Controlling the process will be easier than with a strong concentrate. The process of bluing a knife in Coca-Cola looks like this:
- It is necessary to degrease the knife blade well. Otherwise, uneven etching will occur.
- Pour Coca-Cola into a container of a size suitable for immersing the blade.
- The drink should be heated and all carbon dioxide should be thoroughly expelled. Bubbles stuck to the blade will leave an unetched mark.
- Immersion of the blade is recommended every 2-3 hours. When removing it from the solution, the product should be washed with running water, washing off the oxide that forms. The procedure is necessary for uniform coverage.
The whole process takes about a day. If a light gray shade of the blade is enough, 3-4 hours of soaking in the drink will be enough. The reader should be warned that the resulting layer of bluing is not strong enough, as with other methods. But still, there are advantages: the blade is less afraid of water, high humidity, and there are other pleasant little things.
Current source
To obtain a pattern and a uniformly processed surface, direct current is used. It must be supplied using a battery or charger. High power is not required - it has been noted that a voltage of up to 5 V and an electric current of up to 700 mA are sufficient.
Connection:
- “plus” – to a metal workpiece;
- “minus” – to electrodes immersed in the solution.
The process will be accompanied by increased gas formation, this is a consequence of electrochemical processes. To comply with fire and industrial safety, it is necessary to carry out all work with electric current at least on a balcony that is well ventilated. Better - in the garage or on the street.
A stencil with a future pattern.
Solution
Etching is carried out in a saline solution saturated to the limit. Preparation: add table salt to ordinary water until dissolution stops (even with stirring). It is possible to heat the water to increase solubility.
There are no requirements for containers for preparing the solution. The etching solution must be applied to a non-conductive container. A plastic container is quite suitable - from a bucket to a trimmed 5-liter bottle.
Etching process.
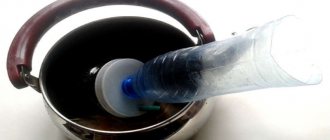
Copper plating process
When replacing table salt with ammonium nitrate (up to 4 tablespoons per 1 liter of water), the same solution is obtained. During etching, it will acquire a rich blue color, in contrast to the dirty color with salt.
The head is prepared in the same way. The only difference is that if you want to get a multi-colored head, you should protect only certain places.
Further:
- The bare wires of the mobile phone charger are connected to the head (minus) and the copper part (plus), which is placed in the solution.
- The part (of any shape) is placed against the wall - without touching the head.
- The etching duration is up to a couple of hours.
- It is not recommended to take out an ax to control the layer.
The result is a smooth copper coating.
Instructions for liquid etching of a knife
The chemical method is simpler and does not require batteries. A strong aggressive environment is required. It has already been stated that the method is dangerous due to its gaseous emissions. Opening a window or getting a good hood is a must. Safety equipment:
- latex gloves;
- respirator;
- protective glasses;
- smock.
Avoid contact with mucous membranes of the body. Washing with water will not do. A chemical burn is a terrible thing. We've sorted out the equipment, now it's a matter of materials:
- insulating tape;
- nail polish, marker;
- grinding machine;
- distilled water in a container;
- Plastic container;
- solvent, acetone;
- ferric chloride supply;
- cotton swabs and disks, toothpick;
- sandpaper of various grains.
The knife must be prepared in advance. On a solid product, protect the handle with electrical tape; on a collapsible product, disassemble it and work with the blade separately.
Creating a protective layer
The pattern that needs to be transferred to the product must be outlined with a protective layer. Considering that in the coated area, the reaction will not take place, and the metal will remain light. Initially, make a sketch with a marker and then cover it with nail polish. This is the best option. The varnish can then be adjusted to ensure evenness of the lines and the pattern itself.
Patterns for etching on a knife.
Don’t be shy about fantasizing; the uniqueness of the work performed also depends on the personal qualities of the master. Use varnishes of various shades; they are clearly visible on the surface of the product. Drawings and sketches for etching on knives are freely available on thematic Internet resources, or use the pattern from the picture above.
Preparation of the solution
We make sure to use personal protective equipment. When working with acid, you need to have a solution of soda on hand; it will come in handy if an aggressive substance gets on your skin. The rule of all chemists is to pour acid into water, never in the reverse order:
- The ratio of ferric chloride and water should be 50/50. This is the best option, but to speed up the reaction, other proportions can be used.
- The plastic container should not be filled entirely; be careful when placing the product there. After pouring a little distilled water, pour in the same amount of ferric chloride.
- Label the container with the words "Acid" and be careful with it. A metal container is not suitable; there is a possibility of it reacting with the solution.
Please note that the diluted liquid will serve more than once; you can actually process a dozen blades in it. Once dilution of the solution is complete, proceed to the next step.
Etching process
To obtain a high-quality result, it is recommended to make movements in the liquid when immersing the blade. The process will look like gently rinsing the product in a solution. Touching the blade is strictly prohibited. Leaving it in it for a long time is also not recommended.
The process of etching a knife.
Etching professionals argue that repeated, short-term immersion of the product in an aggressive environment is necessary. It looks like this:
- you should immerse the blade for 20 seconds;
- take it out into the air for the same time as the immersion;
- quick rinsing under water from a tap;
- hold in air for 20 seconds;
- and then again immerse in the solution for the same period of time.
This achieves constant control of the etching; the circular process must be performed several times. The total time of holding the blade in acid should not exceed 10 minutes. It should not be forgotten that all time intervals depend on the steel and the composition of the solution.
At the end of the process, it is necessary to rinse the product well with running water and remove the protective layer with acetone or solvent. Walk the blade with sandpaper starting from coarse grain 400 grit. and ending with 2000 or 2500. A felt wheel on a sanding machine will help bring it to a shine.
Previous
Knife sharpeningVictorinox knife sharpener
Next
Knives DIY knife lanyard
Preparing an old ax found in a barn: first steps
An old rusty ax can probably be found in any cluttered barn or garage. And with the right approach and lack of laziness, it is quite possible to make an exclusive gift out of it, which the new owner will be proud of. Today we will try to look at just such an example of making a beautiful and functional thing from what is at hand.
It is clear that there is absolutely no need for rust on it. However, before removing it, you should give the ax an interesting shape. Any historical weapon taken as a basis can serve as a prototype. Well, then everything will depend on your imagination. In this example, it was decided to make something like a Viking axe.
Giving the ax the desired shape and polishing it
It is necessary to cut the workpiece along the outlined contour. To do this, you can use a regular grinder with a cutting disc. This work is not easy, despite its apparent simplicity, but it is quite doable.
PHOTO: YouTube.com A blank is cut out along the outlined contour
After the workpiece looks like a future hatchet, it needs to be sanded. A petal disc for an angle grinder will help with this work. Along with processing the sawn edges, the main layer of rust is also removed. Well, then, gradually reducing the grain size of the sandpaper, the hatchet is polished until its surface becomes mirror-like.
PHOTO: YouTube.com The hatchet is ready, it’s time to move on to decorating it