What is a panic button
The panic button is a type of wireless alarm. Using this device, the user can transmit a signal to a specific central security point. It is called a certain button that is located on some surface or key fob.
Reference! Such a button is hidden from prying eyes, and the person’s goal is to quietly sound an alarm.
Start-stop button, price
Therefore, it is worth buying a special start-stop button adapted for these purposes. A complete assembled circuit, which includes the button itself, the control unit, switching wires, additional relays, can cost from a thousand to 5-7 thousand rubles.
Of course, the simplest button, which will only start the engine, can be installed simply in a gap. But then the zest disappears. Therefore, in order for the button to work like a human being, to start and stop the engine, while activating and deactivating the alarm or immobilizer, more complex circuits need to be considered.
Operating principles of the ringing alarm
The main task that such a button performs is maintaining wireless communication with the security point. When you press the button, the signal is transmitted to dispatchers who are located in the main control center. From this point, signals are transmitted to the nearest security group of the private security company. When a signal is received, the team arrives at the scene and works based on the circumstances.
Such models are considered the best choice due to the fact that they are the most effective way to ensure security. In addition, such models have a budget price, and you can send a signal unnoticed.
How to install a button on clothes at home?
Of course, if you have the opportunity, then entrust the installation of accessories to a master who has a special press, various devices, a set of tools, and most importantly, experience, thanks to which such work will not take him much time. If you don’t have this option, or you want to find out for yourself how to install a button on clothes, then prepare the following tools:
- Awl.
- Hammer.
- Forceps.
- Punch. You will have to purchase this tool. It is necessary to ensure that the hole is smooth and the edges of the fabric do not fray.
Important! You can purchase one punch (the smallest size), but it is better to buy a set of punches with removable attachments.
- An anvil (or another hammer).
Adviсe:
- Do not cut a hole for the block with scissors, as over time the button or block will definitely “fall out” of it. The hole for the button should be minimal, it is advisable to even slightly stretch the fabric over the leg, since the tighter the fabric is pressed against the part, the more securely it will be fixed.
- Punch a hole in leather or fabric using a wooden anvil (not metal) to avoid damaging the tip of the punch. The wood should be very dense (not loose). An area with a knot will do. You can use other dense materials as an anvil that will not damage the punch.
- Areas on knitted and bulk materials where holes will be punched can be glued with adhesive fabric so that the edges of the hole do not fray. You can also treat the edges of the hole with silicone glue.
Important! Don't start practicing fastening rivets on expensive clothes right away; practice on something cheaper first.
Rivet installation process
It is necessary to work with tools carefully, slowly and without making sudden movements. Otherwise, the fabric, accessories or tools may be damaged.
Types of radio button models
There are several main types of radio buttons. Depending on the type, the operating principle of the device will depend. What are the main types of radio buttons?
We recommend reading: MOSFET transistors - what they are, operating principle
Stationary
By design, the radio alarm button can be stationary or mobile. In any case, the market provides an assortment of manual designs in the form of keychains, as well as in the form of pedals for pressing with your foot. Additionally, specialized sensors are used to manually generate an alarm signal:
- The doll looks like a model in the form of bank notes folded into a bundle. It beeps when the programmed location changes.
- The clip looks like one bill, but works on a similar principle.
This is what applies to stationary button models.
Radio buttons
These models operate based on radio frequencies. Their range is presented in the form of discreet key fobs that can be configured via a mobile phone. Mobile key fobs are also divided into two main options.
GPS buttons have special functionality and can be configured more individually. Signal amplification function settings are available. Is it true. Such systems are completely inoperable during network failures. And with special equipment, the signal can be easily jammed.
Radio channel buttons operate on their own frequencies. Their action and operation do not depend on the availability and operation of the cellular network. It is precisely this signal that is difficult to block or drown out. However, such a device must be registered with a radio frequency center. There are also buttons that work from a Wi-Fi network.
Reference! Competent and correct operation is only possible with the correct location of network distribution points.
The best option is to install and use stationary and mobile systems. Even if one signal is blocked by an attacker, the second system will be able to work.
Fixed models
Such models require a long press of the button to confirm the signal. The operation of such a button can only be restored by using a special key. They are the best option in two cases:
- The moral one is to support workers by letting them know that the alarm is being sent correctly.
- If necessary, prove the fact of sending a signal in the event of the brigade arriving too late.
We recommend reading: Stabilizer AMS1117-3
This is what concerns the main varieties of the model.
Using the start-stop button
On sports cars, the start/stop button is an indispensable thing. Naturally, there is no question of any keys in the interior of a sports car, and the button is the only way to start and stop the engine. The simplest option is to separate the functions of starting and stopping the engine into two different limit switches - the button can start the engine, and the toggle switch will turn it off. But this is if we talk about single-cell electrical systems of VAZs.
A do-it-yourself start-stop button can be installed in more technically advanced cars as an alternative to the ignition switch for several reasons:
- Combination of many functions in the ignition switch contacts. For example, in many foreign cars, the ignition switch blocks the doors; it is connected to the immobilizer and many electronic systems. Therefore, if it fails, you have to change not only the lock, but also the limit switches on the doors, the alarm circuit or the standard immobilizer, and this can cost a pretty penny.
- Installation of a more advanced alarm system.
- Modernization of on-board electrical equipment or its restoration when it is not possible to find the necessary elements or contact groups.
Now it’s worth getting to know this button in more detail to understand what it actually is.
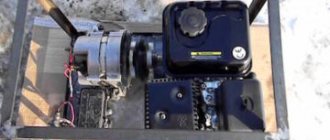
How to make a panic radio button with your own hands
You can build such a structure yourself. What will it take?
What you will need
The first step is to prepare all the necessary equipment. List of required materials:
- A key fob with a protruding button, the frequency of which must be at least 433 Hz. Three models are enough.
- Modules
- Receiver with one receiving channel.
- Frame.
Reference! The housing can be used used.
Panic button diagram
To assemble the structure, you can use the following diagram:
Step-by-step assembly instructions
In order to make an alarm radio button at home, you need to follow simple rules during assembly. Step-by-step instruction:
- Since the lithium-ion battery is used as a basis, it needs to be modified a little. The charging process will be carried out through a small USB connector. We need an MP911 module, the power supply of which will be 12W, converted to a power supply of 5W. To do this, replace the relay with a five-volt one.
- The receiver relay is connected to the input.
- The GSM module must respond to the opening of the relay contacts.
- If you are not satisfied with the standard buttons from the module, they can be replaced with brighter ones.
- Next, the internals are built into the module and the key fob is ready for use.
As you can see from the instructions, making a radio button is not difficult, it is only important to follow the connection diagram.
DIY panic button
Reference! You can make new buttons yourself using a special printer, or purchase ready-made ones.
TOP best buttons
It is important to pay attention to the choice of accessories. Poor quality parts will not hold well and come loose. You should not skimp on accessories and choose products from dubious manufacturers. Cheap parts can quickly become unusable already at the installation stage. A large number of them will go to waste, and instead of benefiting you will incur additional costs.
- HEMLINE is a popular brand all over the world. The rivets and tools for their installation are famous for their high quality, durability, availability and range.
- The German manufacturer PRYM is the oldest brand with a well-deserved reputation. The price of the products is quite affordable. For people who often need such products in Russia, a convenient set of parts with tools is presented.
- The fashionable tandem Cobrax and Rili have conquered the market with the originality and reliability of their products. They produce expensive branded accessories, which are appreciated by fashion designers all over the world.
- The brands “MV-Fittings” and “Trade-Decor” can be considered Russian representatives of quality products. You can order a custom design here.
Before purchasing, study consumer reviews and consider the type of fittings that will suit your product. Compare prices and choose the best option.
Even the seemingly difficult work of installing or replacing buttons on clothes can be done at home using simple improvised means. Useful tips and skills will help you cope with this task.
Source
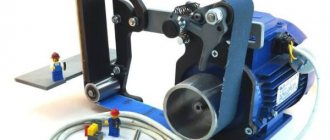
Press for installing accessories. Problems of choice. Analysis of the installation of buttons, holniten, grommets
Manual press for installing fittings.
Problems of choosing an inexpensive press.. There are a great variety of manual presses for installing accessories, ranging from inexpensive tongs to serious presses costing more than 10,000 rubles. and more. We will analyze the most versatile and inexpensive models, which are ideal for craftsmen working at home or in a small workshop.
1. Manual universal press PRESMAK (Türkiye)
2. Manual universal press MIKRON (Türkiye)
3. Universal manual press (China)
If you evaluate the quality of their work, then they cope with their functions with a bang, and the principle of their operation is the same. Turkish presses are practically no different from each other. Mikrona top , unlike Presmak , but in practice no one uses it. Presmak has a significantly higher lower bushing than Mikron , but again this does not have any effect during operation.
If you compare the Chinese hand press with the Turkish ones, the differences are immediately noticeable. Firstly, the Chinese press is much heavier. Secondly, the surface quality of this manual press is much worse, there are many roughnesses and irregularities. It is also slightly different in shape from its Turkish counterparts. There are many reviews on the Internet that attachments for Turkish presses are not suitable for Chinese presses, and many, when buying a Chinese press, found themselves in an unpleasant situation, they had to look for the necessary attachments. But now this problem has been solved and the nozzles are equally suitable for both Turkish and Chinese presses and have a thread diameter of 6 mm. But if you already have a press at home, it is better to check the diameter of its thread before purchasing the necessary attachments.
The Chinese have one significant feature and sometimes this is quite important when you need to install the fittings quite far from the edge on a material that bends poorly, for example on cardboard. The distance from the center of the nozzle to the stand is 8 cm and this distance is almost 2 times greater than that of Turkish presses.
All of these presses can be used to install eyelets, eyelets or buttons of various diameters, but it is important to remember that in order to install the necessary fittings, you will need to purchase an appropriate nozzle of a certain diameter. The type and cost of nozzles can be found here. Nozzles and presses can be rented..
Type of attachment for eyelets.
Video on installing eyelets.
When installing grommets, it is necessary to make a hole slightly smaller than the inner diameter of the grommet sleeve using a punch or improvised means. Then install the grommet on the material, place a ring on top and press it in using a press.
Nozzle for double-sided holniten.
Nozzle for one-sided holniten.
Installation of holniten is also very simple. A small hole is made in the material into which a part of the holniten with a leg is placed, then the holniten cap is placed on top and secured with a press. When installing holniten it is necessary to remember that for a strong installation of holniten it is necessary that the length of the holniten leg is 2-3 mm greater than the thickness of the materials being fastened.
The process of installing single-sided and double-sided holniten on different materials.
Button attachment.
The button attachment consists of 4 parts, as the button consists of a base and a clasp. The process of installing buttons can be seen in the video.
Video on installing buttons.
Good luck in all your endeavors! And let any of your work bring you joy, not disappointment.
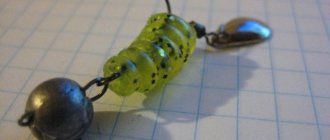
What do the numbers mean?
The numerical designations refer to the size of the teeth: they show the width in millimeters when the zipper is closed. Markings are applied to the slider from the inside. The shape of the upper part of the tongue depends on the type of links.
Metal teeth come in 3, 5, 8, 10 millimeters, the top of the slider has a triangular shape. Molded plastic teeth (tractor) - 3, 5.7, 8, 10 millimeters, oval or trefoil-shaped runner. Twisted plastic links (spiral) - 2, 3, 4, 5, 6, 7, 9, 10 millimeters, the slider resembles an oval. The longer the teeth, the stronger the connection against tearing and stretching.
Metal fasteners
The teeth of a metal zipper are made of flat brass or nickel wire. The shape of the links is asymmetrical: on one side there is a protrusion, on the other there is a recess. The connection with the braid is two-way. The quality of the clutch is high, but due to the misalignment of the teeth, the slider may “stick.”
Tractor zippers
The fastener consists of wide plastic teeth attached to a thick band on one side. The shape of the links resembles a caterpillar track. The advantage of such a zipper is the wear resistance of the links. But in terms of the fastening method, it is inferior in strength to metal and twisted fasteners.
Twisted clasps
A zipper is made from a fishing line rolled into a spiral. The fiber is wound or sewn onto the braid. The adhesion is formed by the fiber protrusions on both sides.
Equipment and presses for installing fittings
To install holnitens, eyelets and buttons on our bags and backpacks, you need to have installation equipment.
Let's look at the possible and available options.
I know four. Each has its pros and cons. About 80% of the fittings have a leg, which is used to fasten them to the material.
There are options when these are simply toothed legs with which we make holes, clamp them from the inside out and it holds on to the material, according to the “hooks” principle. Such fittings do not require installation equipment. Let's consider it separately, in other articles.
Another option is when the fittings have two parts, one of which has a leg that needs to be pressed into the second part and there should already be material between them. For such fittings, you need to have a punch option - to make holes in materials of the required size (according to the diameter of the legs) and an equipment option that performs the function of pressing two (sometimes three) parts.
I am familiar with punches for creating holes of the required size in three versions:
Manual punch. It requires a stand (not metal). I use a piece of wood (something like hemp). I put a part on it with a marking of the exact place where I need the holes, put a punch and gently hit it from top to bottom with a hammer. I get a finished, even hole.
— Such punches are available in any diameter. You can buy them or order them from a turner. — The service life depends on the quality of the metal and proper use. — The punch can be cast and cut out only one hole diameter; you can buy a set with nozzles that are screwed into the base. — The price often depends on the quality of the metal, brand, and country of manufacture. I bought one of these on Aliexpress - a waste of money. The holes do not cut out smoothly, but tear and become shaggy around the edges. The metal is soft and cannot be sharpened.
Manual hole punch. I also have one and use it often.
— It has a limitation on the diameter of the possible hole; in mine up to 4.5 mm you can make holes. — There are enough buttons and holnitens. — The price depends on the brand and country of manufacture. I recommend. Review of one of the masters:
A nozzle or matrix (called differently) for hand presses, which we will discuss below. For example: Tep-1, Dep - 1, Kep - 1.
— Sold as a set, upper and lower parts. — One set cuts out only one diameter. — The service life depends on the quality of the metal and the force of the impact. Mine didn't last long, and they weren't cheap. Even taking into account the fact that I earn money by sewing bags, it turned out to be not profitable.
Well, now let’s move on to the presses for installing accessories.
Set of hand punches and anvil.
— The complete set can be different: both in the number of punches and in the size of the installed fittings. — It has a limited number of diameters in its assortment, but is universal for the use of various fittings and popular sizes. — There is an advantage over other options - you can install it in any place and depth of the part. — The price depends on the quality of the metal, brand, country of manufacture.
Good review from a leather expert:
Tongs or riveter.
— Sold complete with accessories or separately. It may have several options for attachments (for buttons and eyelets) or are intended only for one option of fittings. — One of the minuses is that they do not install large diameters, they are more intended for clothing. For other accessories you will still have to buy something in addition. — The fittings from the kit tend to run out - you need to look for a similar one - another one may become deformed.
I went through several videos, this one will best show how they look and install:
Household presses. They have different capabilities, some more, others less, but at a minimum they can install buttons, eyelets and blinds.
The photo below shows the options and their markings.
This press is sold separately, dies or attachments are sold separately. — it needs a permanent place to secure it for stability; — the country of the press manufacturer is good at installing accessories produced in the same country. The same applies to matrices for it. Example: if you buy a press from Italy, then you need to buy attachments (dies) for it from the same manufacturer and accessories from the same country, respectively.
There is a slight exception with the Tep-1 press, made in Turkey; it can install Chinese fittings. There may be other press options that will be accepted by other manufacturers, but I haven’t heard of them.
By the way, this press for installing accessories is the most popular. It has an attractive price, a large selection of matrices and, as I wrote above, installs Chinese fittings.
The price can vary greatly in different cities, look for options.
But! Consider the main thing - the availability of purchasing matrices for it for different diameters, shapes and types of fittings, the possibility of purchasing fittings that it can install. It’s impossible to say in advance what will be useful to you later, and buying all the matrices at once is very, very expensive.
In another article I will tell you in more detail what you will need to purchase to get started so as not to spend too much.
Review of the Tep-1 press by one of the needlewomen
That's all for today. In other articles I will discuss in more detail the installation, diameters, and nuances of accessories for bags.
A thousand and one ways to work with fittings. Installation of accessories with a press
This master class opens a series of articles devoted to working with metal fittings. In it I would like to show how easy it is to install fittings using a press. I hope that this will serve as a kind of guide for my beloved customers and for everyone who is interested in this topic.
- How to install buttons.
- How to install holniten (rivets, rivets).
- How to install eyelets.
- How to cover buttons with fabric.
Now, in order.
This is what abs looks like. By changing the attachments in it, we can work with different types of fittings.
All sets of attachments consist of a top part with threads and a bottom part without threads. The only exceptions to the rule are attachments for buttons, where the set consists of 4 attachments, and attachments for covering fabric, where the press performs only the function of a pressing mechanism.
Buttons come in different diameters and types of fastening. When you buy buttons for attachments or vice versa, pay attention to the appearance of the button parts. It is very important! Not all buttons, for example, 12mm in diameter, can be installed with one attachment. Now I would like to show you with an example how to install a button with a diameter of 15mm.
We will need: a press, a set of attachments, 4 button components and a hole punch.
First of all, we must make holes for the future button; the holes should be on both the top and the bottom. To do this, we can use either a manual hole punch or a press punch attachment. For this button size, a 3mm hole is sufficient.
I'll use a hand hole punch - my favorite
Insert parts of the button with “legs” into the resulting holes.
Install the top part of the button. We take nozzles No. 1 and No. 2 and remember that the threaded nozzle (No. 2) is always installed on top.
The attachments are inserted.. Now we turn the top part wrong side up, combine the head of the button (part No. 1) with the recess in the attachment No. 1 and put part No. 2 on top.
We press the handle of the press, as a result of this the “leg” of part No. 1 is flattened into a perfect ring inside the button and fastens the parts together.
The top part was installed
We do the same with the bottom of the button.
Here I immediately inserted part No. 3 into the nozzle.
Next, we place the lower part face up, aligning part No. 4 with the nozzle, and remember that part No. 3 is already inserted into the upper nozzle. We fasten it by pressing the handle of the press.
Voila! Everything turned out very quickly and neatly!
2. Installation of holniten, or simply - rivets, rivets. Let's look at the example of holniten 9*9mm (the numbers indicate the upper and lower diameters). I think you have already understood the basic principle of installation))
For this size of holniten, a hole diameter of 3mm is also suitable.
So we've dealt with the Holnitens!
3. Installation of eyelets. Let's look at the example of 5mm eyelets. Please note that eyelets are usually selected according to their internal diameter. So in this case, 5mm is not the outer diameter of the eyelet ring, but its inner diameter.
The hole diameter for this eyelet size is 4.5-5 mm.
4. Covering buttons. Let's consider this process using the example of blanks for 25mm buttons with a plastic foot. After tightening, the diameter of the button will increase by a couple of mm. This must be taken into account when choosing the size of the workpieces.
I cut pieces of fabric slightly larger than the diameter of the first nozzle (on the right in the bottom photo). The black part of the nozzle is auxiliary; with its help you can, for example, push a finished button out of the nozzle.
The next part, thanks to the cut, collects the fabric and directs it to the center.
Now that we have prepared the button, we need to put the attachments under the press and press the handle firmly. At this moment, the edges of the steel cap are compressed and gently “hug” the plastic part with the leg along the entire diameter. Thus, the two parts of the button are tightly fastened and in the future there is no longer any fear that they will separate.
Well, that’s probably all for today)) Now, I think, it won’t be difficult for you to install other metal accessories, because the basic principles of installation are similar when installing denim metal buttons, and when installing holniten with rhinestones, and decorative buttons))
I hope that you find this information useful and that your time will be well spent!
Did you like the article? Subscribe to the channel to stay up to date with the most interesting materials
Instructions for replacing the button
To install a new fastener, you need to perform several steps:
- Dismantle the old one if it is out of order.
- Use an old hole or make a new one.
- Insert a button into the hole.
- Put on the fixation ring.
- Use a flat surface to install the fastener.
- Divide it into four parts with a punch.
- Roll the petals with a hammer.
It is worth having several spare buttons so that you have something to replace damaged ones, since the pin petals often break.
Removing the old button
The process of removing an old, failed push-button fastener is simple, but it is important not to damage the fabric. You should prepare a pair of pliers and a knife whose blade does not bend
You should prepare a pair of pliers and a knife whose blade does not bend.
Procedure:
- At the bottom of the fastener, carefully place the blade of a knife between the button and the material from the underside of the product and bend the metal edge.
- Do the same on the front of the garment, symmetrically to the back.
- The edge should be bent so that you can grab it with pliers.
- On both sides of the fabric, grab the folded edges with pliers and, using a little force, separate the two parts.
- To remove the upper part, use pliers to grab its front and back parts and, twisting, separate it.
Gluing the front part
To attach the front part, perform a series of sequential actions:
- Prepare a wooden plank.
- Make a hole for the fastener using a thick awl or punch.
- Insert the button cylinder into the prepared hole.
- Place the spring part on top.
- Roll the edge using a tapered awl.
To avoid rapid fraying of the edges on synthetic fabric or the formation of torn edges, the awl is heated over a fire before piercing the fabric.
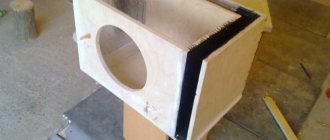
Assembly of the reverse part
To assemble the lower part, you need to prepare a small device. It is a board with a hole slightly larger in size than the part. The tool used is a hammer with a flat striking surface.
The order of the operation is as follows:
- Make a hole using an awl or punch.
- Insert the button into the notch.
- Pass the fabric into the second part of the reverse part.
- Combine both parts.
- Connect the parts with a gentle blow of a hammer.
Video material
Rivets for clothing are invisible but irreplaceable details of every item, from fur coats, sheepskin coats, jackets to underwear. If you learn to work with a variety of sewing accessories, you can always repair any decorative elements without resorting to the services of a specialist. We hope our tips and tricks help you in this process!