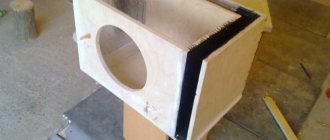
Advantages and disadvantages of homemade products
Handmade wobblers are, first of all, cheap. In the second, you can make baits in different colors and unlimited quantities. In addition, some homemade products can even be superior to factory-made products.
Still, you need some skill and possibly experience. The first time you try, you may not get the intended product, but over time you can get the hang of it. Disadvantages include the time spent on production and, in some cases, wasted nerves. Handwork requires effort and labor.
Micro tail spinner
The idea, of course, is not mine. I simply adapted, modified and went UL. In fact, this note is intended for and aimed at fans of UL and MJ.
In a fruitless search for good micropetals, I somehow came across an excellent selection of micropetals, so I bought a couple of dozen for this occasion. We didn’t find anything other than capricious members of the European Parliament, but I remembered an article on the Internet. The author suggested making a working bait using crappy Chinese spoons. The dimensions, however, were not very light, but the manufacturing principle was simple, so I remembered it.
So, we need:
Hook. Any, single, double, suitable size and preferably with a large eye.
Turning. Quite small.
Wire. Any, but thin and preferably soft.
Body. Half-inch Twister case
Petal. Any small one.
Recommended materials at hand
There are a lot of materials from which you can make homemade wobblers. The most commonly used are wood, toothbrush handle, foam, plastic, etc.
Tree
It is recommended to use pine. It is lightweight, accessible and easy to process. Pay attention to the wood grain. They should be located lengthwise. Alder and linden can also be processed.
Toothbrush
Almost every person has an unnecessary toothbrush. You don't even need to spend money to do this. True, in this case there is a drawback. This is a limited length. It will not be possible to make a large bait from a brush.
Styrofoam
Polystyrene foam is also a fairly common material that can be found without problems. Well, if you couldn’t find it for free, you can buy it at a hardware store for mere pennies. Its main advantage is its ease of shaping. It can be easily cut with a knife.
Plastic bottle
Yes, you can make a wobbler at home from this material. It is easy to cut out the desired shape and elements from it. It is even possible to install a noise chamber. The frame is created using easily bendable wire, and the eyes are made of aluminum rivets.
You don’t even have to paint the plastic, because bottles come in different colors. It is enough to choose the desired color.
Foam rubber
The bait turns out to be quite effective, but each fishing session violates the integrity of the product. In this case, you need to have several ready-made baits in stock. Also disadvantages are excessive absorption of moisture, which leads the product to the bottom and the lack of realistic play. But it is quite possible to catch pike or perch.
Epoxy resin
Epoxy wobblers are quite durable. The predator will not be able to cause serious damage to them. True, manufacturing will require a decent amount of time and a certain skill.
Balm
This wood is distinguished by its softness, which means it is easy to process. To make the accessory more durable, it should be treated with varnish. This is especially important at the cutting stage for painting.
Tools
In order for a fisherman to make a wobbler, he will need to prepare a set of tools and equipment that will help facilitate and speed up fishing. To carry out the work you will need: a sharp sharpener, a hacksaw for metal or a jigsaw with a fine saw, a screwdriver with a set of wood bits of various small diameters from 0.5 to 3 mm, pliers, a small hammer, a file with fine notches, a needle file, sandpaper 0 , 1 and 2 rows of abrasive patina and tweezers. The equipment you will definitely need is a vice that allows you to securely fasten it and then conveniently process the workpiece.
Homemade wobblers for different fish species
Before starting work, you need to decide what kind of fish you plan to bait. Each predator has its own habits and characteristics that must be taken into account.
For pike
Homemade wobblers for pike with your own hands can be made from any material. Pike prefers light colors. It is advisable to apply additional contrasting spots and stripes. The size can range from 5 to 15 cm. Depends on the size of the predator itself.
Daniila Rukin
Snowmobile specialist "Buran". I go fishing in my free time.
Ask a Question
This predator is known for loving realistic play. This can be achieved by making a composite (of several parts). The elements must be connected by hinges.
On Sudak
Pike perch is a rather cautious fish and therefore you need to pay special attention to homemade fish. He likes noticeable and sharp fluctuations. So the game should correspond to this. The length can be up to 9 cm. You can use the Japanese Jackall Squard wobbler as a template.
For chub
The chub is a lover of fry, crayfish, all kinds of insects and small crabs. Accordingly, the product must be suitable for the above-mentioned animals. Recommended size no more than 5 cm. Natural color. Almost all materials will do except a toothbrush.
For trout
It is recommended to take Salmo Hornet as a sample. The shape should be voluminous, but at the same time small in size. Trout react extremely weakly to large bait. Size no more than 5 cm. As for colors, the predator is unpredictable. Therefore, it is better to do it in different colors (light, dark, acidic) and then contact will be ensured.
For asp
Any material is also suitable. Recommended size up to 3 cm. Particular attention is paid to colors. In spring, asp attack well golden and silver baits. In summer it prefers brown and green tones.
Polyurethane foam fish with a tee and a twister tail
This polyurethane foam fish (photo 5) catches perch well in shallow rivers when it goes there after a school of fry in March-April. The polyurethane foam fish itself is very short, so the perch will swallow it without any problems. And the twister tail gives the bait additional attractiveness and lively play.
To make such a fish from polyurethane foam, first cut off the tail from the used twister (photo 5.1). Cut out the body of the fish, three centimeters long (photo 5.2). Then we glue the shirt so that one of its hooks points down (photo 5.3). This makes sense, because very often it is the bottom hook that bites the fish into the tongue and there is practically no chance that it will fall.
Material selection
One wobbler can be made from different materials. For example, the body is from one, and the remaining elements are from another.
Frame
The body is best made of wood. Such an accessory will last much longer than one made from foam rubber or polystyrene.
Blade blade
The blade is needed to attract the attention of the fish. This is an important part of the bait. It is recommended to use plastic or polycarbonate. Transparency does not matter, but the thickness should not be more than 1.5 mm.
Frame
Aluminum wire is best suited for the frame. It bends easily and can be easily given any shape.
Loading
Tungsten balls are used for this. You can adapt it using glue. This is an excellent solution for small baits.
Loading plays a key role in the game and therefore it is important to choose the right weight.
paints and varnishes
Applying colors is important, especially for wooden products. This is additional moisture protection. For these purposes, nitrocellulose varnish is used. It will provide protection for several years, and is also low cost.
Classification
Wobblers have a classification that is quite difficult to remember, which divides them into several varieties with English names depending on certain parameters.
Based on buoyancy, baits are divided into three types.
- Floating (floating). When retrieving, it submerges slightly into the water column. As soon as the movement stops, it floats up.
- Sinking (sinking). After casting, it immediately dives into the depths. This occurs due to additional loading, which is located inside the housing.
- Suspending (literal translation - suspended). After casting, it sinks into the middle layers of water and hangs there.
Important! The words "fast" or "slow" may be added to the names above. They mean that the bait behaves more intensely in the water than the standard one.
For example, a wobbler marked fast floating floats up very quickly.
According to the degree of depth during retrieval, baits are divided into:
- superficial;
- medium immersion;
- deep-sea.
Depending on their shape, wobblers are also divided into several types. The most common are the following:
- poppers - have an oblique cut in the front part, which allows you to simulate the movements of the food object;
- minnow - a long thin bait with a blade, reminiscent of juvenile bleak;
- shad - a more rounded bait, similar to a fry of carp fish (roach, rudd, bream);
- crank - an almost spherical version, which is similar in shape and movements to a young perch;
- jerk – oblong, but at the same time round, with thinning in the tail area.
Wobblers have a difficult-to-remember classification in English.
The products also differ in size. It is selected depending on the size of the fishing object.
How to make a wobbler with your own hands
After selecting the necessary materials and tools, you can begin the main work.
Case manufacturing
The first detail with which all work begins.
Wobbler drawing
A sketch of the wobbler is drawn on paper from different angles. You can view the templates online and print them. A printout will be required to make the outline. It is then applied to the workpiece.
Making a rough model
The product is cut out with a hacksaw or knife. Using a knife, the desired shape is given and the excess parts are cut off. Next comes the sandpaper. The necessary notches are made using a tool (knife) and a file. Then we proceed to finishing using sandpaper.
Victoria Leshchenko
I've been working hard in the fishing tackle department for the past six years. I can help you assemble almost any gear.
Ask a Question
A wobbler made of soft material is made in two parts. One is thicker and the other is thinner. In Tolstoy, cavities are made for the frame. Both parts are sanded and the frame is installed. We connect the two halves and make a temporary fastening (wire). After a successful test, you can glue the surfaces.
Making a blade
The cut plastic blade should be sanded. It is then attached to the body. Plastic is easier to process, but it is less durable.
Frame
To make it you will need wire. Some use chain-link mesh. Where the tees will be attached, you need to make loops
Assembling a wobbler from solid material
- We install the frame.
- Fill with epoxy.
- The blade is installed.
- We are waiting for the liquid materials to harden.
- We do the finishing touches.
Wobbler tests
You can check it in the bathroom. The assembled tackle is tested for wiring, buoyancy, play, etc.
Assembling bait from soft material
After the test, we remove the frame and begin gluing the parts. Once the product has dried, install the spatula, also using glue. Afterwards we do the finishing treatment to remove any remaining glue.
Adjusting buoyancy and wobbler play
Using improvised means, we temporarily attach weights to the bait and lower them into the water. We observe how the product behaves and by adding or decreasing the load we adjust the buoyancy.
The blade influences the game to a greater extent. We start chasing the bait in the water and watch the game. If you are not satisfied, then change the angle of the blade.
Painting and varnishing of the wobbler
First, the product is coated with a primer, and after drying, paint is applied. Oil or acrylic are suitable. Light colors are applied initially and only then dark ones. Then we draw the eyes. After complete drying, varnish the product.
Finishing
By this we mean giving the bait a “marketable appearance”, i.e. grinding and polishing. This is done using sandpaper.
Hinged composite polyurethane foam fish with two tees
Another type of fish with a polyurethane foam joint, equipped with two treble hooks (photo 7). Its use is very effective when a predator attacks in a strictly defined place of the bait, for example, in the tail or head. And it is in these places that the polyurethane foam fish have T-shirts, so the chances of the fish getting away with impunity are much less.
So first we need to cut out an empty space in the shape of a small fish, like the one we cut out to make the fish with a double. Then cut the fish approximately in half (photo 7.1).
We connect two tees with a guitar string, based on the size of the future fish (photo 7.2). We cut off a piece (photo 7.3), having first tested where the hook will be in order to create a cross-section in this place.
We insert hooks with wire reinforcement and glue them (photo 7.4). After the glue has dried, the fish is painted with felt-tip pens (photo 7.5).
As you can see, the process of making a fish from polyurethane foam with your own hands is very simple, and anyone can do it. The main thing is that this makes sense, because foam rubber and vibrating tails, which are not always familiar to everyone, can provoke fishing for pike perch or passive pike. And polyurethane foam fish, thanks to the specific properties of the material, can awaken even the most stubborn predator.
Manufacturing of wobbler elements
The main part is the body. It is to this that the remaining elements are attached. We will analyze the remaining elements in detail.
Uncoupling
To make a release for wobblers with your own hands, you need to start with a drawing. The simplest details are “Cat”, “Loop”. Suitable for shore fishing. The “breaker” is best used for trolling.
Loading wobblers
You can make the product heavier by replacing the hooks with heavier ones, attaching other metal weights (lead), and enlarging the winding rings.
Wobbler blade
The spatula should be the strongest part. It is better to use metal 12 mm thicker than the body itself. It is easiest to give a metal spatula the desired concavity.