Return to list of articles Processing animal skins and dressing them is one of the ancient crafts. But only hundreds of years later did craftsmen begin to put marks on their products. This is how embossing appeared.
Today the craft has reached industrial proportions. The patterns are stamped on special presses. Cliches (stamps with a cut-out design, when pressed, a pattern appears) have been used for many years in a row. Jackets, diaries, bags, belts made of artificial and natural leather are embossed.
Embossing at home takes a lot of time and is performed only on natural raw materials. It is more difficult to achieve evenness in the drawing; the quality of the work directly depends on the experience, knowledge and skills of the master. But with your hands you can create very complex designs and motifs with small details and different textures. The works turn out to be exclusive.
You can decorate the cover of your diary, belt, purse, keychain yourself with embossing.
Required Tools
The main set of tools consists of:
- A rotary knife with replaceable blades of different sizes and shapes, it is needed to create patterns, logos and all kinds of images on the top layer of leather;
- Sets of various stamps, impressions and clichés are purchased in special stores; they can also be created with your own hands or ordered from professionals who work with metals;
- A specialized hammer for stamps that absorbs most of the vibrations when struck;
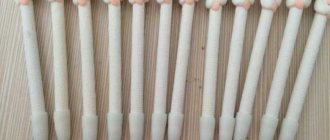
- Styluses made of durable plastic or hard wood for pressing out image borders;
- Wheel markers for marking curved landmarks;
- Lots of files for adjusting the shape of stamps if necessary;
- Smooth platform made of good wood for embossing work;
- A soft sponge for soaking the skin with various liquids before starting work;
- Other useful tools for various types of leather processing.
Leather engraving - basic skills (leatherworking!)
People continue to often ask me “how do you do it” (about engraving) and I thought that instead of constantly telling the same thing to everyone individually, I’ll tell them once for everyone.
This is not a master class, since it will not be a detailed and step-by-step lesson, I will only show specifically how this very engraving of leather is done so that those interested have an idea of what it is about.
First you need to transfer the design to the skin, for which you moisturize the skin (I’ll tell you how to do this separately), then apply tracing paper or film with the design (drawn side up so as not to stain the skin) and trace all the lines with a ballpoint pen without ink or a stylus or a sharpened awl (cut and polished tip to avoid scratching the skin). Do not press too hard, just so that the pattern is clearly visible on the skin.
The lines will be brown because you are doing this on wet skin. When dry, you will have to press very hard and tear the tracing paper and also destroy the surface of the skin.
The drawing transferred to the skin looks like this
Now we take a rotary knife (see tools in a separate topic) and grind the blade - it should be very sharp. The skin should still be damp. If it’s dry, moisten it with a spray bottle.
Carefully cut through all the lines of the drawing. We do not cut along the same line twice, as this will result in two slits. If you are holding a knife in your hands for the first time, I advise you to practice on scraps of leather before working on a more serious item (for example, a bag). Hold the knife straight. We cut no deeper than half the thickness of the skin.
This is what happens after the drawing is cut through
Now we take a stamp - a beveller - and put it in the cut hole. Hit with a hammer (NOT metal).
We move further along the hole and hit again. And so we move along all the lines of the drawing. We try to ensure that the blows are of the same force and move the die evenly. The line should be smooth without deep marks.
So we go through the entire drawing without missing a single line.
Now we make dents on the petals and leaves to give them volume and add reality
Now we darken the middle of the flower to visually “deepen” it
Now we lift the edges of the petals and make them wavy and rising above the surface of the skin
That's all. These are the steps you need to master to do basic leather engraving.
The next step is to process the background. But first, it’s important to master what I described here. You need to learn how to transfer the design to the skin, cut the lines of the design with a rotary knife, process these lines with a beveller stamp and process the flowers - the edges and centers. This is the main thing.
The skin should be moist the entire time. Separately, I will tell you how to do this.
Leather embossing methods
All methods of blundering can be divided into 2 groups - cold and hot.
The cold method is usually applicable in situations where a simple pattern, inscription or brand should be made on the treated leather. For this method, only skin whose thickness is in the range of 0.8 to 1.2 millimeters is suitable.
In general, thickness does not play a special role here, since the most important evaluation criterion is how well the print will hold its shape.
Leather processing using hot stamping technology is carried out with a stamp, which is preheated from 60 to 140 degrees Celsius. The best material for the job is a material whose thickness ranges from 1.1 to 1.4 millimeters.
When creating a relief print, 4 methods are mainly used:
- Blind embossing. Used to produce a drawing or inscription with a perfectly flat surface. The imprint is made using a stamp, which is struck with a hammer; the result largely depends on the force of the blow. Sometimes the dies get hot, but usually not above 80 degrees Celsius, as there is a high probability of damage to the material.
- With foil. The secret of the method is that between the stamp and the material a foil in the shape of a picture or logo is placed, which is pre-impregnated with wax-based glue. When the stamp is struck, the foil is imprinted into the impression and then firmly bonds to the skin. In this case, the stamp necessarily warms up.
- Embossing. Embossing is carried out using a press, the impression is created with or without foil.
- Texturing. The essence of this option is also extrusion, only now the pattern is created on a specific place, and on the entire material.
How to make hot stamping with your own hands at home
We present to your attention a small master class on how to make a hot print with your own hands using foil.
To work you will need:
- A sufficiently hard, flat surface, for example, a wooden board of a suitable size
- Thermal foil for embossing
- Iron
- Metal button
For a beautiful ornament or inscription on leather/leatherette, you will need to purchase or order a cliche, but for the first time, to understand what embossing is and how to make it, you can use an ordinary metal button. The sequence of the master class will be described on the use of just such a button.
Leather or leather substitute is laid on a hard, flat surface. A small piece of thermal foil is placed on the surface of the skin, the size of the future design or ornament, in our case it is a 2x2 cm square the size of a button.
An iron heated to 200 degrees Celsius is placed with a corner on the foil and presses it against the skin for about a minute. After the foil has warmed up well, remove the iron from its surface.
Immediately after removing the iron from the leather surface, a metal button-stamp is placed on it and pressed with force for about a minute or two. After the leather has cooled, you can remove the button.
As you can see, foil stamping using an iron at home is very easy to do. The first time or two, to get ideal results in the future, try making an impression on an unnecessary piece of leather. A prerequisite for a high-quality print is holding the iron heated to the required temperature for sufficient time and pressing the cliche into the surface of the material. If there is insufficient retention of one or the other, the pattern on the leather surface will turn out to have uneven edges and an unpresentable appearance, and removing the foil will become problematic. By the way, about foil. It must be thermal for embossing, otherwise you will get a very disastrous result with cloudy marks on the product that cannot be removed. The foil can be replaced with a special protective film for embossing, which is multi-layered and therefore can be used repeatedly.
This print is made using cliches and protective film for embossing.
Step-by-step instructions for embossing leather
Let's look at a step-by-step example of working using the cold stamping method:
- First you need to decide what kind of leather and how thick you will use.
- Next, select a stamp; if you are applying a direct type stamp, then you should not forget to mirror the elements.
- If you are using vegetable tanned leather, you should soak it in warm water for half an hour before stamping. Then you should wrap it in a 10-degree terry towel to absorb excess moisture. If the skin is over-moisturized, the print will turn out shapeless.
- Tools (a hammer with a stamp) should be placed next to you so that you can always use them quickly. A wooden base or rubber backing should be placed under the material.
- Touch the skin after drying; it should feel like slightly moistened suede.
- Then place the leather on the base, and place a stamp on top at a right angle to the surface. Next, a precise and strong blow is applied with a hammer, the power of the blow and accuracy play an important role. Since a slight shift of the hammer to the side, the impression may remain deeper on one side, while on the other there will be a barely noticeable dent.
- Then the embossed blanks are hung to dry at room temperature. To prevent the skin from becoming deformed when drying, a small weight must be attached to the bottom. Next, you can begin work on fixing the print.
How to prepare leather for embossing?
- First you need to thoroughly moisten the material. The piece is placed in a container of water and kept there until the material is saturated with moisture. You can focus on the bubbles: if they stop appearing, then it’s time to remove the piece from the water. Moisturizing time depends on the thickness and type of skin and varies from 10 to 30 minutes. Once wet, the fibers soften and are easier to process.
- Then you need to let the skin dry a little - it should not be too dry or wet. One way to determine the appropriate degree of moisture is the color of the material. It should be close to the original shade before soaking.
- A properly prepared base allows you to apply the clearest drawings and stamps. With experience, the master begins to determine the ideal humidity level visually.
Useful tips
If you are purchasing a new batch of leather, then for the hot method you should select the temperature again. Since each type of skin can react differently to a very hot tool.
- It is permissible to use gold leaf for emboldening, but it must first be glued with regular foil, since without a reliable base the gold will quickly peel off.
- Experienced craftsmen in leather embossing know that it is easy to over-wet the material, for this reason they use factory-made water impregnations with a spray bottle to moisturize.
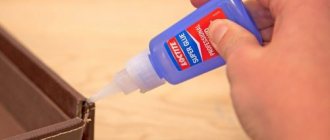
- To better preserve the print, after drying, you can impregnate the design with a special fixing compound, and the reverse side can be treated with PVA glue.
- For foil stamping, only special thermofoil can be used. Regular food grade is not suitable, as it can tear and does not hold its shape well.
- When cold embossing, just pour hot water over the leather and then iron it through 4 layers of newspaper, and the workpiece can be used for work again. This advice will be relevant for beginners, because this way you won’t have to spend a lot on purchasing materials.
- If you want the print to last longer after hot stamping, you can polish the front part using GOI paste.
All steel tools should be degreased after use and then stored in a dry, warm place.
We are sure that the prepared material was informative and interesting for you, and now you are familiar with the basics of leather embossing. We wish you success!
Easy lesson
To work we will need the following tools and equipment:
- Regular food foil;
- Awl;
- Knife;
- Hammer;
- Stamps. You can make them yourself with any images you like. Do not forget that the images taken must be taken in mirror image;
- Knurling. To do this, you can use wheels from broken watches. We will need them to apply patterns and various lines on the skin.
Related article: DIY cat pillows for every taste. Patterns
Step-by-step embossing instructions:
- The selected stamp with a pattern must be heated. This can be done in two ways: either over the flame or over the stove.
- We press the heated pattern onto the prepared piece of leather and hit it with a hammer.
- The pattern should be clear and deep; if this does not work, then start all over again. This means that you did not heat the stamp itself properly. Or, on the contrary, they overheated greatly. In this case, the skin will melt a little, and this material cannot be reused.
- It is for this reason that we recommend that you first try it on a separate piece of leather in order to more accurately understand what force you need to use and to what temperature the stamp itself should be heated.
You can also do color embossing on leather.
The principle of operation is exactly the same, only you need to lay foil of the selected color between the skin and the stamp. You can purchase it in specialized handicraft stores.
- First of all, you need to melt the wax on the stove. To prevent it from hardening as it cools, add turpentine. Stir.
- Spread the foil on a hard surface and apply a layer of the resulting mixture. Place it out of the reach of children to dry.
- Then we apply paint to this foil and again let the foil dry.
- Now let's move on to color embossing. We heat the stamp, and then place the foil on the workpiece with paint to the place where you want the design to be made.
- Press the stamp firmly onto the foil and hit it with a hammer. The most important thing is to take your time. The ink must print completely.
There is another way of embossing - applying gold patterns.
In this method, the cliche must be of very high quality. As you understand, objects made using this technique are considered very luxurious, and not every craftsman can afford to do such embossing. We make it using the foil method described above. Only instead of foil, a thin gold sheet is laid. After hitting the cliche with a hammer, the design is printed onto the leather product.
Related article: Sweet design for beginners: master class on a bouquet of candies with video
A business card holder made in this version will be an excellent gift. Especially if you want this or that person to pay attention to you. Basically, such products are best given as gifts to bosses or business colleagues.
If you didn’t succeed in embossing the first time, try again. After all, until you try, you won’t learn. The main thing is to be persistent and hardworking in this craft.
Photo of embossing on leather
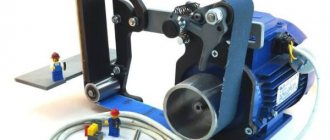
Equipment used
As a rule, these are medium-sized machines that can be used both in self-production mode and as part of a multi-stage production line. The machine is equipped with an electric motor, a laser unit, physical positioning mechanisms and additional devices that implement the supply and movement of material. The latest models widely use various sensors and stabilizers, with the help of which the accuracy and efficiency of manipulating workpieces is increased. However, there is no clear answer to the question of how beneficial automated leather engraving is. Equipment that has completely switched to automation is inevitably used in large factories, since it is also the most productive. However, machines that involve manual intervention still remain in demand among private craftsmen and lovers of decorative crafts.
Features of CNC models
Models of laser machines with numerical control are characterized by close interaction with computer equipment. Such modifications enable the operator to enter more accurate data on processing techniques using virtual graphical models. In fact, computer programs can act as the starting point for generating, for example, a pattern, which is then transferred to the machine input data processing module. To engrave leather from a finished model, the operator needs to place the workpiece on the work platform and use the control panel. As a rule, a complete operation cycle is performed by pressing several panel buttons, resulting in high-precision processing.
Case materials
Leather for embossing should only be vegetable tanned (vegetable tanned, in particular oak). Its main difference from chemically treated leather is that it is able to absorb water. And this is one of the main properties of leather used in embossing. Clothes or furniture are not made from this material. But in embossing it is important to use this kind of leather.
There are many embossing methods. But at home, embossing is most often done using a cliché, which is the most important tool for this. The technology of its use is simple: in order to transfer the image from the cliche to the skin, it is hit with a hammer.
Craftsmen purchase cliches or stamps in stores or make them themselves. Using a special tool, an engraving is made on metal plates in a mirror image, which will be imprinted and leave a pattern on the leather product. The depth of the engraving lines must be at least 3 mm.
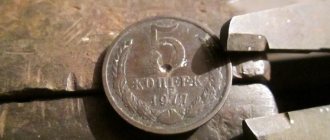
Flat metal objects with three-dimensional ornaments (buttons, coins) are also used as cliches.
To ensure uniform impact force when stamping a design, the handle of the cliche is made smaller than the working surface of the hammer.
Stencils with various images and patterns can also be considered tools for embossing.