The use of foam is among such human conjectures as the use of tools, the mastery of fire, the invention of the lever, wedge and wheel. Suffice it to remember that the bread we eat is frozen foam. In modern life, foaming is widely used, as are foam generators - devices for producing it in large quantities. In this article we will look at how to make a foam generator with your own hands for a fairly narrow but relevant area of application - contactless car washing and other household purposes. And in this by no means wide segment, as we will see, various designs with their own characteristics are used.
General information
Rydvan “armored cars”, painted on the ground in several layers, went to the same place where gasoline cost 7 kopecks. or 10 cents per liter and its consumption by passenger cars (!) is 30-50 liters per 100 km on the highway. Nowadays cars are painted with one very thin layer directly onto the metal. Modern paints are very durable, but rubbing the car with a brush or sponge is still not recommended. Nowadays, cars are washed first. in a contactless way. Let us remind you, just in case: apply the car shampoo solution to the contaminated surface, wait a while until the surfactant eats away the dirt, and rinse it off with water. The car wash community is split into two irreconcilable (just kidding) camps: one, the surfactant must be applied in the form of an emulsion without foaming; others believe that only active foam cleans well. Both give valid arguments in their favor, but since you are reading this text, then you are most likely a supporter of foam washing.
The “Penomoi” (another joke), in turn, are divided into two sects (and this is also a joke): “low-crats” and “high-crats”. Washing with low expansion foam (on the left in the figure below) requires a short wait time before rinsing (usually up to 5 minutes). Liquid flowing foam penetrates well into hard-to-reach places, but due to runoff, a lot of it is lost, and along with it, expensive car shampoo. Washing also requires a lot of water, and there may still be streaks that need to be wiped off with a soft sponge. To obtain high-expansion foam, and again water to wash it off, you need 1.5-3 or more times less water, the dense sticky “coat” (on the right) almost does not drain, but you have to wait up to half an hour for its full effect, and Dirt may remain in narrow crevices.
Car washing with low and high expansion foam
The question is also about price
Purchase a foam nozzle for the washing gun, like the one on the left in the same figure. above, no problem: they are inexpensive, and are often included with the pistol kit. But the nozzle only produces low-expansion foam. The prices for high-expansion foam generators are of a different order, plus you need a fairly efficient air compressor. Therefore, we will next consider how to make a foam generator for car washing, which allows you to obtain foam of various expansion rates with a conventional compressor for inflating tires or a homemade one. The price of simplification is reduced productivity and resp. lengthening the washing cycle. But for periodic washing of your car or for an on-call personal washer, this is not a problem.
How to make a tablet with your own hands
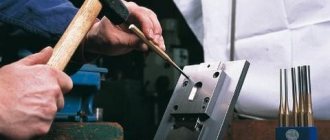
What to do if the cause of the breakdown is a faulty mesh, but the car needs to be washed urgently, and you don’t want to spend money. There is only one way out - to make such a device, a foam tablet, with your own hands, especially since it is very easy to do. The fact is that this thing is called a tablet only because of its shape, but in fact it is a small cylinder of pressed wire. Therefore, making a foam tablet with your own hands is very simple. To do this, you need to take a regular metal dishwashing sponge and press it into a tight lump.
Terminology
There are hundreds of types of artificial foam, and many dozens of types of foam generators (without taking into account design features). Therefore, in order to avoid confusion in what follows, let’s define the terms:
- Foam is a finely dispersed system in a dispersion medium. Simply - a liquid, elastic, elastic or solid bubbly substance in which the total volume of the cavities of the bubbles is at least several times greater than the total volume of the partitions between the bubbles.
- Foaming is the transformation of the initial dispersible medium into foam.
- A foaming agent is an initial dispersible medium, a substance or a mixture of substances that foams under certain conditions.
- Filler is a gas that fills foam bubbles. There is a vacuum in the bubbles of unfilled foam.
- A foam generator or foam generator is a technical device, the inputs of which are supplied with a foaming agent and filler, and foam comes out of the output. An unfilled foam generator is a vacuum chamber with continuous pumping into which active filler is supplied.
- Bubbler (foaming agent) is the part of the foam generator in which foaming occurs.
- An active bubbler arouses the foam in one way or another, acting mechanically, pneumatically (bubble bubbler), or through electrical, chemical or electrochemical processes.
- A passive bubbler is a solid, chemically resistant dispersed system through which the foaming agent sol in the filler is forcibly pumped. Foaming occurs due to microturbulence in the pores of a passive bubbler.
- Active foaming agent - does not require the supply of filler, because It foams itself under certain conditions (heating, pressure relief, adding a foaming reagent, etc.).
- Foam expansion ratio is the ratio, per unit volume, of the total volume of the filler to that of the foaming agent. For example, if it took 1 ml of foaming agent to create 1 liter of air foam, then its multiplicity is 999.
Note: modern special-purpose foam generators can produce foam with an expansion ratio higher than 1000. For contactless car washing, foam with an expansion ratio from 15-20 to 50-70 is used.
Why does the foam generator produce too thin foam?
There are several reasons, let's look at them in more detail.
- How do you apply chemicals for contactless washing, the only thing you can achieve thick foam at home is a foam nozzle with adjustable chemical supply, which are sold on our website - link, everything else, tanks on the sink bodies, a chemical intake built into the sink, foam nozzles which come complete with sinks upon purchase, etc. - they won’t give you foam. The solution is to buy a prof. foam nozzle with an adapter for connecting to your washing gun.
- On the canister of chemicals for contactless washing, the manufacturer indicates two proportions, their differences being the ratio of water and chemicals. If you have a foam nozzle, use the proportion for the foam nozzle, the average value is 1k3; if you have a foam generator, then the proportion for the foam generator, the average value is 1k50. The solution is to dilute the chemical according to the manufacturer's information.
- Water hardness, the harder the water and the more chemicals for contactless washing in proportion, if the manufacturer indicated 1k5 on the canister (1 part chemicals and 5 parts water), for hard water we recommend trying 1k3, 1k2. The first number is an indicator of the part of the chemistry in the proportion. The solution is to try different proportions.
- Use warm or room temperature water to dilute chemicals in a foam bottle. The solution is to use water at the right temperature.
- Bad chemicals for contactless washing, there are non-name manufacturers who have bad chemicals for contactless washing, do not foam and do not wash, buy another one from a manufacturer that has proven itself in the market, for example Grass or European manufacturers. The solution is to buy chemicals from another manufacturer for testing, take one liter, you can take a liter from different manufacturers.
Operating principle
So, we will design an air-liquid foam generator with a passive bubbler. This type of this class of devices is technically simple and accessible for self-production, and its performance and foam expansion indicators are sufficient for an individual car wash. Air-liquid means that the foaming agent is liquid (a solution of car shampoo in water), and the foam filler is atmospheric air.
The principle of operation of a foam generator of this type is illustrated in the figure:
Operating principle of a foam generator for car washing
Depending on the method of supplying the foaming agent and filler, this device can be structurally designed:
- Injection (supercharged) - the foaming agent and filler are supplied forcibly under pressure. The possibilities for adjusting the expansion rate and foam consumption are the widest. “Range” (see below) is the greatest. Air compressor – low or medium performance for a pressure of 4-5 ati (4-5 bar (approx.) or 55-70 psi). Shampoo consumption for washing a passenger car is 30-50 ml; water for foaming agent – 5-6 liters.
- Direct ejection (supercharged) - air is also supplied forcibly and sucks the foaming agent from a supply container with atmospheric drainage, as in a cologne atomizer with a pear. Structurally simpler than before. type (no need for a pressure vessel), but the ability to set foam parameters is somewhat narrower. Compressor for pressure from 2-2.5 ati (bar, or 29-36 psi); water and shampoo consumption approx. 1.5-2 times more than before. case. With a low-performance compressor (for inflating tires), it is possible to obtain only low-expansion foam. Most foam nozzles for washing guns are built according to this scheme.
- Reverse ejection - a jet of foam concentrate from the nozzle draws in atmospheric air. Its flow rate is determined by the pressure drop at the nozzle exit, which cannot be more than 1 atm (0.987 bar or 14.5 psi), so it is impossible to obtain high-expansion foam. The additional parameters relevant for a car wash (see below) are unsatisfactory, but using a model of such a device using a washing gun with a mud cutter and cutting a plastic bottle with a “waist” (below in the figure), you can clearly understand the principle of operation and learn how to adjust the foam.
Extra options
The performance of a foam car wash is significantly influenced by additional parameters of the foam generator:
- range of foam jet ejection (range) - the greater the distance you can “shoot” a given area, the less time it takes to wash and the better its quality will be, because the foam sprayed at the beginning has less risk of “overstaying”;
- homogeneity of the jet - washes the car preeminently. foam from the dense core of the jet, and the flakes that form the halo flow down more uselessly;
- transverse compression of the jet - washing foam with a compressed “shovel” results in much less loss of surfactants than with a “broom” that is round in cross section.
Injection generators “shoot” the farthest, 3 m and further. The uniformity and compression of the jet is largely determined by the spray nozzle, see below.
Another generator
Some foam nozzles for washing guns are produced with double bubbling, active pneumatic and passive. Air is pumped into the supply tank through a sprayer in the form of a stream of bubbles through a foaming agent, above the surface of which a cap of low-expansion foam is formed. When you press the shutter, part of it enters a chamber with a passive bubbler, which increases the foam expansion rate. Due to this, the range of jet emission sharply decreases, but a household pump sprayer can be very easily adapted to a generator of this type for washing small surfaces (see below), and the possibility of using it for its intended purpose is not lost.
Do-it-yourself Karcher foam nozzle repair
Hello everyone, I encountered a problem with the foam generator of the Karcher high pressure washer. Plastic foam generator from a cheap series Article: 2.641-847.0 with a volume of 0.6 liters.
It worked well, but not for long. He began not to pour foam, but to spit it. The motor turns on and stops at this moment of spitting. And so it goes cyclically, spit after spit, while overloading the engine with constant starts and stops. I looked online and couldn't find anything about repairs. I wrote a letter in support of Karcher. They answered that this foam generator is plastic and non-separable. Only the professional series can be disassembled and components replaced. I was upset that it could not be repaired, and decided to try to take it apart. I’ll break it and then I’ll buy a professional iron one for him. With these thoughts I began to disassemble it.
It turned out that he understands it in an elementary way. On the nozzle, which rotates to change the direction of the foam jet, there are two plastic stoppers that bend and the nozzle is easily removed.
A problem often arises with the foam kit; usually it stops foaming. Let's look at the reasons that can give rise to these phenomena.
1. Air leak.
There is an air suction regulator on the top of the foam kit; it regulates the intake of car shampoo from the bottle by creating a vacuum in the foam kit.
Due to the injection effect, the chemical is sucked from the bottle into the gun. Tighten it - reduce the air leak, more shampoo is sucked in. Spun it - the vacuum was reduced, the suction of shampoo decreased, and therefore there was less foaming. It happens that the regulator breaks down and the vacuum is not regulated, hence little shampoo comes in and the foam kit stops foaming.
2. The tablet in the foam kit is clogged.
The tablet mixes liquid and air and is a foam creator. If dirt, reaction products of water and chemistry get into it, then it tends to become clogged with them. If the shampoo consumption is normal and the shampoo in the bottle decreases, this is noticeable. This is the diagnosis that the tablet is clogged.
Which one should I do?
Types of homemade foam generators
The choice of the type of foam generator for self-construction is made based on the existing production and economic needs, the container for consumables and the allowable costs of creating the installation (see also Fig.):
- from a household pump sprayer - only a mini-generator with double bubbling. But with its help you can wash the most dirty places of the car: wheels, wheel arches and body sills (see figure below), motorcycle (sorry - bike), scooter/moped, bicycle, rubber boots after going out into nature or working in the garden;
Washing car wheels and wheel rims with foam - from a pump portable garden sprayer - the same foam generator without a compressor, but suitable for washing a compact city car. With a compressor - any of the types described above. The best base unit is the Russian “Beetle”, its tank can hold 6 bar without any problems;
- from a car fire extinguisher - a supercharged foam generator for washing a personal car or minibus/van of the Gazelle type. "Ford Transit", "Mercedes Transporter", etc. A compressor for inflating tires or from a refrigeration unit will do;
- from a stationary fire extinguisher - a foam generator for professional washing, incl. heavy vehicles. Compressor - with a capacity of 120-150 l/min (for example, based on an onboard ZIL-130);
- from a canister, bucket with a lid, etc. – ejection with supercharging. The generator parameters are determined by the type of compressor available.
A little about the improvement
How can you make your foam generator work even better? Here we are talking about increasing productivity, that is, increasing the amount of foam created.
No complex repairs will be required. And you won’t have to open the generator drawing. The essence of the modification is to make the attachment work better.
I note that many foamers experience problems with mixing components due to the imperfection of the standard nozzle. The water is supplied under low pressure, so although the shampoo gets into the mixture, complete mixing does not occur. There are models with a too narrow hole through which shampoo is supplied. The water simply does not allow the detergent to push through there.
There are two methods by which you can improve the lack of factory foams.
- Replace the injector. You will need a screw nut. This is a fastener that is used in computers and holds the motherboard on it. The advantage is that the nut is soft and easy to drill. A drill with a diameter of 1 mm is required. At low speeds it makes a hole in the middle of the nut without damaging the thread. A slot is made on the end side for a screwdriver. The resulting device is screwed into the nozzle. That's not all. We take the same nut, but a little larger, and also a 2 mm drill. Make a hole and widen it to a cone with a file. Only on the side that will be facing the inside of the nozzle. Install the nozzle. Take a pen rod (preferably gel) and cut a tube 30-40 mm long. A hole of about 4.6 mm is made on top of the nozzle. This is ideal. This way the tube will fit tightly. Treat everything with sealant, wait until it dries and check the operation of the foam generator.
- For nozzles that have a mesh. It serves to break the flow of water and create foam. The problem is that the meshes wear out quickly. For modification, take a jet from a carburetor Zhiguli car and a mesh made of stainless steel. The jet is installed in place of the standard injector. Be guided by the sizes. The mounting hole will have to be drilled out to fit the jet. We remove the standard grid and make a new one using its template. It is advisable to choose a mesh whose cell diameter does not exceed 2 mm. 1.5mm would be ideal. Put it in place of the old one and try out the effect of the modification yourself.
The device of "real"
For high-quality car washing, you still need an injection or “direct” ejection foam generator. Structurally, they are largely similar, so let’s look at both at once.
The structure of a supercharged washing foam generator is shown in the figure:
The device of a foam generator with pressurized supply tank
Foaming begins already in the supply pipe, since due to the so-called. throttling effect, the pressure behind the mesh filter drops and air microbubbles are released from the mixture. This is not foam yet, but there are many embryos of it. Amateur designers usually do not install a foam concentrate nozzle, passing the mixture ready to foam directly through the bubbler. But in vain: a sharp drop in pressure behind the jet does not produce an aerosol, but a “foam sol” of tiny droplets of high-expansion foam. In the bubbler they “swell” with air, almost without losing their multiplicity, and thick, sticky, almost non-draining “Nivea for cars” goes into the hose.
Setting up a supercharged foam generator does not require qualifications:
- the compressor gearbox is set to a pressure from 4 bar (min.) to 6 bar (max.) depending on the required foam flow;
- the boost and adjustment valves are fully open;
- turn on the air supply and set the foam ratio using the valve settings (visually, based on its density and fluidity);
- the boost valve sets the foam flow rate;
- If necessary (rarely), I adjust the quality of the foam using the adjustment valve.
An ejection-type foam generator (in the next figure) is also connected to the compressor through a pressure reducer; A check valve in this installation is not necessary; the standard one in the compressor will suffice. The design of an ejection foam generator is similar to an injection one, only the nozzle is moved to a different location.
The device of a foam generator without pressurization of the supply tank
But setting it up is more complicated:
- shut-off valves are closed;
- The air control valve is opened approx. half;
- the foam concentrate control valve is closed;
- turn on the air, open the shut-off valves;
- by smoothly opening the foam concentrate control valve, achieve the appearance of foam from the nozzle nozzle (see below);
- Operating the control valves alternately or simultaneously to achieve the desired consistency and foam consumption. The adjustments are interdependent!
Note : if you need to wash the same car, operated under the same conditions, with the same shampoo, then after adjusting the foam, it is better to carefully remove the handles of the control valves so as not to disturb the adjustment.
Design Features
The supply tank of the injection foam generator must withstand a pressure of at least 8-9 bar. The purpose of the check valve is rather technological: when the foaming agent has been used up for approx. by 2/3, the compressor can be turned off, and the rest of the mixture will be produced under residual pressure, because its fluctuations within 30-35% do not significantly affect the foam parameters. The diameter of the hole in the jet washer is 1-3 mm and is selected for a specific shampoo; You can get a set of washers with holes of different diameters. Length L of the mixing chamber of the injection generator is 120-180 mm; ejection 220-350 mm. Channel diameter resp. 8-20 and 9-12 mm.
Safety regulations
The main danger lies in high blood pressure. When assembling a foam generator with your own hands, do not skimp on structural elements. The sprayer container must withstand pressure up to 4-5 atmospheres. Car shampoos are made to be as delicate as possible, but in order to effectively dissolve dirt and chemicals, they must have a certain degree of aggressiveness. Therefore, metal structural elements must be made of stainless steel and treated with an anti-corrosion compound. For the same reason, you should not store leftover shampoo in the sprayer; over time, it can corrode the plastic. It is recommended to use as much detergent as needed for one wash. And after use, rinse the tank.
Parts and components
The critical components of the foam generators described here and below are:
- passive bubbler;
- mesh filter;
- check valve;
- spray nozzle.
Bubbler
Passive bubblers for washing foam generators are sold under the name foam tablets. Hobbyists, as a rule, make foam tablets themselves from a steel kitchen sponge (scraper, “brush”). But - no need.
A high-quality branded foam tablet is a putanka (emphasis on the first syllable) made of round stainless wire, see figure:
Foam tablet for foam generator
Firstly, steel sponge is not designed for long-term work under pressure in an active environment. Secondly, it (the steel sponge) has a lot of thin sharp edges. Active foam “pinches off” microparticles of solid metal from them. Not a bad abrasive, right? And - on sparkling paint. The car begins to lose its appearance after 3-10 washes, depending on the quality of its painting.
Net
Strainer:
- begins foaming in the supercharged injection generator;
- serves as an active bubbler in a double bubbling foam generator (see below);
- can become the basis of a very good homemade passive bubbler, in no way inferior to the best branded one.
For the latter case, you will have to buy something, but quite inexpensively, in some hardware store ("Everything for the home", plumbing, etc.). There, however, they do not always know what it is. Often it’s just They put a price tag without the name of the product. So let’s take a closer look.
Unscrew the cap from the faucet spout of the kitchen sink or washbasin (arrow on item 1 in the figure below). This is done simply with your hand, if you hold the “gander” with the other. Examine what is unscrewed. Do you see the mesh (item 2)? Push it with your finger and the mesh filter will come out. Its lid can be removed if you pry it off with a toothpick, etc. in any of the side holes, arrow on pos. 3. The meshes are squeezed out with your finger in the same way (pos. 4).
Household tap strainer
Note : you might be surprised how much dirt there is! In such a case, the nets are cleaned with an old toothbrush under a weak stream of water. Signs of clogging - the stream from the tap jerks, breaks into drops early, and splashes.
Now let’s remember what to look for, or take it with us as a sample - to show it to a young, tolerant, politically correct, confident saleswoman. At home, we disassemble the “new, good” filter and cut off the stop from the cover (arrow on item 4). For what? 3-4 meshes are not enough for a foam generator. The missing ones can, firstly, be cut out from an old strainer from a Chinese teapot; stuff them as much as will fit. This thing is suitable for a filter, and instead of a foam tablet (installation diameters 20/18 mm) for a productive foam generator. The foam is a sight to behold - high-quality, thick, you could make snowballs out of it.
Secondly, you can supplement the filter with synthetic felt cut from a soft kitchen sponge (see figure). It is necessary to cut with a lack of thickness so as not to catch the adhesive layer. A filter with this addition is suitable for an active pneumatic bubbler and a passive one in a manual foam generator.
Valve and nozzle
Do-it-yourselfers install purchased reed valves in their foam generators or make them themselves “in the image and likeness” of standard ones. Which requires turned parts and some plumbing experience. And we will make a ball valve at home “on the knee”, that is, on the work table. Its throughput is lower, and its response delay is greater than that of a leaf valve, but we don’t need to turn a turbo drill, and the ball valve is very durable and reliable.
You will have to buy a bronze water tee for 1/4″ - 3/4″ (crosspiece, if the generator has a pressure gauge) with an external thread (type NNN), select a ball from a bearing of a suitable diameter and a piece of tube for it; drawings and proportions of a check valve for a homemade foam generator are given in the figure:
Ball valve drawing for foam generator
The assembly is done as follows:
- in the tee/crosspiece, holes for stops are drilled in one pass;
- one of the ends of the piece of tube for the valve seat is countersunk with a conventional twist drill;
- the saddle is placed in the tee/crosspiece and placed on the table with the saddle down;
- insert the ball and, with light blows of a hammer, drive it to the saddle through a hard wooden stick;
- the seat is secured from the outside to prevent it from falling out with silicone glue; the connecting fitting will not allow it to be squeezed out under pressure;
- place a stop, fix it with silicone or caulk it.
Note : a homemade ball valve may leak a little at first, but after 3-4 air starts/misfires, the ball will “beat” its seat until it is completely tight.
Drawings of the spray nozzle for the washing foam generator are given on the following. rice.:
Drawing of a spray nozzle for a foam generator
If the foam is simply supplied through a hose without a gun (which, of course, is inconvenient), instead of a threaded socket, a herringbone fitting is machined for the hose. It is not advisable to reduce the length of the nozzle, because it also serves as a “mint” stabilizer in the foam hose. Making a nozzle is quite complicated:
- through channel D6 is drilled;
- the threaded socket is turned out, the workpiece is turned to the shape from the outside;
- From the right (according to the drawing) end of the workpiece, 2 D6 holes are drilled at an angle, converging in a V-shape at 27 mm from the end. This is a complex and responsible operation;
- From the left end according to the drawing, channel D9 is drilled to a depth of 270. It is advisable to go through it with a reamer after drilling, because roughness in the channel strongly “hits” the foam expansion rate;
- Excess material is removed from the right end with a thin narrow cutter. This is the most delicate operation;
- The fit of the nozzle on the gun is checked and adjusted by grinding the left end, see fig.
Tank options
It is better to make an injection foam generator based on a powder fire extinguisher, and there is a pitfall here - its standard bubbler. The first powder fire extinguishers were plastic containers with a lid filled with self-foaming extinguishing powder when heated. Simple, cheap, but if it got on a hot metal surface, the powder could explode. In general, simple dry powder fire extinguishers have saved many more lives and property than they have caused harm; quite a few of them are still waiting in the wings to this day. But, of course, a possible explosion instead of extinguishing a fire is no good. Therefore, modern powder fire extinguishers (see figure on the right) are filled with microencapsulated fire extinguishing composition and pumped with an inert gas, which squeezes the powder through a steel sponge. The shells of the microgranules in it are destroyed, and the ready-made extinguishing mixture comes out. It’s complicated, a little expensive, the fire extinguisher needs to be checked periodically, like a carbon dioxide one, but an explosion is excluded.
So, the foam tablet enters the internal nest of the microgranules destructor. First, they naturally use a used-up fire extinguisher for the foam generator, and don’t buy the tablet. Why, it seems, if something that looks suitable already exists? But the fire extinguisher destructor is disposable; it will create dust with a steel abrasive even stronger than a kitchen sponge. Secondly, there is no aerosol chamber in front of the bubbler in the fire extinguisher, and without it high-expansion foam will not be produced, this is the first. However, this is “not fatal”; it is possible to modify a foam generator from a fire extinguisher to obtain high-expansion foam, see video:
Video: modifying a foam generator from a fire extinguisher
Note : for another version of a homemade foam generator from a fire extinguisher, see next. video clip:
Video: making a foam generator from a fire extinguisher
Options for the Beetle
A foam generator from a Zhuk type sprayer can be made with supercharging from a built-in pump or compressor. To wash a city car, 3-7 liters of foam concentrate are required. Garden “Beetles” are available in capacities from 5 to 10 liters, above in the figure:
Garden sprayers of the “Beetle” type and a foam generator from such a sprayer
To ensure that the foam “keeps its condition” and does not stagnate while the tank is being pumped up, you need to fill it with foaming agent no more than halfway (preferably 1/3). And in order to wash a large car with a small “Beetle”, you need to install a pipe in its tank to connect the air hose from the compressor (shown by the arrow below in the figure). If the compressor is homemade without a graduated gearbox and pressure gauge, then the pipe is needed with an internal inch thread. A tee with a check valve is screwed into it (see above). A pressure gauge is screwed onto the free arm of the tee; threaded joints are sealed with FUM tape. In order for the sprayer to be used for its intended purpose after modification, you will also need to buy a plug for the shoulder of the tee with a valve.
Making penogen
The least labor-intensive method for making foam is to use a regular garden sprayer.
This device is taken as a basis, after which it is supplemented with some elements. It was previously mentioned that the sprayer is very similar to car wash equipment, so it is ideal for creating a foam generator. The simplest penogen design can be easily done at home. The master will have to take care of the availability of:
- Sprayer of any volume;
- Two cuts (one second of an inch);
- Nuts for drives;
- Air fitting;
- valves;
- Foaming tablets;
- Adapter for tablet;
- Metal tube.
A DIY foam generator for washing a car from a sprayer is made according to the following scheme:
- The pressure relief valve is removed from the base, as well as the fitting for attaching the hose;
- Squeegees are inserted into the resulting recesses;
- The bends on both sides are fixed with nuts using sealing gaskets;
- A tube is installed on either of the two ends. It must be arranged in such a way that it does not touch the bottom of the cylinder. A check valve and fitting are installed on the same outlet;
- An adapter is installed on the second drive, and the tablet is wound through it;
- The hand pump is turned off as it is not needed. In the finished foam generator it will act as a tank lid;
- A hose is connected to the outlet fitting of the foam concentrate;
- A spray gun is attached to the free end of the hose.
The equipment is completely ready. It should be mentioned that when making a foam generator for a car wash with your own hands, you do not have to make the drawings yourself - you can find them in specialized literature, or search on the Internet.
Operating a self-made penogen is a little more difficult than the factory version, but not so difficult as to abandon such equipment.
In order to wash a car using a self-made foam, you should:
Fill two thirds of the container with detergent; Connect the compressor and start pumping air into the container (it is important to control the pressure so that it does not exceed the standard); After the atomizer valve opens, air masses will direct the mixture and force it through the tablet. High-quality foam will come out of the gun. The main disadvantage of self-made foam is the need for constant pressure pumping, since a special regulator is not provided in this equipment
In addition, the master will not have the opportunity to regulate the strength of the outgoing jet.
The main disadvantage of self-made foam is the need for constant pressure pumping, since a special regulator is not provided in this equipment. In addition, the master will not have the opportunity to regulate the strength of the outgoing jet.
There is another way to create a foam generator for washing a Karcher with your own hands. It is not used as often as the previous one, but does not lose popularity among motorists. The execution technology is quite simple:
- You need to get a canister with a volume exceeding 20 liters;
- A compressor from the car should be connected to the inlet nipple (made of brass) from the tire;
- Next, you need to connect the hose (length - 6 m, diameter - 1.6 cm) to a pre-prepared gun;
- The elements can be fastened using rubber flaps, clamps and nuts.
Video tutorial:
Manual mini foam generator from a sprayer
“Beetles” are also produced as hand-held household ones. However, for a non-compressor mini-foam generator with double bubbling, any household sprayer of a similar design is suitable: an excess pressure of 1-2 bar, to which it can be pumped with a standard pump, is sufficient in this case.
To make a portable foam generator from a household sprayer, you first need to remove and disassemble the outlet valve of its air pump, on the left in the figure:
Making a foam generator from a household sprayer
There is almost always enough space in the valve nozzle to place a synthetic felt gasket at the air outlet (see above) and thus obtain a first-stage pneumatic bubbler; You may need to tighten the valve disc return spring a little. The primary bubbler is checked by immersing it in a jar of water: when you press the piston rod, air should come out into the water in a thick stream of small bubbles. You may need to add felt. Next, the standard sprayer is unscrewed, and the body of a medical syringe with a foam tablet (preferably branded wire or homemade mesh, see above) and 3-4 layers of synthetic felt from a kitchen sponge are pulled onto its nozzle. The felt pad is placed first along the foam path, on the right in Fig. That's all, you can refill and wash. Only if the sprayer is used for its intended purpose, the primary pneumatic bubbler will need to be removed before filling with fertilizers or pesticides, otherwise the active ingredients of the drugs may oxidize before they fly out.
Finally, note : for 2 options for turning a sprayer into a washing foam generator, see the video:
What to do if Karcher does not give foam
Now let's look at what to do if Karcher for some reason does not produce foam. Let's highlight the instructions, starting with the simplest steps to the most complex.
Check requirements
First, make sure that your Karcher pressure washer meets the minimum requirements for the attachment to work. Here you need to take into account the information provided by the manufacturer. In particular, the LS3 operates normally at pressures of 75 bar and above.
Make sure the fluid is diluted correctly
The performance of the device largely depends on the correct preparation of the “chemistry”. This work must be done taking into account the hardness of the water and the proportions for dilution. The necessary information must be indicated in the instructions.
Check the foam tablet
Quite often, Karcher does not produce foam due to contamination of the foam tablet. If it is clogged, replace it with a new one. To solve this problem, you do not need to disassemble the foam nozzle - just follow these steps:
- Remove the pin.
- Remove the plastic housing of the jet regulator.
- Remove the guide. Be very careful not to damage the mechanism.
- Unscrew the foam tablet lock.
- Secure the attachment in a vice. Be careful not to damage the regulator responsible for dispensing the chemical (black thumb at the top of the nozzle).
- Use a screwdriver to push the old tablet out of the retainer housing.
- Insert a new foam tablet.
- Apply a sealant to the casing of the product where you plan to screw the foam tablet holder. Don't forget about the rubber gasket.
- Pull out the tablet holder.
- Replace the foam jet guides.
- Replace the plastic regulator housing.
- Install the pin.
