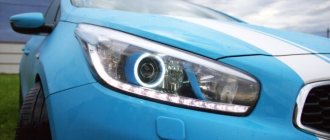
Based on modern conditions, we can say with confidence that tuning headlights with your own hands is a fairly common occurrence among domestic car owners.
And this is not surprising, since such changes lead to improved protection of the vehicle itself, plus they help decorate the car with new elements.
A wide range of modernized optics also contributes to tuning taillights with your own hands. As they say, there will be plenty to choose from.
The only negative is that when purchasing a finished product you will have to pay a decent amount. Therefore, in this situation, men prefer to do something on their own, because, among other things, this is an excellent solution for protecting headlights from scratches and other mechanical influences.
Car lights: rules of use
Modern vehicles are equipped with a number of basic and additional external lighting devices, the use of which is strictly regulated by the relevant traffic rules. Let's remember how to properly use external lighting devices in order to drive safely, not interfere with drivers of other cars, and not be fined by the traffic police inspector
Headlights, “dimensions” and other lighting devices of cars
In order for cars to be clearly visible on the roads, and drivers to be able to confidently drive them at night and in the evening and in bad weather, manufacturers equip each vehicle with a set of lighting and alarm devices. The list of required external lighting equipment for cars is regulated by international standards, and usually includes the following devices:
- High and low beam headlights.
- Side and parking lights.
- Daytime running lights (optional - not available on all vehicles).
- Front and rear direction indicators and side repeaters duplicating them.
- Stop lights.
- Hazard warning lights (usually combined with direction indicators).
- Reversing lights.
- Fog lights (optional).
- License plate lamps.
- Passive signaling means – reflectors.
- Inside the cabin or interior: instrument panel lighting and parking lighting.
On special-purpose vehicles, headlights - spotlights and cornering lights - seekers can be installed. Tractor-trailers and other multi-unit vehicles must have an illuminated "Motor Train" sign.
The procedure for using lighting devices in traffic regulations 2020
Every driver must remember and strictly comply with all the requirements of the Traffic Rules, including the procedure for using automobile lighting and alarm devices set out in Section No. 19. The main provisions of this section contain:
- The requirement to turn on high or low beams and side lights on all vehicles driving in the evening and at night, as well as during the day and at any other hours of the day when visibility on the roads is poor. Drivers must comply with the same requirements when moving in a tunnel. The trailer or vehicle being towed must use all available parking lights.
- When drivers use high beams, they must switch to low beams if the distance to the oncoming car is 150 meters. The indicated distance can be greater if the driver of the oncoming vehicle requests it, signaling by several switches of the headlights.
- In the dark hours of the day, there is a requirement to use side lights to mark vehicles stopped or parked on the road without streetlights, as well as in cases of parking or stopping in places with difficult road terrain and obviously poor visibility. In the latter case, it is recommended to additionally indicate the vehicle by turning on the low beam, as well as turning on the rear fog lights.
- A requirement for all moving vehicles to drive, even during the day, with low-beam headlights on or standard daytime running lights replacing them. If necessary, low-beam headlights turned on when driving during the day can be replaced with fog lights.
- Restrictions on the use of fog lights. As a supplement to low or high beams, they can only be turned on in cases of obviously poor visibility. It is also permissible to use such headlights together with standard low (high) beams in cases where driving is done on dark, unlit roads.
Other paragraphs of Section No. 19 of the Traffic Regulations regulate the limited use of headlights such as spotlights and seekers, the procedure for using rear fog lamps, the “Road Train” identification sign, as well as giving overtaking signals by alternately turning on and off the low and high beams.
Possible penalties for violations of the rules for using lighting devices
The motorist should know that a violation is not only errors in the use of vehicle lighting equipment in certain road situations, but also unauthorized changes to the design of on-board lighting equipment. In such cases, the actions of the perpetrator are equated to driving a faulty vehicle and are qualified under Art. 12.5 Part 1 of the Code of Administrative Offenses of the Russian Federation (fine amount 500 rubles).
According to traffic police statistics, the most common violation of traffic regulations regarding the use of lighting devices is drivers ignoring the mandatory requirements to turn on low beams during the daytime. These violations, as well as failure to comply with other provisions of Section 19 of the Traffic Regulations on the procedure for using light devices, allow the traffic police inspector on the basis of Art. 12.20 of the Code of Administrative Offenses, warn the driver, or impose an administrative fine on him in the amount of 500 rubles. This rule came into force on January 13, 2020.
Malfunctions with turn signals and their elimination
As a rule, few problematic situations arise in this direction; most likely, this is ensured by the extremely simple and uncomplicated design of the devices. In extreme cases, it is not difficult to replace the turn signal yourself. But still, it is useful to know about some malfunctions, especially since the breakdown can be eliminated yourself.
So, what breakdowns most often occur in light indicators:
1. The filament in the incandescent lamp burns out. 2. The contacts in the switch and breaker burn out. 3. The winding or resistor burns out. 4. Fasteners become loose. 5. Wires and devices oxidize.
As for burnt-out lamps, resistors and windings, they will have to be replaced with new ones. In relation to burnt contacts, clean them with a file or treat them with medium-sized sandpaper and blow them with air. Oxidation of wires and other places is combated by thoroughly cleaning them and installing them in place with reliable fastening.
In many cases, it is quite affordable to repair breakdowns on your own, provided you have minimal knowledge of certain skills, however, this is what our website is dedicated to, here even those who have never tried to repair any component in a car on their own will find a lot of important and useful information for themselves .
Types of lighting equipment
Bosch optics
Both devices have a unit in their design that includes low and high beams, dimensions and direction indicators. That is, there are no fundamental differences between them, but it will be useful for you to know certain nuances.
- Equipment from the domestic manufacturer Kirzhach is characterized by glass sealing, which causes certain difficulties during replacement. Also, the low beam area is equipped with a lens. This makes the flow limited but more targeted compared to its German counterpart.
- In the case of Bosch, the glass is fixed with special latches, and sealing is done using rubber gaskets. They are easier to remove. But there are no lenses for low beam. There is a reflector here, due to which the boundaries of the glow are more blurred.
Many believe that Kirzhach is superior to Bosch optics in many respects. But this opinion can be called controversial.
But when it comes to dismantling and replacement, here German devices are the clear favorite, since they are much easier to disassemble.
Glowing bottom
We immediately warn you that tuning the light for the bottom of the car is illegal, since the changes are not provided for by the manufacturing plants and car designs. But this does not stop many car enthusiasts, so it’s up to you to make such an upgrade or not.
Previously, “lower” tuning was done using neons, but it was quite unprofitable and tuners switched to LED backlighting, which is much easier to install and consumes much less electricity.
- Waterproof LED strip.
- Soldering iron and everything needed for soldering.
We measure the size of the bottom and cut the tape to the desired size. It's good if you get 4 pieces. After which contacts are soldered to each piece. Then we install them on the bottom of the car using clamps, so it will hold much stronger than if you glue it with glue.
Route the wiring through the holes, connect to the dimensions, or make a separate power button.
The procedure for illuminating the bottom, like the others, does not require special knowledge; even a novice car enthusiast can cope with it. The main thing is not to catch the eye of a traffic police officer with such tuning.
In conclusion, we note that light tuning is an inexpensive and effective way to distinguish yourself. You can implement it on your car in a short time, so don’t be afraid to experiment, and the result will be excellent.
Currently, LED optics are one of the most popular types of flashlights. LED and high-quality headlights for a car allow you to improve the luminous flux and are an integral element in the case of tuning. In this article we will talk about the advantages of these headlights and how to install diode bulbs in the headlights.
How does the adaptive lighting system work?
Whatever company develops the technology, cornering headlights often have the following basic functions:
- City light. Connects when the vehicle speed does not exceed 55 km/h. Mode characteristics:
- extensive distribution of illumination;
- a cut-off line that has a horizontal position;
- short range;
- connecting additional lamps (they detect objects while making turns).
- Country road light. It is recommended to use it when traveling outside the city, when the car speed reaches 55-100 km/h. This is the low beam familiar to the common man. The main difference is a certain shift to the right side, which is illuminated somewhat better than the left.
- Lighting on the highway. It begins to function when the vehicle speed exceeds 100 km/h. In such conditions, it is extremely important to drive carefully in a straight line, but at the same time be aware of the possible dangers when cornering. Low beam with increased range provides additional safety.
- High beam. It’s no different from the usual high beam lighting, but you don’t need to switch to low beam. There are two ways to control the light rays: vertical or adaptive cut-off.
- Adaptive cornering lights. The most popular feature, the headlight module changes its rotation angle by 15 degrees depending on how much the vehicle's speed has changed and where the steering wheel is turned.
- Illumination in adverse weather. If there is snow, thick fog or rain outside, it is recommended to connect a special mode, which has the most capacious light dispersion. The reduced illumination range is responsible for reducing the amount of glare that occurs in conditions of high humidity.
Do-it-yourself solution
Unfortunately, today only a small number of cars are equipped with adaptive lighting technology. It doesn't take much effort to equip your car with adaptive light sources. Of course, it will not be possible to achieve an original result, because it is created only with the help of modern technologies and an on-board computer. If the machine has standard power supplies, they can be equipped with a rotating mechanism, as well as adjust the tilt level.
It's important to think about the wiring first. The sensor elements must match the headlights. If an error occurs somewhere, the product model must be replaced. In practice, you will need two sensors that will be installed on the front wheels. To be able to control the adaptive, a special LCM module is used.
Let's get started with the installation
To install such a light yourself, you will need to open the front hood. To do this, it should be removed, but without touching the cables of the fog lights and the fluid supply to the washer. After this, the headlights themselves are disconnected. As a rule, they are mounted with 3 bolts. After this, it is necessary to conduct wiring from the new set of lights to the interior. Among the adapters there will be ground wires that need to be placed in the side members under the headlights.
For convenience, it is better to wrap all wires running into the cabin with electrical tape. Also, it is best to install the cable from the left headlight under the battery, and from the right one - behind the washer. After this, the headlights are assembled, and a unit for ignition and adaptive light is connected to them. After the connectors are connected, you can connect the battery to work. Next you need to gain access to the fuse box. The lamp wire is inserted into the black connector, which will supply energy to the lighting devices and start their operation.
Since sensors are connected to the vehicle's driving elements, they will be able to transmit a signal to the adaptive headlights. This system does not work on all machines, but a similar effect can be achieved on your own. Also, most modern functions cannot be implemented into the vehicle independently, since they require the operation of an on-board computer.
Today, AFLS adaptive xenon headlights have become a new trend. Drivers are attracted by their functionality and convenience, because they can make the trip much more comfortable. To acquire these devices, you can purchase headlights in specialized stores and install them yourself. This will give the lighting functionality as close as possible to the original.
To afford modern adaptive headlights that can change the angle of illumination, it is better to contact a specialized company that will select such devices for the car model. It is possible to do this yourself, but it is important to take into account the compatibility of all elements and have sufficient skills.
Tinting
This headlight tuning is great for those who want to do it themselves . In this case, you will need to buy inexpensive consumables, prepare a tool and set aside several hours to complete all the work.
Tinting (or tinting) the optics allows you to give the headlights a new shade, which looks unusual and stylish, especially at night. You will need:
Headlight tinting
- A special dye in aerosol form, which is intended for car headlights made of a certain material (glass or plastic);
- degreasing agent;
- masking tape;
- polishing cloths;
- tools for dismantling optics.
How to cook
First of all, the car enthusiast needs to remove the headlights from the car. Next, these parts should be thoroughly cleaned of dirt, washed and dried, and the surfaces to be treated should be degreased.
Segments of optics that cannot be tinted should be protected with tape. In addition, during preparation for the procedure, it is recommended to immerse the paint container in hot water for about five minutes so that the paint composition becomes more flexible.
The paint should be sprayed onto the prepared surface of the optics from a distance of about 30 cm. Having applied the first layer, you need to wait until it dries completely, and only then repeat the procedure. Otherwise, you risk the appearance of drips that will have to be removed with a solvent and starting all over again.
Headlight tinting
The final stage is polishing, which is performed with special napkins, which will provide the headlights with shine and gloss.
When is tuning necessary?
The quality of roads in the countries of the former USSR, especially in the periphery, leaves much to be desired. Long-term operation of the vehicle in such conditions leads to a violation of the factory settings of the external lighting elements. Gradually, the settings get lost, causing the head optics to direct beams of light in different directions - up or directly under the wheels of the car.
Consequences of incorrect headlight adjustment:
- the driver has to strain to see the unlit part of the road surface;
- if the reflectors of the optics are raised at a large angle, passengers of oncoming cars suffer from glare;
- insufficient illumination of the roadside can lead to an accident - the driver will not notice an obstacle or a person walking along the edge of the road in time.
Note. Electrically adjusting the lighting devices does not help the situation, since the servos only change the angle of the optics up and down, and both headlights at the same time. The task of such systems is to adjust the direction of light beams depending on the vehicle load.
When you need to adjust your headlights yourself:
- if you notice multidirectional light streams (for example, the left headlight shines down, the right one shines up);
- drivers of oncoming cars constantly signal about blinding by briefly turning on the high beams;
- after repair, replacement or removal of front optics units;
- after being hit by the front of a car as a result of an accident;
- when installing rims or tires of other sizes;
- after replacing the front “sagging” springs;
- during the installation of fog lights (FTL).
If you happen to change burnt out light bulbs, then you do not need to adjust the position of the light fixtures. Another thing is the installation of new types of elements (xenon, LED) instead of standard halogen bulbs. In this case, it is advisable to adjust the low beam headlights.
LIGHTING SYSTEM, CONTROL AND INSTRUMENTS
Adjusting the headlights is carried out after installing the machine on a flat horizontal surface in front of a smooth wall. The distance from the car to the wall should be approximately 5 m. After this, a screen is marked on the garage wall or other vertical, flat surface (Fig. 87).
Before you start adjusting the headlights in a garage, you need to check the tire pressure and fully equip the car, install a spare tire on it, fully fill the fuel tanks, and replace the driver’s weight with a load of the same mass.
Figure 87. Screen markings for adjusting headlights on the garage wall
Having measured the distance from the center of the headlights to the floor, you need to transfer it to the screen and mark it with the letter n, and mark the longitudinal plane of symmetry of the car on the screen with a vertical line 0.
Figure 88. Adjustment screws
Having set the position of the headlights in the “driver and front passenger” mode, cover one of the headlights with a dark opaque material and turn on the low beam, then adjust the direction of the light spot for the remaining headlight according to the image marked on the wall using the corresponding screws (Fig. 88).
When adjusting, you need to bring the light elements into such a position that the upper edge of the left halves of the light spots coincides with line N on the wall, which is drawn at a distance of 65 mm from the height N.
In this case, the vertical lines A and B must align with the intersection points of the horizontal and inclined sections of the light spots C1 and C2.
CONTROL AND MEASURING INSTRUMENTS
As a rule, all instrumentation and warning lights are located on the same panel as the car's speedometer, and are connected by wires to certain sensors.
If the wiring insulation is damaged, the wire may come into contact with ground, which may result in a short circuit, which in some cases can lead to a fire.
Replacing a regular lamp with an LED one
If you want to improve your lighting and install diode bulbs in your car instead of conventional ones, you will find these instructions useful. The replacement procedure, in principle, is not particularly complicated, so even a novice car enthusiast can handle this process. You just need to install special diode strips to decorate the interior design or to replace the rear dimensions. All you need is a soldering iron, the diodes themselves, and a 470 Ohm resistance. One resistor is connected to each individual diode.
- So, you will need to take an old burnt out light bulb from the taillight or dashboard, this is not important. The glass bulb must be removed from this lamp, as well as everything inside.
- The next step will be soldering. Using a soldering iron, you will need to solder five diode components minus the ground of the base. In this case, the plus of the LED will need to be soldered through the base to the positive contact of the light bulb base.
- The resulting structure must be filled with special hot melt adhesive or epoxy resin. As a result, the device is installed in the cartridge. Look at the resulting result - if all the diode elements are lit correctly, then install the system in the optics and enjoy the bright light. When installing glass to a headlight, the structure itself should be treated with sealant around the entire perimeter. If you do not do this, moisture and dust will enter the headlight, causing condensation and contamination. Accordingly, the quality of the light flux will be significantly worse. Naturally, without a control unit, the extensive functionality that we reported earlier will not be available to you.
Sources of light
Tungsten bulbs are the cheapest, but they also have low light intensity. For this reason, the use of these lamps is possible only for side lights, turn indicators, reversing lights and to illuminate the space inside the car.
Halogen lamps are used as light sources for low and high beam headlights. Xenon lamps, which are approved for use in low and high beam headlights, are in great demand. Diode lighting is used to perform signaling tasks. Very rarely, LEDs are used as a light source for headlights.
Adaptive headlights device
Adaptive headlights are a set of equipment that includes:
- directly lighting devices (headlights);
- motors for their active movement vertically and horizontally, as well as around their axis;
- control units;
- sensors designed to read, process and transmit information about objects of the material world to the headlights.
Adaptive headlight device
The headlight units themselves are equipped exclusively with lensed optics, since reflective reflectors are not capable of producing a controlled outgoing light flux. Both xenon and diode lamps can be installed in the lens. Halogen light sources are not used.
A few years ago, the advantage was given to xenon, but in recent years the advantage has leaned towards diodes. According to automakers, such light has a brighter glow and is more comfortable for the human eye.
Regardless of the light source, both the near and far beams are in the same lens, and switching between modes occurs due to a special curtain.
The adaptive installation engines are also built into the headlight unit; by mechanically moving the lens in different directions, they create the effect of actively changing the direction of the light flux.
Sensors, also known as traffic monitoring cameras, transmit information to control units, which “give a command” to change the direction of the light beam.
The light from the adaptive headlights is adjusted depending on the environment around the car, which is captured by a special camera
What types of reflectors are there?
Different car models have excellent reflectors.
The choice of one type or another depends on a number of factors:
- light bulb power;
- number of filaments;
- type of light bulb.
The last point includes ordinary lighting devices, as well as halogen devices.
On modern cars you can find 4 types of reflectors.
- Parabolic. The shape of the device resembles a geometric parabola. Focusing of the light flux occurs mainly due to the reflection of rays from the upper part of the reflector. This type allows the use of light bulbs with double filaments.
- Bifocal. It is similar in shape to parabolic, but the lower part of the reflector has a flatter direction. This factor allows for more intensive use of the lower rays of light, directing them to the area in front of the car. This structure eliminates the possibility of using light bulbs with two filaments. Therefore, for high beams, cars are equipped with an additional pair of headlights.
- Sofocal. It has several reflective parts, the design of which allows the light rays to converge into one focus (direction). This configuration allows you to increase the luminous flux, which affects the quality of illumination of the road space. A two-filament lamp is acceptable here.
- Polyellipsoidal. The design of the reflector, together with the spotlight optics, makes it possible to obtain a focused beam on a surface of less than 30 cm2. Moreover, additional electronic light control systems provide control of the position of the illumination limit. This type of headlights is widely used for trucks, vans and buses. The lighting lamp fits here with only one filament. Therefore, cars equipped with a polyellipsoidal reflector have four headlights.
In addition to the structural features of the reflective lens, reflectors differ in the material they are made of.
They can be made from:
- thermoplastic;
- thermoset;
- specialized glass;
- metal (top layer – chrome).
Modern foreign car models use thermoset plastic. This material is a smooth plastic whose surface allows the application of a reflective layer without an intermediate leveling layer.
Unlike thermoplastic, thermoset plastic has greater resistance to prolonged exposure to elevated temperatures. Low weight, as well as sufficient strength, are a clear advantage of this material over glass and metal.
Consequences of optics fogging from the inside
- The constant presence of condensation inside the headlight creates a lens effect, which leads to refraction and scattering of the rays. As a result, the lighting efficiency is sharply reduced, which makes driving more difficult.
- The presence of moisture negatively affects the contacts, significant oxidation of which can cause failure of the electrical wiring.
- Moisture falling on the heated surface of the reflector leads to its destruction.
- The presence of condensation on a metal surface leads to corrosion. In turn, sooner or later, rust can lead to a loss of functionality of the metal parts of the headlight.
- High humidity significantly reduces the service life of lamps.
If a headlight fogs up, only an experienced specialist can tell you exactly what to do. After all, this requires certain knowledge, skills and equipment. For example, it is almost impossible to detect microcracks in the glazing of optics with the naked eye. Therefore, in most cases, the best option would be to seek help from the service center technicians.
If you decide to fix the cause of the problem yourself, it will be useful to use the following recommendations.


