This specific type of equipment is well known to all lovers of hunting, winter recreation and mountaineering. Buying a branded product will not be cheap, so most people prefer to make their own snowshoes. They are indispensable during winter hikes in the mountains and walking along snow-covered paths. The devices not only help you overcome the intended route, but also protect your feet from sinking into the snow and prevent falls.
The stores offer a wide range of different models, but you can make almost any of the presented options yourself. The differences between them are in the technologies and materials used. We will tell you how and from what it is easier to make such a thing in this article.
DIY snowshoes
What do you need to know before you start making this simple equipment? The first thing is to decide on what terrain you will be walking on. The second is to select materials and fastenings.
Before making snowshoes with your own hands, decide on their model.
Figure 1. Two types of snowshoes: solid base and mesh frame
In total, it is customary to distinguish two types (Figure 1):
- On a dense base without holes - needed to move on slippery ice in the mountains, they are made of plywood, plastic or a wooden block;
- With a full or partial base on a mesh frame - for walking through a snowy forest, the main structure is made of plastic, aluminum, wood or bone, weaving - synthetic thread, rope.
An important point is the fastening of the product; it should be selected to match the shoes on which it will be worn - boots with a welt or any other. Fasteners can be made of rope, woven rods or leather straps, which will be more reliable.
Let's take a closer look at why use snowshoe equipment (Figure 2):
- They are comfortable to use - lighter and smaller in size than wide ski tracks;
- They provide greater speed of movement, unlike hunting skis, although they have an almost identical design in terms of their base and method of fixation;
- Cover a larger area of the surface under your feet, evenly distributing and reducing pressure on it;
- They allow you to easily move on the crust without falling under it, increase stability due to the larger area of contact of the foot with the ground;
- Indispensable when crossing frozen ponds and mountain paths, for which special elements are provided in the design - hooks and crampons.
Figure 2. Using snowshoes
Selection of materials for snowshoes
When starting production, consider the terrain for movement and weather conditions. Study the geographical features of the area where you will go and only then model a certain shape of the product and choose the right material.
Answering a common question - how to make snowshoes with your own hands, we can immediately say that there are two proven recipes.
The main types of homemade snowshoes (Figure 3):
- Frame options - made of aluminum or plastic pipes, pieces of tarpaulin and leather;
- Quickly, right on the spot - woven from improvised means, cords and branches.
Separately, there are models for icy areas, although they have no fundamental differences, except for additional equipment - crampons, special claws that prevent slipping.
There are also more complex schemes. To make two-wheeled snowshoes with your own hands, you will have to take care of the availability of mounts for the wheels and the wheels themselves.
Figure 3. Frame and “quick-make” snowshoes
Snowshoe wheels:
- They will provide maneuverability and increase the speed of movement on rolled snow;
- High-quality plastic wheels of small sizes, from office furniture or the same skateboard, are suitable for them;
- They are installed in the middle of the product, symmetrically on both sides of the frame.
You can even make self-balancing snowshoes with your own hands, the whole trick of which is to correctly distribute the load and body weight relative to the frame.
Self-balancing snowshoes:
- As a rule, they are slightly larger than usual in size, but are made of lighter material, so they weigh less;
- They require calculations of how much area the ski track should be so that you don’t fall under the snow and move confidently on any surface;
- If they are designed for ice and ensuring balance, then you should think carefully about where and how many metal claws will be located so that you can easily maintain your balance on an icy lake, similar to the same skates.
When it comes to selecting materials, most hunters and fishermen give their preference to plywood, as it is affordable and allows you to cover short distances without much effort (Figure 4).
Figure 4. Example of plywood snowshoes
Here is a simple method on how to make your own snowshoes from plywood:
- For the deck you will need a sheet of plywood No. 7-10, a jigsaw, a drill and screws, a drill with drills and two small boards measuring 20x50;
- To secure the finished ski on your leg, you can use leather straps or bindings for regular skis;
- Next, two elongated ovals or rectangles with rounded edges are marked on the sheet, and the marked shape is cut out with a jigsaw, after which the place for the foot is marked on it;
- Two planks are attached along the foot on the underside of the deck to strengthen the structure, which will prevent the plywood from breaking when stepping on an unevenness or hole;
- Important - the length of the board to be fixed must be identical to the length of the frame itself;
- After both elements are fastened to each other, a line is drawn for the center of the foot and holes for the screws are marked on it with dots;
- Please note - plywood holes should be slightly narrower than the diameter of the screws, and block holes, on the contrary, wider;
- Small holes are filled with glue, after which they are twisted using fasteners with a frame;
- Stepping away from the markings of the foot, other holes are drilled into which laces or ropes are threaded, when using wide straps - they need to be enlarged with a jigsaw, they will ensure the fixation of your foot with the equipment.
Design features of the sled
Before you begin design work, you need to understand what basic elements the sled consists of. The fact is that the manufacturing process includes several stages, at each of which some key part is made.
It is necessary that you have a good understanding of the purpose of each of them:
- The main part of any sled is the frame, which is the basic supporting element for the entire structure. It must be as durable as possible, since it depends on:
- safety of operation of homemade sleds;
- duration of trouble-free operation;
- reliability of the device as a whole.
Considering that the snowmobile sled will be used in difficult conditions, the frame must be able to withstand negative ambient temperatures, as well as the impacts that the sled is constantly exposed to when driving through forests or bushes.
Otherwise, you will be unpleasantly surprised when the loaded sleigh falls apart while riding and dumps all your belongings on the snow in the middle of a forest clearing.
- The second important element is the runners. Strength is also very important here, however, another important detail is ease of control. This determines whether the sled will tip over when cornering or not.
The last point is the dimensions of the structure. This parameter is selected individually based on the tasks that are supposed to be solved with its help.
The sled may be small, but maneuverable and light. Or it will be a durable, reliable structure designed to move significant loads. You decide.
Do-it-yourself snowshoes from plastic pipes - how to make?
The simplest and most cost-effective option to make a product is to use plastic and a nylon cord with elastic bands (Figure 5). In order to assemble snowshoe equipment this way, you will need:
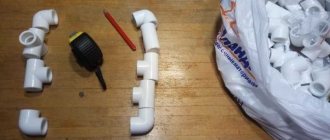
plastic polypropylene pipes with a diameter of 20-30mm, a length of 1.5m - 2 pieces;
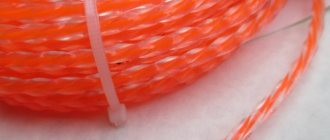
nylon cord or synthetic rope with a cross-section of 4-6mm - approximately 2 skeins;
technical elastic band, for fixing the leg - 2 pieces, you can take 4 with a reserve.
It’s easy to see that all these purchases will easily fall within the limits of up to 1000 rubles. Now let's move on to the master class.
Figure 5. Example of snowshoes made of plastic pipes
How to make snowshoes at home from plastic pipes:
- Cut 20cm from each tube;
- Take long pieces and shape them into a semicircle by heating the middle part of each on a gas stove;
- To get the correct oval, use rounded objects at hand, for example a metal teapot;
- Cool the bent elements in cold running water;
- Bend the toes of the resulting blanks by 120-130 degrees; for greater accuracy, use a protractor;
- Bend the ends of the tubes so that they are tightly connected to each other and you have a completed structure;
- Take a rope or cord and start winding it around the product; for better fixation, sand the surface of the pipe with sandpaper;
- Secure the pieces of plastic that were initially cut across in the middle of the resulting ski track using a cord;
- Install the fastening rubber bands onto the secured sections using mounting fasteners.
Manufacturing stages
The material needs to be given an oval shape. The width and height are calculated individually for the foot of the person who will wear this device. It is necessary to prepare bars specifically for the crossbars, water-repellent impregnation to treat the wood to protect it from swelling and cracking.
We give the beam the desired shape, but do not fasten the ends separately from the frames. Holes are made in the bars in advance to fit the size of the twine or other selected material that you will be stretching. There should be approximately 20-22 similar holes. The next step is to form a mesh from twine. It is made by pulling elements through ready-made holes crosswise. The finished mesh should be covered with any dense fabric. For fastening it is necessary to use belts, the width of which is selected so that the foot can easily fit in the shoe. The straps are firmly fixed in the middle of the base.
It will be more difficult to make a plastic structure, so you will need more detailed instructions:
- To make snowshoes from more modern high-quality materials, you can, for example, use polypropylene pipes as a basis. Their diameter should be 20 mm. This design ensures the strength and reliability of the product. From these pipes you need to prepare four blanks 65 cm long, eight blanks 23 cm long. Additionally, you will need four fragments of a metal-plastic pipe (50 cm long). The edges of the pipes will need to be slightly rounded.
- The next step is to heat the ends of 6 tubes with a special gas burner and insert them into adapters (also called tees). If such a device is not at hand, heat it over a gas stove. The output should be tubes 23 cm long and adapters at the ends.
- In the same way, the ends of metal-plastic tubes (4 of them) and the remaining polypropylene tubes are heated. Now you can start assembling the frame. Each includes three components. One end of the frame is fixed with so-called barrels. Metal-plastic tubes are bent and fastened to the resulting frame with self-tapping screws to form the nose of a snowshoe (part of a hoop).
- Next, the holes necessary to stretch the mesh onto the frame frame are made. The cord is pulled in the form of diamonds.
- We prepare a base for fastening from plywood (size 30x15 cm), then install the fastening itself.
- The final stage is to securely fix the frame base to the plastic frame. The resulting homemade snowshoes can support the weight of a person with dimensions of about 75 kg.
We use nylon thread for weaving
An important point is to braid the frame correctly so that with minimal braid costs you get the largest support area (Figure 6). Let's look at how to make snowshoes yourself, focusing on tying with nylon thread.
Figure 6. Example of “knitted” snowshoes
Snowshoes with nylon thread dressing:
- The weave pattern is somewhat similar to the fashionable direction of macrame needlework; it not only looks aesthetically pleasing, but also provides high reliability and density;
- All jumpers and dressings at support points should be as rigid as possible, since they bear all your weight and the main load;
- The braid or thread should be pulled tightly and evenly around the entire perimeter of the frame, avoiding sagging;
- To make the nylon stretch better, it should be slightly moistened with water;
- First, transverse cords are stretched on the frame, serving as the basis for further design, and the weaving itself begins from the toe;
- You can make your task easier by melting the ends of the nylon ribbon with a match or lighter - this way they will not break during work;
- The lace should be woven and laid in such a way that all the angles of its intersections are as straight as possible;
- From the second row two more braids are added to it, and from the third two more and so on until the first crossbar on the frame;
- On the other side, the ropes are woven in a similar way, and at the meeting point the ribbons are connected with classic knots;
- Also, don’t forget about the fastenings for your feet - they need to be woven into your macrame, choosing elastic bands or pieces of leather that will cover the booted foot as firmly as possible;
- Upon completion of the work, all ends of the weaving are secured with loops and small nails, and the finished product, together with the mesh, is covered with a layer of varnish.

