How to make a blower from a vacuum cleaner with your own hands
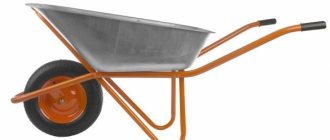
The most obvious way is to construct a garden leaf blower from a vacuum cleaner. It already has a motor, so all that remains is to make a body from PVC pipes, choosing a convenient length. First you need to disassemble the vacuum cleaner and remove the motor from it - this is the basis of the garden leaf blower. The next steps are:
The next step in constructing a garden blower from a vacuum cleaner is to make a handle and a switch. Plywood is used as a basis. It is necessary to draw an outline and cut out the part with a jigsaw, then sand it and screw on a fastening element from a fragment of a pipe. The instructions are:
Now you need to make attachments for a garden blower from a vacuum cleaner:
Preparing materials and tools
I had a piece of walnut wood from which I decided to make my own tongs. I also needed:
- Printable drawing of toaster tongs.
- Wood glue.
- Ruler.
- Pencil.
- 2 small clamps.
- Oil for wooden surfaces.
- Sandpaper 120, 220 and 320 grit.
- Paper towel.
Tools used:
- Table saw.
- Belt sander.
How to make a blower from a trimmer with your own hands
A garden blower can be made not only from a vacuum cleaner, but also from a trimmer (a type of lawn mower). This is an attachment consisting of a housing in which the fan is installed. It is attached to the lawn mower bar and the engine is started. It is designed for cleaning garden paths and other surfaces.
You can purchase it or construct it yourself, for example, from a floor fan:
This garden leaf blower operates using a fan rather than a vacuum cleaner. But even this power is enough to clean garden paths. More detailed manufacturing instructions are shown in the video.
Machine for installing buttons and eyelets
August 23, 2020
Reading time:
A press for eyelets or a press for installing fittings is a special tool, the main functionality of which is to fasten fittings (in particular, eyelets) to various materials.
To ensure that the edges of the holes on textiles always look neat and are durable, you need to secure them with eyelets.
This is usually needed for decoration (clothes, shoes, children's toys) or has a specific function - for example, it helps to secure curtains to the curtain rod (the rod is threaded through the round eyelets) or to set up a tent (a special strong cord is used with the eyelets).
- Advantages and disadvantages of a press for installing eyelets
- How to use the Hand Press correctly
- Universal
How to make a mini leaf blower
To clean small areas or objects (for example, a computer system unit), you can make your own electric mini-leafer. The basis of the device is a 12 V DC motor, preferably a new one (can be purchased in large stores or on websites). The storage element is the battery from the screwdriver. The device is compact, fits comfortably in the hand and can be freely used to clean even hard-to-reach places.
Step-by-step manufacturing instructions with photos:
After this, you can begin making the impeller. The sequence of actions is as follows:
How to sew curtains
This type of window design is considered the most popular today. In addition to the previously listed basic materials for sewing curtains, you will need grommet tape, the adhesive base of which will help to properly attach the product. The tape can be purchased at a specialty store, where it is offered in widths from 5 to 12 cm.
In order for the curtains to have an aesthetic appearance, you need to correctly calculate the number of fastening elements. How to make eyelets on curtains? If an even number of eyelets is installed on the curtain, the edges of the product will be directed in one direction. The standard distance between them can range from 15 to 20 cm. If the distance is greater, then the folds will be larger.
The first and last fastening element is installed 5–7 cm from the edge. If the distance is greater, the curtains will puff up; and if it is less, then the part may get caught on the hem and not be fixed.
Once all the instructions have been carefully read, you can begin sewing. DIY curtains with eyelets step by step instructions.
Master Class.
- The top edge of the curtain is folded inside out 2 cm and ironed.
- The size of the next hem will depend on the width of the eyelet tape. It is wrapped and ironed.
- The eyelet tape is placed between the fabric, under the large hem. It should be shorter than the width of the curtain by the amount of the side hems.
- Having straightened everything out carefully, we proceed to ironing. To avoid damaging the fabric of the curtains with the hot temperature of the iron, you need to place the cotton fabric on top of the curtains and only then iron them.
- To prevent the tape from falling off over time, it must be sewn with a machine stitch along the upper edge of the hem.
- The next step is processing the bottom of the product and the side edge.
- We install the eyelets according to the markings made in advance. To do this, you need to attach a ring and draw its inner circumference on the fabric. When all the elements are outlined, you can cut out the holes with sharp scissors, you will get some kind of loops. In order for the eyelets to be neatly attached to the fabric, you need to cut a slightly larger diameter than the one drawn. Two parts of the eyelet are applied to the resulting hole and compressed until a characteristic click is heard.
Advantages of curtains:
- Many people enjoy the sound of their window curtains sliding and closing. But this only happens when metal is used as the material for making eyelets.
- When the curtains are closed, the wave is uniform - it will not be disturbed after washing.
- Thanks to the eyelets, the fabric wears out more slowly, regardless of how often the curtain is closed.
- The design is very simple: even a child can open and close the curtains.
- If you accidentally pull the curtain, it will not break. The mount is quite strong, the main thing is to install it correctly.
How to make a vacuum cleaner with your own hands: detailed instructions for assembling a homemade device
“He has golden hands” - this is what they say about craftsmen who are able to assemble a miracle of modern technology from scrap materials. Despite the abundance of inexpensive ready-made equipment in stores, self-taught craftsmen successfully design and create household appliances, units for the garden plot and very effective devices for the workshop.
It turns out that you can also assemble a vacuum cleaner with your own hands. The main thing is to understand the design, find the necessary parts and allocate some free time. We offer three interesting models for independent experiments.
Option 3: making a cyclone from a bucket
Let's consider several options for making a cyclone for a vacuum cleaner with your own hands from sewer pipes and methods for making such a device according to detailed instructions with drawings and photo examples.
Without cone
materials for making a cyclone for a vacuum cleaner
To build a bucket and sewer pipe you will need:
- corrugated pipe 2 m long and 40 mm in diameter;
- 2 bends (corners) of 90° plastic sewer pipe;
- plastic bucket with lid;
- screwdriver with a 51 mm crown.
we drill holes in the lid of the bucket of the future cyclone.
We drill two holes, with a crown, with a diameter of 51 mm in the lid of the bucket of the future cyclone. This is a bucket made from polymer putty. Finishing putty from many manufacturers is sold in such buckets.
install bends in the cover
We install plastic 90° sewer pipe bends with a diameter of 50 mm into the bucket lid.
All that remains is to insert the hoses from the vacuum cleaner into the outlets, put the lid on the bucket and the cyclone is ready.
cyclone with vacuum cleaner in operation
The photo shows a finished cyclone with a vacuum cleaner. This cyclone perfectly separates dust from the air. They are good at vacuuming construction waste.
how much garbage did the cyclone collect?
The photo shows how much garbage the cyclone collected in just a few minutes of operation. The vacuum cleaner bag remained absolutely clean.
Similarly, instead of a bucket, you can use a plastic barrel with a lid, but the barrel needs to be reinforced from the inside, otherwise it may collapse. This happens because the walls of the barrel are too thin.
Option 4: a simple cyclone made from plastic bottles
If you need a vacuum cleaner to clean your workplace after running a router or similar equipment, you can assemble a simple and compact cyclone from PVC sewer pipes and plastic bottles.
bottle cyclone
For assembly you will need:
- electric drill with drills;
- PVC pipes with a diameter of 50 and 110 mm;
- heat gun with glue.
- 2 corrugated pipes for the vacuum cleaner;
- 2 plastic bottles of 2.5 liters and one of 5 liters.
Do not use corrugated pipes that are too thin as they will make a loud whistling noise during operation.
Construction vacuum cleaner from an old household one
If you constantly deal with technology, the design features and operating principles become clear.
And if necessary, you will no longer spend money on a branded construction vacuum cleaner, but in a couple of evenings you will make a device whose characteristics are not inferior to the popular “cleaner”.
This is what the author of the construction model, based on the failed Whirlwind vacuum cleaner, did. We invite you to get acquainted with the manufacturing process of a construction vacuum cleaner.
When making a homemade product, you should take into account the characteristics of the room and some nuances of the selection and fastening of individual structural elements. The following are useful guidelines for assembling a vacuum cleaner.
What will be needed for the remodel?
Literally all the products involved in the modernization have already been used and therefore do not require acquisition costs. If you don’t have any parts on hand, you can buy them for pennies on an online sales site or find them in a landfill.
True, it is still recommended to use a new filter - for high-quality operation of the vacuum cleaner, and also to buy some little things: a socket, parts for the electrical board, wires, fasteners.
The total cost of purchasing new parts was 800 rubles, and the most expensive element was the socket - 350 rubles. Parts for the board cost 250 rubles, the filter – 200 rubles.
Shredder design for branches and grass
The purpose of the unit is to quickly and safely grind plant debris. The main function is performed by the cutting block. The knives are driven by the engine directly or via a belt drive. The units are installed on a stable frame. The moving elements are covered with a casing. Two compartments are made for feeding branches and unloading chips.
Metal frame
A homemade shredder with a powerful electric or gasoline engine needs a stable, durable frame with space to install the engine and a rectangular support for the cutting unit.
To make the shredder frame use:
- profile pipe 25;
- corner at 30;
- channel.
Fasteners:
- ears for the engine,
- nuts,
- hairpins.
Engine
Full autonomy, work anywhere in the garden, independence from the outlet - the advantages of a gasoline engine. A homemade shredder for processing branches, tomato tops, and grass is equipped with a motor from a motor-cultivator or walk-behind tractor with a capacity of 6 liters. With. It is moved from one unit to another.
You need a gearbox that provides 90° rotation if the gasoline engine has a horizontal shaft and the chopper has a vertical shaft.
Electricity costs are lower than gasoline, so if there is a network on the site, an electric motor is installed on the unit. To chop branches 2-3 cm thick, a 3-phase electric motor of 2200-3500 W is sufficient. When making a low-power grass cutter, they take engines from household devices. They are removed from washing machines and vacuum cleaners.
Knives
The thickness of the branches processed by the shredder depends on the design of the cutting unit. In home-made designs, several options are implemented:
- to grind branches with a diameter of 7-8 cm, several cutters are installed on the shaft;
- hammer-type cutting block for grinding thin rods;
- the universal cutting mechanism is made of 15-30 circular saws mounted on a shaft;
- knives from factory garden equipment - brush cutters, lawn mowers;
- chop grass - trimmer line;
- stump crusher from a plane;
- two shafts with 3-4 steel knives for cutting branches of bushes and trees.
Homemade knives are made from springs.
Protective cover
To prevent chips from flying around, you need a protective cover. It is made from sheet steel with a thickness of at least 1.5 mm. Tin is not suitable for this purpose. During active use of the shredder, it quickly becomes deformed from strong impacts of wood chips.
Container for receiving sawdust
Old shopping bags, boxes, buckets, and bins are used to collect small garbage. For powerful units, the bunker is welded from steel sheets and riveted from galvanized steel.
Electrical wires and start/stop button
To turn on and off a homemade unit, use a push-button station designed for the appropriate current. Its purpose:
- turning off and turning on electrical equipment;
- changing the direction of rotation (reverse).
To connect the engine to a three-phase network, you need a five-core flexible copper cable in double insulation; for a single-phase household network, a three-core cable is sufficient.
Cyclone vacuum cleaner for workshop
Another option for a construction vacuum cleaner, but with a more complicated design. This replacement for the commercial model is made from an old vacuum cleaner, a plastic container, and a cyclone filter.
The peculiarity lies inside the design - it is a metal casing to protect the filter.
The cost of homemade products is determined by spending on individual parts. An old, but working, household vacuum cleaner was found in the pantry, a plastic tank was purchased for 500 rubles, a filter for a Gazelle car - 180 rubles. It's easy to calculate the total cost.
You will learn how to make a cyclone for a vacuum cleaner from our article. It describes the assembly process in detail.
Source
Bender - thermobending pliers for PVC and acrylic
The tool allows you to speed up the process of assembling three-dimensional letters from PVC and acrylic. Two pieces for 4500 rubles. Reliable and convenient. The best assistant to the master layout designer! There is free delivery and cash on delivery! Call or write to clarify conditions
This thermobending device is based on the technology of heat treatment of plastic with its subsequent bending along the heating line.
Bender saves working time in production and allows you to make a product of higher quality.
Forget about cutting pieces and gluing them together - with an A-bender, you can make the side panel one piece and place one single seam on the top of the outside of the letter and the bottom of the inside of the letter.
This outdoor tool is scary to use for many, but only at first glance - once you pick it up, you will only use it.
The price is indicated only for our colleagues and customers. When purchasing over 1000 LED modules, you will receive it for only 2300 rubles . Or just buy a pair of these curling irons, their cost will be 4,500 rubles per pair .
The same for the A-angle. Manufacturer: Fuan, not polybend.
Making a garden vacuum cleaner and blower with your own hands: detailed instructions and useful recommendations
Purchasing a professional tool designed for cleaning fallen leaves is justified only for large volumes of work.
Cheap analogues often do not have the necessary properties or are much less reliable.
Therefore, the manufacture of homemade devices for performing this type of work is gaining increasing popularity.
We'll focus the bulk of this article on blowers, but we'll also talk about other tools you can make yourself.
Advantages and disadvantages of a press for installing eyelets
The main advantage of the grommet installation press is the principle of its operation - with the help of this tool you can simultaneously make a hole in the base fabric and attach the sleeve and washer (they are also called metal trim). When using a press to install fittings, you can forget about any other tools - you simply won’t need them, everything you need is done in one movement.
Special equipment is especially necessary when installing a large number of fittings.
One of the disadvantages is the cost of such equipment - the most modest model of a pneumatic press will cost at least 150,000 rubles. It would be better to tactfully remain silent about the cost of the most expensive options on the market.
Hammer drills come in different types. It all depends on the material on which the holes will be punched: paper, fabric, leather, etc.
How the devices work
Both the vacuum cleaner and the blower are united by a common operating principle - an impeller rotating at high speed imparts centrifugal acceleration to the air, which is why a high-pressure zone appears at the outlet, and a low-pressure zone at the inlet. As the impeller speeds up, the difference in pressure at the inlet and outlet accelerates the air to high speeds.
On some models of leaf blowers or garden vacuum cleaners with this function, this parameter reaches a value of 270 km/h or more . By changing the hose connection point, you can switch the operating mode of the device from a vacuum cleaner to a blower.
When operating in vacuum cleaner mode, it is necessary to either separate any dirt or remove only solid ones . In the first case, the collected leaves settle to the bottom of the filter bag without being crushed.
The advantage of this method is that you can use the impeller from an old vacuum cleaner, however, at such rotation speeds of this part, even a leaf from a tree that slips through the filter bag can damage the impeller.
In the second case, a durable impeller is installed, which not only withstands a collision with a leaf, but also effectively crushes it, due to which the volume of collected fallen leaves is reduced by 10–15 times.
Handmade poker and scoop for barbecue
Depending on the model you choose, you can make a poker yourself. This is a fairly simple process; Even a person without experience working with metal can handle it.
DIY rebar poker
The basis for production is a metal rod, the diameter of which varies from 8 to 12 mm. The rod must be heated in the fire, then flatten the tip of the workpiece on an anvil and bend it until the desired shape is obtained.
If it is not possible to use a forge, the heated metal can be bent to achieve the desired result using a hammer.
Making a scoop with your own hands
The procedure for making a scoop is also simple and requires performing a number of steps in a certain sequence:
- Draw the outline and fold lines of the scoop onto the steel sheet.
- Cut the workpiece along the contour and clean the edges.
- Place the workpiece in a vice and bend the sides.
- Apply weld seams.
After the working part of the scoop is ready, you can start producing the handle:
- Bend one end of the reinforcement into a loop.
- Flatten the other end with a hammer, bending it at an angle of 60 to 90 degrees.
- Weld the handle to the blade.
The handle can be secured using specialized rivets.
Is it possible to make these devices yourself?
You can make such a device yourself, but difficult to implement the grinding function at home .
The fact is that it is necessary to maintain a balance between the speed of rotation of the impeller and the power of the engine, and therefore the mass of the entire installation.
After all, you need such a high speed of rotation of the impeller wheel shaft , at which the foliage is not only crushed, but also completely removed from the surface of the part due to centrifugal force.
To solve this problem, mass-produced garden vacuum cleaners use a complex-shaped impeller made of materials that can withstand enormous centrifugal loads.
Therefore, most often, homemade vacuum cleaners-leaf blowers cannot chop leaves, but increasing the volume of the bag and using devices designed for shredding grass and leaves solves this problem.
We have already talked about such devices in this article. In addition, when making a homemade vacuum cleaner, you have to choose a method for sifting out leaves and other contaminants.
The problem is that the most efficient cyclone filters take up a lot of space, and small mesh ones clog quickly.
In serial devices, this problem is solved using the grinding function , so only the largest fragments that pose a danger to the impeller have to be sifted out.
This problem will have to be solved when making a garden vacuum cleaner of any configuration, so many people first make a blower to hone their skills, and only after that they begin to develop a vacuum cleaner model.
Selecting a filter type
For garden vacuum cleaners, 3 types of filters :
The mesh filter allows air and contaminant particles smaller than a certain size to pass through it.
They
can be made either car air filters or durable fabric .
The disadvantage of this type of filter is that the speed of air movement at the inlet of the vacuum cleaner directly depends on the filling of the filter.
Therefore, it is not well suited for leaf removal due to its small internal volume.
The advantage of this filter is that no objects that could potentially damage the vacuum cleaner or its centrifugal pump will pass through it.
The principle of operation of an inertial filter is that it is easier for air moving at the same speed as any solid fragments, including leaf litter, to change direction due to its lower density and mass.
The simplest model of a vacuum cleaner
For those who really don’t like to tinker with homemade products, we offer the simplest version of a vacuum cleaner. In general terms, the device consists of a plastic bottle. There is a hose on the neck to suck up debris. Inside the container, a motor with blades is attached to the bottom. A filter is installed between the fan and the inlet.
The materials you will need are a 1–1.5 liter PET bottle, a piece of corrugated hose, copper wire, a nylon stocking, batteries and stranded wire. The motor can be taken from a children's toy, but they are usually weak. In order for the vacuum cleaner to suck up debris well, it is better to remove the motor from a broken tape recorder or other electrical appliance.
The instructions for assembling the vacuum cleaner consist of the following steps:
Making a homemade product starts with the body. The bottle is taken from the Sprite drink. The choice is due to the irregular shape of the container, inside of which it is more convenient to place the parts. At the expansion site, the bottle is cut with a sharp knife. The top will form a lid.
The second part of the bottle narrows a little, and near the bottom it expands greatly. You need to randomly cut a narrow strip from the cut point. The narrowed part will easily fit inside the lid.
The housing is set aside and manufacturing of the fan begins. A durable and lightweight propeller can be made from a tin can for beer or drinks. Use scissors to cut off the bottom and top. The resulting cylinder is cut lengthwise, unbent and leveled to form a rectangular piece of tin.
A circle is drawn on the blank using a compass. The diameter of the propeller and the inside of the bottle near the bottom should almost coincide. Leave 2–3 mm for the gap so that the blades do not touch the walls.
A circle is cut out of tin using scissors. The blank is drawn with a pencil, dividing it into 8 identical triangles. Cuts are made along the lines, not reaching the center 10 mm.
The cut segments are bent at an angle. When rotating, the blades should draw in air, not push it out. In which direction to bend the petals depends on the direction of rotation of the motor shaft. Everything can be experienced experimentally. If the fan pushes air out, the petals can easily be bent in the opposite direction.
A hole is pierced in the center of the propeller with an awl. The impeller is placed on the motor shaft and secured with hot glue or a screw if there is a thread.
When the fan is running, air should come out from the bottom of the bottle. Holes are burned with a soldering iron, drilled or cut out with a knife.
The back of the motor is placed in a plastic plug. The wires come out on the side. The motor is glued to the plug or screwed with bolts if the body has threaded holes.
Using a hot gun, a plastic cap with a motor is glued to the inside of the bottom of the bottle. The engine is located strictly in the center. They try to turn the fan so that the blades do not catch the walls of the bottle.
A filter is made to protect the motor from dust. A ring is bent from thick copper wire to the diameter of the bottle. A piece of nylon stocking is pulled over the frame.
The filter is inserted inside the bottle in front of the motor. The ring should fit tightly. On both sides of the filter, the wall of the container is pierced with pushpins. Stoppers will prevent the ring from moving. To prevent the buttons from falling out, wrap the area of the bottle with electrical tape or tape.
A suction hose is placed on the neck of the second part of the bottle. It can be made from a piece of plastic corrugation for laying electrical wiring. The connection between the hose and the neck is tightly wrapped with electrical tape. Working nozzles are made from any plastic tubes.
The two parts of the vacuum cleaner are done and just need to be connected. The wires from the electric motor are routed through the ventilation hole on the bottom. You can connect it to the power supply, but pulling the wires behind the vacuum cleaner is inconvenient. It is better to glue a plastic battery compartment to the outer part of the bottom. You can take the mobile vacuum cleaner with you on the road.
Other homemade tools
Most homemade tools for harvesting leaves are analogues of commercially produced devices, so below we will talk about the most popular and useful of them.
Bag loading attachment
This device can be made from various materials, because its main task is to constantly keep the bag open. The nozzle is a U-shaped box , the dimensions of which are 1–2 cm smaller than the size of the bag. When it is inserted into the bag, it forms a large window together with it, thanks to which the leaves can be raked directly into the lying bag.
If the nozzle is made in the form of a funnel , then to load the bag it will be enough to fill it with collected foliage, then lift it and install it vertically, due to which the entire mass of foliage will slide into the bag under its own weight.
Trailer for walk-behind tractor
This device will be useful when transporting collected leaves to the boundaries of the site or a disposal site , for example, a compost pit or a pyrolysis gas generator that turns leaf litter into a flammable gas. In addition, the trailer can also be used to transport a garden vacuum cleaner.
Wire rake
Unlike conventional rakes, this device causes much less damage to the grass surface , and also makes it easier to collect leaves in hard-to-reach places. They can be made from ordinary galvanized wire, using ready-made analogues as a basis.
Transport cloth
This is a piece of dense fabric, to which a comfortable handle is sewn at each corner. Such a canvas is used to move collected heaps over short distances, from where all the material will then be transported to the disposal site.
The optimal size depends on the number of workers - the larger the canvas, the more leaf litter you can drag at one time, but the more people will be required for this.
Therefore, in most cases, the length and width of such a device fit into no more than 2–3 m.
This device is laid out in the place where leaves are collected and filled with a rake or blower, adding a pile of leaf litter. Then the rope is pulled, and the net covers all the collected material, so that when dragged to another place, the foliage will not fall out of it.
After reaching its destination, the rope is first loosened and then completely released, revealing the net and removing the collected material from it.
How to install grommets without tools
It is quite possible to rivet the grommet so that it closes the hole without special units; in some cases the result will be better, especially when compared with cheap, low-quality pliers.
Ways to install eyelets using improvised means:
- A bolt with a round head slightly larger in diameter than the grommet. Instead, a bearing, steel ball, etc. are also used. The striker is placed on the walls of the grommet and hit once or twice with a cloth, then the “petals” are bent with the same hammer, striking from the center to the edge of the grommet.
- Phillips screwdriver (or screwdriver bit). The sting is placed in the center of the grommet, on the wrong side, and the handle is lightly struck with a hammer, as if it were a hand punch. It turns out to be a quadrangle - the part is rotated 90 degrees and the blow is repeated. The walls move apart and are tapped with a hammer to make the edging flatter.
- A blade from a stationery knife. It is placed across the block and hit from above with a hammer so as to cut the walls almost to the fabric (or other material). Rotate 90 degrees and repeat the operation. You will need 3-4 such cuts. Then the “petals” are bent and flattened with a hammer.
Tips and tricks
Finally, we have some useful recommendations that will help you when you decide to make your own vacuum cleaner bag.
- If you plan to make disposable bags for your vacuum cleaner, then it is quite possible to use thick paper rather than material.
- If you want your reusable bag to serve you for a long time, but at the same time you do not want to wash it too often, then you can do the following. Take an old nylon stocking - if it is tights, then you will only need a piece. Make a tight knot on one side to make a bag from a piece of nylon tights. Insert this nylon bag into the main dust collection accessory. Once it's full, it can be easily removed and thrown away. At the same time, the bag itself will remain clean.
- Don't throw away the old bag from your vacuum cleaner, as you will always need it as a template for making homemade disposable or reusable dust bags.
- The fabric used for pillows is quite suitable as a material for making a reusable dust collector. For example, it could be teak. The fabric is quite dense, durable, and at the same time perfectly retains dust particles. A fabric such as non-woven fabric may also work. But it is not recommended to use old knitted items, for example, T-shirts or pants. Such fabrics easily allow dust particles to pass through, which can cause damage to the household appliance during operation.
- When making a pattern for a future dust collector, do not forget to leave a centimeter at the edges for a hem. If you don't take care of this, you will end up with a bag smaller than the original.
- For a reusable dust bag, it is best to use Velcro, which should be sewn into one side of the bag. It does not deteriorate even after repeated washings, but the zipper can fail very quickly.
Vacuum cleaner bag - what can you replace it with?
Before you start making a homemade dust collector for a vacuum cleaner, you need to find out what kind of dust collector was in the equipment before. The choice of material depends on this.
Garbage containers can be:
- Disposable. It is considered the best option because once the dust container is full, it is thrown away, reducing the risk of dust getting into the motor and into the air. It is a package, the entrance to which is framed by a cardboard frame. You need to put a rubber seal on it to avoid air leakage. Disposable containers are made from filtered paper, which allows air to pass through well but traps dust. Dust collectors made of synthetic fabric are rarely found. They are stronger than paper ones and hold more debris. You can only use accessories recommended for a specific vacuum cleaner model.
- Reusable. They are made from durable, breathable fabric. The advantage is that it is economical and can be used for a long time. After filling, the container is shaken out or washed and put back. Reusable collections have more disadvantages: they are less hygienic (when shaken out, debris gets into the air), they allow small debris to pass through, which can get into the vacuum cleaner motor. Harmful microorganisms also remain on the fabric.
Recommendations for use
Using a poker and scoop for a barbecue requires compliance with rules and recommendations, the main ones of which are:
- The poker should be longer than 40 cm. Products of shorter length not only cause discomfort, but also increase the risk of burning.
- The optimal length of the poker is 75cm; Otherwise, it is inconvenient to turn over firewood or stir coals.
- The poker should be light and not cause a feeling of heaviness.
- The scoop can be used not only to remove ash or wood chips, but also to clean the barbecue from shavings.
- The angle of the scoop handle should be comfortable for work.
- Immediately after use, it is recommended to hang the poker and scoop in one place on a special mount. It is usually located at the bottom of the grill.
- It is recommended to choose a poker with a sharp beak: it will be easier to split logs.
- There are models with additional spurs, with which you can get out extra logs or coals.
- It is better to break large logs or coals with a poker, which will ensure their uniform smoldering and also get rid of undercooked meat.
A poker is a must-have product in the arsenal of every barbecuer, through which you can control the position of firewood and coals in the grill: this is necessary in order to control the degree of roasting of the meat. You can either make the accessory yourself, or purchase a ready-made product: manufacturers also offer models with elements of artistic forging, which will be an excellent gift for a lover of grilled dishes.
Pros and cons of homemade bags
The main advantages of reusable consumables are durability, durability and minimal cash costs. For example, compared to disposable bags, reusable bags are replaced much less frequently and last longer. A reusable garbage container will not burst from the collected dirt and dust and can be used when collecting sharp, wet garbage.
The disadvantages include the growth of bacteria and the appearance of an unpleasant odor. In this case, flavorings should be used. The manufacturer does not recommend rinsing the garbage container under running water, because the capacity of the garbage container increases.
So why do people choose reusable waste bins? They are much cheaper compared to disposable bags.