Getting ready for work
First of all, you need to choose the necessary tire that is most suitable for the job. This means that it is better to find the most “bald” one, for the reason that it will be easier to cut. It is very good if there is a longitudinal pattern on it - this will also greatly facilitate the process.
Some tires have steel cord reinforcement (breaker). It is difficult to cut such a tire; in addition, there may be sharp ends of the cord sticking out at the cut site, which can cause injury both during the work and on the finished product. Therefore, preference should be given to an old tire with a nylon cord (the marking should contain the words “Steel”).
The selected tire must be thoroughly cleaned of dust and dirt, washed and dried - it is simply more pleasant to work with clean material.
We immediately prepare the instrument. You will need:
- chalk for marking;
- roulette;
- electric drill;
- drills 3 and 10 mm in diameter;
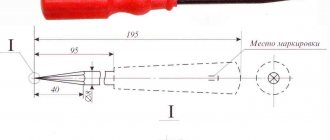
- sharp knife (with a powerful blade, like a shoemaker's);
- jigsaw;
- “grinder” with a cutting disc;
- pliers.
From additional materials:
- wire for staples;
- plastic metal rod (or thick wire) 1.2 - 1.5 meters long;
- paint to give the finished “swan” the desired color.
Of course, you need to be patient - the process ahead is quite labor-intensive and complex. For work, it is better to choose a fine day in order to carry out the entire process in the open air - during the drilling or cutting process, the rubber burns, which is accompanied by an unpleasant and difficult to remove odor.
Tools for creating a bird
There is nothing surprising or unique in the list of tools necessary for work.
The items needed to create a fairy-tale character include:
- chalk;
- drills with a diameter of 10 and 3 mm;
- electric drill;
- a simple tape measure for taking measurements;
- shoe knife;
- electric jigsaw;
- pliers;
Don't forget about the grinder and cutting disc.
Additional materials you will need:
- thick wire;
- dye;
- metal rod for staples.
The entire process requires patience as it takes a significant amount of time and is considered quite complex. The entire process of creating a blank for a swan is best done in the fresh air. And for this it is better to choose a beautiful sunny day. It will be difficult to remove the smell from burning rubber when cutting or drilling from the room.
Product marking
So, for example, we are working with an R13 tire, 165 mm wide. Its circumference is 180 cm.
Marking should begin by drawing two marks (lines) dividing the circumference of the tire approximately in half; this, in fact, is the length of the “neck” of the future “bird”.
Marking the future neck
Next, the “beak”, “head” and “neck” of the swan are drawn successively on the tread part of the tire. It’s good if there is a visible center line on the old tread pattern - this will greatly simplify the marking. If not, then it will not be difficult to carefully draw it with chalk.
So, from the first mark, symmetrically to the center line, a “beak” is drawn, the length of which is 8 - 9 centimeters, width - 3-4. The “beak” goes into the “head”, 10-12 centimeters long and 7-8 wide.
It is clear that where the “head” ends, the “neck” begins, which gradually expands towards the “body”, at its beginning it is 4 - 5 centimeters wide, by the end it reaches 8 - 10. The marking of the “neck” ends on that line, which divided the tire in two.
The last element of the markup is the “tail”. Partially it is already outlined, its fork is what will happen when cutting out the “beak”. All that remains is to draw two parallel lines with a distance between them of approximately 8 centimeters (across the width of the “head”) and a length of about 30 centimeters.
We've learned how to make the Swan's tail
, now figure out the flower beds from scrap materials.
Including tires. We plant rhododendron in the garden according to our instructions.
Cutting process
Perhaps this is the most labor-intensive manufacturing stage, requiring patience, dexterity and extreme caution to avoid injury. It would probably be useful to remind you that work should be carried out in strong work gloves in order to protect your hands as much as possible.
Remember safety! Do not neglect protective equipment: gloves and special glasses.
The cutting is carried out from the base of the neck to the head.
Depending on the material of the tire and the degree of its wear, this can be done in different ways. A heavily worn, thinned tire may succumb to a shoemaker's knife. Thicker treads can be cut using a grinder, but this process is quite dangerous and is accompanied by a lot of smoke and the smell of burning rubber.
If you have a jigsaw of sufficient power, then after making the initial holes with a grinder, it is better to use it.
First we make the holes with a grinder, then we will use a jigsaw
Experience shows that it is better to choose a jigsaw file with fairly frequent teeth pointing upward - this will greatly simplify the process. The operation should not be carried out at high speed of the tool; on the contrary, it should be reduced by half.
To insert the jigsaw file into the right place, you can make a slot with a grinder or simply drill holes on the edges of the “neck” with a 10 mm drill. By the way, the work will be greatly simplified if the same holes are drilled at all the turning points of the marking.
It would be a big mistake to cut out one side first and then switch to the other; working with a jigsaw in this case will be complicated by strong vibration that interferes with the process. It is better to cut both sides in parallel, in small sections of 4–5 centimeters. You can simplify cutting by resting the tire from the inside against a piece of wood (board), gradually moving it as needed.
We saw along the marked lines with a jigsaw
Having finished cutting, it is necessary to carefully process the edges of the resulting parts. If there was a metal cord in the thickness of the tread, you will need a grinder to grind off the protruding steel wires. If the cord was nylon, it will be enough to trim the edges with a sharp knife.
Turning the tire inside out and giving the “neck” the necessary bend
In order for the “wings” resulting from the sidewalls of the tire to gain the proper scope after cutting, the cut tire must be turned inside out. This will not be much work - a little effort with your hands and the help of your feet will easily turn out a tire that has lost its integrity.
Turn the tire out; it will take some effort on your hands and feet.
As a result, the “swan” has already spread its “wings”, but its “neck and head” lie limply on the ground - they need to be strengthened and bent properly. For this you will need a prepared steel rod.
First, you need to drill paired holes with a diameter of 3 mm along the center line, symmetrically to it. They are drilled starting from and to the beginning of the “tail”, with a distance between pairs of holes of about 15 centimeters.
We drill paired holes along the neck every 15 cm.
The required number of staples are prepared from soft wire, which are threaded into the holes made. These brackets will hold a metal rod that gives rigidity to the structure.
We insert these staples into the paired holes made in the swan’s neck
Insert the staples like this
It is better to start laying the rod from the bottom, twisting the protruding ends of the brackets around it with pliers. After cutting off the excess, the “swan neck” can be given a characteristic bend.
Some may find it simpler or more accessible to use a steel strip instead of a rod - this is also a completely acceptable solution. In this case, steel and rubber can be connected using bolts or rivets.
We secure the metal rod along the neck with prepared staples
Next, the neck, with the rod already attached, is bent to the desired shape of the neck of a real swan.
Essentially, the “mechanical” part of the work is completed.
Do you like flowers? Read about planting and caring for phlox.
We grow heather in the garden, an article about this unpretentious plant.
The garden needs to be lit. But with what? Overview of types of lamps - https://greennirvana.ru/osveshhenie/svetilniki/ulichnyie-svetilniki-dlya-dachi.html
Location of swans on the site
The natural habitat of swans is ponds. Therefore, they look harmonious near water or its imitations. If there is a pond on the site, then you can plant the swan near it or install it using a stand in the pond. Then the swan will rise majestically above the surface of the water.
It is possible that you may need material on making drip irrigation from plastic bottles with your own hands.
Rubber birds will decorate your lawn or flower bed. You can pour soil inside the sculpture and plant your favorite plants there. For stability, use a stand in the form of another tire. It needs to be painted to match the color of the swan or the surface on which it is installed.
You can arrange a special pond for swans. To do this, you need to make a small pit, line it with a thick film, secure the edges with stones, pour pebbles onto the bottom of the film and pour water. Swans will look extraordinary near such a lake.
You might also be interested in the process of building glass gazebos.
Other ways to use tires on the site
Fans of original decor will love other decor ideas. A swan can easily be turned into a parrot. To do this, you just need to make the cuts a little differently and paint the product in a suitable way. Tires can easily be turned into a garden bed or even a mini-pond.
Used tires are used by summer residents not only for arranging flower beds and small architectural forms. This material was not ignored by adherents of practicality in design. Craftsmen make wonderful furniture from tires. These are not only simple poufs, but also more complex chairs and tables in the colonial style. Such ensembles are complemented by swings on playgrounds and tire fences.
All information about crafts made from polyurethane foam can be found at this link.
Painting and installation
“Swan”, in principle, is already ready, all that remains is to bring its appearance to the required state.
It is necessary to carefully check again whether the resulting figure has sharp, cutting edges or protruding wires. Children are very curious and will definitely want to explore the “bird” with their hands - the possibility of scratches and wounds must be excluded.
You can paint it in the color characteristic of swans - white or black, but this is not particularly important, the main thing is that the paint is resistant to atmospheric influences. The beak will stand out well if it is made red. If desired, you can make “eyes”, for example, using the wide heads of large bolts.
Here is the resulting swan
You can install the finished “bird” on a stump, a post, or simply on the ground, sprinkled with earth for stability. A good option is to use another tire for the base, painting it, say, blue.
By the way, having gained experience and still having bad tires in stock, maybe it’s worth making a “girlfriend” for the first-born “swan” next weekend?
Video: master class on how to make a swan from a tire
The video explains in detail how to make a swan from a tire:
To make a swan from tires you will need imagination and certain skills in working with tools. Ladies should not take on such work. In skillful hands, the figurine will turn into a worthy element of landscape design. You can create entire groups or use single sculptures. It all depends on the characteristics of your site. This decor always looks cute and homey. This applies to everything that is done with your own hands.
Maybe