Why doesn't the candle work?
In addition to electrical reasons - breakage and breakdown, failure or unstable operation of the spark plug can be caused by trivial things. For example, an incorrect gap. We look at the car's operating manual, take the correct feeler gauge to determine the gap and bend or straighten the contact. Another reason is carbon deposits. Carbon deposits, especially black, greasy ones, can be caused by low-quality fuel, improper adjustment of the engine power system - old drivers talk about this phenomenon as “overfilling”. Or, in the worst case, wear of the oil scraper rings. Which is fraught with engine disassembly and repair. The spark plug is cleaned of carbon deposits using various mechanical and chemical methods. The simplest thing is to remove carbon deposits with a metal brush and rags, and additionally clean the electrodes with sandpaper. If the spark plug is clean and the gap is set correctly, we check for electrical problems.
How to identify faults?
Tester for diagnostics of the SZ
It is not so difficult to identify the performance of the SZ on your own - this can be done both by visual inspection and by analyzing the performance of the engine. One of the main symptoms of an SZ failure is non-standard engine operation. In particular, we are talking about the difficult start of the power unit, its unstable operation, in particular at idle speed.
But besides these symptoms, there are many other signs, which are given below:
- In particular, we are talking about the rotation of the crankshaft. The crankshaft rotates at the required frequency, but the power unit does not start because ignition, i.e., ignition of the air mixture, does not occur in the system.
- Presence of flashes in the cylinders. If flashes of the air-fuel mixture occur in the cylinders, this can lead to unstable engine operation. In particular, the internal combustion engine will work intermittently.
- Poor engine starting. In principle, the engine can start, but if the starter stops working, the engine also stops.
- Increased gasoline consumption. If there is no ignition of the air-fuel mixture, then engine power is either reduced or completely lost. Accordingly, compensation of engine power is carried out as a result of supplying an increased portion of fuel to the cylinders. Ultimately, this leads to excessive fuel consumption.
- Failure of the catalyst. If the system does not ignite, the air-fuel mixture will not be able to ignite. Fuel that does not ignite will enter the catalyst and oxidize, thus contributing to its failure.
- Problems starting a cold engine. At the moment when the driver turns the key in the ignition switch, cold SZ can collect condensation, which in itself is a good electrical conductor. If the gap between the SZ electrodes is increased, the breakdown voltage level should be increased. However, at home it is impossible to increase it, since electricity will flow through these same electrodes and ceramic cone.
- Another, no less important sign is the presence of traces of mechanical damage on the surface of the spark plug. This indicates, if not a complete breakdown, then at least incorrect operation of the SZ, which over time can lead to its failure.
- Presence of soot and deposits on the SZ electrodes. In addition, if the SZ smells of fuel, this indicates a malfunction of the system itself, as well as the spark plugs.
- High-voltage cables on the NW can also contribute to the deterioration of engine performance. Especially if these wires are damaged.
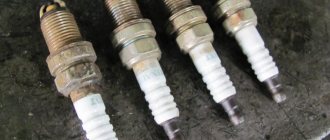
Two SZ - with and without plaque
Visual method
As already noted, the simplest diagnostic method is visual. How to check the performance of spark plugs? Here special attention is paid to appearance. The following are photographic examples with different conditions:
- Normal working condition.
- Increased fuel consumption.
- Weak composition of fuel and air.
- Excessive formation of additives.
- Oil seals are in poor condition.
- One of the valves or the partition between the piston rings is broken.
- The engine was running too long or poor quality fuel was used.
- The oil burned due to wear and tear of the piston oil rings.
How to check the serviceability of spark plugs? On them we exclude: deformations, chips, various scratches, etc.
If there is soot and burning on each heat cone, then the fuel is supplied evenly and burns out stably. If there is a difference in the amount of carbon deposits, fuel supply is problematic.
This is interesting: Replacing the CV joint on a VAZ 2114 and the outer boot with your own hands
If there is oil deposits on the elements, this is a sign that the engine fuel technology must be restored.
We also exclude dark paths. This is a sign of a damaged glazed coating.
If one or more of their designated signs were detected, this is not yet evidence of complete deterioration. This can only be absolutely verified with equipment.
How to check the performance of spark plugs
The design of most cars allows you to disconnect the ignition elements without much difficulty. This makes the process of checking spark plugs easier.
There are several ways you can carry out this procedure without resorting to the help of specialists:
- "to the sound";
- "to spark";
- using a multimeter;
- using a "gun".
The first two methods are the simplest. Even a novice driver can cope with them. They do not require special tools or skills. Devices designed to carry out such a procedure are also easy to use. If you wish, you can create your own device that performs these functions.
Spark plug
Sound check
Malfunctions in the engine cylinders affect the sounds it makes. If one of the parts does not cope with its functions, the cylinder does not work correctly, and the nature of the sound of the engine changes. This property can be used for diagnostics. You must proceed as follows:
- Start the engine. Remember the sound it makes.
- Disconnect the wires from each spark plug (one by one), checking at the same time for any changes. If you disconnect the working spark plug, the unit will make a noise different from the original one.
- A non-working element can be identified if, when the spark plug is turned off, the sound of the engine does not change.
This is the easiest verification method available to everyone. No tools are needed to carry out such diagnostics. However, the method has a number of disadvantages. The first is to use fuel during the test. The second is the impossibility of establishing the nature of the breakdown and its cause. The method only allows you to identify the malfunction and replace the element.
Additionally, the sound changes are not always clear enough to detect the problem. In some cases, it is quite difficult to notice the difference. Using a spark test, it is easier to detect the problem. A more reliable way: build a stand for checking spark plugs with your own hands.
Checking for spark
The second method is no less simple, but you will have to remove the candle. Therefore, the car owner must have a special key designed to carry out this operation. If not available, it can be purchased at any auto parts store. To check, you must first remove the element. First of all, the wire cap is disconnected from the part. Next, it is removed using a special key. Before proceeding directly to the performance test, it is necessary to carry out certain preparatory work. The surface of the spark plug must be cleaned of deposits, and the gap between the electrodes must be checked using a feeler gauge (you can find out the standard value of this parameter by reading the vehicle’s maintenance manual).
If the gap complies with the regulations, you can begin checking. To do this, you need to connect a high-voltage wire to the unscrewed spark plug and lean the latter against any part of the vehicle made of metal (this creates an electrical contact). After turning on the starter, you need to monitor the spark produced by the spark plug. The absence of a spark is evidence of a faulty part. Red sparks indicate abnormal operation of the element. The working part produces powerful and bright blue sparks.
Multimeter
Using a Multimeter
Despite popular belief among the population, a multimeter is not a device for checking the performance of spark plugs. Its use does not guarantee identification of a non-working element. However, using this device you can check the spark plug for a short circuit inside, as well as the wires going to it.
In order to check for a short circuit , proceed as follows:
- Unscrew the spark plug.
- Connect one wire of the device to the input of the element, the second to its thread, that is, the base.
- Set up the multimeter (resistance – twenty kOhm).
If a contact is detected during the test, the cause of the problem may be a defect in the insulator, which leads to a short circuit. If there is contact, resistance appears, which is shown by the multimeter. At the same time, you can check the resistance of the wires. If this parameter is lower than required, parts need to be replaced.
Piezo gun
Do-it-yourself checking of spark plugs under pressure is carried out using a piezo gun. This is a special stand that allows you to check spark plugs for functionality without unscrewing them from the engine. It looks like a gun with a probe, equipped with a special lamp (serves as an indicator) and a plastic cap containing a core connected to a wire.
This is interesting: Why does error P0134 appear and how to eliminate it on VAZ cars?
Before starting diagnostics, it is necessary to thoroughly clean the part to avoid incorrect results. After this, the high-voltage wire is removed from the element, in its place a plastic cap is installed. The tip of the gun should rest against the cylinder head. After several pulls on the trigger of the gun, its indicator lamp should flash. This is a sign that the part is working. If this does not happen, the element must be replaced.
A small generator is hidden under the body of the gun, which is the main element that allows you to check the performance of the spark plug. The advantage of the method is the ability to check without starting the engine and wasting fuel. The device is notable for its low cost (for example, the price of the “TEST-M” model ranges between two hundred rubles).
Piezoelectric element from a lighter
Testing devices you can make yourself
There are a large number of schemes according to which you can independently build a stand designed for testing candles. A DIY device will help you save money. Such devices can be used repeatedly. The method is suitable for those who are interested in design and want to have their own devices at their disposal.
Checking using a piezoelectric element from a lighter
A cheap way to check is to use a tool made from a simple lighter. It needs to be disassembled. The device will need a piezoelectric element contained inside. The wire coming out of this module can be extended.
To check the functionality of the spark plug, just connect the wire to the tip of the spark plug and attach the body of the piezoelectric element to its body. After pressing the button on the piezo module, a spark should jump out. If it is not there, the part needs to be replaced. The design of a simple homemade tester looks like this:
The device has one significant drawback. When working, pressure is applied to the part. With the help of a tester based on a piezoelectric element, no pressure is created. Therefore, the results may be incorrect.
Factory product
Factory made tester.
The factory device for testing spark plugs under pressure has the following main components:
- a pistol-shaped body equipped with a special tip that acts as a probe;
- indicator light;
- a plastic cap containing a core inside connected to a wire;
- There is a small generator located inside the device, its purpose is to diagnose the performance of the SZ.
When checking the serviceability of the SZ using the device described above, there is no need to start the engine - this allows you to save fuel mixture consumption.
The performance of the SZ is checked in this way:
- inspect the SZ, if there are external defects (carbon formation, damage to the integrity of the spark plug body, damage to the contacts), replace the products with new ones;
- disconnect the high-voltage wire, install the plastic cap of the measuring device in its place;
- rest the tip of the “gun” against the cylinder head;
- Press the button of the measuring device several times, while watching the indicator light; the presence of flashes on it indicates the serviceability of the diagnosed SZ.
Please note: the absence of sparking during diagnostics indicates a malfunction of the tested spark plug.
The main drawback of the device is the measurement error; it is impossible to judge by the presence of a spark that the spark plug is 100% serviceable: the pressure created by the “gun” differs from the pressure parameter acting inside the engine. The generated spark may not have enough power to ensure normal operating characteristics of the power unit.
How to make a device for testing spark plugs under pressure with your own hands
To assemble such a device, you need to prepare the following:
•two syringes: one 20 ml and one smaller volume, which will be used for applying glue;
•goujon: corresponding to the diameter of the candle;
•glue.
When everything you need is already at hand, we begin to manufacture the device. To do this we do the following:
•cut off the nose of the syringe;
•apply glue to the resulting cut;
•install a threaded bushing (goujon); It is better to insulate the fastening with sealant. We check the part as follows: screw it into the threaded bushing, then connect the high-voltage wire to it. The element body is connected to ground. Then we start the engine. Using a syringe, we carry out a pressure test - this means you need to press on its piston. If the spark is weak or completely absent, then we change the part.
As you can see, checking the performance of a spark plug is a simple matter even for a novice car enthusiast. This can be done either with the help of tools that are available in the market or with a homemade tester. It is necessary to take into account that the pressure level obtained from a home-made device may not coincide with the indicator that is formed when the spark plug operates during actual operation of the car.
Even if it is impossible to detect minor problems in the operation of spark plugs with the help of such devices, they will help identify a spark plug that does not work at all.
Why is this device useful?
A device for checking spark plugs with your own hands can be easily made even by a novice motorist. Having checked the ignition elements using this device, you can consider the whole picture of their operation, namely the following results: 1) Spark power. Its color can always tell the car owner whether the spark is capable of igniting the fuel mixture. Strong sparks are white and blue, weak sparks are pink. It may also happen that there will be no spark at all. 2) How the spark behaves at different speeds. A do-it-yourself spark plug tester diagnoses the operation of the electrodes under pressure, while it recreates the lowest and highest speeds. 3) The device can be used as a candle cleaning tool. If the spark plug is made with electrodes made of precious metals, then to clean the spark plugs you only need to get a powerful spark. Since there is no fuel to ignite, no additional carbon deposits are applied to the electrodes. In other words, the surface being cleaned receives a charge from a powerful spark - under conditions of high pressure, it burns carbon deposits on the surface.
This is interesting: How to install lenses in a headlight yourself - useful tips for car owners
Making a simple ignition tester with your own hands
One of the most common breakdowns in gasoline cars is ignition problems. In this article we will tell you how you can easily and simply make a portable ignition tester for your car using available materials. We need:
- syringe (20 cubes)
- the wire
- spark plug (any old or unwanted one will do)
We cut off the thread of the candle in a circle. We will use it as a connector for connecting the ignition module or high-voltage wires.
Products for inventors Link to the store.
You should end up with something similar to this: you need to cut the threads, but leave the insulator intact.
We take the syringe and cut off its nose. We also remove the piston. We make a hole strictly in the center and insert our candle there. It is best to make the hole using a soldering iron. This is what the picture should ideally look like:
DIY electronics in a Chinese store.
After this, glue the candle to the syringe using thermal or superglue. We make a hole in the center of the piston, insert a wire into it and also secure it. On the other side, we attach a crocodile clip to the wire. We will hook it to ground.
We insert the piston into the syringe and get a fairly simple spark gap. In addition, we also change the distance to the spark. When checking, it will not matter to us whether the car has a common ignition module or a separate one. We hook the crocodile to ground, remove the high-voltage wire from the car and put it on the tester. If everything is good, then we will see a spark inside the syringe.
zen.yandex.ru
Device option for testing, checking spark plugs under pressure
There is also another type of homemade spark plug tester. One folk craftsman assembled such a device with his own hands - as he himself said, not to make it cheaper, but to create a device with his own hands - and he did it perfectly. This tester is made in the form of a box, and also consists of an ignition coil, a switch and a Hall sensor emulator, and a compressor for inflating the wheels inside this box. At the top there is a pressure gauge, which allows you to control the pressure in the chamber, as well as the chamber itself in which the candle is placed. A cooler is installed to purify the housing in case of checking a large number of spark plugs.
On the right side there is a fitting, including a tap, to which air can flow from an external compressor.
A battery is used to power the device. Protection against polarity reversal is provided.
A turner worked on the chamber - he turned out a cylinder into which the spark plug should be screwed. The chamber has a spool for bleeding air, in the lower part there is a fitting that supplies air, in the upper part there is a window to monitor the formation of a spark. There is a small mirror installed inside the chamber, which makes it possible to see the end of the spark plug and check whether a breakdown has formed on the insulator of the central electrode. A spark appears only between the central and side electrodes, even if there is pressure. An abnormal spark can be seen here. The spark plug worked normally, but after the pressure in the chamber increased to 6 bar, the spark stopped appearing between the central and side electrodes, but appeared under the skirt of the spark plug. That is, the spark plug generates a spark, but it will not ignite the fuel mixture. In this case, the spark plug works well at idle, but if there is a load, misfires will begin. You can view all the other information in the video. The device itself is described in detail here, how to make the device, and how it works is shown.
Assembling a spark plug tester
The device is made on the basis of any kitchen electric lighter. When purchasing it, you may mistakenly take a gas lighter. You need one that does not burn, but only generates a spark for ignition and is powered by batteries. The lighter body is disassembled. You need to remove the metal rod coming out of it; it will no longer be needed. The wires connected to it are disconnected.
There are 2 holes made in the upper front half of the body. A large clamp is screwed through them onto the screws. It must be positioned in the same way that the removed rod was secured.
A wire from a lighter coil is connected to the crocodile. It will also require drilling or burning a thin hole in the housing. The second wire needs to be brought out from the side. For this, a separate hole is drilled. To make it wear out less, it should be protected from fracture with heat shrink. A small clip is attached to the end of the wire. Most likely, the length of the existing wiring will not be enough, then before installing the heat shrink and clamp, you will have to extend it with a small section of 15 cm.
The device body is assembled and 2 batteries are installed in it. For aesthetics, you can cut the insulator removed from the large clamp lengthwise. The resulting segment is glued to the bare crocodile handle, screwed to the body.
To test a candle, it is clamped in a large crocodile on the threaded part. A small clip is placed on the contact tip. After pressing the button, the high-voltage converter delivers a discharge to the spark plug. If it is working, then a striking spark should appear in its gap between the side and central electrodes. A spark plug that is not working will not have a spark.
Homemade tester for checking the ignition system
In gasoline cars there is often a need to check the ignition system; I suggest making a very simple tester for the ignition system. For these purposes, we only need a 20 cc medical syringe and a piece of ordinary wire.
We also need an old spark plug; we need to cut the threads around it (with a grinder).
We will use it as a connector for connecting high-voltage wires or the ignition module.
In the end it should look like this:
a cut candle with a intact ceramic insulator but with a cut metal thread.
Next, take a 20 cc syringe, bite off the spout, we don’t need it,
remove the piston. You need to make a hole in the center of the syringe and insert a candle there. It is best to make a hole with a regular soldering iron; we expand the hole with a soldering iron so that the candle completely fits into the syringe. The candle should fit into the syringe.
The candle needs to be glued to the syringe with simple hot glue. We drill a hole in the center of the syringe piston; we will need to insert a piece of ordinary wire into it.
We insert the wires into the drilled hole and glue it with hot glue.
We attach a crocodile to the opposite end of the wire, which we will connect to the ground of the car.
We insert the piston back into the syringe, you get this kind of spark gap with a variable distance for the spark.
And in order to prevent the markings on the syringe from being erased, we wrap the syringe with several layers of tape.
Well, now the tester is in action... it doesn’t matter whether we test a system with a common ignition module or with separate ignition coils for each cylinder.
In my case, this is a common ignition module, from which wires go to each spark plug separately. We connect the wire from the tester somewhere to ground, remove the high-voltage wire from the spark plug (which we will test) and put it on the spark plug that we cut and installed in our homemade tester. This way we can observe a spark inside the tester. Manually we can increase the spark gap and look at the maximum distance the spark strikes. So, we start the car with three spark plugs, move the syringe plunger and look at the spark. A spark is visible in the syringe; move the syringe as far as possible until the spark disappears.
In my case, the spark began to disappear more than 3 centimeters, the norm is considered to be at least one to two centimeters. In this way, all cylinders are checked and a broken wire or faulty ignition coil is very easily identified.
With such a simple homemade product you can easily determine the malfunction of the ignition system, thank you all and have a smooth road.