Once upon a time, only royalty and noble nobles had a personal seal. You can use the author’s advice below and make such an unusually interesting thing for personal use. You will find it useful for sealing hand-made wedding or anniversary invitations, and you can also use it in decoupage and other types of hand-made needlework. For people working on a commercial basis, it is generally irreplaceable - you don’t need to make name tags for your works, just take jute twine and hang an imprint of your personal seal on the product instead of a tag on the product.
To work, you need to prepare the following materials and tools:
1. A small piece of flat wooden stick. The author advises using a small piece of a shovel handle, which can be bought in construction supermarkets. 2. The tape is not wide. 3. Simple pencil. 4. A picture of the future print printed on a printer. 5. A collet knife or a small, thin, sharp knife. 6. Wood burner. 7. Sandpaper. 8. Soft rags. 9. Napkins. 10. Vegetable oil. 11. Drying oil. 12. Brush for applying drying oil. 13. Matches. 14. Sealing wax or wax candle.
1 step.
First, we thoroughly sand the piece of stick using sandpaper.
We will especially carefully polish the end side on which we plan to place the seal. Then, using a collet knife, we very carefully cut out the image of the previously printed seal. The author recommends printing the blank on thick paper.
Making a template for future printing is a painstaking job that will require your full concentration. This is roughly what a neatly cut blank for printing should look like: Step 2.
Then we apply the cut-out design to the end side of the previously prepared stick, secure it with tape and paint over the wooden surface with a pencil through the cut-out design on the paper.
It is very important not to forget that the template blank must be applied in a mirror image, otherwise you will end up with an incorrectly positioned seal. This is approximately what you should get as a result of painting:
step 3.
Then, using a burning device, we carefully burn the wood according to the drawn template, while trying to burn the wood to the same depth.
Step 4
Now you need to process the blank for printing using drying oil.
Then thoroughly dry the workpiece with a rag and leave it to dry for 24 hours. After the drying oil has completely dried, your seal is ready for use.
You can put your personal stamp on sealing wax, wax, paraffin and even use hot glue from a hot glue gun for these purposes. This glue comes in different colors, so try and experiment. But keep in mind that sealing wax will be the strongest and most durable. To make a seal imprint on wax, light a candle and drip hot wax where you want your personalized seal to be. The wax should be given a little time to cool slightly. This time is approximately 15-20 seconds. At this time, dip the seal in vegetable oil and carefully blot off excess oil with a napkin. Then press the seal tightly onto the slightly cooled wax and leave it until it hardens completely. Many centuries ago, only those of royal blood and titled nobles at the royal court were given the privilege of having their own seal.
Today, anyone can purchase a personal one. The seal is no longer the exclusive symbol of power and might. In addition, if you wish, you can make it at home instead of ordering it from a specialty store. This will be discussed in our article.
Why might you need a wax seal?
A wax seal created by yourself will allow you to decorate gifts, letters, souvenirs, hand-made items and much more with unique imprints.
The ice cream can be used:
- when decorating and sealing invitations - for a birthday, wedding, engagement, party, anniversary and so on;
- in decoupage and scrapbooking;
- when making homemade cards;
- when writing special letters and arranging gifts.
Wax seal is most popular among craftsmen, in particular scrapbooking (decorating personal and family albums). Print impressions will give products individual, unique features and an unusual style.
Let's figure out how to make a sealing wax seal at home using one of the simplest step-by-step instructions. This will greatly simplify all further work - for example, you will not have to come up with and develop the design of copyright logos and tags. However, it should be borne in mind that the printing process itself is quite long and requires attention and painstaking work.
Vegetables and fruits stamp
For those who do not know how to make a stamp with their own hands from improvised materials, you can use the simplest option: make stamps from vegetables or fruits that are found in the house.
In this case, everything depends on the density and structure of the selected product.
- For example, you can easily make a stamp from a potato with your own hands, just like you can from an eraser or cork. The vegetable is cut into pieces and a design is cut out on the cut.
- You can cut out hearts, stars, animal paw prints and much more.
- Other vegetables form a certain pattern when cut (for example, onions). It can be printed without additional processing.
Such simple designs can be used to decorate children's clothing or other surfaces.
Step-by-step instructions for making a seal at home
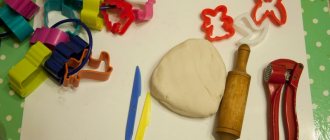
Before you start creating a sealing wax seal, you should prepare for this process and select all the necessary materials. Depending on your printing needs, you may need:
- glue;
- clay, plastic or ready-made modeling kit;
- embossed buttons and epoxy resin.
One of the easiest ways is to create the desired tool using buttons with a relief surface, chess, nail polish remover and resin. Buttons can be pre-polished - this will create a better impression.
Step one
. The checkerboard surface is cleaned of dirt and dust using nail polish remover.
Step two
. Buttons are washed and wiped dry.
Step three
. A ball is formed from the resin (which, when leveled, should cover the bottom of the chess piece).
Step four
. The button is carefully pressed into the epoxy resin. After this, you should wait until the mass hardens.
Step five
. The sealing wax is melted and an impression is carefully made.
Recommendations
. To prevent the sealing wax from sticking to the button, the seal must be slightly cooled before use. If there is some material left in the recesses of the button relief, it can always be cleaned off with a knife or dissolved with nail polish remover. The seal itself should always be kept clean.
Working with a lamp
The resulting “sandwich” must be placed in an ultraviolet nail dryer with the negative side down. After this, turn on the lamp for one and a half minutes. You need to clearly record the time, so you should use a stopwatch. After this, we turn the “sandwich” over and send it out to dry again.
After this, you need to disassemble the structure. To do this, first remove the clamps, and then the sides. The seal itself will be sticky, so you need to rinse it under running water. Additionally, it is worth using a soft brush to wipe off the remaining polymer composition. You need to act with extreme caution. You need to wash the seal until it is completely clean. However, even after this it will be slightly sticky.
Disadvantages of homemade printing
As we have already found out, creating a simple seal is a task that is feasible for almost everyone. However, homemade fillings have a number of disadvantages. For example, the product may not work out the first time or may not fully meet the requirements. In addition, the imprint of a homemade seal does not always look clear and even.
But over time, you can improve the technology for making ice cream, stock up on the necessary materials and correct all the errors.
The time for letters sealed with wax is long over; now wax seals are used in narrow industries for specific purposes and by an extremely narrow circle of people. And if you decide to send your girlfriend a romantic letter with a stamp, then you can do it quickly and easily, you just need to walk through the pages of our website. And after reading this article, you will find out what sealing wax is made from and what it is.
Drying the print
In order for the product to last a long time, additional processing will be required. First of all, the print must be dried using a regular hair dryer. This will help completely remove any remaining water. But that's not all.
Additionally, you need to sprinkle the finished product with baby powder and shake it off. After this, the seal will no longer be so sticky. But it is also necessary to remove the remaining powder. For this you will again need a toothbrush.
If the product is not hard enough, you can additionally illuminate it in an ultraviolet lamp. But, you should not hold the seal for more than 3 minutes. But you can do without this step.
Preparation of sealing wax:
It is necessary to carefully melt the rosin (shellac can be used) in an enamel container; when heating, it is necessary to stir constantly. When the rosin is completely melted (the rosin should neither burn nor boil), you need to add turpentine, after which you need to gradually pour in a mixture of chalk and sulfur-barium salt, gradually stirring.
You can color the sealing wax by adding mineral paints (cinnabar, ocher, chrome yellow) to the hot mixture. To obtain brighter colors, you can use aniline dyes, which dissolve in fat. The main thing is that your paints are not temperature sensitive!!!
When all your mixture is mixed, you need to take a little and carefully drop it onto a wooden surface to check whether your sealing wax has acquired the desired properties (color, hardness and fragility).
After the mixture is ready, it must be poured into molds after lubricating them with oil and heating them.
We study leather embossing in a combination of design and inscription
The first step in making such embossing will be to first soften the leather with a sponge soaked in water. Then, using a stylus, apply light pressure to apply the design, resulting in a light imprint on the surface of the skin.
The next stage in this kind of embossing is cutting out an image on the skin with a special scalpel. You need to cut carefully, the result should be slices that are identical on both sides.
Stamps with several head sizes are used to create cuts and lines using a hammer to give them a 3-D effect.
After the desired volume is achieved, the rotary knife removes all imperfections on the surface of the leather product and smoothes out all roughness. The embossed image is created using special leather paint.
When the leather paint has completely dried, the leather product is carefully polished with a soft cloth.
Sealing wax recipes:
1) Red (highest grade):
a) 8640 g of gum varnish, 3600 g of Venetian turpentine, 5760 g of the best cinnabar, 135 g of Peruvian balsam,
b) Melt: 12 shellac, 8 Venetian turpentine, 9 cinnabar, 3 magnesia, 2 turpentine.
2) Wax for parcels:
a) 2000 g of rosin, 1000 g of pine resin, 30 g of turpentine oil, 750 g of chalk, 500 g of turpentine.
3) Simple black sealing wax.
a) Mix 6480 g of gum varnish, 3600 g of Venetian turpentine, 2880 g of chalk, 720 g of Dutch soot.
PS: I tried to clearly show and describe non-tricky tips. I hope that at least something is useful to you. But this is not everything that can be imagined, so go ahead and study the site
We first encountered the need to apply a wax seal 3 years ago. The client wanted to decorate gift chocolate with sealing wax. And the client’s desire, as we know, is the law...
We bought a bunch of unnecessary (as it later turned out) equipment and got to work. The process went slowly and looked like this. One man was carefully applying wax seals. The second methodically tore them off: the prints turned out crooked and a good half of them were wasted. Of course, we fulfilled the order. But we spent a lot of time, nerves and money.
In general, as expected, the first pancake came out lumpy for us. But the very idea of using wax seals on packaging seemed interesting to us. We started experimenting. And our experiments were crowned with success.
Step-by-step instructions for embossing leather
Let's look at a step-by-step example of working using the cold stamping method:
- First you need to decide what kind of leather and how thick you will use.
- Next, select a stamp; if you are applying a direct type stamp, then you should not forget to mirror the elements.
- If you are using vegetable tanned leather, you should soak it in warm water for half an hour before stamping. Then you should wrap it in a 10-degree terry towel to absorb excess moisture. If the skin is over-moisturized, the print will turn out shapeless.
- Tools (a hammer with a stamp) should be placed next to you so that you can always use them quickly. A wooden base or rubber backing should be placed under the material.
- Touch the skin after drying; it should feel like slightly moistened suede.
- Then place the leather on the base, and place a stamp on top at a right angle to the surface. Next, a precise and strong blow is applied with a hammer, the power of the blow and accuracy play an important role. Since a slight shift of the hammer to the side, the impression may remain deeper on one side, while on the other there will be a barely noticeable dent.
- Then the embossed blanks are hung to dry at room temperature. To prevent the skin from becoming deformed when drying, a small weight must be attached to the bottom. Next, you can begin work on fixing the print.
Preparing for work: what do you need to have on hand?
To start making wax seals, you don’t need any complicated equipment. You can find everything you need to get started at home or buy it literally “for pennies” in the nearest store.
You will need:
- Sealing wax.
We recommend buying lump sealing wax - it is cheaper than candle sealing wax. Although if you need to decorate several invitations, for example, for a wedding or corporate anniversary, you can use sealing wax in candles: it is somewhat easier to work with. - Cliches for sealing wax.
You can order cliches from a company that specializes in the production of seals and stamps. And prepare the layout in any vector program (for example, Corel, Illustrator). - Metal cup
for melting sealing wax. We use cheap military grade camping bowls. - Tea spoon.
- A hair dryer
will help remove the remaining sealing wax from a spoon or speed up the process of melting the substance. - Electric stove.
If you plan to make several prints, then you can get by with a home stove or even a hair dryer. If there is a lot of work to be done or it will be carried out regularly, then it is better to purchase an inexpensive stove with one burner. Otherwise, you can seriously damage your home oven with sealing wax leaks.
Absolutely useless:
- Wax gun
. At its core, it is an ordinary heat gun. It is not just inconvenient to use, but almost impossible. - Wax seals
. They are not cheap, but they do not provide any benefit. We declare with full responsibility: the use of sealing wax will not speed up the process and does not improve the quality of the finished seals. Therefore, we advise you not to throw money away, but to spend it on something truly useful.
Web services for creating stamps online
If you have a seal impression, you do not need to create its layout in the designer. Just contact a company that makes stamps. Our specialists will restore your stamp themselves and send it by mail.
MyStampReady
MyStampReady is a convenient stamp designer with a large number of ready-made templates with the ability to create a layout from scratch. Here you can choose one of three geometric shapes: circle, triangle or rectangle. You can independently adjust the line width, text location, and print color; add pictures – there are a lot of thematic images in the database. Plus, you can upload your own image in svg format to the service.
The downside is that you have to pay to download the created print: from $1.2 to $3.30 for one layout. The price depends on the number of formats in which the stamp can be downloaded: png, svg, pdf and docx.
I'll tell you how to create a seal/stamp using this site:
- Open the MyStampReady service. Click "New Seal" in the top right corner.
- Select the shape of the future seal/stamp: circle, triangle, rectangle.
- Specify the diameter of the circle, the length of the side of the triangle, or the width and height of the rectangle. The value is indicated in millimeters.
- The previously selected geometric figure will appear on the screen. Use the sliders on the right to adjust the line thickness and break. Use the Size (or Radius) slider to adjust the print scale.
- To add text along the circle line, click on the “Circle Text” button. Enter the desired text in the Sample field. For example, your company type (limited liability company, sole trader, etc.). Using special tools, adjust text parameters: font style, letter size, etc.
- You can add a second text to the same line in a circle using the same button. For example, you can enter the name of your city. Place the first text at the top of the circle, the second at the bottom. To do this, change the arc length and starting point for each text. You can switch between texts using the tabs located above the seal. Or you can click on the element on the print itself. To flip the bottom text, click on the upside down “A” icon (it’s located in the text options panel on the right).
- Or simply set up different text radii. Then they will be at different distances from the edge line of the circle, and, accordingly, will not merge. You can also add OGRN and TIN data to the second line of text.
- To add text to the middle of a geometric shape, click the Text icon. Here you can enter the name of the company or your full name (if you are an individual entrepreneur). Use the sliders to adjust the location of the central inscription if necessary: move it up or down, right or left. You can tilt the text (using the Rotation slider). You can also change the text parameters: font, letter size, thickness, slope.
- To add a themed picture to your stamp or your company logo, click on the last icon on the top toolbar. Click on the drop-down menu and select the subject of the image. Choose a suitable picture. Or click on the “Upload yours” button to add your logo (in svg format) to the service.
- Use the sliders to determine the size of the image and its position on the print: offset along the x and y axis, as well as tilt (Rotate tool).
- To change the print color, click on the paint can icon and select a color from the palette.
- If you want the stamp to have wear, click on the magic wand icon and click Continue.
- When the print is ready, click “Download print design”.
- Choose the tariff that suits you. Click "Download".
- Pay for your purchase with a bank card.
The service has a set of ready-made stamps where you can only change the text. The layout will make things easier for you. Click on the "Templates" button in the upper left corner. Find a stamp that matches your theme. You can use the search bar at the bottom left to find a seal for a similar company. Select the stamp with the left mouse button - it will appear in the designer.
Your task is to change the company name, TIN and OGRN data. You can also insert your company logo or any picture that matches your field of activity.
Print Expert
It’s even easier to work in the “Print Expert” service than in MyStampReady. Choose a suitable template (for individual entrepreneurs, LLCs, doctors, etc.), edit the text and order a print with delivery throughout Russia. Each template has a fixed price – 390 rubles.
Simply downloading a print will not work. Another disadvantage is that you cannot edit the print size manually. All stamps are created using a template only.
In addition to round seals, there are also rectangular and triangular designs.
I'll tell you how to work in the constructor:
- Open the service website. Choose a template that suits you. All layouts are grouped into sections: individual entrepreneurs, organizations, bookplates, stamps in the form of a triangle and rectangles. Click on the "Edit" link under the selected layout.
- Wait while the template editor loads. A list of elements on the layout will appear on the left, and the layout itself will appear on the right. Select the element you want to change, for example, last name. To do this, click on the corresponding item in the left panel. Or select this element on the seal itself, then click on the pencil icon in the upper right corner of the frame.
- Enter your last name in the field.
- Change the text for other print elements in the same way.
- To remove or change the position of some elements on the print, click on the arrow. It is located on the element item itself on the left panel. Select the required action: delete, clone, align centered or left/right (not suitable for all print elements), place in front or one level above/below.
- For some elements, such as stars, a Rotation option is available. Select an element on the layout and use the arrow button to position the icon.
- If you performed the wrong action, go back one step using the special arrow in the upper right corner of the constructor.
- To add any image to the print, click on the “Picture” button.
- Select a png image that is stored on your PC.
- Another item will appear on the left panel - for the newly downloaded image. Place the picture in the background so that it does not cover your name on the seal, for example. To do this, click on the arrow on the item and select the appropriate option in the menu.
- When the print is ready, click on the “Continue” button in the lower right corner of the designer.
- Place your print order. Select the delivery method and payment method (cash upon receipt or online payment by credit card).
Stamp Master
The Stamp Master service is similar in functionality to MyStampReady. Here you can simply download a print or order its production. Both services are paid. Simple download – from 69 to 129 rubles. Depends on the number of formats: png, pdf, eps, svg. Making a seal – 350 rubles.
You can add a QR code to the print. Use it to encode plain text, a phone number, or an email address.
I'll show you how to create a stamp in this service:
- Open the Stamp Master website. If you want to create a stamp from scratch, click on the “Create” button and select a layout form. If you want to use a template, select your organization type and preset print layout. The price for each template will be immediately presented.
- Scroll down the page a little and select the print size (cliché). Change the stamp color if necessary. To do this, click on the button with a can of paint and select the desired color in the palette. Only 4 colors available: blue, red, green and black.
- Use the Stroke slider to adjust the line thickness of the circle (rectangle or triangle, depending on what you chose in the first step). Using the third slider, the line of the figure can be made intermittent (that is, empty spaces and spaces will appear on the line).
- Enter text for the items in the appropriate fields.
- If you need to add a third element with text, for example, a phrase in the middle of the print, click on the first “Text” button (which does not have a circle). Another item will appear on the left panel - enter the required phrase there.
- Under the constructor itself there are text parameters: font type and size, bold and italic font. Change the parameter values as desired. Using the sliders, adjust the distance of the phrase from ), the length of the arc with the phrase (the distance between letters) and the starting point of the phrase on the print (“Rotation angle”). Using the left and right arrows you can undo any actions. I also recommend periodically clicking on the floppy disk icon to save changes to the layout.
- Click on the three dots icon for an element. A menu will appear. In it you can remove an element from the print, place it one level below/above, or in the background or foreground.
- Optionally, you can add a picture or QR code to the print. Click on the corresponding button on the vertical panel on the left. You can choose a thematic picture from the service gallery or upload your own from your PC. Accepted formats are svg, png, jpg and jpeg.
- If you added a QR code, enter its contents in the toolbar below: your phone number, email address, etc. Determine the size of the code (maybe it needs to be reduced) and its place on the print (specify the horizontal and vertical position, select the angle turn).
- When the print is ready, click on one of the buttons: “Download layout” or “Order print”. The cost of downloading and printing will be immediately indicated on the buttons. Delivery method: PickPoint points in your city. Delivery time is from 1 to 5 days from the date of production. You can pay for your order using a card from any bank.
DIY wax seal: step-by-step instructions with video
So, we have stocked up with everything we need, now we can start making wax seals.
When working, follow this algorithm:
- Solid sealing wax should be split into small pieces.
- Melt the wax on the stove at medium temperature, stirring constantly.
- Scoop up the sealing wax with a spoon and pour it onto the desired area.
- Wait for the sealing wax to harden and remove the cliche.
- Repeat steps three and four for subsequent products.
This way it will melt much faster. In addition, it is more convenient to pour small pieces into a cup for melting during operation.
We do not recommend melting a lot of substance at once: it will be difficult to work with. Also, do not bring the molten mass to a boil. Boiled sealing wax forms bubbles, which give the finished prints a sloppy appearance.
According to manufacturers, the melting point of sealing wax is 60°C. But, as our practice has shown, this indicator can vary significantly depending on the color of the substance. Apparently, this is due to the pigments that are used to color the wax mass.
Thus, black and white sealing wax have a much lower melting point than red sealing wax. Bronze sealing wax has the highest melting point and hardens much faster than sealing wax of other colors.
Make sure that the sealing wax is not too liquid, otherwise it will spread over the surface and give an unsightly impression. Press the resulting clot with a cliché and wait for a while.
Different colors of sealing wax require different times to harden. Black sealing wax is the most difficult to work with - it hardens for a very long time (several times longer than, for example, red).
After the sealing wax hardens, the cliche itself will easily separate from the finished seal. It is better to shoot the cliche a little sideways rather than horizontally.
Do not forget to add new batches of crushed sealing wax into the melting bowl as you use it - this will prevent it from boiling.
In addition to the article, we have prepared a video about how our company’s craftsmen apply wax impressions to corporate gifts. We hope that the video will give you a clear idea of the process of applying wax seals with your own hands at home.
Programs for creating stamps on a computer
With applications, things are a little worse - their interface is not as convenient as in web services. The values of almost all parameters will have to be set manually in special fields - there are no usual sliders here. Plus there are not so many programs themselves.
Stamp085
The Stamp085 program has a rather outdated interface. It will take some time to figure it out. All settings are divided into tabs: “Form”, “Row Options”.
The disadvantage of the program is that you cannot expand the window to fill the entire monitor screen. The print layout will be displayed in a separate window, which will be even smaller.
However, the program is quite functional. Here you can insert pictures, select a geometric shape, draw a custom print shape, change color and much more.
Paid program:
- 950 rubles for the installer file sent to your email.
- 1300 rubles for the installer file on a separate disk. The disc is sent by mail.
You can download a demo version of the program to familiarize yourself with its main functions. The demo version does not have the ability to download, print and insert a finished seal into Word. Therefore, in any case, you will need to buy a paid registration code.
The program works without installation - just run the downloaded file and you can use it right away.
To avoid getting confused in the interface, use the following algorithm for creating a seal:
- Download the demo version of the program from the official website. Open the downloaded archive and run the file called “Stamp085d.exe”.
- A window with a preliminary registration code will appear. Click on the "Continue" button. A program window will open.
- Click the Preview button to control the changes you make to your print. A separate window will appear showing the layout.
- Go to the "Form" tab. Select a geometric shape for future printing. Available in triangle, oval, circle, square and custom shape. To draw a custom shape, click on the star button. Using separate lines, create a frame for future printing.
- If necessary, change the shape size in millimeters and radius. Specify the thickness of the lines and the spacing between them.
- Open the "Center" tab. Here you can enter text in the middle of the print and also add your own design. Specify text parameters: font type and size. You can highlight the text in bold or set the inclination of the letters. Enter the text itself in the field. Specify character and line spacing as needed.
- To add a picture, check the box next to “Figure 1 in . Select the bmp file that is stored on your computer. Wait until the image is uploaded to the service. If necessary, change the color of the image and adjust its brightness. Determine its location in the picture (block “Drawing displacement”: items “Along the X axis” and “Along the Y axis”). Increase or decrease the size of the design on the print (items “Height” and “Width”). You can also check the “Auto size” checkbox. Then the program itself will adjust the drawing for printing.
- Go to the "Strings" tab. Specify text parameters and enter the desired phrases in the “Top Lines” and “Bottom Lines” fields. In the upper field, write, for example, your status “Individual entrepreneur”, in the lower field - the name of your city.
- Open the Row Options tab. Uncheck the “Auto-distribution” checkbox so that the texts of the top and bottom lines stop merging. Adjust the interval if necessary.
- Adjust the width and height of the letters, the width of the indentation from the outer and inner lines, the thickness and color of the inner line of the circle. If necessary, move the text left or right along the circle line to align the text.
- When the print is ready, click on one of the buttons (if you previously paid for the program key or if you found a free key on the Internet): “Save print design” (floppy disk with print), “Print” (printer icon) or “Insert print into Word document (Microsoft Word logo).
- To save your print settings, click on the floppy disk icon. Select a folder to store the settings file on your hard drive.
To receive a registration code, click on the “Registration” button. A small instruction will appear on how to purchase a key, and two lines for entering the key. Pay the required amount and send a letter by email. In the letter, indicate the set of numbers from the “Key 1” field and information about the money transfer. They will send you key 2 - enter it in the second field. After this, all paid features of the program will become available to you.
MasterStamp
There are three geometric shapes available in the MasterStamp program: circle, triangle and rectangle. Each has its own tab. You can additionally insert a picture in the center into the round shape. You can change the layout in the program: there is not only Cyrillic, but also other character sets (for Western European languages, Hebrew, Arabic, etc.).
The position of the elements is adjusted in the same way as in Stamp085. Instead of sliders, there are special fields for x and y coordinates and for the number of pixels (px). The fields need to be filled in with numbers manually, which is quite difficult and inconvenient.
The created print can be saved to your computer as a separate file: in bmp or mst format. This file can be inserted into Word documents.
The program costs 250 rubles. Payment is made through mobile payment to Megafon, Yandex Money or Qiwi wallet. All details are on the official website of the program. After payment, send a letter to your email. In the letter, indicate the payment details and a unique code from the program (it is displayed in the “About the program” tab). In the response letter you will be sent a registration code - enter it in the field in the same “About the program” section.
There is also a free version of the application - with the ability to save prints on a PC in the same formats. But the downside is that such a seal will have a red inscription “Unregistered version”.
The program does not require installation. Download and use immediately. I’ll tell you in more detail how to work with it:
- Download the program archive from the official website. Open it and run the “MasterStamp.exe” file. The designer window will appear.
- Select the tab with the stamp shape you want to create: round, triangular or rectangular (Stamp section).
- If you selected a circle, check the boxes around the circle that you want to fill in (depending on the number of phrases you need to enter). Also mark the lines that will be located in the center of the circle. Enter the appropriate text into them.
- Click on the Font button to select text options for a specific line. Specify the font type, style (regular, italic, bold, etc.), character size. If necessary, underline or cross out the phrase. Select the color of the inscription. If you need to enter text in another language, specify a different character set in the special menu. To save the settings, click “OK”. Optionally, adjust the text settings for all other lines.
- Try to align the text of each line on the circle. To do this, enter the appropriate value in the “Circle Radius” and “Rotation Angle” fields.
- Select a position for the rows to be centered. To do this, enter the appropriate values in the fields: “X-coordinate”, “Y-coordinate”, “Rotation angle”.
- Indicate the number of circles you need on the print. To do this, uncheck or check the numbered circles. For each circle, select the line thickness (S menu) and radius (R menu). Also indicate a color for each circle.
- If you need a picture in the center of the print, please put o. Click on the "Open" button. Select the bmp file that is stored on your PC. After loading the picture, determine its position in the center of the circle. Move it to the right/left (menu “x”) or up/down (menu “y”).
- When the print is ready, download it to your PC. To do this, click on one of the buttons: “Save mst” or “Save bmp” (depending on the format you need). Select a folder on your hard drive to store the layout.
The procedure for creating a triangular seal is almost the same. You choose the number of geometric shapes on the template, the thickness of their lines, and the number of lines. Specify the font for each phrase and its exact location on the print (using fields for x- and y-coordinates). You cannot add a picture to the center of a triangular seal. When the print is ready, download it in one or two formats: bmp or mst.
To create a rectangular layout, open the Stamp tab. The logic for constructing the template is the same here. Select the required lines, enter text in them, adjust the font and position of the inscriptions on the stamp: you can move the text to the right, left, up or down. You can also select the number of contours, their position on the print and the thickness of the lines. It is not possible to add a picture to this layout. After all the steps, download the stamp in bmp or mst format.
Problems when working with sealing wax and solutions
- Sealing wax boiling.
- The print falls off after drying.
- Sealing wax sticks to the cliché.
When working with sealing wax at home, certain problems may arise. One of them is boiling wax, leading to printing defects. If the substance boils during melting, then you need to reduce the temperature of the stove and vigorously stir the sealing wax. Stirring will remove air bubbles from the sealing wax, which reduce the quality of the prints.
Another problem is the weak adhesion of the wax mass and the material on which it is applied. This leads to the fact that after hardening the seal simply falls off. In our practice, this happened with craft bags to which the sealing wax did not want to stick. We conducted many experiments and found a solution. If you add a small amount of hot-melt glue (hot-melt gun rods) to the molten sealing wax, the seal will reliably adhere to the craft paper.
In this case, we use a hair dryer. Using it, we heat the cliche and carefully remove the softened wax mass with a rag. Some people recommend using a solvent to clean the cliché. We have not tried this method. But you can try both methods and decide which one is more effective.
What should I do to prevent sealing wax from sticking to the seal?
Seal
(or another work surface) should be dipped in oil and placed on a cotton pad, which will absorb the excess.
This is done to prevent the sealing wax from sticking to the seal
.
Interesting materials:
How do I restore my Premier subscription? How to restore the Yandex search bar? How to restore the coating of stainless steel? How to restore a full bricked Android? How to restore wrinkled fur? How to recover damaged information on a flash drive? How to restore PowerPoint? How to restore a previous save in The Sims 3? How to restore your old Facebook? How to restore the previous size of a flash drive?
Wax seals in decoration: options for use
With the help of wax impressions you can design a wide variety of objects. Textured prints give them a vintage look, making them elegant and impressive.
- Applying sealing wax to paper and cardboard.
- Applying sealing wax to fabric.
- Applying sealing wax to wood.
- Applying a wax impression on glass.
Classics of the genre are scrolls and envelopes with wax seals. There are no difficulties with applying stamps to envelopes. As for the scrolls, there is one trick here. To make a scroll, take a round stick and wrap paper on it. You need to pour sealing wax into the right place - it should not be too liquid, otherwise the clot will spread. The sealing wax needs to be pressed firmly onto the cliche, and the scroll is ready.
This way, for example, you can decorate gift bags beautifully. Feature: when applied, sealing wax flows through the fibers of the fabric. Therefore, you need to place something metal under the canvas - a thin ruler or a trowel.
Rope sealed with a wax seal looks very impressive on gifts and scrolls. To get such a print, take a metal sheet or a construction trowel and grease it. Place ropes on the metal, fill them with sealing wax and place the cliche. After complete hardening, the wax seal will easily come off the metal surface.
We often use this technique to decorate wooden boxes with corporate gifts. By the way, a wax seal can be combined with a label. Applying sealing wax to wood, as a rule, does not cause any problems.
This method can be used when decorating bottles. To apply to glass, thick sealing wax with the consistency of “sour cream” is required. To get it, it is enough to lower the heating temperature of the stove. You can also add a few solid pieces to a cup of melted sealing wax and stir the mass vigorously.
If you have any questions, ask them in the comments - we will be happy to answer. We will also be glad if you share your secrets of working with sealing wax at home.
Sealing wax at home can be replaced with:
| How can I replace sealing wax? | Description |
| Stamp from a glue gun | Those who are actively involved in handicrafts and scrapbooking must work with a glue gun. It will help in creating an imitation of sealing wax. A stamp blank will be required. It will be replaced by a button or a coin. |
| Stamp made from wax crayons | Wax pencils can be purchased at any store that sells similar products. Their consistency, of course, is weaker than sealing wax, but if you don’t have anything else at hand, this is a good solution. |
| Printing from modeling material | Modeling compound is also sold in DIY stores. Its consistency allows you to create an imitation of sealing wax at home. It is necessary to separate the required amount of mass and roll it into a layer of equal thickness. Next, attach a stamp or coin. This option is used to decorate hand-made products. |
| Wax seal | Wax candles can also be a worthy replacement for sealing wax. Contact a craft store to purchase a candle with suitable wax. Light it at home, drip melted wax onto the site of the future seal, attach a coin or a completed blank, make an impression and wait until it hardens. |
| Homemade sealing wax | At home, you can prepare good sealing wax for future letters or packaging of hand-made souvenirs. All the necessary components can be found in the nearest stores. Required:
You can also make a print blank yourself, but you can purchase the print you like or replace it with a button or coin. |
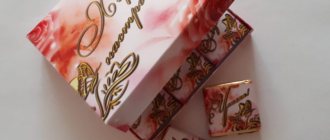
Wax in its composition is a homogeneous mixture of resins, dyes and auxiliary components. A wax seal can be found on invitations, certificates, commemorative and souvenir letters.
There are several options for replacing sealing wax if you don’t have it on hand at the right time.
At home, you can easily make an alternative version of sealing wax using a glue gun.
- You need to insert a rod into it, heat it up, and drip liquid glue into the place where the future seal will be printed. Don’t feel sorry, the print should be quite dense.
- Leave the mixture for 30 seconds.
- Then attach the finished stamp, button or coin.
- Press firmly and leave until set.
The print can be easily painted with acrylic paints. Many people use ready-made colored rods.
Types of printing
Current legislation provides for 3 types of seals:
- Stamp. They are equipped with federal or regional symbols. Used exclusively by government employees;
- Commercial. Used by various organizations and individual entrepreneurs. Must contain the logo or full name of the representative. They are similar in legal force to stamp ones;
- Stamps. Used for applying text information and product labeling to forms and other media. They are additionally created for narrow applications in branches, or for specific documentation or products. Stamps are not mandatory in the company, but they significantly help to increase the efficiency of the work process due to pre-applied details (full name, date stencil, signature and much more).
The development of your own seal should begin with the choice of the type of print. To do this, it is necessary to take into account the purpose and intended scope of application. The type of print will determine its size and shape.
The most widespread are round seals (approximately 12-50 mm). Moreover, the size depends mainly on the contained text. Oval ones are relevant for internal documentation. Triangular ones are most often used in the medical field.
Printing from modeling material
Modeling mass is sold in children's art stores. Make a blank of the desired size, attach a stamp, and then bake the mass in the oven. Detailed instructions are on the packaging.
By melting a wax or paraffin candle, you can get the desired seal that imitates sealing wax. To work, you can use colored candles, or then color the seal.
Pour hot wax onto the desired area, apply the seal and wait until it cools.
What technologies are there?
Embossing on leather products, which you can do yourself, comes in several types. Let's look at each of them in more detail:
- Blind hot stamping. It is done as follows: we apply a design to the surface using a cliche. The parts that are in this workpiece must be located in the same plane. This type can also be cold.
- Stamping using foil. In this option, you will need special equipment designed for stamping in the form of cliches, and of course, ordinary food foil. In this case, the use of a hot iron is a must.
- Embossed pattern printing. In this method you can also use foil or do without it. A press and an electric iron are also used.
Homemade sealing wax
Prepare the necessary components and follow the simple instructions.
- Take an iron container (you can use a Turk).
- Pour 50 g of rosin into it.
- Cut 3 cm from the candle and add to the container.
- Add a pinch of chalk.
- Place the Turk (cocotte maker) in a pan of water and turn on the heat.
- Cook until all ingredients are dissolved, stirring constantly with a wooden stick.
- Add ocher to a homogeneous mixture and stir.
- Make a paper tube and place it on the second sheet.
- Carefully pour the liquid ingredients into a paper tube, holding it with your hand in an oven mitt and a plastic bag (to avoid getting burned).
- Hold the tube well, preventing any liquid from leaking.
- After hardening, peel off the paper and use sealing wax using the usual technology.
At home, you can find something to replace sealing wax by making stylish and sophisticated seals on souvenirs and bright packaging. The offered options are affordable, and if you wish, you can make sealing wax yourself.
Easy lesson
To work we will need the following tools and equipment:
- Regular food foil;
- Awl;
- Knife;
- Hammer;
- Stamps. You can make them yourself with any images you like. Do not forget that the images taken must be taken in mirror image;
- Knurling. To do this, you can use wheels from broken watches. We will need them to apply patterns and various lines on the skin.
Related article: Do you need a turbo brush for a vacuum cleaner?
Step-by-step embossing instructions:
- The selected stamp with a pattern must be heated. This can be done in two ways: either over the flame or over the stove.
- We press the heated pattern onto the prepared piece of leather and hit it with a hammer.
- The pattern should be clear and deep; if this does not work, then start all over again. This means that you did not heat the stamp itself properly. Or, on the contrary, they overheated greatly. In this case, the skin will melt a little, and this material cannot be reused.
- It is for this reason that we recommend that you first try it on a separate piece of leather in order to more accurately understand what force you need to use and to what temperature the stamp itself should be heated.
You can also do color embossing on leather.
The principle of operation is exactly the same, only you need to lay foil of the selected color between the skin and the stamp. You can purchase it in specialized handicraft stores.
- First of all, you need to melt the wax on the stove. To prevent it from hardening as it cools, add turpentine. Stir.
- Spread the foil on a hard surface and apply a layer of the resulting mixture. Place it out of the reach of children to dry.
- Then we apply paint to this foil and again let the foil dry.
- Now let's move on to color embossing. We heat the stamp, and then place the foil on the workpiece with paint to the place where you want the design to be made.
- Press the stamp firmly onto the foil and hit it with a hammer. The most important thing is to take your time. The ink must print completely.
There is another way of embossing - applying gold patterns.
In this method, the cliche must be of very high quality. As you understand, objects made using this technique are considered very luxurious, and not every craftsman can afford to do such embossing. We make it using the foil method described above. Only instead of foil, a thin gold sheet is laid. After hitting the cliche with a hammer, the design is printed onto the leather product.
Related article: White men's sweater knitted with description and diagrams
A business card holder made in this version will be an excellent gift. Especially if you want this or that person to pay attention to you. Basically, such products are best given as gifts to bosses or business colleagues.
If you didn’t succeed in embossing the first time, try again. After all, until you try, you won’t learn. The main thing is to be persistent and hardworking in this craft.