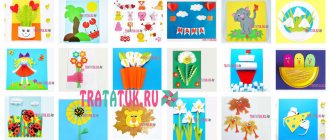
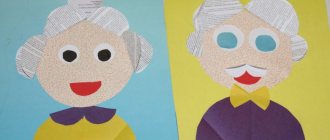
An interesting way to teach children is applications made from colored paper. They develop children's thinking and hand motor skills in preschool and school age. Children love to do such an exciting activity as appliqué; they can be on different topics: flowers, vegetables, animals. This develops their horizons and gives them a good feeling that they can create something themselves.
Working with children's applications on the topic “Vegetables” usually takes place together with adults, who show children how and what to do, and talk about options for various approaches to this creative work.
What and how to make an applique from leaves
What we need:
- 1. Natural material: leaves of various sizes, shapes and colors (they can be dried in advance), twigs, flowers, herbs, seeds.
- 2. Colored paper, felt, glue, scissors, paints, pencils, cardboard.
- 3. Varnish can also be useful to fix the finished work and give it shine.
How to work with leaves:
To start working on crafts from leaves, they must first be dried. This can be done between the leaves of books, or using an iron. Store the leaves between the pages of books or newspapers.
Pictures made of pebbles, shells, sand
Don't limit yourself to just dried flowers. Try making a picture using pebbles, sand, river and sea shells.
How to prepare shells:
Collecting shells is a fun activity. But first of all, you need to make sure that no one lives inside. And in order to avoid unpleasant odors in the future, they must be properly processed. First you need to remove organic particles that will be a source of stench.
The most effective method that does not require special tools or skills. Cooking and boiling help to easily remove all excess.
1. Place the collected material in a pan with water. Make sure they are completely immersed in liquid.
2. Then place the container with the contents on the fire. Cook after boiling for 5-10 minutes, it depends on the shape and number of shells.
Next, when removing products from boiling water, be careful not to get burned.
How to paint stones
Dense, smooth, light-colored pebbles are the best basis for drawings. They need to be washed thoroughly with soap and soda solution. Then dry. You can paint with gouache, watercolor or acrylic.
The first two types are quickly washed off with water. Acrylic paints dry better and are more durable. Before painting, first apply a primer to the stones. It provides good adhesion of paint to the surface.
We draw strokes and details with felt-tip pens or an outline. The final touch to give the product brightness is to varnish it.
How to paint sand?
White sand will make stylish beautiful paintings. This material is sold in specialized stores for creativity. Colored sand can also be purchased, but it is very easy and simple to color it yourself at home. For this you will need: coloring matter (colored crayons, dry tempera, liquid food coloring), plastic containers (for mixing paints, storing dry material), paper towels.
Dry tempera painting method:
Start painting with small volumes. Mix a glass of sand and 1 teaspoon of dry paint. Add it until you get the desired shade. Experiment with different colors and get your own color scheme.
Second method with food coloring:
Pour water into a convenient container. So much so that the sand is barely hidden in it. If there is more liquid, then you will need to add more bulk material.
Add dye 1-2 drops at a time. Mix and add it in small portions until you get the shade you want.
Then drain the water through cheesecloth. Let the sand dry by scattering it on napkins.
Create your masterpiece.
Types of applications made from natural materials
- Overlay applique. A simple look that does not require additional work with leaves - they are glued to a sheet of paper or cardboard, creating the intended plot. These can be animals, trees, mushrooms. You can add some details.
- Mosaic or modular application. This technique involves gluing leaves that are identical or similar in shape. This way you can make a bird's tail or fish scales.
- Symmetrical applique. In this case, it is necessary to select similar leaves to create mirror images. This way you can make an image in water, a butterfly, a dragonfly.
- Ribbon applique. A type of symmetrical applique, but in this case you can make several similar images.
- Silhouette applique. The leaves are trimmed to create the desired pattern or shape.
Children become interested in applications and crafts even at the stage of collecting material. Kids like to collect leaves on the paths while walking, look for cones and chestnuts. Therefore, it will not be difficult to persuade your child to use all this to create a beautiful applique.
Simple autumn applications for kids
It is always more difficult to work with the youngest children and you need to find an approach to them. They cannot be forced to sit on one job for a long time. Therefore, the craft should be as simple as possible. How to make an interesting autumn-themed craft in just a few minutes to inspire your child to continue.
It seems that nothing simpler than this application can be found.
Take one beautiful yellow leaf. Turn the wide part down. Glue it onto cardboard. You can finish drawing the arms and legs, and insert the drawn umbrella into your hand.
A leaf like this with eyes will look funny. They can be made from plasticine or cardboard, or maybe you can find small buttons and glue them on. Don't forget to make it cheerful by drawing a smile.
Autumn from palms: applique
We will need:
- Colored paper
- Scissors
- Glue
- Sheet of cardboard
1. We need brown paper to create a tree trunk.
2. Trace children's palms on colored paper, making several multi-colored blanks.
3. Glue the tree trunk and leaves onto the cardboard
Options for appliqué on the theme of autumn made from palms:
Application for the younger group: autumn tree
Another applique option for the little ones is a tree.
It’s easy to make: collect thin branches of approximately the same size and glue them in a bunch on cardboard. We lay the leaves above like a crown. You will get an autumn tree from leaves.
You can make a torn applique from colored paper.
Using cereals you can make a beautiful autumn tree.
Paint the millet with different colors. Draw the trunk and branches. Using PVA, glue the cereal to create a tree crown.
The difference between applications on the topic “Vegetables” with children from kindergarten and school
Vegetable applications are aimed at developing children's thinking and the ability to use glue and paper. Thanks to applique activities, children expand their perception in the field of knowledge of figures.
Junior group
At 3-4 years old, appliqué lessons help the child learn to use stationery items. This is how imaginative thinking develops and skills in working with available tools are improved. Educational institutions provide 2 or 3 such classes per week. Crafts lessons help children remember what shapes are and how to make them.
Classes should be educational and interesting for preschoolers.
With younger children, short-term teaching techniques are carried out for 15-20 minutes. But with older groups it will take longer, since their tasks are more difficult.
Such activities to study appliqué techniques should be carried out in a playful way. That is, the teacher must pretend to play with the children, thereby attracting their attention and teaching.
Since children do not know how to use scissors and this is dangerous, they are given pre-cut shapes, which they glue together using regular glue. The teacher shows exactly where to stick it and, thus, the child receives the first basics of appliqué. After the teacher’s explanations, the children glue the figures together and paint their creations using felt-tip pens or pencils.
Senior group
In the elementary and older groups, children remember and learn new shapes, and also learn the theme of flowers. Thanks to such activities, they can cut paper into strips, and hand motor skills immediately develop. They also learn to associate color with an object. That is, paper of a certain color can become a vegetable that has that color.
Children from the older group begin to conduct classes with appliqué on a plate or pan. The teacher shows the children a ready-made object and the children must repeat it using previously given multi-colored figures, felt-tip pens, paper plates themselves, glue and scissors. In order for the child not to lose interest in the task, you need to constantly encourage him, praise and help.
Despite all the skills listed above that a child receives from such activities, it also helps to develop the brain itself. Because when working with paper, bending it in different directions, both sides of the brain hemispheres are activated.
Application for the younger group on the theme of autumn
Applications made from natural materials in kindergarten are not very complicated. For them you can use not only leaves, but seeds, acorns, twigs. Colored paper and cardboard are also used.
Autumn flower applique
Beautiful colorful leaves that fall to the ground from trees can be transformed into an autumn flower. You can create such a flower using glue and a sheet of cardboard.
If one flower is not enough, then you can make a vase with flowers from autumn leaves.
Beautiful umbrellas will be made from pieces of colored paper. This type of applique is called cut-off.
Autumn applications: preparatory group
Applications made from natural materials in kindergarten occupy a large part of the children's development program. Autumn gifts of nature open up many possibilities for activities with children. Therefore, autumn fairs are a place where you can show off your talents.
You can invite the children to come up with a real composition of leaves.
If you combine drawing and applique, you can make such a cute hedgehog from seeds.
Using flower petals and grass sprigs, you can make beautiful applications
How to make a hedgehog?
Autumn hedgehogs are a very popular idea for creativity. Its needles can be depicted with leaves, seeds, plasticine, well, you will soon see for yourself.
Here is an application for little ones. With button decoration.
Or seeds and cereals.
Character from the cartoon "Tilimilitryamdia".
This template will come in handy.
The hedgehog bears rowan on its needles.
Parts in the shape of children's hands also form a composition.
Or from long strips that are glued together in the shape of a drop.
The circles we already know will also come in handy.
Just draw this cute animal using watercolor.
It is possible to cut out a handsome man from a postcard and decorate his needles with natural materials.
Also a fabric hedgehog.
Look at the finished results of children's creativity, taken from the school competition exhibition.
You may find these diagrams and drawings of hedgehogs useful in your creativity.
They can be painted, filled with plasticine or cut along the contour.
Leaf applications: senior group
Leaves are the most accessible material for embodying your talent in creating bright and colorful paintings and applications on the theme of autumn. By choosing leaves of the correct shape, you will get a variety of animals and insects.
Applique: fox made of colored paper
It is very convenient to make applications with children using ready-made templates. To do this, just print the blank and cut it out.
Another version of the fox template made from colored paper made of geometric shapes.
The fox cubs may turn out completely different, but adding them with a drawing will result in interesting works:
Unusual three-dimensional applique made of colored paper
Applique Autumn tree: middle group
The change in nature in autumn is noticeable to everyone and even children see the difference when the trees turn yellow.
We will need:
- Sheet of cardboard
- Colored paper
- Glue
- Scissors
Create a tree trunk and branches from brown construction paper.
Glue the tree onto a background sheet of cardboard, having previously made a tree crown
Glue leaves of different colors onto the branches of the tree.
Autumn mushroom: applique
You can always find mushrooms under a tree in the fall, so learning how to make mushroom appliques is also useful.
Mushroom cutting templates for appliques
If classic appliqués are already boring and you want some variety, then you can combine drawing and gluing natural materials. Such works are quite suitable as applications made from natural materials for elementary school.
Children can already give a gift to their mother by drawing her portrait and adding leaves and other natural materials to the picture.
Autumn applique for students in grades 1, 2, 3, 4 made of paper with templates
Well, now let's move on to more complex crafts. I’ll say right away that I took some from social networks, that’s why there’s a link there. If you're interested, type it into a search engine and look there. But here I have selected ones that are more suitable for schoolchildren.
For example, this application. It is quite complex and requires accuracy. However, a 4th grade student can definitely handle it.
Advice! Use double-sided paper.
I won’t describe the steps, everything can be seen in the picture. This template was used. Please note that the stem of the leaf is not cut off, but falls on the fold. This is fundamentally important.
Next is the master class “Autumn City” .
So, for houses you need to cut 7 roofs: 4 trapezoids and 3 triangles. Our houses will be in the form of rectangles of different sizes.
Place rectangles on the base and distribute them so that they do not completely cover each other. In other words, create a composition. After this, they can be fixed to the cardboard with glue. Then we put them on the upper sides of the roof and also fix them.
The leaves will be circles, which we will make with a hole punch from different shades. We also cut out tree crowns; they can be uneven in shape. And we finish the craft.
Use pieces of colored paper from which you made leaves with a hole punch. You can put together such a tree. Waste-free production is achieved.
The next craft is with a mouse.
Use this template.
Here's an idea for a fall harvest basket. Instead of paper, cotton pads, felt and foamiran are suitable for depicting fruits.
Here is a diagram for the blanks.
Do you want to laugh? Then it's time to sculpt such a positive acorn.
You need to take two sheets of paper: a brown shade and a yellow or orange one. We cut out two blanks. From a brown shade, a square with sides 6*6 cm. From yellow we make a rectangle 6*5 cm.
Fold the square in half and insert the short side of the rectangle into it. Glue them together.
Next, you need to give the bottom of the rectangle the shape of an acorn or bowl by cutting off the ends. We bend the edges of the brown workpiece on the wrong side.
We complete the remaining details with a felt-tip pen.
These are the beauties they turn out to be.
Next up are some cool umbrellas. This important element of autumn is reflected in applications.
Below is a step-by-step master class.
To make cones, it is convenient to first draw a circle with a compass. Cut it out. And then cut into 3-4 equal parts.
Leaflet templates can be used those presented in the lower sections of the article.
Based on this idea, such masterpieces are created.
And here is a voluminous idea with a maple leaf and umbrellas.
Advice! When you glue the umbrellas, go beyond the base.
This is the diagram that will come in handy for you.
Next in front of you is a cute dog with a romantic soul.
This is what the details look like.
Another voluminous idea in the form of a pumpkin. You've definitely done something like this before. There is absolutely nothing complicated here.
Cut out these parts. Place it on colored paper and trace it. You cut out the blanks or fix them on the base, as in the photo.
Advice! For pumpkin, choose several shades of orange, then it will turn out brighter.
Here is a version of an autumn umbrella with a squirrel.
It can be painted and covered with plasticine. Fill the white voids with cereals, berries or napkins.
You will also like the mushroom basket.
By the way, the mushroom itself can be anything: from saffron milk cap to fly agaric.
A dress for the beauty of autumn will not leave any girl indifferent.
Here's a diagram for the details. The skirt can be made from toilet paper or a napkin. Just fold it like an accordion and secure the top part of the workpiece together. You can see it in the photo.
Warm tea is sorely missed in autumn. Typically, these are herbal drinks with lemon, cinnamon and ginger. This is what inspires.
Take the diagram.
By the way, the mug can be made in a single color!
Open palms inspire confidence. We will also put autumn leaves on them.
Here is the palm template. You need two of them. One side is not cut off, but gets folded.
This is what it should look like on paper. The diagram of the maple leaf will be below.
The squirrel was amused. The work is painstaking, but very nice. I give it for inspiration.
Of course, the most important thing is that the squirrel turns out to be friendly and cheerful.
And then we add any design.
A voluminous basket with fly agaric mushrooms made of paper. They can also be repeated from felt or foamiran.
The leaves are folded like an accordion. Here's a sketch.
You can also take paper helpers. For example, bushings. Flatten them to make an oval. Dip the edge in paint and make imprints in the form of leaves.
Or use it completely in an application. The inside can be painted or filled with napkin balls.
Like here. Plasticine balls are also suitable for filling.
A little more children's creativity. Autumn spoils us with rain and clouds. This is what is shown below.
But nature itself is simply beautiful. Especially when the sun comes out. Therefore, we personify her in the form of a beautiful girl with an ornament of flowers, leaves and harvest.
To make the task easier for the child, part of the application can be drawn. And make some details voluminous.
The composition of the lower craft is interesting. The master made it against the background of a circle. And along the edge he let out branches and moss.
Older guys can repeat this beautiful idea.
Or this one.
Well, at the end of this section, I’ll show you some cool hedgehogs.
Take a sheet of paper. Fold it in half. In the upper part of the half we draw the face of a hedgehog.
Cut out the nose along the contour.
And we fold the rest of the sheet like an accordion.
Glue both ends together.
Decorate them as desired.
Autumn applications made from natural materials
With the help of activities with natural materials, you can also strengthen children’s understanding of changing weather conditions, explain to them what the seasons are and what happens with their changes.
The late autumn applique will help reveal to the child a new stage of nature that precedes winter weather. After all, in late autumn we observe a cooling, the leaves become less and less and the last leaves are blown away by the wind from the branches of the trees.
Application: autumn has come
An application on this topic will reveal to the child the concept of how summer changes to autumn, what happens in nature during this period. After all, there are still many leaves on the trees, some green, but also red, orange and burgundy.
Take unnecessary puzzle pieces, paint them with different colors, whatever color you want the leaves on the tree to be. The tree trunk can be drawn, or it can be glued from paper.
Ideas for crafts from scrap materials (plasticine, plastic)
Here I mean fabric, plasticine, disposable tableware and other accessories that can be found in almost every home.
Therefore, here is a master class on creating such a plasticine application.
First, draw the shape of a leaf. Then tear off a piece of plasticine and smear it inside the drawing with the pad of your finger. Next, cut out the blank along the lines and glue it onto the base.
Advice! For creativity from plasticine, take soft types.
The following photo depicts the crown of trees in the form of spirals. First, a long and thin sausage is rolled, which is twisted into a spiral.
A plastic disposable plate can become the basis for a mushroom.
Or warm the bird.
You can cut out animal details from a piece of fabric and paste them onto a piece of paper.
Another option is made of plasticine.
There will be a lot more interesting things to come.
Volumetric applique on the theme of Autumn
Autumn is accompanied by rains and an attribute that can be found in any apartment is an umbrella. It’s quite simple to depict an umbrella and create a voluminous applique on an autumn theme.
Take a white sheet of paper. Starting from the corner, draw any pattern. You need to cut the corner in a semicircle. We fold the cut out part of the sheet like an accordion.
Glue this part onto a piece of paper
You can draw raindrops on a piece of paper.
You can also use a ready-made template to make an umbrella.
We cut out the template, having previously printed it, and make patterns on it.
Just like in the previous version, we fold the umbrella blank like an accordion
You can make such funny umbrellas
Draw or print out an image of a girl and glue an umbrella to her hand.
Pictures of cereals and seeds for children
The fastest and most colorful work. Small children enjoy doing it. For this work, it’s a good idea to stock up on templates with large drawings. Coloring books are suitable for little ones.
There are several options for attaching seeds, choose which one suits you best:
Option 1. You can apply plasticine onto the prepared base and press seeds and cereals into it.
My two-year-old daughter made this abstract rug for a cat BY MYSELF.
Crafts made from a cut out template look very impressive.
The most interesting thing remains - decorate with grains, seeds, and pasta.
This is the 3D picture in the shape of a hedgehog.
Leaves applique: autumn
It is not necessary to use only whole leaves for appliqués. There is a separate direction in creativity - broken applique. You can use not only leaves, but also colored paper. Its principle is that the silhouette of the figure is created from torn material.
To make the application, we will need:
- Sheet of cardboard
- Leaves
- Glue
- Dye
Dried leaves must be crumbled.
Draw a tree trunk and branches on cardboard.
Once the paint is dry, apply glue to the trunk and branches where you want the leaves to be.
Sprinkle pieces of leaves onto the glue.
Press down the leaves a little to secure.
Shake off excess leaves from the appliqué.
The same tree can be made using colored paper.
It is not so easy to cope with such an application. The main thing here is to choose the right leaves
Applique Autumn bouquet
This craft is quite suitable as a gift for a teacher or mother from a schoolchild. After all, such a bouquet of leaves will last much longer than a fresh bouquet of real flowers.
Pre-dry leaves from different trees. Prepare glue, scissors and a sheet of cardboard.
Form a vase from the leaves by gluing them onto cardboard. And then help your child create a beautiful bouquet of leaves. To make it bright and neat, use light leaves for the craft, without holes or stains.
A vase for an autumn bouquet of leaves can be made from colored paper, or you can create a bouquet not only from leaves and do without a vase.
Autumn paintings, panels: applications
Using the appliqué technique, you can create beautiful and original paintings from a variety of natural materials.
Collect various leaves, twigs and flowers, dry them as a herbarium and start creating real panels and paintings.
The following are perfect for such a picture: moss, straw, spikelets, seeds, small flowers
Painting “Autumn Girl”
Volumetric applications of vegetables and fruits in the preparatory group
Every child will be interested in making a variety of fruits and vegetables out of paper, which they eat from an early age. They can be made as appliqués on paper or in volume.
How to make an apple out of paper
We will need a sheet of red double-sided paper. Fold it in half and cut it. We also fold the halves in half and draw the silhouette of half an apple with a pencil.
Glue the apple halves onto a piece of paper and create a core, stalk and leaf.
Winter applications for children
Bear on an ice floe
This master class presents a simple three-dimensional applique “Bear on an Ice Floe”, made of blue and white paper and cardboard.
Read more: applique “Bear on an Ice Floe”
Trees in winter
A simple winter applique made of cotton wool “Trees in the Snow” for children's creativity. A child-friendly plot, easy actions, and a combination of textured materials. How to interest a child in creative activities? This is a question many parents ask. Try offering your child to work not with colored paper or plasticine, but with cotton wool. Using this material, you will get an interesting winter-themed applique.
Read more: winter applique made of cotton wool “trees in the snow”
Applique with a voluminous bullfinch
You can start working on this craft with a riddle. Let the child try to guess the bird whose breast is brighter than the dawn. It is by their bright red breast that we recognize bullfinches. In today's master class we have the application “Bullfinch on a branch”.
More details: applique with a bullfinch on a branch
Winter bird feeder
Winter applique “Bird Feeder” is made of paper and cotton wool. This is a simple winter themed creative activity idea for kids.
Read more: winter applique with bird feeder
Fruit applique: senior group
Making strawberries out of paper
Cut out tails from green paper.
Fold two pieces of red paper in half and cut out a heart.
Glue one part to the base of the sheet, and glue the second along the fold line.
Glue a green tail cut from a template on top and draw dots with a black felt-tip pen.
Volumetric cherries made of paper: applique
From red paper you need to cut 4 circles (diameter 5-6 cm).
Fold the circles in half and cut out the green strip.
Take a green sheet 12*6 cm and cut out the leaves by folding the paper in half
Glue a strip folded in half onto a sheet of cardboard. Glue leaves on top and a cherry on each branch.


