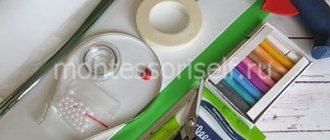
Handmade products have always attracted fashionistas. This is not only a unique accessory filled with soul and love, but also a wonderful field for creativity. Even from simple improvised materials, which are found in almost every home, you can create a real work of art.
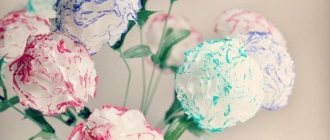
Today we will look at how to make flowers from nail polish and wire. This needlework technique is not at all expensive, it is quite exciting and simple, so that even a novice master can cope with it, and the finished result will definitely please you and will not leave others indifferent. Such flowers look very impressive, and at first glance it will be difficult to even understand what they are made of. At first glance, many people think that this is the finest work of porcelain.
special instructions
In order for the creative process to be easy, fun, and homemade flowers made from wire and nail polish to look beautiful, you need to choose the right materials.
- First of all, it is better to take nail polish a little dry. It’s easier to work with, and the flowers will turn out neat.
- The wire should be relatively soft and pliable. Don't take the thick one. A special wire for handicrafts, 0.2-0.6 mm thick, which can be purchased at specialized handicraft stores or hardware departments, is ideal. You will need it to create a frame for future flowers, so the color does not really matter. Choose the one that you like or is suitable for a specific decoration.
- But the wire cutters can be replaced with large scissors (if, of course, you don’t mind them, because during the work you need to be prepared for the fact that they may break).
- When creating flowers from nail polish and wire, it is quite possible to do without special tools such as pliers and round nose pliers. Since they are only needed to give the wire the desired shape, they can be replaced with improvised materials, such as a pencil, felt-tip pen or other frame for your future petals. In addition, if a sufficiently thin wire is used in the work, then all manipulations can be carried out manually, giving the product the desired shape.
- To fix the work done, as well as to ensure that the flowers made from nail polish and wire dry neatly, you will also need a washcloth in which you can place the finished workpiece, or a paper clip to hang it. The drying stage usually takes several hours, so to be safe, it is better to leave the workpiece in this form overnight.
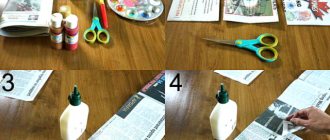
- Before starting work, prepare the work surface and cover the table with paper, newspaper or unnecessary oilcloth to prevent varnish from getting on it.
- Always have wipes on hand to remove excess varnish and liquid with acetone in case you accidentally get dirty yourself.
- It is recommended to work in a well-ventilated area.
Chenille wire animals
To determine which wire to use for a craft, you need to start from the age of the child taking part in the creative process and what you are going to do.
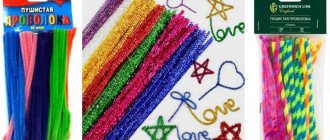
To create animals, fluffy colored wire is suitable, which is popular with young children; it is flexible and not brittle. Start by forming a small ball at the end of the wire, then wrap the next section around a pen or marker and continue as a squiggle tail, pulling out the stationery.
Cut two small pieces and bend them at the ends of the legs, then attach them to the body. The color and shape of the figure will determine the type of animal; stick eyes on the muzzle. You can make plastic people and other interesting things from this funny wire.
Flowers made from nail polish and wire: master class
Before you start work, think over all the necessary parts and their quantity. Draw a layout of the proposed craft. You can create not only flowers from nail polish and wire, but also butterflies, figures (hearts, stars) and so on - there is no limit to your imagination. The only condition is that the product must be small in size. If you are planning to make a voluminous item, then assemble it from several parts.
Experience shows that a separate part should be equal in diameter to a varnish brush. But it might be a little less. In this case, you can easily cover it with a layer of varnish, and the craft will be beautiful and neat.
Fish - wire keychain
Before you create a wonderful keychain, prepare:
- Uninsulated and non-ferrous copper wire;
- Beads;
- Key ring;
- Scissors.
Let's get started:
- Draw a schematic diagram of the fish according to which you will continue to work.
- Place a pair of multi-colored pieces on the ends of the copper wire and connect them.
- Spread the ends of the multi-colored wires and place beads on them.
- Wrap the vertically placed wire with another component, then throw the material over it, throwing the other side of the future keychain over it.
- Tie the ends of the wire in the tail area of the fish. Then attach a large piece of copper on top, thread colored wire onto it, and hang the finished product on your key ring.
Progress
Cut the wire into small pieces 20-25 cm long. There should be as many of them as the parts you need. For example, in order to make five flowers for a hairpin or brooch, you will need, respectively, five segments.
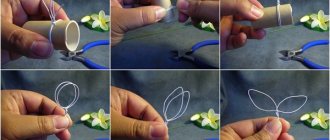
We take one such piece and bend it in half, placing a pen or felt-tip pen in the middle so that the free ends of the wire hang down.
Holding the wire, we turn the handle three or four times. Do not apply too much force or twist too tightly to avoid tearing the material.
After such simple manipulations, the first petal of your future flower is already ready. Do the same procedure four more times. You will get a flower consisting of five petals. To give it volume and more naturalness, lightly press each petal in the middle with a handle, as if making a small indentation. This way you can create other variations of colors, different sizes, using handles of different diameters.
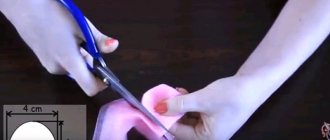
Now you can move on to the most exciting part - varnishing. We take the varnish and carefully paint the petals. It should be thick (slightly dry) and seem to hang from the brush. On the back side of the flower, carefully draw along the base of the petal and remove the varnish from the brush. It is very important that the latter completely covers the entire width of the petal.
The main, most labor-intensive part of the work is completed, and all that remains is to dry the blanks and assemble them into the final composition. Knowing how to make flowers from wire and nail polish, try to place the finished flowers close to each other, twisting the wires together. Carefully cut off the end and fold each free section inward under the last petal. From such a bouquet you can make hairpins, brooches, necklaces, rings, earrings, elastic bands or hoops. It all depends on your imagination and creativity.
DIY wire tree
You can make a beautiful tree figurine from wire with your own hands and without much effort. The finished craft will be an excellent decoration for your home. Prepare the following items to create the blank:
- Copper wire;
- Red and green beads;
- Flat stone.
Let's start creating the craft:
- Cut five long strips of wire that will serve as the base of the craft.
- Twist the strips together, leaving an empty gap at the bottom, and twist the tops so that they resemble branches in appearance.
- Attach the base to the stone and bend its ends.
- Thread the bead through the wire and bend it, then attach it to the branch.
- Exactly the same as in the previous paragraph, secure the branches to the tree. Thread beads between them.
- Straighten the branches so that they resemble the shape of a tree.
Portraits woven from threads and nails
The technique of weaving String Art fascinates many people, they begin to do it professionally: they make products for sale, perform huge works with which they participate in competitions and exhibitions. Of course, such skill is very difficult to achieve, but it is this scale, this scope that is especially impressive!
Do you recognize the portraits of idols?!)
Using the example of Justin Timberlake's portrait, you can see how such grandiose works are made (video from the wearts ru channel):
The directions of String Art creativity are very diverse; this technique is even used in weaving icons:
Working with different types of wire
After you have mastered thin wire for creativity, it’s time to move on to more elastic and deformation-resistant materials. For example, creating crafts from wire with a multi-layer coating and a larger diameter than a copper coil.
Master Hanka Sladka, Czech Republic
Working with elastic wires will be interesting for older children. To work with this material you will need curved pliers and a vice handle. If you plan to place the finished product on a support, do not forget to purchase a set of special pins. For those who have mastered the technique of working with wire, you can use a variety of devices to create patterns and decorations.
Decor pendant. Master Irina Sergeeva, Rostov-on-Don
Bicolor puppy
The toy's paws and face will be one color, and the body, head and ears will be another. For this craft made from fluffy wire, you will need four whole blanks - two each in two different colors and a piece of black for the nose. The sequence of actions is as follows.
- You need to make a frame from one whole wire. It consists of a back, legs and a small loop in front on which the head will be built up.
- Use a different color. Bend a small tail at the end and, starting from the back, wrap the body of the dog.
- Insert a black piece into the front part of the body, and bend the nose at one end with round pliers. Twist the second black end of the wire several times.
- Thread two new wires into the loop in the front of the dog; Make small ear loops from one, wrap the ends around them;
- Twist the muzzle from the second one so that the tip of the black wire sticks out of it.
- Make the eyes from pins with colored heads, having first shortened the metal part.
The bicolor puppy is ready.
Wire for a beginner
If you have never used wire for decorative purposes, twisted it into intricate shapes, or invented an intricate frame for toy furniture, then you will have to start small. Buy copper wire in a skein for bead crafts. This material can be purchased at any craft store. A tool for working with any wire is similar to pliers with an elongated nose. It's called round pliers. Crafts made from copper wire can be made with children aged five, when the arm muscles have become stronger and some perseverance has appeared. It is enough to explain the principles of operation and control at the initial stage.
There are plenty of sketches for working with copper wire on the Internet. Many fakes made from this material can be safely used in the design of a children's room. For example, a garland woven from copper wire can be a good decoration for a child’s room.
Using copper wire, beads and beads, you can decorate photo frames, flower pots or wall clocks. Small crafts made from copper wire can fill the calendar planning space or the daily routine of a first-grader. The most important thing is that the child will find it interesting and easy to work with such wire.
String Art for children
The art of weaving is very useful to practice with your child. Weaving with threads will instill in him attentiveness and perseverance, give him an idea of complex geometric shapes and develop fine motor skills, and simply introduce him to beauty!)
Start weaving using foam as a base. It has a soft texture that will easily allow your child to insert carnations into it.
Do not pull the threads on the foam base too tightly, as the nails may pop out and the entire composition will collapse.
With your help, a child can wind very simple, but at the same time cute things:
Please note that nail heads can be painted to match the thread color. You can use, for example, nail polish.
You won’t find such a piggy bank like this!)
Boys can make a picture with their favorite hero, for example, Spider-Man or Stormtrooper. Art String Art keeps up with the times!
Spider-Man...
...and an Imperial stormtrooper
How is String Art useful?
If you decide to make a picture from nails and threads with your own hands, then you will need a lot of patience, attentiveness and perseverance. But the results are worth it: decor using the String Art technique looks very stylish!
Various panels and paintings made in this style will decorate any interior, be it a cozy cafe, kitchen or other room.
Such a homemade gift will surprise and delight anyone, since you definitely cannot buy such a product in a souvenir shop.
Each of us is exposed to various stresses every day: at work, at home, in the family. Weaving from threads and nails has a calming effect on the psyche; this type of art is included in the list of art therapy techniques.
Therefore, as a result of doing crafts in this style, you will not only receive enormous aesthetic pleasure, but will also have a beneficial effect on your emotional health!
Materials and tools for String Art
To create your first painting using the String Art technique, check out the list of necessary materials and tools:
First of all, choose a wooden, cork or cardboard base
on which you are going to place the drawing. In rare cases, foam plastic or thick cardboard is used (these materials are ideal for mastering thread weaving with children).
Basis for String Art
Sandpaper
necessary to clean the base for the panel.
Hammer
the nails
themselves (furniture, carpentry or any other decorative nails are suitable).
There must be a lot of them! Even for the smallest picture you need to prepare at least 20 cloves
Dye
, varnish or adhesive film are useful if you need to add color to the base.
When using plywood or a wooden base for painting, a water-based stain is ideal
Threads for winding
(knitting threads are ideal in terms of density and color range, but you can also use floss, iris, and twisted threads).
It is important that the threads are strong(!), this will make your work easier, because during the weaving process you will not have to tie up broken threads!
Paper template with design
(or dot pattern). You can download it on the Internet, buy a ready-made diagram in a store, draw it yourself, or take a ready-made image and apply a bitmap to it yourself.
YOU WILL NEED IT
To create a picture from nails and threads, download the templates and diagrams collected in. It's free)
Pen without rod
or another narrowed cavity for more convenient winding of threads (can make the pulling process easier).
See how quickly you can wind threads using this simple tool:
Scissors
,
pliers
(will help if the nail is driven into the wrong place).
Anna art
tells how and from what paintings in the style of String Art are made, where to buy materials for String Art:
