New Year's garland
A great idea for a craft made from cups with your own hands. Ordinary disposable tableware turns into an original decoration.
You will need a minimum of materials:
- Several disposable paper cups,
- Tinsel,
- A piece of foil (you can also use candy wrappers to decorate),
- Rain,
- Paper (you can use newsprint).
- In addition, you cannot do without scissors, a stapler and a needle.
Manufacturing technique:
- Using a stapler, attach the tinsel to the cup along the bottom edge.
- Now go to the top edge - also decorate it with tinsel. Roll the paper into a ball and wrap it in foil.
- Pierce the bottom of the cup with a needle, into which you have previously inserted a rain ribbon.
- Pull this rain through the bottom into a glass and attach a ball to it to make a New Year's bell.
- Make several of these bells using misha of different shades - this will make the craft bright and unusual.
- Collect all the bells into a garland, attaching them to the tinsel. Your garland is ready!
Bells
The lightest products are bells. Manufacturing techniques can be completely different, depending on the available decorative materials. When making bells, it is possible to use several techniques at once.
Ornaments applied to the surface of transparent cups look beautiful. They need to be applied with stained glass paint from children's art kits. The design can also be done with a gel with shiny elements or regular manicure varnish.
White containers are covered with illustrations cut out from any materials. Napkins with beautiful designs are suitable. Next, the product is varnished, then decorated with the option you like.
You can attach tinsel to the edge of the finished bell at any time as a decoration. It is advisable to place a loop and a bow on top. The inside must be equipped with a tongue.
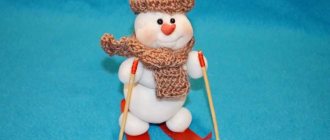
Cheerful snowman
We will complement the collection of New Year's crafts from cups with a snowman, which you can see in the photo of crafts from cups. This is a snowman craft that you can easily make together with your child.
The finished composition will be quite large; decorate your children’s nursery with it or install it near the Christmas tree.
- To make this snowman craft from plastic cups, take a lot of disposable cups, as well as a stapler, PVA glue, colored paper, and other elements for decoration.
So, what do we need and where to start?
Materials
Select appropriate materials. Both ordinary plastic cups and colored ones can be used. You can combine different volumes, which will allow you to create a variety of unique shapes.
What you will need:
- Scissors,
- Cray moment or second,
- Scotch,
- Needle with thread,
- Marker,
The work table on which the child will craft can be covered with polyethylene or newspapers to make cleaning more convenient. Cling film can work well for this purpose. If you don’t have such funds, you can take a garbage or regular bag, cut it, and build a covering for the craft.
Important: Be sure to advise your child on the safety of working with materials or work with him. The main thing is that a small child is not left unattended.
So, the table is ready, there is a set of materials, what else:
- Acrylic or any other thick or gel based paints?
- Sequins,
- Rhinestones,
- Beads,
- Beads.
As you can see, additional materials can be anything you like.
What can be done?
The following are interesting master classes for handicrafts with children from the authors of dnevnikmastera.ru.
"Modeling" a snowman
- To begin, fold the cups in the form of a circle, with the bottom inward, gluing or fastening their walls with a stapler. This will be the basis of the work.
- Place the following rows so that you end up with a ball.
- To do this, as the rows increase, reduce the number of glasses.
- Make two more of these smaller balls. Assemble your masterpiece and decorate the finished snowman - put a hat on him, cut out eyes, a mouth and a carrot from colored paper.
- And if you place an LED lamp inside, the toy will turn out to be fascinating.
So, the New Year's decor item is ready - you can decorate the room!
Bright basket
Idea for children's crafts made from cups. You can put sweets, hairpins and other little things in this basket.
You will need:
- A plastic cup,
- Wool threads,
- Colored paper and PVA glue,
- As well as beads and rhinestones for decoration.
Progress:
- Cut out elements for the future flower from paper of different colors, and then put them together and glue them. Glue your flower to the cup.
- You can first cover the glass with bright paper.
- Now make a handle - you can use woolen threads for this - weave it into a rope or braid and string multi-colored beads on them.
- Attach the handle to the cup. You can additionally decorate your creation with beads and rhinestones.
- The basket is ready, use it for decoration or storing all sorts of small items.
Technology for working with plastic cups
Plastic cups can be cut, using scissors to give them the desired shape, pasted over with additional elements or glued together.
Specific methods of work depend on the chosen craft, for example, toys are usually made from one glass, decorated with eyes, ears, and flower petals are cut out of a glass and then used as separate parts to create buds.
Christmas tree
Making a Christmas tree craft from plastic cups is very similar to the technique of making a snowman.
- You will need a large number of cups. You can color them in advance; the tree can be either plain or multi-colored.
- Fasten together the walls of the glasses, located with their bottoms inside the structure.
- As you move to the next tiers, reduce the number of cups in the row to give the product a Christmas tree shape.
- When the product is ready, decorate it with beads, bows and rhinestones.
- Place the tree on a base (for example, foam).
DIY bell for the New Year
New Year is a fabulous time. And what would a winter fairy tale be without a bell? A plastic cup is the ideal basis for creating a New Year's bell. You just need to use your imagination and a unique decoration will soon appear in your home.
The bell can be made in different ways. Let's look at the main methods:
Paints. Decorate the glass with a beautiful color. Then you can decorate it with a variety of snowflakes, wizards, gnomes, and so on.
Cling film. Take regular foil and wrap the cup in it. And you can glue a bow on top.
Self-adhesive paper. She needs to stick around the glass. You can hang a button on a thread inside and tie a bow on top.
If you want your bell to actually ring, you can place an actual small bell inside the cup.
Rabbit
- Use a plastic cup, pencils, scissors, paper of different colors (plain white, soft pink and shiny), as well as a glue gun, red and black felt-tip pens, a stationery knife, and you can’t do without cotton wool or white wool threads.
- Make a bunny ear template on white paper, cut it out, then trace it onto a piece of glitter paper.
- Cut out two ears from glitter paper, then make small ear blanks from pinkish paper. Glue the shiny and pinkish blanks.
- Use a utility knife to cut holes for the ears in the bottom of the glass. Insert the ears into the slots.
- Secure the bunny ears with a glue gun. Glue cotton wool between them - this will be the rabbit's bangs.
- Make a pompom from thread or cotton wool and attach it to the back of the cup. He will play the role of a tail. Draw a bunny's face with felt-tip pens. So, the toy is ready! Your child will definitely take a prize in a crafts competition if he makes such toys.
Bunny
By making several animals in one picture, you can play in the theater and act out interesting scenes. Useful for work:
- White plastic cup, if you only have a transparent one at hand, then paint it with snow-white gouache;
- Cocktail pipe.
- Doll eyes are flat, sold in departments with goods for creativity;
- Black marker;
- A piece of felt, white and pink;
The master class on creating a rabbit includes the following steps:
- Cut two identical oblong pieces from white felt;
- Cut out slightly smaller pieces from pink felt and glue them onto the white pieces;
- The result was a pair of bunny ears;
- Place the cup bottom up, open side down;
- Glue the ears vertically with PVA glue, resting them just below the bottom;
- Make a muzzle, glue the eyes;
- Cut the cocktail tube in half, cross the halves and glue them onto the muzzle, depicting a mustache;
- Using a marker, draw a smile and eyebrows in a “house”.
In the same way they create a bear, a wolf, a frog and other animals. Plastic glasses can be easily painted with acrylic paint of any color.
Snake
Ideal as an idea for creativity for young children with their parents. Prepare colored cups or paint them in advance if they are white.
Using a similar technique, you can make a baby dragon, decorate it with ribbons.
- You will need seven or more cups - this depends on how long the product you are going to make. Also prepare two or three sponges and a piece of wire with a diameter of up to one and a half millimeters.
- You can’t do without toothpicks, a thick woolen thread or an elastic band from clothes, scissors, a stationery knife, a black felt-tip pen, tape and an ice cream stick. Cut circles from sponges that match the size of the bottoms of the cups.
- Bend the wire, tie a knot at the end of the elastic, insert a couple of toothpicks into it, tie a new knot after tightening the knot. Trim the sharp ends of toothpicks for safety. Using scissors, make a hole in the bottom of the glass.
- Thread the wire, the loop should remain outside the glass. Place an elastic band in the loop and thread it through the bottom of the cup. Pierce the spongy circles with wire and then thread the elastic through. Place the sponge in the cup. Do the same with the remaining glasses.
- Shape a popsicle stick into the shape of a snake's tongue and paint it red. Cut a hole in the cup for the snake's tongue.
- If you used a thread for the work, attach it to the tongue with tape; if it is an elastic band, wrap a thick layer of electrical tape around the popsicle stick and tie the rubber band above. Draw a muzzle.
All these ideas will help you create original products that will decorate your child’s room, and making them will be a great pastime for the whole family.