Additional materials for work
To create original crafts, a number of auxiliary materials may be useful:
- Thick cardboard.
- Sewing needle.
- Glue.
- Paints, brushes.
- Scissors.
- Decorative elements (rhinestones, beads, decorative mesh).
To make more complex models, you will need additional accessories: wire, magnets, iron frames to frame the product.
Filling Drawing Segments
Large and beautiful paintings with large design elements can be made using the technique of circular or sequential thread filling:
- a template for the future composition is drawn on paper or thick cardboard;
- a thin layer of PVA glue is applied to the selected element and filled with threads;
- circular elements are filled starting from the center, threads are placed in circles;
- shaped components can be filled sequentially by choosing the direction of installation.
Using this technique, you can make not only a child’s drawing or applique, but also a beautiful geometric composition or abstraction with a lot of details.
Use of thread crafts
Creating crafts from threads is most often done for school and creative exhibitions. But this is far from the only application: crafts can be used as Christmas tree decorations or original applications.
Using a minimal set of accessories and a little ingenuity, you can make a decorative refrigerator magnet.
Historical reference
When translated from English, the word "String" means "rope", or "string", or "tension". Accordingly, String Art is thread art or a type of isothread. Isothread is embroidery on cardboard, that is, on a hard surface, and String Art is already an interweaving of threads on nails.
Author - Veronica Zapsha (@veronitta)
String Art is not a new creation at all, but it is very famous due to its beauty and originality!
This art came from England. Four centuries ago, English weavers used nails and thread to decorate their homes in this way. They drove nails into wooden planks and pulled threads onto them in a certain sequence. This is how openwork products for wall decoration were obtained.
Then the invented thread weaving technique was transformed and improved with the help of the English researcher Mary Bull. With the help of threads and nails, she taught children algebra and geometry, and thus the string art technique from Mary Bull appeared.
We invite you to watch a short tour of the String Art technique and a master class by Diana Kiseleva:
Master classes on making crafts
Very often in practice, various products are created based on pompoms made of threads. Therefore, the first thing a novice master should learn is how to weave a pompom.
We recommend reading:
Crafts from plasticine: the best master class for children at school or kindergarten. 90 photos of the best ideas for creating plasticine figures- Felt crafts - the best patterns and templates. Step-by-step instructions and master class for beginners (130 photo ideas)
- DIY crafts from egg trays - the best step-by-step master class, with description. TOP 100 photos of original ideas for crafts
Thread pompom
One of the most common methods for making a pom pom is to wrap yarn around a cardboard base. To work, you need to prepare the following materials:
- Cardboard.
- Scissors.
- Compass.
- Yarn.
You should give preference to soft yarn with high pile, because crafts made from woolen threads turn out fluffy and keep their shape.
Step-by-step instructions for the master:
- You need to cut a circle out of thick cardboard.
- Cut a smaller hole in the center of the paper circle.
- On one side, it is necessary to cut out a wedge-shaped section to make it easier to thread the threads.
- Next, start winding the yarn. For a pompom you need a fairly large number of threads, because pomp is the main quality of the product.
- The skein of thread is cut along the edge and the cardboard frame is carefully removed.
The threads are straightened, irregularities and blemishes are removed. The pompom is ready, and now it can be used in further work.
Crafts for kids
Applique Tree
For this craft you will need a minimum amount of equipment:
- sheet of white paper
- pencils
- glue
- Knitting thread
- scissors
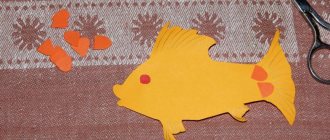
Cut the threads into small pieces, it will be best if the colors of the yarn match the shades of autumn foliage.
On a sheet of paper with a pencil, draw a tree trunk and outline the crown. Apply glue to the paper and begin to lay out the threads that will represent the foliage. Move from the edge of the crown to the center.
You can depict autumn leaf fall by gluing falling leaves and strings.
Let your child complete the picture on his own by using crayons to depict the sun, the earth, and whatever else he wants.
Applique Dog
- colored cardboard
- PVA glue
- colored wool threads
- black beads
- pencil
Using a pencil, draw the outline of a dog onto a sheet of colored cardboard. Start laying out the applique from the animal's nose. To do this, mark the place where it will be and apply glue there. Roll the black thread in a circle like a snail and glue it.
Divide the remaining threads by color, finely chop and fluff. Use them to depict the dog's fur. Finally, glue on black beads in the shape of the dog’s eyes, and use red thread to make a mouth.
Another entertaining and funny type of applique for kids will be three-dimensional portraits. Where the face can be made using paint or pencils, and the hair from wool yarn.
Rug made of pompoms
Having a sufficient number of lush and colorful blanks on hand, you can make an original and soft rug for your feet.
We recommend reading:
DIY crafts from Kinder surprise eggs - 125 photos of exclusive options with step-by-step instructions, master class and video- Crafts made from twine - an overview of original design solutions. More than 100 photos of new products + step-by-step instructions for creating crafts with your own hands
- DIY crafts from candy wrappers: 150 photos of the best ideas from craftswomen. Simple instructions, master class, diagrams and video tutorials on creating crafts from candy wrappers
The master can place it at his computer desk, near the bed or as decor on the coffee table. The soft and fluffy base will warm your feet, and the beautiful decor will emphasize the style of the interior.
To work you will need:
- Sewing needle and thread.
- Scissors.
- Decorative elements (in this case you can use silk ribbons, large elastic mesh, a piece of felt).
- Pompons prepared using the presented technology.
It is also worth pre-preparing a work diagram, a photo of the finished thread craft and step-by-step instructions. Work should be carried out in the following order:
- According to the existing pattern, pompoms are sewn in rows using thread and a needle.
- Additional seams are also laid between adjacent rows of parts.
The original frame of the rug will emphasize its curvaceous shape. Some experienced craftsmen can create very fancy and complex patterns on a rug using only pom-poms.
Ideas for useful and decorative crafts
The creative process of creating any of the crafts can be divided into several stages, which are best carried out sequentially.
First of all, this is preparation; at this stage it is necessary to decide on the main idea, draw up a plan for carrying out all processes, and allocate time for processing materials.
Next, maximum attention will be required to prepare the most consumables and all the necessary tools.
It is better to immediately purchase those accessories that are not in stock, so as not to be interrupted and not abandon the process of making crafts, being distracted by ordering missing elements or going to the store.
When choosing an idea for making a craft, you should consider not only its attractiveness, but also its scope.
This could be a product for a school exhibition, or a decorative decoration for the interior of a house or cottage, a gift for close friends, or even a useful craft that will come in handy around the house.
Family Tree
Using thick woolen threads or durable jute, you can create an installation on the wall of a living room or children's room.
On the wall you need to draw a sketch of the future trunk and branches, redrawing from a paper project, after which the threads are glued using template sketches.
Once the blank is ready, you can mount photographs on it in beautiful and personally decorated frames, or use decorative wood for other DIY decorations.
Pompom panel
For this craft you will need a picture or color scheme and many colorful pompoms made from wool threads.
The smaller the pompoms, the more interesting and detailed the picture will be; it could be a portrait of children, a pet, or a still life, an imitation of a famous work of art.
Fluffy pompoms can be glued to the base, sewn together, or secured to fabric or paper in the same way, and special meshes can be used to create rugs and blankets.
Decorative balls
Unusual crafts made from yarn and threads are often used in the interior and for thematic decoration of living spaces.
Decorative balloons are made using a simple technique; this requires inflated balloons (the diameter depends on the size of the craft), PVA glue and thread.
The inflated ball is covered with a layer of glue, after which it is wrapped in a chaotic order with threads, this layer should dry and the next one can be applied, again wrapping the product with threads.
As soon as the last layer has dried, you can pierce the ball and remove it from the workpiece, and use these parts to make lamp shades, table decor or candlesticks.
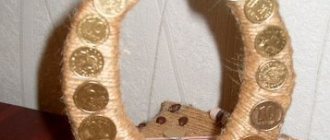
Yarn plates
Using this technique you can make stands for candies or other sweets, fruits and decorations, decorations or style accessories.
At the preparatory stage, a suitable container is selected, and starting from the center, a jute or wool thread (5-7 mm thick) is laid along its inner walls.
Glue is periodically used to fix the threads being laid; after making the craft and the glue has dried, it is removed from the container and you can start decorating it.
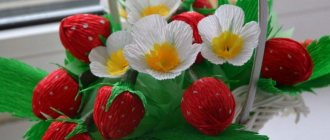
Flower bouquet made of threads
To create this model you will need additional accessories: metal wire and glue. Step-by-step instructions on how to make a craft from threads:
- A wide base for the bud is glued to a metal wire at one end. You can use old balloon trays, metal or plastic circles as a base.
- A pompom of any chosen color is glued to the base.
An improvised stem can be supplemented with a satin ribbon, wrapped in corrugated paper or covered with a layer of paint.
We recommend reading:
- Crafts flowers - 125 photos of the best ideas from craftswomen. Instructions on how to make it yourself from A to Z. Simple and complex options for crafts + video tutorial
- DIY crafts: TOP-200 photos of the best ideas. Schemes, master classes, modern design, new products, instructions with descriptions
- Crafts from plaster - 120 photos of the best ideas for creating original crafts with your own hands. Master class for beginners with examples and video lessons
Nitography for beginners
Thread printing is an excellent handicraft technique. You can also find the name “picture from threads”, “drawing with threads”. This technique allows you to create bright paintings without a brush or paint, just using threads and glue. Thread painting will help you express your artistic talent in a simpler form. The image is textured, voluminous and captivating.
This technique is not as well known as, for example, quilling or embroidery, but it already has its fans. And it’s not surprising, since thread printing is such a fascinating craft that it’s simply impossible to stop at just one job.
Materials and tools for thread printing
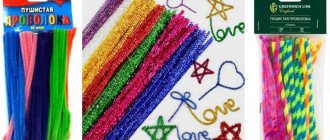
To create paintings from threads you need to prepare very few materials and tools . Needlewomen use:
- PVA glue,
- well sharpened scissors,
- simple pencil or acrylic paints,
- thin wooden skewer or knitting needle.
Threads must be of the same thickness.
It is better to immediately buy all kinds of colors from one manufacturer. If you take threads of different structures, the work will not look perfect and smooth, but it will turn out to be unusually embossed. Wool yarn, acrylic threads or even floss are suitable for thread printing. as a base , since it is not only durable, but also has a smooth surface, so the threads easily lay on the surface and quickly stick. You can also work with glass, plastic, wood, thick cardboard, velvet paper, carpet and fiberboard.
Little tricks and secrets
- You need to start working with simple drawings. When you learn how to form coils correctly, you can move on to plot images.
- It is better to take thicker PVA glue, since liquid will quickly be absorbed into the base.
- Glue is applied to the base, and the threads are applied on top.
You can even use threads that are left over from unraveling knitted items, but they should first be straightened.
- If threads of different thicknesses are used in one work, the image will appear in relief. The thicker the thread, the more voluminous the picture will be.
- It is more difficult to work with textured yarn (shaggy or curly thread), so for training you need to take smooth threads 2 mm thick.
- It is better to apply the image with a simple pencil. But some needlewomen prefer to make a color image with acrylic paints, so that the final result does not show the base through the turns of the design.
- You immediately need to glue the thread to the outline of the picture, and then start filling in the image.
- To ensure that the yarn turns lie more evenly, you need to use a knitting needle or a thin stick (toothpick).
- After laying the threads on the glue, you need to lightly press them with your hands to the base so that they stick more evenly.
- If something doesn’t work out for you or the turns are uneven, you can tear the threads off the smooth surface and redo everything.
- In order for the picture to turn out to be of high quality, you need to ensure that the turns fit closer to each other.
- If you notice that such and such a turn does not stick well to the base, then apply a little glue to a toothpick and glue the thread.
- Round elements are filled in a spiral, and long ones - from right to left.
- To make the finished work look more perfect and even, you can iron it with a warm iron, placing a wet light cloth or gauze.
- It is better to place finished paintings using the nitcography technique in a frame without glass, so that everyone can feel the relief of the image by touch.
Pig in the form of a refrigerator magnet
A pig craft made from thread is an original handmade souvenir. To work, you will need to prepare additional accessories: a metal cell or setting for framing the magnet, the magnet itself, especially strong glue.
Step-by-step instructions for the master:
- From pink yarn you need to weave a strong braid approximately 50 cm long.
- From thick cardboard, cut out a pig figurine from the front.
- Apply a thin layer of glue to the cardboard.
- Roll the braid in a circle, forming a pig.
- Bead eyes, a patch of pink felt and bugles are glued on top of the muzzle, and ears are cut out of fabric.
- Now the main task is to attach the magnet. To do this, the pig on cardboard is placed in a metal base, gluing the underlying layer.
- There is a magnet on the back of the metal frame.
The master received an original souvenir in the form of a refrigerator magnet.
Flowers
You can also make unusual flowers from pompoms made from leftover threads, which can be used to decorate any interior by choosing the appropriate color of yarn.
For flowers you need:
- threads;
- cardboard;
- glue;
- thin branches.
Instructions:
- We make pompoms using cardboard circles and winding threads.
- Glue the finished pompoms to the top of the branch.
- We put the finished flowers in beautiful bottles, decanters or vases.
Bird made of threads
A bullfinch craft made from threads, placed on a dense base, can serve as a decorative bookmark for a schoolchild. A voluminous bullfinch made of lush yarn will decorate a shelf in the living room.
Materials for work: yarn, cardboard blanks, metal wire, decorative elements (beads, eyes). Threads are wound according to the general principle onto cardboard blanks of three sizes: for the head, body and tail.
The parts of the titmouse are connected using glue, according to the diagram or the selected pattern of the bird. The legs and beak are formed from metal wire. The beady eyes are glued last.
Letter Design Combined with String Art
Letter design is a long-known interior trend; it was introduced by Western designers. Letters, words, phrases - all these elements are quite appropriate in decor, and in combination with threads and nails they turn into stylish voluminous home decorations.
Absolutely any letters on the wall will enliven the interior! And if they form a word, for example, a meaningful “OK” - that’s even better)
For a step-by-step master class on creating such a picture, see the link, where you can download a free template with letters.
The original master class is in English, so for your convenience we offer a brief translation of the process of creating this painting.
Materials and tools are standard: blue threads, brush, hammer, scissors, nails, dotted sketch on paper, tape.
Print the templates, glue the word from A4 sheets. Place the sketch on the base and drive nails into the points on the drawing. Remove the sketch from the base.
Tie a knot on the first nail and start winding the thread around the perimeter of the pattern (letters “OK”).
Creating letter outlines
Next, wind the threads around the resulting letters, gradually filling the background. You can wind the thread randomly, or you can wind it in a certain specified order. Don't forget to change the color of the threads according to the chosen color scheme!
Filling the background
This composition is made according to the same principle. The marine theme in letter-string design will appeal to everyone who loves the delicate color combination of blue and white)
Such a heartfelt personalized gift will definitely pleasantly surprise)
Author: Belarusian craftsman Alexander Andriyanov
A bright accent in a delicate children's room can be given by a panel with a very important word on it!) An alternative could be a similar panel with the name of the owner of the room or other warm words)
Despite the sharp nails, the String Art style can be very gentle)
Tenderness is in hardness
Love can be expressed by anything
How do you like such a bright greeting in the living room?)
Or a soulful picture in the hallway:
Home Sweet Home
Hallway sign
As they say “Don't worry – be happy!” String Art will help bring positivity into every home!)
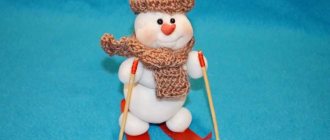
New Year's toys
New Year's crafts made from threads can be made from both pompoms and woven braids. The first method is used more often, since voluminous fluffy balls are excellent decorations for a bright holiday.
Today, thread crafts for children are a very popular technique for extracurricular creative work.
And as an original accessory for the interior, models made from threads are used more and more often - the popularity of the method determines the minimum financial investment, ease of work, and interesting appearance.
Using cut threads
Having previously selected a template, you can begin preparing for the creative process, which consists of several stages:
- threads of different colors are selected to fill individual elements of the design;
- wool threads are cut into pieces of 0.5 - 1 cm depending on the size of the pattern;
- one element of the template is covered with a thin layer of PVA glue without going beyond the edges of the workpiece;
- the hand-glued area is covered with cut woolen threads;
- the edges of the dried blanks are outlined with colored felt-tip pens of the corresponding color.
This method is suitable for using threads left over from another type of needlework and creating simple volumetric appliqués.
Photos of crafts made from threads
Did you like the article?
1+