Food should not only be tasty, but also beautifully presented. After all, first we eat with our eyes, and then we start the meal itself. You can simply decorate this or that dish with a sprig of herbs, but flowers made from whole vegetables will look much more beautiful. Bright roses, chrysanthemums, and daisies will turn any lunch into a celebration.
Any hard vegetables are suitable for flowers: cucumbers, daikon, radishes, tomatoes, onions, sweet peppers. You don’t have to be perfect at carving to make a beautiful flower craft. It is enough to learn a few lessons on the formation of flowers and every housewife will be able to aesthetically serve any ordinary dish. Even the usual “Herring under a fur coat” or “Olivier” will play differently if a bouquet of beet or carrot roses is on top. Next, we will take a step-by-step look at how simple vegetable flowers are made.
Onion chrysanthemum
An ordinary bulb can easily turn into a gorgeous white chrysanthemum. This flower can be used to decorate a salad or main dish.
You will need:
- 1 small onion;
- water at room temperature.
Manufacturing process:
- For chrysanthemums, a small, dense onion is suitable. It is desirable that the onion be thin-walled. You can take white, pink or blue onions. Accordingly, you will get flowers of different colors.
- Remove the peel from the onion, cut off the top and root. Using a sharp knife, cut the onion lengthwise, not cutting 0.5 cm to the bottom edge of the onion. When cutting, we start from the top edge, where the feather usually grows. Now we make another longitudinal cut perpendicular to the first one. The result is an onion almost cut into 4 parts.
- We cut each quarter into several petals, moving the knife in the same direction (from top to bottom, without cutting to the end). We try to make the cuts carefully so as not to damage the adjacent petals.
The notches should be deep enough to make the flower lush. But if you cut too much, the bud will simply fall apart and will not hold its shape.
- Pour water at room temperature into a deep bowl, place the onion in it so that the liquid completely covers it. Leave for one and a half hours. Gradually the onion will bloom in water and turn into a lush chrysanthemum, as in the photo
- Depending on the type of onion, it may take more or less time to open. If time is running out, you can carefully spread the petals with your fingers, then the flower will be ready even earlier.
Garlic in the mythology of different nations
According to the myths of Ancient Greece, Hermes gave a bunch of garlic to Odysseus so that he would not be afraid of sorcerers and witches. In the Roman Empire, a baby was protected from envious people and otherworldly forces with the help of a necklace made of dried slices. And the Slavs who inhabited the territory of Kievan Rus hung amulets in their houses to scare away evil spirits.
Negativity will not affect a person if he wears a bracelet with this vegetable.
During pregnancy, girls always made a talisman from a head of garlic and did not remove it until the baby was 1 week old. Then, to protect children, the liquid squeezed out of the vegetable was rubbed on the body, and a slice was placed under the head when the child fell asleep. Another effective way of protection is sewing garlic into clothes or making a garlic bracelet. In Egypt, the vegetable was a mandatory component of the diet of slaves, as it bestowed strength and endurance.
Fresh cucumber rose
A beautiful rose can decorate any salad or place it in the center of a plate with sliced meat or vegetables. Anyone can make such a flower, even those very far from cooking and carving.
You will need:
- 1 long fresh cucumber;
- vegetable peeler;
- toothpicks.
Manufacturing process:
- From a washed, dried cucumber, we begin to cut thin longitudinal strips with a vegetable peeler, from which we will subsequently form petals. We won't need the very first strip of skin.
- Slowly cut the strips until we reach the core with the seeds. Because the cut parts with seeds will fall apart, then we turn the vegetable over on the other side. Cut strip by strip again. One medium cucumber yields 16-20 pieces.
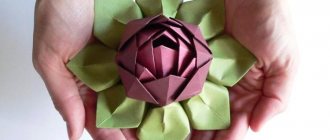
- We select the narrowest and shortest strip, roll it into a tube with a slight spiral offset, forming the middle of the flower.
- Now we form the first petal. Without letting go of the center of the bud from your hand, take a strip of cucumber with your free hand and wrap one end of it behind the spiral tube. A little lower we make a bend away from ourselves, lowering the second end to the base of the bud. We wrap the remaining end of the strip around the base of the rose as low as possible. The petal is ready.
- We apply the next strip to the base of the first petal, bend it in the same way away from ourselves and wrap the tip around the bottom of the flower. We try to form subsequent petals in a checkerboard pattern so that the base of the previous petal is covered by the next one. Because Since the vegetable strips are covered with sticky cucumber juice, the petals will easily stick together. If we come across blanks that are too long, we shorten them as we work.
- Don't worry if somewhere the flower turns out to be asymmetrical or crooked, this will give the rose a more natural shape. To form one bud we will need about 11-12 petals.
- At the end of the work, the flower can be secured with a toothpick, supplemented with several leaves from the same cucumber or several sprigs of parsley.
Using the same scheme, you can make roses from daikon, carrots, pickles, etc.
“The Cheerful Caterpillar and Her Friends” - crafts made from onions. Photo report.
Galina Shinaeva
“The Cheerful Caterpillar and Her Friends” - crafts made from onions. Photo report.
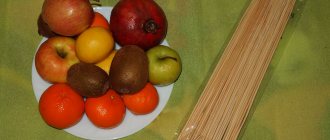
On September 1, my youngest granddaughter, she was two years old, went to kindergarten in the short-term stay group. And here is the first homework. For the autumn exhibition in kindergarten you need to make a craft from vegetables or fruits. At the family council they decided to use onions. It does not spoil as quickly as other vegetables or fruits, such as kiwi, bananas, tomatoes or apples.
The first thing that came to mind was to make
a caterpillar
.
Connected them together with toothpicks.
The joints were decorated with chenille wire.
The paws, antennae and tail were made from chenille wire.
Added eyes and a nose.
This is how the caterpillar turned out.
Daria really liked the lesson, she actively participated in our creativity. When the caterpillar was ready, it began to demand “More.”
An ant was made from red onions and two-color chenille wire.
A squirrel was made from two brown onions.
The squirrel's tail is made from dry onion scales.
On her own, with a little help from her grandfather, Daria made two birds.
This is how the caterpillar made friends.
Application “Cheerful Caterpillar” in the middle group Application on the theme: “Cheerful Caterpillar” in the middle group Purpose: to teach children to place objects on a sheet of paper in the right place. Develop goodwill.
Didactic game “Funny Caterpillar” The game is made for use in individual speech therapy classes. In the upper corner there is a pocket in which you can put pictures with a certain one.
Carrot lily
The orange root vegetable produces very beautiful bright flowers that do not require additional coloring. You can easily make a beautiful lily from a small carrot in a matter of minutes. It can be used to decorate a salad, aspic or snack cake.
You will need:
- 1 long carrot;
- sharp knife.
Manufacturing process:
- Wash the carrots and peel them. We make sure that there are no damage or wormholes on the carrot. We cut off the top and bottom parts of the root vegetable to make a barrel. Cutting off the excess, we form a pentagon from the carrots.
- Armed with a sharp knife, we cut off a thin petal strip from each edge, not cutting a little to the very bottom. We sharpen each petal at the ends, cutting off the excess at the corners.
- We cut off the next row of petals, but not from the place where the first ones were cut off, but slightly moving to the side. The petals should be staggered. Thus, we cut out 3-4 rows of petals depending on the thickness of the carrot.
- We round the remaining central part to form a cone. At this point our lily is ready. The same white lily can be cut from daikon.
DIY onion crafts: autumn onion craft for kindergarten
What are they used to make crafts for kindergarten!
Pumpkins, cones, leaves, sticks, pebbles and moss - everything has a place in children's creativity. But if you want to truly surprise kids and their mothers, be sure to try making autumn crafts from onions!
This miracle vegetable, capable of eliminating “seven ailments,” is undeservedly deprived of attention. And we propose to restore justice.
There is another compelling argument in favor of using such a unique natural material: in the autumn, onion crafts for kindergarten are especially good because while they are standing in the kindergarten lobby, in a group or reception area, the amount of harmful bacteria and viruses in the air noticeably decreases . It’s a rare case when a craft not only decorates the garden, but also protects children’s health.
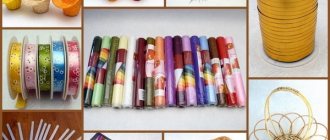
What you will need to make such a “miracle craft”:
- Several medium-sized onions. We give preference to fresh harvest, preferably bulbs collected from our own garden. Their outer skin is well attached, and the inner scales fit tightly to each other.
- A small flat pumpkin.
- Quite a large carrot. You can immediately give it a cone shape.
- A pair of toothpicks.
- Black peppercorns.
- Sharp knife.
Materials for crafts
Using a knife, we immediately cut one of the bulbs horizontally.
Cutting the onion
Insert one of the toothpicks into the top half.
Insert a toothpick
Peel off the brown husk from one side of the second onion.
Peeling off the husks
On the cleaned surface, closer to the roots, use a knife to make a notch.
Cutting out the dimple
Insert a peppercorn into it.
Insert pepper
We make another such depression nearby and immerse the second pea in it.
Add another pepper
Below we make a deep transverse incision.
Making a transverse cut
Cut out a couple of triangles, one semicircle and several narrow strips from the carrots.
Triangles, semicircles and stripes
We insert the triangles into the recess made next to each other.
Inserting triangles
Pink beet bud
If you need to beautifully decorate a dish with roses, then the most beautiful rose comes from table beets. The root crop has a bright color that smoothly changes shades.
You will need:
- 1 large beetroot;
- small kitchen knife with a thin blade.
Manufacturing process:
- First, let's prepare the vegetable for work. Wash the beets thoroughly and clean them. Now we give it the desired shape. On one side we outline the base of the bud. We give it a conical forum, cutting off all excess. The petals will be cut along the cone, the second part remains round.
- We outline the place where the first lower petal will be located. Holding the root vegetable firmly, we cut off the first petal, not cutting 1-0.5 cm to the end. Moving from the center along the wall of the cone to its base. Closer to the base, the petal should thicken, and we try to make the edge very thin.
- We cut out all the excess from under the petal. To do this, place the knife at an acute angle to the inside of the cut petal and cut off what is unnecessary. This way we create additional space between the rows of petals. We go around the circle, cutting off the petals - the first row is ready.
- Now we begin to cut the second row, only forming the petals in a checkerboard pattern relative to the first row. We also remove excess pulp. If necessary, trim and round the edges of the petals.
- We make the third level in the same way, only gradually reducing the size of the petals and changing their angle of inclination, because the cone will become increasingly truncated. The petals must be handled with extreme caution, because... They are very fragile and can break off with one careless movement.
- Having made 4 levels, we proceed to making the center of the bud. We also cut out petals from it, only they turn out to be quite small.
- We inspect the bud for the last time and straighten the petals. The pink beet bud is ready.
Zucchini crafts
Zucchini and zucchini also delight us with a variety of shapes and shades.
"A whale swimming on the waves." Dmitriev Timofey. Vegetables used in the work: cabbage, zucchini.
"Happy Rat" Klochkova Sasha. The work is made of green zucchini, the nose, ears, paws and tail are made of carrots, the eyes and teeth are cut out of white cardboard. Antennae made from fishing line were inserted into the nose.
Vegetable boat:
Margarita Generalova, 5 years old, made with her own hands, with her father’s help, an airplane from a zucchini grown by her grandfather (pictured).
Vegetables used:
- Fuselage, wing, stabilizers - squash;
- Cabin glazing, windows, door, side number - zucchini;
- Landing gear - potatoes;
- Wheels are carrots;
- Engine nacelles - cucumber;
- Screws, identification marks of the Russian Air Force (“stars”) - bell pepper.
Rabbit made from vegetables, kindergarten No. 267, Izhevsk
"The Gnome's House" Kirill Radostev. A zucchini house decorated with plasticine.
“What a company...” Tsintserova Alena Gennadievna. Zucchini, straw, chicken fluff, bird cherry.
"Crocodile Gena and Cheburashka." Polyakov Elizar. Crocodile Gena is made of zucchini, carrots. Eyes are made of chicken protein and black pepper. Cheburashka is made of white eggplants, eyes are made of cloves, a hat is made of an acorn cap, stands on a squash.
"Here I am". Isaeva Ekaterina Olegovna. Zucchini.
"Minion". Trofimova Polina 5 years old. Cherepanova Anastasia 13 years old. For our craft, we chose the ripest yellow zucchini. They painted it with gouache, made hair from toothpicks, and eyes from corks. Everything is simple and very beautiful!!!
"Little Pig." Andriychuk Daria.
"Race car" Klochkov Alexander, 6 years old. The car was made from zucchini and tomatoes. The parts of the car are made of paper. The person in the car is made of plasticine.
"Boat of Knowledge" Soloviev Alexey. The “Boat of Knowledge” craft is made from zucchini, carrots, cabbage, thread, sticks, and plasticine.
Anokhina Maria, 4 years old, MKDOU kindergarten “Skazka” town. Tuzha, Kirov region. Work: “Black Pearl”.
"Into the sky". Marchenko Kirill. Airplane made from natural material.
"Zucchini Engine" Lonsky Artyom. The work is made from zucchini with the addition of small details.
"Car". Maksimov Dmitry. The work is made from zucchini, the man is made from carrots, onions and tomatoes.
"Boat". Group No. 2. Educator G.V. Kochurova
Kovtun Sveta. "Firebird". The craft is made from vegetables, berries and leaves.
Makar Mikhailov. "Blooming cactus." Made with your own hands from zucchini and the aster that the zucchini feeds. And the needles of a cactus are made from pine needles.
Isakov Ilya, 5 years old. MKDOU "Kindergarten No. 4" in the city of Kirov. Leaders: Olga Alekseevna Komaritsyna and Anna Aleksandrovna Chistyakova. Mom - Isakova Olga Sergeevna.
The idea to create Minions came from Ilya. They made heroes with interest. The base is zucchini, the eyes are plasticine, the pants are made of fabric, the legs are salt dough.
Pochepko Vanya, Krasnoyarsk. The “Beauty” craft is made of zucchini and decorated using plasticine.
“Hedgehog”, Kopytova Alexandra
Alena Komarova, 4 years old, town. Tuzha, Kirov region. Work: "Penguin Trickster."
Chikisheva Sofia, 3 years old, MKDOU kindergarten “Fairy Tale”, town. Tuzha, Kirov region. Work: “At - two! At - two! Make way for Jacket Potato."
Sweet pepper flower
Using peppers of different sizes and colors, you can get a beautiful floral bouquet that you can even snack on.
You will need:
- 1 pod of sweet pepper with a tail;
- cold water;
- small kitchen knife.
Manufacturing process:
- Taking the pepper by the tail, we make cuts with a sharp knife. We move from the top of the pod to its base, without cutting a couple of centimeters to the tail. Cut all the pepper pulp into thin strips, moving in a circle.
- We cut each resulting narrow petal lengthwise into two more parts. Therefore, it is better to take meaty peppers. If we cut off only the peel, it will curl into a circle. And if a little pulp remains on the peel, then both petals will be straight.
- When chopping the vegetable is finished, immerse the pepper in cold water for a quarter of an hour. The petals in the water will open and spread apart, making the flower voluminous and beautiful. If we leave only the skin, it will curl into a ring, forming beautiful curls along the radius of the flower. Such an elegant flower will become a real decoration of the festive table.
Onion peel applications
Some people prefer unconventional methods of working with vegetables. For example, onion crafts can be made using its peel. Onion peel is a very interesting and easy-to-work material with a gorgeous color. The husks are removed very carefully; they must not be crushed. The removed material is steamed in water (hot) for about 10 minutes. The husks are then ironed. You can also paint the material with potassium permanganate or wood stain.
Before starting work on the applique, sort the husks into light and dark shades. As a base, take silk, velvet or cloth, pre-stretched on a stretcher. It is also acceptable to use cardboard or thick white and colored paper. Purple and blue shades are great for crafts from onion peels. Black color will reduce the amount of work, but will beautifully highlight the golden color of the husk.
Edible carrot flower
The blanks for this fabulous flower are cut out very simply. Then they are collected with a toothpick and the decoration is ready. And to make the flower tasty to eat, the petals are kept in a marinade.
You will need:
- 1 large thick carrot;
- salt and vinegar to taste;
- water;
- sharp knife;
- toothpick;
- vegetable peeler;
- 1 small onion.
Manufacturing process:
- Wash the carrots, peel them, and make an oblique cut. Using a vegetable peeler, cut thin petals along this cut.
- Cut each petal in half from one edge to the center of the workpiece. At this point, the petal will fold and prick onto a toothpick during assembly.
- From the opposite side along the edge to the center of the workpiece, we cut off narrow strips on both sides of the top of the petal. For one flower we make 4 large petals and 4 slightly smaller ones.
- So, let's start collecting the flower. First we put the large petals on the edge of the toothpick. To do this, take the first piece, string first one half of the part cut in half onto the edge of a toothpick, and then the other. Thanks to this, the petal takes on the shape of a boat. The cut off antennae stick out. We string all 4 large petals, placing them opposite each other.
- Now we also put on smaller petals, but we arrange them in a checkerboard pattern. Place a piece of white onion on the end of a toothpick to imitate the core of a flower.
- To make the flowers tastier, add table vinegar and salt to taste to boiled chilled water. Mix everything well, put our flowers in there for an hour. Decorations marinated in this way can be stored in the refrigerator for several days.
How to make a craft from onion peels with children: step-by-step description
In the master class we will show you how to make a small decorative pendant in the shape of an Easter egg, but you can also make a small panel of any shape using this technique.
Step 1
— From scraps of gray cardboard, cut out an egg-shaped blank using zig-zag scissors.
— From scraps of wallpaper, cut out a blank of a similar shape, but smaller in size. The difference in size is approximately 3 -5 mm.
Helpful Hint: What color of paper to choose for the background in this step. I tried several wallpaper colors. And I found out that roses made from onion peels look best on a white background.
- Glue the smaller piece onto the larger one.
Step 2
Apply dried onion tails - our future “roses” - to the background blank and try on which ones will look best in the composition.
Trim off excess ponytails.
Step 3
Apply PVA glue (you can pour droplets of glue into the middle of the cut of the onion), apply a good layer of glue to the workpiece and attach “roses” from the onion peel to the background in a certain sequence, creating the desired composition. Allow time for the glue to dry completely.
Step 4
Make a craft:
— Tie a bow from untwisted hemp rope using linen twine.
— String beads onto the ends of the twine, tie knots so that the beads do not fall off.
- Glue the resulting bow to the bottom of the craft using hot glue.
— Make a hole for hanging the craft. In the upper part of the craft made from onion skins against the background at the top, pierce a hole, thread the linen twine, and tie a knot.
The craft made from onion peels and waste material is ready. The result was a small panel in a simple and soulful country style. With this panel you can decorate an exhibition of autumn children's crafts or a room in a country house, you can make a bouquet of more flowers or make the panel square. Imagine, try, experiment! We wish you inspiration!
You will find more interesting ideas and master classes for making crafts from natural and waste materials with children in the section of the site
In the fall, the time comes when teachers in kindergartens and schools ask parents and children to take part in exhibitions. Many willingly participate, undeservedly bypassing the attention of such a vegetable as onions. Onion crafts can be very interesting. In addition, onions are an affordable and easy-to-process material. It is easy to cut, pierce, and the bulb has a convenient shape. This article will teach you how to make crafts from onions with your own hands!
Hot pepper antarium
The bright red hot pepper antarium looks very impressive on the table. A dish decorated with such a flower will not go unnoticed. And making such a decoration is not at all difficult.
You will need:
- 1 pod of hot pepper;
- scissors;
- sharp knife.
Manufacturing process:
- We wear rubber gloves to avoid getting burned when working with hot peppers. Wash and dry the pepper.
- Using a sharp knife, make a longitudinal cut along one of the walls. We cut off the pulp around the stalk, cut out the tail along with the core on which the seeds are attached. You need to act carefully so that the seeds do not fall out, because... they will occupy a central place in our craft.
- We unroll the pepper on a board and give it the shape of an antarium. To do this, it is enough to round the bottom of the workpiece and slightly trim the top so that it becomes pyramidal in shape with a rounded edge.
- The final touch remains. Having retreated 2-3 cm from the base of the workpiece, we make a puncture in the center on the front shiny side. We insert the tail of the pepper into it, and the core with the seeds remains on top, turning into a flower pistil. The antarium is ready.
Use in amulets: rituals and methods of activation
Powerful home protection
A hard, milky-white head of garlic must be purchased secondhand, paying in small change, or grown yourself. If the vegetable is from the garden, then in return you need to leave 5 kopecks in the ground. At the kitchen table, garlic is clutched in the left palm, and a handful of black salt is taken in the other hand, which is prepared on Maundy Thursday of Holy Week. A disclaimer is pronounced: “Just as garlic is snow-white and hard and consecrated salt is pure and powerful, so it will be sunny in your home, clean in your apartment. Evil forces and envious people will bypass the tenth road and will not come close. They will not cross the hardness of garlic and the power of salt. Let it be so!".
To tie the protective attribute you will need a yellow silk thread.
The head is sprinkled with seasoning and then tied with a long, bright yellow silk thread by the tail. The talisman for the home is hung on the ceiling in an inconspicuous place - a pantry, balcony or behind kitchen cabinets. The amulet is valid for 1 year. Then the garlic is removed and buried outside with an expression of gratitude. It is prohibited to throw away a used amulet.
Amulet against magical attacks and the evil eye
To attract money, you need to remove the husk from the head and put it in the wallet compartment. The month must be in the growth phase.
To make a strong amulet, you will need to first peel the vegetable slices.
If you suspect severe damage, it is recommended to make an amulet according to the following instructions:
- Take 7 peeled and washed slices and pierce them with a hot knitting needle. Each piece of garlic should have 7 through holes.
- The slices are connected with a snow-white lace and tied with 7 knots.
- A black thread is threaded through, forming 2 circles.
- The tied slices are wrapped in scarlet linen or cotton.
- The wood chips are set on fire and blown out so that smoke comes out. As an alternative, an aroma stick with a neutral scent that will not overpower the garlic aroma is suitable.
- A disclaimer is pronounced: “Just as my exhalation extinguished the splinter, so the breeze that passed through the garlic will blow out any evil spirit that crosses the threshold. As long as I breathe, no splinter will burn. If the garlic cloves haven’t dried out, then evil spirits and sorcery won’t get into my home, and the enemies of my family won’t see them.”
- Holding the wrapped amulet, you need to make 3 circles around the apartment.
- The garlic garland is taken out of the fabric and hung on the ceiling so that it is not visible.
A rotten attribute element must be replaced.
If the slice begins to rot, then it must be immediately replaced with a new one and the ritual repeated. This reaction indicates that an attack was made on the house, but the amulet successfully repelled it. The rotten part of the head cannot simply be thrown away. The slice is dried and burned to ashes, and the resulting ashes are scattered in nature with mental gratitude.
Amulet made from pepper and garlic
The advantage of amulets, which are made from burning red pods, is that they can be placed in plain sight. The more people pay attention to the amulet, the stronger the magical power. 6 white heads of garlic, 4 peppers and 2 onions are strung on a bright yellow thread. Amulets made from burning vegetables are usually placed in the kitchen, next to the cabinets. The slander is arbitrary, you can simply mentally ask the vegetables for protection, for example: “Vegetables are sharp, burning, burn any misfortune that approaches the threshold, ward off the envious, please.” The amulet is valid for 6 months and then replaced with a new one. It is recommended to burn the spent garland over an open fire.
Daikon curler
A white papillot made from daikon with a bright orange core looks very bright in spring. Therefore, it is good to decorate holiday dishes for March 8 and Easter.
You will need:
- 1 daikon;
- 1 carrot;
- salt;
- water;
- sharp knife.
Manufacturing process:
- Wash the daikon and remove the peel. Cut off the lower tapering part and the tip. You should get a barrel-shaped piece 10-12 cm high.
- Separately, prepare a steep salt solution in a bowl and place the daikon preparation there for an hour. After this, the radish pulp will soften and will be easy to cut.
- Now place the barrel on its side on a cutting board. We begin to cut a strip of 2 mm thick and 10 cm long in a circle with a sharp knife.
- Fold the resulting ribbon in half lengthwise. We take a sharp knife and start making cuts from the side of the bend, without cutting to the end of 1 cm. We make cuts in increments of 0.5-0.7 cm.
- We twist the fringe into a flower and chop it off with a toothpick.
- We perform the same operation with carrots to obtain a fringe to form the center of the curler. We attach the orange part to the center of the flower with a toothpick. The flower is ready.
Cipollino
To make the “Cipollino” craft, take three medium-sized onions. A slightly sprouted vegetable is best for the head. Using a regular awl, make small holes for the eyes, mouth and nose. Fill the resulting openings with seeds. For example, make eyes from grape or apple seeds, a nose from corn grain, and a mouth from viburnum seeds. The remaining bulbs are the body of our fairy-tale hero. Cut off the tops of the fruits, carefully insert thin twigs or toothpicks there and connect the bulbs together. To attach the head to the body, cut off the root part and place it on a toothpick. It’s not at all difficult to make such onion crafts with your own hands.
Leek flower
A very effective decoration for any leek dish.
You will need:
- 1 leek stalk;
- knife;
- toothpick.
Manufacturing process:
- Take a fresh onion stalk, wash it thoroughly, and separate one outer leaf. Fold it in half along its entire length.
- Using a sharp knife, make cuts from the side of the bend, not cutting 1 cm to the edge. We make cuts every 0.5 cm.
- We roll the workpiece into a spiral, starting from the light green part of the sheet. Then the flower will be light inside, and will gradually darken towards the edges.
- We make petals from the wide part of the stem by bending equal sections of the stem in half.
- Attach 6 petals to the spiral-twisted core with toothpicks. At this point, the work on the flower can be considered completed.
To ensure that your own vegetable flowers do not disappoint you, choose fruits with a dense structure. Also, many vegetables tend to dry out quickly when cut, so you should not make vegetable flowers long before serving. As a last resort, store the flowers in the refrigerator until ready to serve. If you follow these simple rules, your dishes and decorations will impress even the most picky guest. Bon appetit everyone!
Video:
Onion peels for the garden and indoor plants
An infusion of onion peels and its waste is used to wash indoor plants, cleansing them of a dangerous pest - spider mites.
The infusion is prepared like this. Place 20 g of onion peels in a liter glass jar of water and leave for 24 hours. Then strain the liquid and thoroughly rinse the plant with it, especially the underside of the leaves. After a day, the plant must be washed well with clean water.
Try watering indoor plants with onion peel infusion and you will see that they will “become more cheerful” literally before your eyes.
It turns out that onion peels are universal and can be used more than once. After preparing a decoction, infusion or dye, do not throw away the husks, but use them as organic fertilizer and you will definitely get a good harvest of vegetables. The husk is not only a fertility stimulant, but also an antiseptic that helps in pest control.
Used husks can be composted.
It is also known from popular experience that to combat the Colorado potato beetle, which destroys potato plantings, onion peels are buried next to the plants - the beetles cannot stand its smell.
When planting tomatoes, cabbage, or potatoes, place a handful of onion peels in the hole. This helps against the invasion of wireworms and mole crickets.
It is useful to spray cucumbers with onion peel infusion when their leaves begin to turn yellow. Take two large handfuls of husks in a bucket of warm water (about 30C), bring the water to a boil and leave to steam under the lid. When the infusion has cooled, drain. Add 2 liters of infusion to a bucket of water (+20-22C) and pour over the cucumber leaves.
Often, with the soil (if it is not steamed) you can introduce a fungus, from which the plants get sick with “blackleg”. “Black leg” can be removed if you treat the soil and plants with an infusion of onion peels (20g of onion scales are poured into 1 liter of water, left for 24 hours, filtered and sprayed 2-3 times after 6 days.
Clean onion peels can be stored in a dry place for years without losing their medicinal effect. One very important note: we take the husks removed from absolutely healthy bulbs.
In the fall, the time comes when teachers in kindergartens and schools ask parents and children to take part in exhibitions. Many willingly participate, undeservedly bypassing the attention of such a vegetable as onions. Onion crafts can be very interesting. In addition, onions are an affordable and easy-to-process material. It is easy to cut, pierce, and the bulb has a convenient shape. This article will teach you how to make crafts from onions with your own hands!
Broccoli poodle
You will need: broccoli or cauliflower, a knife, toothpicks, black peppercorns.
Master Class
- Select a part for the poodle's body.
- Cut off 4 legs and a tail.
- Select the part for the dog's head.
- Use toothpicks to secure the broccoli pieces together to form a poodle.
- Attach black pepper eyes.
Broccoli poodle is ready! You can make it from cauliflower in the same way.
Carrot crafts
This root vegetable also sometimes grows into intricate shapes. This is just a godsend for lovers of creativity.
Crafts from MBDOU 267 in Izhevsk. Carrot chanterelle.
Carrot Indian