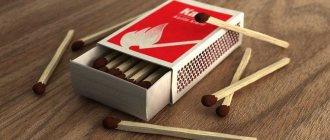
About 1.5 million years ago, man learned to make fire. Thanks to this discovery, cooking, heating the home and much more became possible. If earlier it was necessary to strike a spark by rubbing a stick against a stick or a stone, now it is enough to take a match, strike it on the box, and now a fire is burning in your hand on a small stick.
We are accustomed to this use of this item. But what if matches can be used for other purposes and still get benefits? Today we will tell you how to do this.
Let's learn how to make crafts from matches with your own hands.
The benefits of crafts made from matches
“What is the benefit?” - you ask.
Crafts made from matches can truly be a work of art. And each art, in turn, develops in a person a sense of beauty, perseverance, hard work, discipline, creative and spatial thinking.
Take a match in your hands. It is small, wooden, and has four sides. Hold it in your hands a little longer. Now you have your own feelings about this subject.
Small materials develop fine motor skills, and long-term work with them calms the nerves.
Who can practice match art?
The art of matches, like love, is suitable for all ages. For children, crafts from matches that they make themselves are a way to acquire new skills and knowledge, and for an adult, it is an opportunity to try something new and spend time productively.
A person is constantly looking for a way to self-realize, and after trying yourself in this creativity, perhaps you will realize that this is exactly the way you were looking for.
House
The previous lesson is needed to create a house, and if you try, you can create a castle, church and other architectural structures. To create them, basic skill in working with matches is required. In this work the main steps are:
- sketch development;
- assembly.
Naturally, creating such a craft will require perseverance and concentration, so don’t rush and go step by step towards your goal.
https://youtu.be/pIQo3P0c-AYhttps://youtu.be/llhkN4aRCqY
_
Workplace
The place where you will create should be well lit and spacious. To do this, you can sit near a window or use a good lamp.
It is best to work on a table so that you can move your hands freely and additionally place all the necessary materials nearby.
Tips from needlewomen
The following tricks will help you quickly master the algorithm for creating crafts:
- In order for the house to look aesthetically pleasing, it is necessary that the heads are positioned harmoniously - in rows they should look in the same direction. In other options, they are alternated, maintaining symmetry and uniformity.
- The entire work process requires special care and attention. Just one awkward move can ruin the whole job, and you'll have to start over.
- A CD box is most often used as a workplace. Dough or plasticine can be used as a base; the material is rolled out and laid on a flat surface. One of the advantages of this choice is that the house does not slip.
- In order not to spoil the already assembled structure, tweezers are used for “jewelry” actions.
- To maintain the required distance between the “logs” in the first rows of the base, a ruler is laid on the surface.
- If a child is involved in creativity, you should avoid the possibility of a fire hazard. The matches are poured into a container prepared in advance, and the boxes are thrown away. It is not only safe, but also convenient for work.
- Using matches with multi-colored heads in your work, you can give the product additional attractiveness.
- When choosing a material, it’s a good idea to look into the box. It is important that not only the “logs” are even, but also that the heads are small and of the same size.
- When starting the creative process, everything unnecessary is removed from the workplace. Any little thing, even a slightly wobbly table, can play a cruel joke and reduce all efforts to zero.
- To align and push parts, use not only tweezers, but also a toothpick.
Materials and tools required
First of all, these are, of course, matches. Chances are you have a couple of boxes lying around in your kitchen cabinet. And if not, then it won’t be difficult to purchase them at your nearest grocery or hardware store.
We recommend that you buy more, so that later you will not be distracted from the process, and if something remains, it will always come in handy on the farm.
Scissors or a utility knife, but wire cutters or nail clippers are best. They make it much easier to separate the ignition head from the handle.
Glue "Moment". It sets quickly and prevents the structure from spreading, but PVA will also work. If your child is doing the work, then it is better to fasten the matches together with small pieces of plasticine.
Thick cardboard for attaching crafts or drawings to. Pencil and ruler for sketching the outline of the drawing.
Well
The foundation for the future structure is prepared from four matches. The heads are removed, and then the elements are glued together perpendicularly, so that the end part of the next one is attached to it at a distance of 3-5 mm from the edge of the side part of the match. The result is a square with offset side lines. The second row is prepared in the same way, but is glued to the base in the opposite direction. Subsequent rows are also alternated until the desired well height is achieved.
Two stands are made: two matches with the heads removed are glued together and attached to two opposite walls of the well in the middle from the inside. Another match is glued to the protruding parts, but from the outside.
The collar consists of a toothpick bent in a zigzag pattern at one edge with a thread wound in the middle. The collar is glued to the posts, and a roof beam is attached on top of the posts. The sides of the roof are made up of elements alternating along the length, fastened together with glue, another match is attached to the seam on the inside for reliability, and two crossbars are placed at the edges. The roof rests on a beam.
Additional materials
Some crafts may require additional materials. You can replace them, combine them, add something of your own, or completely abandon their use. It all depends on your taste and imagination.
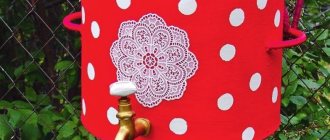
- Bathroom tiles. What is it like?
- Angorka. What it is?
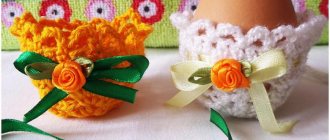
- Flowers as gifts.
It can be:
- fabric, threads, ropes, trimmings, beads, beads, pasta, cereals, wine corks, etc.
- paints and brushes.
Never throw away boxes. You will need them for crafts, and maybe you will want to make something new from them later.
Nice panel
You can use matches to make a craft in the form of a beautiful panel. The product can serve as a frame for a photo or a congratulatory message. Here everything will depend on the decorative elements present.
For this activity you need a sheet of thick cardboard. We measure the length of the match, then multiply this number by 4. When making a large panel, the length of the match should be multiplied by 5, 6, and so on. On a sheet of cardboard you need to draw 16 identical square shapes.
The base of the first square must be filled with matches, laying them straight. One match head faces up, the next down, and so on. The second square is filled with matches arranged in a horizontal direction. The entire cardboard is filled in this way.
The matches are attached to regular office glue. At the same time, you should not use a liquid consistency, otherwise it will soak the wood. Glue a large cute flower into the central section of the craft. The edges of the panel can be decorated with beads or images.
Let's get started
Now you are 100% ready to start your creativity.
Our small master classes are in order: from the easiest to the most difficult. As with any other activity, we recommend that you start with the basics and gradually move towards the top, making the task more difficult step by step.
Match puzzles
The puzzle is not a craft, but you can spend a whole themed evening on this topic at home or at school, among high school students or just adults.
Dream Island - a place for a family holiday- Gas burners for heating metal: where to buy on the most favorable terms?
Gazelle. Why is she so popular?
When you search for “matchstick puzzles,” you will find a whole bunch of them. Choose 10-15 puzzles and have a competition. All you need are matches.
Final stage
Glue 8 matches onto the tape and cut out two circles from such a shield. They can be drawn using a coin.
Place the petals between the circles, gluing them together. A whole chip is used as a stem. Remove the tape after the glue has completely dried.
Match cube
We move from two-dimensional space to three-dimensional space. Large complex match structures are based on simple geometric shapes, the execution of which you need to master. And we'll start with the cube.
Stock up on enough matches and a ton of patience. If you don't succeed the first time, don't give up and try again.
So let's get started!
- Two matches are laid out on the work surface, parallel to each other, at a distance of approximately 3 cm.
- Perpendicular to these two matches, 8 more are laid out, in the second tier.
- With the third tier we again lay out eight matches, parallel to the first tier and perpendicular to the second.
- We have received the basis for our future cube.
- The next tier will be laid out perpendicular to the previous tier. In the fourth tier, 2 matches are placed parallel to each other, as on the first tier.
- The fifth tier is again 2 matches parallel to each other, but perpendicular to the previous tier.
- Repeat steps 5 and 6 five more times.
- After these steps, all that remains is to complete the frame by placing 8 matches in parallel, and then 6 matches, perpendicular to the previously laid eight.
- To prevent the structure from collapsing, place a coin on top.
- Stick 4 matches in the corners of the cube, and then repeat the same around the entire perimeter. The heads should point up.
- You will get a square of match heads, place a coin in its center and press down the sides so that they fit snugly against each other.
- When the heads are clearly marked, you need to insert 6 matches between them, and another 6 matches perpendicular to the previous ones.
- To complete the craft, you need to insert matches into all the remaining holes.
And this is just the beginning.
Practice and develop your skill. Study yourself and help your child create beautiful things. And who said that matches are not a toy for children?
Instructions
Let's look at the step-by-step instructions for making a match cube:
- Step No. 1. Place seven matches with black heads in the base.
- Step No. 2. Seven matches with red heads are placed across the first tier.
- Step No. 3. Next, the so-called well is made - two matches (on the edges of the workpiece) of different colors.
- Step No. 4. In a similar way, seven rows of material are laid out with black, and six with red.
- Step No. 5. “Close” the cube by placing seven matches with different colored heads into the blank.
- Step No. 6. Place seven matches crosswise and place a large coin on top.
- Step No. 7. Insert matches into the existing gaps in a vertical position.
- Step No. 8. Lightly press the coin and then carefully squeeze all the matches from all sides.
The craft is ready. As you can see, it can serve as the basis for such a product as a small house.