Weaving from wicker, straw and other plant fibers is a fascinating activity, but ordinary newspaper tubes can be a modern alternative. After all, natural materials are quite capricious; a lot of effort must be spent on their proper preparation, which is very problematic in an apartment.
Therefore, paper wicker weaving is rapidly gaining popularity. This hobby requires minimal investment, and the products are very beautiful and durable. In addition, you can easily get rid of piles of accumulated newspapers and magazines, turning them into hand-made masterpieces and delighting your friends with unusual gifts.
In this article we will reveal all the secrets: how to make newspaper tubes and color them, how to properly prepare a man-made paper vine for weaving and other little tricks so that your crafts are impeccable.
Pros and cons of newspaper weaving
DIY crafts from newspaper tubes, like any creativity, have characteristic features.
pros
- Availability of material.
- Cheap, because old newspapers are worth nothing.
- Simple technique.
- Possibility to paint products in different colors.
- Unlimited number of options.
Minuses
- A large amount of material is required.
- Long preparatory stage.
- Crafts are afraid of dampness.
- Fragility and relative fragility of products.
Cones
By the way, you can make a very beautiful topiary from cones, especially since it is quite easy to do. What is needed to make topiary from cones:
- pot or glass;
- stick, branch, tube - trunk;
- round base for topiary - you can take a foam ball, you can cut it out of polyurethane foam, in extreme cases, crumpled newspaper wrapped in threads will do;
- lumps (preferably bigger);
- brown acrylic (preferably glossy, dark);
- fabric for decorating a glass;
- decor to decorate your topiary made of cones - beads, threads, buttons and so on;
- gypsum or any building mixture for fixation;
- glue gun and rods for it;
- scissors, brushes.
Our craft must be neat, only then it will not be a child’s product, but a chic craft decor.
We start making topiary from pine cones by decorating the glass - we cut the fabric diagonally (this way it drapes better), and we tighten it, gluing it with a gun. By the way, do you want to avoid unsightly glue marks? Glue it where it will not be visible (on the bottom and inside the glass, and the walls should simply be covered).
We prepare the base - fix the stick to the ball, paint everything with acrylic (it’s better to cover it with newspaper first).
We cover the ball with cones, let it dry and fix it in a pot - to do this, we dilute the plaster, dip the trunk of our tree and hold it until the plaster sets.
You can decorate topiary from cones in different ways; I prefer beads in natural shades.
You can decorate your pine cone topiary with ribbons, hang artificial berries or even small figurines on the cones.
Materials
Old newspapers, glossy magazines, advertising brochures, in a word, everything that relates to single-use printed products are used.
Usually, after reading or leafing through a newspaper, they throw it away, or at best, hand it over to waste paper. And craftsmen and craftswomen practically have no concept of “waste”. Everything will be useful for business.
You will also need:
- PVA glue, moment glue;
- acrylic paints;
- varnish
Step-by-step master class with photos - DIY coffee tree
Preparing the barrel and ball, filling the pot with alabaster (plaster)
Stage 1. Barrel preparation and bronzing. For the “Spices of the East” coffee tree, a trunk from a self-harvested corilus branch was used. That is why sanding was needed before painting to ensure the paint applied evenly. Store-bought Corilus sticks do not require processing.
Bronze the smooth trunk evenly using acrylic paint. As a rule, to get a rich color, it is enough to apply 1 layer, but it all depends on the quality of the acrylic.
Stage 2. Painting the ball. We paint the foam ball in 1 layer with brown acrylic (to match the color of coffee beans). Instead of acrylic paints, you can use a mixture of gouache and PVA glue, or wind with brown yarn to hide the gaps between the coffee beans. In addition to the visual benefit, coffee sticks better to a painted or wrapped ball (hot silicone does not burn through the foam).
Stage 3. Attaching the trunk and filling the pot with plaster. There are 2 ways to fill a topiary pot: liquid and thick solution. The first method is used if a smooth pouring surface is required or the topiary design involves pouring the pots right to the very edges. In all other cases, the solution is mixed in a pot:
Fill in plaster, about 1/2 of the pots. Slowly pour water, stirring the solution until a thick, viscous mixture is obtained.
Be careful with the water so that the solution doesn’t turn out too liquid!
We insert the trunk in the right place - to the bottom.. Such a filling of topiary dries out almost completely in 2-3 hours
Such a filling of topiary dries almost completely in 2-3 hours.
Forming the crown and decorating the ball
Stage 4. Gluing the coffee beans. The plaster cast dries, and we move on to forming the base from coffee beans. There are at least 4 ways to glue coffee onto a topiary ball, but now we will use the longest and most scrupulous one - glue one grain at a time, with the core facing out. This is justified for the design of a particular coffee tree, since we need to get a smooth and neat base.
Stage 5. Landing the ball on the barrel. Approximately to the middle of the ball, we use scissors to cut a hole equal to (but not more!) the diameter of the barrel. We fix the barrel with glue in the required position according to the intended design. We coat the gypsum base with PVA glue in 2 layers so that the decor sticks better. Fixing the topiary trunk and processing the base is allowed only after the plaster has completely dried!
Stage 6. Small decor. In a chaotic manner, over the entire surface of the crown of the coffee tree, as well as in the remaining spaces between the grains, we glue small decorations - peppercorns and star pasta. We distribute the same painted bow pasta in the same way, but leave room for the central composition.
Stage 7. Main composition. In a pre-selected place on the crown of the coffee topiary we form a central composition:
- The base is 2 dried orange or lemon slices, placed on top of each other.
- A “button” made of salt dough or a similar decorative element.
- We glue brown felt leaves (cut in the shape of a “fish”) around the citrus slices in 3 places: on the sides and bottom.
- We glue bay leaves on top and sides - in bundles of 3 pieces.
- Glue 2 cinnamon sticks tied with twine or paper twine onto bay leaves.
- Small decor: cardamom seeds, cloves, peppercorns, coffee beans - we glue them randomly throughout the composition.
Filling the pot and finishing topiary decor
Stage 8. Composition at the base. On a plaster surface treated with PVA glue, we form a multilayer “clearing” (each layer is carefully fixed with glue or hot silicone):
- Fragrant base: cloves, cardamom, peppercorns, coffee beans.
- “Grass” made from fluffed twine or similar ready-made material.
- Main composition: dried orange slices (halves), bay leaves, decorative snail.
Stage 9. Finishing decor. The final touch remains: all over the topiary we glue corn, peppercorns, coffee beans, peas and other small decor. Not too much, only where there was clearly a void left. We glue a pre-made bow from satin ribbon or a ready-made bow onto the trunk.
Tools
- knitting needles, wooden sticks of different diameters;
- stationery knife;
- scissors;
- a simple pencil;
- ruler;
- clothespins;
- paper clips;
- brushes for glue, paints, varnish;
- boxes, plastic containers, cylindrical, spherical objects, etc. as a frame;
- finishing elements for decoration.
Cutting blanks
The paper is cut into strips 5 to 10 cm wide. The wider your strip, the thicker the twisted tubes will be. It is clear that one product requires tubes of the same thickness.
The stripes are marked using a pencil and ruler. But this is a very long task. Since newsprint is thin, it is better to cut it in whole stacks at once in several layers.
How to twist paper straws
It's time to move from theory to practice and learn how to properly and quickly twist tubes from newspapers. At first, this may seem like something incredibly complicated. But in this matter the main thing is to start and get used to it. A little training - and you will see that the spell that prevented your fingers from obeying has dissipated and the tubes will begin to appear almost on their own.
To work you will need:
- Paper
. We talked about it in detail above. Let us only add that newspapers for folding must be taken fresh, whole and uncrumpled. Substandard does not suit us. A clean newspaper edge is suitable for tubes without letters; we will also discuss this in detail below. - Stationery knife.
Make sure you have spare blades, they get dull very quickly on paper. It will be more difficult to work with scissors, leave them for other types of creativity. - Glue stick
. It is necessary for fixing the edges of the workpieces. But often when painting, the ends of the tubes come off after the glue stick, so experienced craftswomen recommend using Glue Moment Joiner PVA in a red jar, you can find it in construction stores. Or PVA glue LUCH in yellow packaging. Or any polymer glue (most often it is sold in large bottles, which is inconvenient for our creativity, so for convenience you can pour it into a syringe). - Long thin knitting needle
. For a beginner, its optimal thickness is 1.5 mm. If you choose a thicker one, then the tubes will turn out to be thicker, with a cavity inside, and will form creases in the weaving. Once you become familiar with the process of winding tubes, we recommend looking for an even thinner knitting needle, ideally 1 mm. If you (or your grandmother’s) do not have such a thin knitting needle, then take a knitting needle from an old umbrella or sparkler, a piece of thin wire, etc.
The thinner the base (knitting needle), the higher quality raw materials you can produce for your masterpieces. Therefore, immediately strive for the ideal and try to gradually accustom yourself to rolling the thinnest, dense tubes possible.
We are preparing a newspaper
- Place the newspaper directly in front of you. If there are a lot of sheets, remove some of them. Fold the newspaper in half vertically.
- Cut it along the fold with a knife.
- Fold half of the newspaper in half again vertically and cut along the fold.
- If you did everything correctly, you will end up with neat, long strips of newspaper.
They are distinguished by the presence or absence of a pure white edge. Tubes rolled from strips with a clean newspaper edge will be white and without letters. Products from the remaining bands will have typographic fonts or designs.
To weave medium-sized products, you will need to use a knitting needle 1 mm or 1.5 mm thick and strips 7-10 cm wide. Remember, the lower the paper density, the wider the strip should be for twisting the tube.
Develop your own experience and experiment with the thickness of the workpieces that is convenient for you. In the meantime, we recommend that for medium-sized crafts, when using a 1-1.5 mm knitting needle, take strips of newsprint 7-8 cm wide, and for massive products increase the width of the strips to 10 cm.
We do not recommend twisting long tubes to a full spread of a newspaper sheet, since with such a strip length the tube does not turn out even. This leads to problems with extensions and, ultimately, with the appearance of the product. So, for beginners, we recommend that you avoid long tubes longer than 40 cm and instead twist tubes from strips 30 cm long; as a result, you will no longer have problems with extensions and the appearance of the product will undoubtedly improve.
The main secret to successfully preparing paper is to cut it along the grain.
When cutting the first strips, beginners often notice that in one direction everything goes like clockwork, but in the other it is much more difficult to cut, and the cut turns out to be “shaggy”. Similar difficulties can be encountered when twisting the vine.
These apparent anomalies are related to the direction of the cellulose fibers in the sheet of paper. That is, before cutting, you need to determine their location.
Method No. 1
Tear the newspaper in different directions (vertically and horizontally). The tear along the fiber will be smooth and straight, its edges will be less shaggy. Accordingly, breaks across the fibers will be uneven. For this method of testing, the familiar but slightly modified rule from childhood is suitable: tear seven times - cut once.
Method No. 2
Fold a sheet of paper in two perpendicular directions and smooth the folds with your fingers. The fold running along the fibers will be smooth and even to the touch, while the fold that runs across will be rough and slightly broken.
From all of the above, let us formulate a simple but very important rule: always cut strips for tubes along the paper fibers.
Spin it on a knitting needle
Now it's time to learn how to properly twist your first newspaper tubes for weaving. Be patient and look at the step-by-step photos, everything is much simpler than it seems at first glance, just don’t forget to strictly follow our instructions.
Advice:
It will not be very convenient to twist on a bare table, since the paper on a smooth surface slides and does not adhere well to the knitting needle. We recommend rolling it on a silicone baking mat; these are sold in hardware stores, Ikea, and Fix Price.
It is desirable that the surface be slightly rubberized, then the grip will be very good, the knitting needle will not fidget and the tube will be wound more tightly. Be sure to pay attention to this important nuance!
Some craftswomen advise using a piece of vinyl wallpaper instead of expensive rugs. Vinyl also gives excellent grip and is a budget option.
Experiment with the choice of bedding and rugs, only then will you understand what will be more convenient for you to do this on.
Method of torsion on the table
Place a strip of newspaper in front of you. Place a knitting needle on its lower right corner at an angle of 30 degrees and begin twisting the newspaper onto it.
At the very beginning, you need to firmly press the knitting needle against the paper with your fingers so that it tucks under the knitting needle, as if swinging it back and forth, then the newspaper will grab a little under the knitting needle and adhere to it. For convenience, you can lightly moisten your fingers with water.
, then the paper will adhere well to the knitting needle.
Try not to make a large angle between the strip and the knitting needle. By placing the knitting needle at an acute angle, we lengthen the tube as much as possible. Do not allow it to move while twisting and make sure that the turns are parallel to each other. This way the workpiece will be the same thickness along its entire length.
Different angles and widths of the turns will give the finished wicker product a sloppy appearance.
Try to press the knitting needle against the newspaper as tightly as possible so that the tube turns out smooth and dense.
After twisting the tip, place your hands like on a rolling pin and twist the rest of the strip.
When a small “tail” remains of it, coat it with glue and twist the tube completely. Finally the knitting needle can be removed.
As a result, you get two types of tubes: light (from white newspaper edge) and with letters.
We would like to give one more important piece of advice. Try to twist the tubes as tightly and tightly as possible. With the correct technique, the turns of paper are arranged so tightly that they form a single canvas. Such raw materials will produce high-quality products, and the weaving process will be easy and enjoyable.
Method of torsion by weight
We would also like to introduce you to the method of torsion on weight. We recommend watching the video master class - you will clearly see that you can definitely twist newspaper tubes.
But many experienced craftswomen who previously twisted on weight eventually switch to the method of twisting on a table, which puts less strain on the hands and shoulders. Therefore, in order to avoid relearning in the future, learn to spin it on the table right away. And the method of twisting on the table is more convenient to control the tightness of the twist.
Twisting
The workpiece is twisted tightly and evenly, moving diagonally from the corner. Wrapping is usually done on a knitting needle, which is placed at an angle of 45-60 degrees relative to the edge of the paper sheet. The ends of the winding and in several places in the middle are fastened with glue.
Having twisted the entire sheet, the knitting needle is removed. Dry the tube thoroughly. This will be the main material for weaving products.
- Craft mug: 135 photos and video master class on how to make beautiful crafts with your own hands
- Crafts from spoons - 125 photos and videos, tips and tricks with step-by-step instructions on how to make crafts
Crafts from cotton pads - 125 photos of beautiful crafts, features and videos of new cotton crafts
New topiary ideas 2022 made from money and artificial grass
Let's look a little more at what types of topiary there are. Maybe you will now get excited about the idea and run to create. I propose to pay attention once again to the so-called “money trees”. Just look at how many options for crafts you can come up with on this topic!
You don't have to use banknotes - coins are fine too. Or you can combine both in one topiary.
As soon as you add up the money differently, the tree takes on a completely different look.
We looked at how to make such flowers. It turns out very tender, doesn’t it?
If you have time and desire, create a composition from several topiaries. They will attract twice as much money.
Sisal is perfect for decoration, as well as figurines of birds, insects, beads, etc. In general, everything you like.
This is where the bird took refuge.
You don’t have to cover the entire base with money flowers, but use them only as an additional element, as in the work below.
In general, as you can see, you can do anything. Creativity is wonderful because no one limits the flow of your imagination. What you succeed depends only on yourself. Be sure to write in the comments under this article whether you liked my selection, and which of the ones discussed above you would like to implement. Good luck to everyone and have a nice day!
Coloring
Rolled newspaper tubes contain printed elements. If you start weaving right away, the product will not have a beautiful finished look. Therefore, the working material should be painted beforehand.
You can also color the finished product. But painting the joints of layers and all the work from the inside is very inconvenient. It will take too long. It is much more rational to paint the working material in advance.
To do this, take a tray, pour a thin layer of paint, put a dozen or more tubes (a handful) at once and roll them over the surface of the paint. This must be done quickly so that the paper does not have time to get wet and lose its shape.
Dry the tubes horizontally on supports or in a vertical position by placing them in a container of suitable size (jar, glass, etc.).
- Cardboard crafts - 135 photos of useful and beautiful crafts for children and adults
Unusual crafts: we make cool and original things from scrap materials (120 photos and videos)
- Beautiful crafts: examples of very stylish and unusual options for homemade crafts (125 photos)
Master class for beginners
Tools and materials
To design a stylish topiary, first of all you will need coffee beans. If possible, try to purchase the highest quality coffee; preference should be given to products in which the beans are evenly roasted and have the same size
It is very important that they are dried carefully. Before starting work, you need to sort the grains, of course, this activity is optional, but if you want to get a truly beautiful topiary, then it is advisable to do this
First, any damaged grains should be removed, and the rest should be divided into 4 groups. The first will include the most beautiful beans of the same size, they will be located at the top of your future coffee tree. The second group includes rounded grains - they are usually used to decorate flowerpots. The third includes whole grains, but they are not beautiful enough; they are used to decorate the lower part of the crown. The fourth group includes the smallest grains - they are used to finish the spaces between the remaining grains.
You will need the following.
- The base is usually a ball or a heart - you can buy it ready-made in the store or make it yourself from paper or foam. Threads will be required in almost all options for creating topiary.
- Varnishes and paints are needed for application to the base.
- Wire/tube/skewer or tree branch is necessary to ensure that your topiary has a trunk.
- Glue - it is better to give preference to a hot glue gun.
- Plaster/alabaster – prepare these along with a mixing bowl.
- Sharp scissors.
- Flowerpot. These options are very different, ranging from flowerpots and pots, ending with ordinary jars or unnecessary mugs.
- Scotch tape - to create a topiary you will need double-sided tape.
- Additional decor - the finished craft is decorated with bows, flowers and beads. Also used are cinnamon sticks, as well as cloves and dried fruit slices.
How to do it?
On the Internet you can find many master classes on how to create a coffee topiary with your own hands. We invite you to familiarize yourself with the step-by-step instructions, which include several popular techniques and are characterized by exceptional ease of implementation.
Step one - work with the workpiece. To create a round topiary, you need to take a base prepared in advance in the shape of a ball or heart. The workpiece is pasted over with paper and wrapped with knitting thread, preferably in dark shades.
It is necessary to cut out figures of equal shape from cardboard and place a tube between them, it will act as a trunk. Both blanks are glued together, then pieces of cotton wool or disks are attached to the base thus obtained, giving the desired volume. After you prepare the base and paint it, you can begin to paste it with coffee beans, it is advisable to do this not in one, but in two rows - in this case, the first layer is placed with the flat surface inward, and the second layer is the opposite.
Popular articles The Legend of a River
Step two - we design the trunk. The wire or stick that you plan to use as the stem is carefully covered with strips of tissue paper. If it is not there, you can use satin ribbons or jute thread and then secure it to the crown. When working with wire, you can bend it a little.
Step three - plant it in a flower pot. First you need to mix a certain amount of gypsum-based solution and pour it into the prepared container. After it begins to set a little, a topiary is placed in the center and held until the mass hardens completely. When the plaster has dried, the so-called soil can be covered with a thin layer of ground coffee, wood shavings, sisal or dried moss.
Step four. Decorating the topiary. If we talk about coffee tree decor, then there are no limits to your imagination. You can stick on traditional ribbons, curls, beads and bows made of foamiran, or you can show your imagination and combine coffee with figures of insects, animals, star anise, coarse fabric and other decorative elements.
What to cover with?
Some needlewomen prefer to coat their coffee trees with a mixture of coffee and PVA - this is not necessary, but this treatment will make the craft more shiny. Usually the glue is mixed with water in equal proportions and instant coffee is poured in until the desired color is achieved. You can add a little cinnamon and cocoa to this mixture - in this case, the topiary will turn out even more fragrant and fill the house with an atmosphere of family warmth and comfort.
This treatment allows you to close the gaps well, as well as mask all traces of glue. If desired, you can apply a layer of varnish. Of course, this will remove the pleasant coffee aroma, but it will protect the product from dust accumulation.
Types of weaving
Crafts are woven from newspaper tubes in different ways. The choice of a specific technology depends on your skills and features of the design of the future craft.
Typically, the tubes are divided into a base - a frame or guides for the future product - and workers with which the frame is braided.
How to make topiary from artificial flowers
If you don’t want to spend a lot of time making decor to decorate the crown, you can use ready-made artificial flowers. This guide tells you exactly how to do it. We skipped the process of making the base for the tree because you already know how to make it and focused directly on the decoration itself.
For work we will need:
- Artificial flowers;
- Artificial greenery;
- Glue gun;
- Base for topiary (you can make it using the method described in any of the master classes we reviewed earlier);
- Satin ribbons for decoration;
- Sisal.
Subsequence:
We glue sisal at the base of the tree. Let's use a hot gun for this.
We begin to decorate the crown of the tree with artificial flowers.
You can alternate flowers of different shades - it will be even more interesting.
We continue working until the entire surface of the base is covered with flowers.
Now for the finishing touches. We make a bow from a satin ribbon.
We do not tie, but glue the ribbons to each other.
And we decorate the trunk of our topiary.
At this point, the tree of happiness can be considered ready.
What you get depends on what materials you use.
As you can see, the options can be very different.
Simple
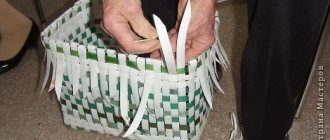
The technique resembles conventional weaving of fabric. As a basis, take several tubes along the planned width of the product and place them at a distance of 1-2 cm from each other. They are braided with working tubes, alternately passing over or under the guides of the base.
Weaving is done from left to right, lengthening the working tubes as necessary.
Preparing the tubes is the first important step
- Without newspaper tubes you cannot start weaving.
- Therefore, when the object for weaving is selected, it is necessary to begin creating the tubes themselves.
- Newspapers and magazines (or rather, their sheets) are cut into several pieces of the required size. For example ⅓ or ¼.
At this stage, it is not necessary to observe the exact dimensions in parts or centimeter by centimeter.
Layer-by-layer
The technique of execution is similar to simple, but denser without gaps. In addition to the main working tube, additional ones are used, which are also actively involved in weaving. They work according to a certain scheme.
If you use additional tubes in contrasting colors, you get noticeable decorative layers.
Rows
It is also performed on a simple basis, but three or more tubes are used as workers. They work alternately. When the length of one tube runs out, they do not extend it, but start working on a new one, but not from the first, but from the second base post.
They work in this way until the desired height of the product is reached. The principle is reminiscent of weaving a wreath of flowers.
Topiary for beginners: main components
The main and important thing in making topiary is not the material, but its shape - it is a large decorated base on a leg, placed on a stable stand.
Topiary consists of three main parts:
- You can start work with any process, but it’s more rational to prepare the stand first. In most cases, the role of a stand is played by a flower pot or an ordinary mug. Silicone, foam or rubber material is placed inside such a base so that the barrel holds well. The base is decorated to your liking, in this case you can not be afraid to get creative and cover it with beads, grains, buttons or paper. The main thing is a harmonious combination with the overall composition.
- Barrel preparation. Anything can serve as a material for making a barrel. For example: use a real twig from a tree - cover it with varnish or stain; put together several skewers, tubes or sushi sticks - tie and wrap with ribbon or thread. You can also use wire. You should prepare several equal pieces of wire of the same length and wrap them with some material.
- Preparing the base. You need to choose a base for topiary based on your idea. If in the process you need to stick in the bases of the decor, then it is better to take a soft base, such as foam. To paste elements over the crown, it is better to give preference to solid materials, such as plastic or plastic.
The base of the topiary does not have to be a ball. You should start from the event or significant date in honor of which the topiary is made. Basics in the form of a star, letters and numbers look creative and original - for a birthday or other celebration, in the form of a heart or a Christmas tree - on Valentine's Day and the New Year. If necessary, the base should be coated with paint or covered with corrugated paper in accordance with the color of the decorative elements. In this way, the base is painted over to eliminate possible gaps.
The appearance of the tree should be oriented towards the event for which it is being prepared. If this is a gift for a child, then you can use candies in bright wrappers as decoration. If the occasion is some kind of holiday, then various bright ribbons, beads, fresh flowers and rhinestones can serve as decorations.
When making topiary for yourself, you should take into account the overall interior of the home
List of sources
- tytrukodelie.ru
- kitchenremont.ru
- homeli.ru
- gretahome.ru
- samodelych.ru
- myhobby.guru
- minyt-ka.ru
- originalnie-podarki.com
- decorator.guru
- comfort-myhouse.ru
Openwork
Particularly beautiful crafts from newspaper tubes are made using the openwork weave method. Unlike the solid one, there are gaps between the paper tubes in the openwork, which play a decorative role.
There are a lot of openwork weaving patterns - from simple ones, reminiscent of a picket fence, to very complex ones with an intricate multi-layered pattern.
Paper vine frame
Crafts from tubes for beginners is a photo frame.
- We use cardboard as a base.
- You can glue the tubes parallel to the edge in the shape of a frame, or you can glue them in a herringbone pattern, like French parquet.
- After drying, they cover it with spray paint, decorate it with ribbon, lace, beads - all ideas are good, and insert a photo.
Spiral
This method stands apart; it is often isolated as a separate type. It is in many ways reminiscent of another paper craft technique - quilling.
The point is that the tubes are flattened and a spiral is twisted from flat newspaper strips, then, if necessary, they are given a convex shape and the spirals are connected to each other.
In a similar way, children of the 20th century made various toys from New Year's paper streamers.
Papier mache
When talking about how to make a craft from newspapers, one cannot fail to mention this wonderful technique. You can make anything from papier-mâché! In addition to newspapers, you will need the most ordinary plasticine and paste.
Paste is a glue made from flour that is very easy to make at home. Take a couple of tablespoons of plain flour, pour into a bowl and pour in a small amount of boiling water. There is no need to cook anything.
We tear the newspaper into many small pieces (we don’t cut it, we tear it, then the edges will be soft and thin). We mold the desired figure from plasticine and paste it with pieces of newspaper using paste.
We make five or six layers. When it dries, cut the figure in half with a knife, take out the plasticine, connect the halves and glue it with newspaper. Then we cover it with emulsion, paint it and varnish it. The beautiful figurine is ready!
Crafts
Using different weaving techniques, different patterns, design ideas, decorations, a wide variety of products are obtained:
- baskets;
- flowerpot;
- caskets;
- panels, frames;
- topiary – Christmas trees, flowering trees;
- jugs;
- vases;
- trays;
- candy bowls;
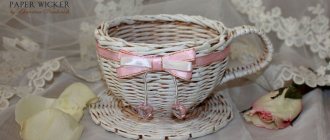
- cups;
- flowers;
- voluminous souvenirs - bast shoes, hearts, mushrooms, berries, etc.
Several days pass from the idea of a serious product to its final implementation. But the result is worth the effort.
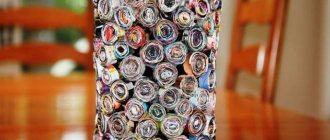
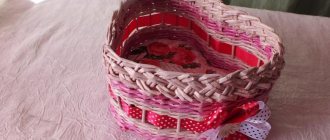
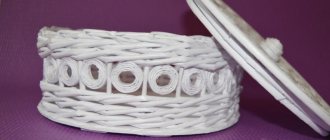
In the photo, you can hardly distinguish crafts made from newspaper tubes from real ones woven from wicker. If you are a creative person and love crafts, you can create beautiful and useful things from waste paper - old newspapers. Truly, imagination and hard work work wonders
Heart made from scrap materials at home for Valentine's Day (February 14)
Topiary can be an excellent gift not only for the New Year or birthday, but also for Valentine's Day, if it is designed correctly. In the following step-by-step tutorial, we'll look at how to make a heart-shaped topiary. Intrigued? Then go ahead!
Materials:
- Foam heart;
- Red napkins;
- Scissors;
- Glue gun;
- Satin ribbons;
- Flower pots;
- Alabaster;
- 2 kebab skewers;
- Decor.
Stages:
We break each skewer into 2 parts and glue the 3 halves together. We put the fourth one aside - we will need it later.
We insert the resulting trunk into the pot and fill it with gypsum solution. We wait for it to dry completely and decorate everything with ribbons to your liking.
We attach our foam base to the trunk.
And let's start decorating it. To decorate such a small heart you will need about 15 napkins. Cut each of them into small squares with a side of 3 cm.
We will work using the cutting technique. Take the remaining half of the skewer and wind one square onto its blunt end.
After this, dip the skewer into PVA glue and place the workpiece on our base.
In this way we cover the entire surface of the heart.
Ready. Add decor at your discretion and the craft is complete.
How to decorate your tree is up to you to decide.
But of course, if a tree is presented as a gift on February 14, you should take into account the taste of your other half.
Some even use candy for decoration. A very original move!
Beautiful, don't you agree?
Would you be happy if someone gave you something like this? I think it's a very beautiful tree.
Photos of crafts made from newspaper tubes
Tell your friends

