Among the advantages of handmade soap is not only the purity of the product, but also uniqueness and individuality. The secret of how to make handmade soap is not known to everyone. Otherwise, the business of selling natural soap would not bring such profit and people would not bring a new fragrant bar of magical action from every business trip.
In this article we will look at all the details of how to make handmade soap
The advantage of handmade soap is that you can make it from those nutritional ingredients that are necessary specifically for your skin type
This soap will be an original gift for your loved ones.
The advantages of handmade soap include not only the purity of the product, but also uniqueness and individuality. You can independently select and add to the bar those nutritional components that your specific skin type needs. If you give a gift to a teenager, you need to take into account the increased likelihood of acne. Men need to soothe their skin after shaving. And confident women should be given skin care, youth and freshness along with soap.
- Let's start doing magic
- Master class with step-by-step photos on making handmade soap
- The only thing better than flowers is a bouquet of handmade soap
- How to make a drawing on soap
- Step-by-step master class on making multi-colored soap
- How to make handmade soap with inscriptions: cute, fast, cheap
- Useful properties of laundry soap in handmade soap
Advantages
Homemade soap is a beautiful and much needed gift. It will appeal not only to your loved ones, but also to your work colleagues. The advantages of such a present include the following features.
- Uniqueness. New Year's soap figures made by hand are of high value and differ from factory products. Each product is unique and has no analogues.
- Versatility. Soap is used in everyday life. Therefore, such a gift will not only decorate the restroom, but will also be used for its intended purpose. In addition, enjoying a beautiful soap in the shape of a Christmas tree or a snowman is much more pleasant than a standard rectangular product.
- Environmental friendliness. Household chemicals used in manufacturing may contain harmful components. Handmade soap is created entirely from natural ingredients.
- Individuality. When creating a New Year's gift from soap, you take into account all the preferences of the person who will receive it.
You will have the opportunity to create a “soap” figurine with a specific aroma and shade.
Why should you choose homemade soap?
Most often, everything has to do with the composition. Store-bought soap in a regular supermarket does not have natural ingredients. You still have to look for good soap, and the price for a natural bar of soap will be far from pleasant.
Store-bought varieties also dry out the skin and can cause allergic reactions in large quantities. Homemade soap can be:
- Completely natural;
- Suitable specifically for your skin type;
- Do not contain allergens;
- Be a good contributor to the family's income.
To get a feel for this topic, you can watch a video on soap making on the Internet. After all, you can make anything, for example, roses from soap with your own hands!
Take into account all the nuances
The dimensions of the finished composition will depend on the silicone or plastic mold; you shouldn’t make very large pieces; you need to remember about practicality. An original solution would be to choose a postcard soap; your friends have probably never received something like this in their lives. The approach is so amazing that it can surprise the most whimsical person.
You can take ordinary children's pictures from any book as a basis, or find a beautiful image and print it. When starting to create New Year's soap from scratch, you should use exclusive stencils made of thick paper; such things will not be superfluous during the manufacturing process.
Bright and not too thin blanks will lead to a long use of the craft made, disposable items are quickly forgotten, and a good pleasant gift can be used for hygiene with joy and for a long time.
The souvenir is perfect even for children; in this case, an extraordinary approach to natural aromas and composition is quite important. It is necessary to interest the young member of the family and then the gift will be appreciated.
Basket made of packaging (polypropylene, strapping) tape
Basket made of packaging (polypropylene, strapping) tape
SOURCE
author: Sergey from Kostroma
For 7-8 liters.
We cut 36 strips of 2 m each. For ease of weaving, we cut the ends immediately at an angle.
Using a tape measure and a pencil, mark the middle and 15 cm in both directions on 4 strips, 2 times. On the remaining strips, for convenience, we mark only the middle.
We weave a square of 18x18 strips with sides of 30 cm. There are 4 stripes marked along the edges. We fasten the corners with a stapler
We weave the first corner of the future basket. We divide the side of our square in half and weave 9x9 strips. We align with the marks and staple.
One corner is ready.
We weave the second corner.
Third.
All four corners are ready, aligned with the marks on the tapes and stapled together.
Turn it over. The bottom of the basket is ready.
We stretch the corners of the basket so that there are no large gaps.
The corners are drawn out.
We measure the sides and diagonals of the bottom. If somewhere else we tighten or weaken it.
Turn the basket over and weave the sides above until the marks intersect, and staple.
The sides are woven.
We determine where the edge of the basket will be and begin to pick up the strips.
One by one.
Further.
Up to the strip with marks.
At the same height we weave the other side of the edge of the basket.
We stretch the edges.
After pulling the edges, we weave the strips all the way through the entire basket.
Let's weave.
The edges are woven and we move to the sides.
We bend and weave the strips as shown in the photo, tighten the edge so that it is even.
On both sides, When pulled up, we weave the strips to the end. You can now remove the stapler clips.
We weave as far as it will go and trim it so that the tip can be hidden under another strip.
They hid it, and nothing is visible, neither outside nor inside.
We hide the ponytails in the same way when two ribbons meet.
They hid it and went on weaving.
The ribbons that curved outward were woven, leaving ribbons that should be woven into the inside of the basket.
But it’s extremely inconvenient to weave inside. Therefore, we thread them as shown in the photo. (second tape from the left)
And we weave it out.
We weave the ribbons to the end.
With each woven ribbon, the basket becomes stronger and stronger, and sometimes you have to use a tool.
We braid the other side too.
Let's move on to the most difficult part of the product - the handle. We cut 16 strips of 1m each.
We weave 2 strips from the edge on the right and left.
From the outside and from the inside. Total 8 strips.
And we begin to weave a handle. Weaving goes in a circle. It may not work out the first time.
We determine which strips should go where and weave the handle into the other side of the basket.
What will you need?
In order to create a beautiful New Year's soap figurine, you will need:
- soap base (white or transparent);
- dyes;
- set of molds;
- flavorings or essential oil;
- alcohol.
Please note that you should never use perfume as a flavoring agent. Such soap can cause an allergic reaction, and its smell will be too strong. Use essential oils. For New Year's figures, a light scent of lemon, ginger, juniper or lavender is suitable.
Video instructions for a New Year's gift in the form of soap
Where to get soap ingredients
All the necessary ingredients for making your own soap can be found in specialized stores, but in small towns these are unlikely to be found. Of course, everything can be purchased separately. Dyes are sold in grocery stores, flavorings in perfume shops, and soap base in household stores. Alternatively, instead of the base, you can use baby soap, but in this case you will not be able to get a transparent product.
DIY soap making kit
If it is not possible to buy soap base, it can be purchased in online stores, as well as everything else - fragrances, dyes. It is more practical to order a complete soap making kit. It will contain all the necessary elements to make soap from scratch.
All details require attention
When choosing a filler, you need to be creative; banal coffee, various herbs or oatmeal can lead to the fact that the texture of the finished product is simply smeared. Large particles are also inappropriate; not everyone will like the scrubbing effect.
It is also better to select essential oils carefully; the basic options are the most popular and popular in such crafts.
It is worth paying attention to a base made of argan, shea, jojoba or olive oil. New Year's crafts made from soap should be thought through to the smallest detail, thanks to which the composition will turn out perfect in every sense of the word.
First steps on the path to success
Creation begins with choosing a form; it can be a symbol of the coming year in the form of an animal or bird, a snowman, a forest beauty. All of the listed ideas for handmade New Year's soap are very popular; everyone who dares to try themselves in this business is free to choose the one they like.
Special materials can be purchased at craft stores, where you will find all sorts of shapes and components. If you have a great desire, some things are worth looking for at home; no one has canceled the means at hand.
Interesting plastic bottles with a pattern are perfect for creating New Year's compositions from handmade soap of this kind. Borrowed children's accessories for playing in the sandbox will also come in handy; there will probably be unusual silicone baking dishes in the kitchen. Old toys that have long been forgotten should also be used; they can transform the main structure.
Safety precautions for working with alkali
- Use protective equipment - remember to prepare goggles, gloves and a respirator;
- Avoid exposed body parts. Wear long-sleeve pants and a sweater;
- Do not use cooking utensils after making soap;
- Turn on the hood and open the windows;
- Prepare ice cubes and cold water;
- Use a glass container to mix alkaline ingredients.
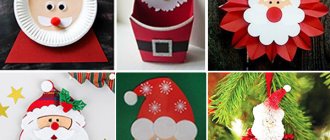
Ideas
Naturally, making soap with your own hands for the New Year is necessary in a “winter” theme. Before you start creating an original gift, pay attention to the options presented. So, soap figures can be made in different shapes.
- Christmas trees. A classic option that comes in a variety of colors (from traditional green to creative pink). In addition, the “soap” Christmas tree can be made elegant (decorated with toys and garland).
- Santa Claus. The main symbol of the New Year will undoubtedly delight everyone, “from young to old.” A bearded wizard can be with a bag of gifts or in a sleigh with reindeer. Everything will depend on your imagination.
- Snowman. A similar soap figurine will perfectly decorate the bathroom and add a festive mood.
- Shara. Christmas tree decorations always evoke the most positive emotions. You can create them from soap in different colors.
- Snowflakes. The original option would be red or blue figures.
- Symbol of the year. An excellent gift option would be “soap” animals, which are a symbol of the coming year.
In addition, handmade soap can become the personification of a person’s hobby. For example, you can give a friend who is interested in sewing a gift in the shape of a button.
Use available tools
An interesting option using a cookie cutter will look like a Christmas cake or an elegant snowflake. Perhaps the most appetizing are all kinds of sandwiches with red or black caviar. Making it yourself opens up a lot of possibilities for creativity, your fantasies can be anything you want, soap as a gift for the New Year implies a special approach.
And the main thing is that with the help of such soap making, children are instilled with useful habits, hygiene is one of the primary rules in order to be healthy. Fighting bacteria has never brought such positive emotions as every person can get now.
The costs for all components will not hit your wallet hard, and your efforts will be rewarded with a satisfied smile and words of gratitude.
You shouldn’t work according to a template; you should add something of your own to each item, all kinds of sparkles, a beautiful presentation, a special box. In order for both the giver and the recipient to enjoy the souvenir, it is necessary to approach the creation seriously, it is better not to make mistakes.
All kinds of master classes will be useful for beginners in this business; New Year's soap will seem difficult to make, but if you follow all the advice and adhere to consistency, everything will definitely work out. You can diversify family leisure time by inviting everyone living in the house to take part in an exciting activity; such moments will be very memorable.
Basket made of polypropylene packaging tape. Weaving
- Basket made of polypropylene packaging tape for 7-8 liters.
- Master class on weaving from Sergei from Kostroma
It took for the craft:
— Tape 15 mm wide and 0.8 mm thick. — 88 meters (36 stripes of 2 m and 16 of 1 m)
- — Stapler clips 10 pcs.
- — Time 4 hours.
- Tool used:
- - roulette
- - pencil
- - stapler
- - anti-stapler
- - narrow-nose pliers
- - scissors
We cut 36 strips of 2 m each. For ease of weaving, we cut the ends immediately at an angle.
Using a tape measure and a pencil, mark the middle and 15 cm in both directions on 4 strips, 2 times.
On the remaining strips, for convenience, we mark only the middle.
We weave a square of 18x18 strips with sides of 30 cm. There are 4 stripes marked along the edges. We fasten the corners with a stapler
We weave the first corner of the future basket. We divide the side of our square in half and weave 9x9 strips. We align with the marks and staple.
One corner is ready.
We weave the second corner.
Third.
All four corners are ready, aligned with the marks on the tapes and stapled together.
Turn it over. The bottom of the basket is ready.
We stretch the corners of the basket so that there are no large gaps.
The corners are drawn out.
We measure the sides and diagonals of the bottom. If somewhere else we tighten or weaken it.
Turn the basket over and weave the sides above until the marks intersect, and staple.
The sides are woven.
We determine where the edge of the basket will be and begin to pick up the strips.
One by one.
Up to the strip with marks.
At the same height we weave the other side of the edge of the basket.
We stretch the edges.
After pulling the edges, we weave the strips all the way through the entire basket.
Let's weave.
The edges are woven and we move to the sides.
We bend and weave the strips as shown in the photo, tighten the edge so that it is even.
On both sides, When pulled up, we weave the strips to the end. You can now remove the stapler clips.
We weave as far as it will go and trim it so that the tip can be hidden under another strip.
They hid it, and nothing is visible, neither outside nor inside.
We hide the ponytails in the same way when two ribbons meet.
They hid it and went on weaving.
The ribbons that curved outward were woven, leaving ribbons that should be woven into the inside of the basket.
But it’s extremely inconvenient to weave inside. Therefore, we thread them as shown in the photo. (second tape from the left)
And we weave it out.
We weave the ribbons to the end.
With each woven ribbon, the basket becomes stronger and stronger, and sometimes you have to use a tool.
We braid the other side too.
Let's move on to the most difficult part of the product - the handle. We cut 16 strips of 1m each.
We weave 2 strips from the edge on the right and left.
From the outside and from the inside. Total 8 strips.
And we begin to weave a handle. Weaving goes in a circle. It may not work out the first time.
We determine which strips should go where and weave the handle into the other side of the basket.
We stretch and weave the strips to the end.
To give rigidity to the handle, we weave it again with the remaining 8 strips.
The basket is ready.
Source: https://podruzhkii.ru/blog/43989496686/Korzinka-iz-upakovochnoy-polipropilenovoy-lentyi.-Pletenie
Father Frost
In order to create a beautiful New Year's soap figurine, you will need:
- soap base (white or transparent);
- dyes;
- set of molds;
- flavorings or essential oil;
- alcohol.
Please note that you should never use perfume as a flavoring agent. Such soap can cause an allergic reaction, and its smell will be too strong. Use essential oils. For New Year's figures, a light scent of lemon, ginger, juniper or lavender is suitable.
Master Class:
- transparent base;
- dyes (red and white);
- flavoring;
- base oil;
- mother of pearl powder;
- acrylic paints;
- a set of brushes;
- pipette;
- alcohol;
- silicone mold.
Melt the soap base in a water bath or using a microwave. We divide it into two parts. Add red dye, a teaspoon of base oil and flavoring to the container with the first liquid. We paint the second part white and use the same ingredients. Take a silicone mold in the shape of Santa Claus and fill its bottom with a white soap base. Let it harden. Next, we cover its surface with alcohol and, using a pipette, fill in the figure’s “fur coat,” “hat,” and “boots” with a red base.
When Santa Claus from the soap hardens, cover it with mother-of-pearl and use a brush to paint the eyes and nose with acrylic paint.
At the request of the main winter wizard, you can decorate it with a bag of gifts. It is also made from a soap base, which is poured into an appropriate mold. Attach the bag (already frozen) to the figure using a few drops of water. Liquids are added to the attachment site and a “soap” bag is applied.
We wrap the finished figurine in wrapping paper and secure it with a golden ribbon.
Weaving baskets with your own hands from plastic tapes
Once upon a time, our ancestors, after finishing work in the field, sat down to weaving bast shoes and baskets for their large families, so that there would be no shortage of them next spring and summer. Today, only a few craftsmen weave bast shoes, and only for tourists (it’s a pity that we forgot such comfortable, versatile shoes).
But there’s a problem with baskets in general. Those sold in stores are only suitable for souvenirs. My grandson went into the forest with one, and it fell apart and fell apart.
For his sake, I had to remember what my grandfather once taught me for fun - to weave baskets myself.
But since you can’t find bast now during the day with fire, I decided to use plastic tapes as the material. I suffered a little, but my hands quickly remembered everything.
And now I am happy to weave baskets for everyone (in my house, it seems, I have “basketted” all the residents; there is not a single person dissatisfied).
I think anyone can master this craft. Of course, not everything will work out at first, but the main thing here is painstakingness and perseverance. It’s easier for me - I’m a pensioner, a disabled person of the 1st group, and therefore I have nowhere to rush. Therefore, I decided to tell all readers of the magazine in detail how to make comfortable, practical and beautiful baskets.
I use the following tools for work: scissors, an awl, a hammer, nails and a stapler. I lay ribbons according to the size of the future basket on a wide board, and I always use only an odd number of them. I begin to braid them, having first bent each one in half.
I lay the first two central strips in a cross and nail them in the middle with a nail to the board (Fig. 1). I begin to apply other ribbons to them on both sides and weave them together. The result is a braided braid (Fig. 2). Its size depends on how big the basket needs to be made.
Having decided on this, I nail the braid to the board with nails in the corners (Fig. 2). This will be the base of the bottom of the basket. I make a box using the size of the braid from a cardboard fruit box (Fig.
3), corresponding to the height of the future product (essentially making a model of the basket). I place this box on the wickerwork of the basket and lift up all the ribbons (Fig. 4). I link them at the top.
Then I start braiding horizontal ribbons.
Weaving baskets with your own hands from packing tapes
When weaving, I move them with an awl to each other as tightly as possible. But you won’t achieve great density with this, since the tapes are very rigid and they need to settle. To do this, I take out one ribbon from an almost woven basket (I say “almost” for a reason) and replace it with three of the same kind.
I do this first at the bottom of the basket. If even after this good density is not obtained, then I repeat this operation in the upper part of the basket. There is another way: to do this, I twist two ribbons next to each other in the same way and only then run a third one between them, which goes crosswise (Fig. 6).
Now regarding the handles. If you noticed, I have missing the two longest ribbons along the length of the basket (Fig. 4).
They are installed along the bottom so that they divide it into three parts. So they will be the handles - I simply connect them together and wrap them inward along the walls of the basket (Fig. 5).
I choose the size of the handles so that they meet in the middle of the basket. If you plan to load your container with a heap, then the handles need to be made a little longer. And for greater strength, the tapes can be connected to each other with a stapler (and for beauty, I sometimes wrap them with colored insulating tape).
Related link: How to weave a basket from twigs
Having finished weaving the horizontal rows, maintaining the height of the basket, I trim the protruding ends of the strips of the stands, if necessary, then wrap them in braid, leaving two ends on one side and the other (opposite) side, and make basket handles from them (as already described above) .
Weaving homemade baskets with your own hands: material plastic tapes
How to weave a basket from a plastic tube
© N.AKULIN. Moscow
Tools for craftsmen and craftswomen, and household goods are very cheap. free shipping. recommended - 100% verified, reviews available
Below are other entries on the topic “How to do it yourself - for a homeowner!”
- How to weave a basket with your own hands? DIY weaving of willow baskets...
- How to weave a basket for shelter Do-it-yourself basket for shelter For…
- Do-it-yourself folding basket (photos and drawings) How to make a folding basket -...
- How to weave a basket from a plastic tube with your own hands Weaving baskets with your own hands A famous expression...
- How to weave a laundry basket with your own hands (+ step-by-step photos) WEAVE A LAUNDRY BASKET FROM…
- Weaving baskets and tueskas from birch bark or packaging tapes - lesson. How to weave a basket and decorative…
- How to weave a basket from paper tubes A bunny basket from paper tubes with your own…
Source: https://kak-svoimi-rukami.com/2014/11/pletenie-korzin-svoimi-rukami-iz-plastikovyx-lent/
Soap in the shape of a snowflake
You will need:
- refined olive oil;
- blue food coloring;
- alcohol (in a spray bottle);
- cup;
- glitter for manicure;
- silicone mold;
- soap base (80 g organic base, 20 g goat milk base);
- fir aroma oil.
Instructions:
- Spread some glitter evenly across the bottom of the silicone mold.
- Carefully cut the white goat milk base into small cubes, then melt it in the microwave. The resulting mixture will be the top layer of the future gift.
- Take fir oil and drop a few drops of it into the same cup. This will give our product a pleasant aroma and enrich it with beneficial properties, since this oil is a wonderful remedy for caring for wrinkled skin.
- Now quickly pour the resulting mixture into a silicone mold.
- Spray alcohol from a spray bottle on top. This is necessary to ensure that there are no bubbles left in the solution. We wait until the mixture cools down.
- After the solution has hardened, you need to make neat cuts on its surface using a regular kitchen knife.
- Now in another cup we begin to prepare another layer. To do this, you need to dissolve food coloring in a small amount of water - just a few drops.
- Melt the organic base in the microwave, after cutting it into small pieces.
- Add dissolved dye (a few drops) and one-third teaspoon each of olive and fir oil alternately to the melted base.
- Now quickly pour the resulting mixture onto a hard white layer, after which we also spray it with alcohol from a spray bottle. We wait a couple of hours until the solution hardens.
- Remove the cooled solid product from the silicone mold. Our beautiful and delicious-smelling handmade soap is ready!
Master class with step-by-step photos on making handmade soap
Take a decoction of calendula and mix it with a soap base. Heat on fire until a creamy mass forms.
Pour the finished mixture into the mold. And send it to the cold. It will take 2-3 days to harden.
After the soap has hardened, it must be cut into portions.
At the final stage, the soap can be sprinkled with calendula flowers.