How to make salt dough with your own hands: recipe
Probably everyone knows how to make their own salt dough. Just in case, let's remember the recipe:
- 2 cups of flour;
- 1 cup extra salt;
- a little more than half a glass of water (ordinary tap water);
- 2-3 tablespoons of vegetable oil.
NOTE
It’s hardly possible to do without oil at all – the dough will inevitably stick to your hands. However, you don’t need to add too much of it either, because then dirt can stick to the craft, and most importantly, it will dry much longer than usual.
We proceed like this:
Step 1. Take a bowl, first pour salt into it and add half of the specified amount of water.
Step 2. When the salt has dissolved, add the flour, and then the rest of the water.
Step 3. At the last stage, add vegetable oil. This is not necessary, but the dough with butter will not stick to your hands, which is good news.
Step 4. That's all - put the dough in the refrigerator, wait 2-3 hours, and our raw materials for modeling are ready. In the meantime, let's stock up on a good mood and study what New Year's figures can be made from such dough.
The technology for making toys from it is quite simple and consists of 3 main stages:
- First, the base is molded using a mold.
- Then it is painted with gouache and decorated with decorative elements (beads, buttons, shells and many others).
- After this, it is dried naturally or in an ordinary oven.
In general, it is best to dry crafts in the oven, especially since this process goes very quickly, and the heating is not very strong.
| temperature, оС | drying duration, hours |
| 50 | 2 |
| 75 | 1,5 |
| 100-130 | 1 |
| 150 | 0,5 |
It is also possible to brown toys at higher temperatures (up to 200°C). However, this is a more risky path, so it is better to constantly be near the stove.
And the total “cooking” time should take no more than 15-20 minutes. Therefore, most often they choose a comfortable range of 70-130°C. Then the models acquire the necessary strength and at the same time do not crack due to overheating.
And most importantly: any products made from salt dough are strictly prohibited from being eaten!
It is especially important to keep an eye on children who constantly put all sorts of things into their mouths - necessary and not so necessary. There are 2 threats here - the inedible “cookies” themselves and small decorative elements that decorate ready-made toys (beads, seed beads, etc.). Be careful!
We sculpt a wolf from the cartoon “Once Upon a Time There Was a Dog”
There are not many master classes on sculpting Soviet cartoon characters on the Internet.
I would like to share my tutorial on sculpting a wolf from the film “Once Upon a Time There Was a Dog” from polymer clay. This wonderful “living” character has not left anyone indifferent for more than 30 years.
Here I will show you the basics of creating one. After which you can do whatever your heart desires with it.
I sculpt from Fimo plastic. For work we will need:
— 5 colors (dark gray, light gray, light yellow, black and white);
- toothpick;
- a stick with a ball at the end or something similar.
Stage one: Making the head.
1. We form a ball, slightly stretch it into an oval and mark a place for the future muzzle (press it from the center line and below).
2. Attach the ears, slightly folding them along the edges. Apply with your finger.
3. We outline the eyes (one is round, and the second is more triangular in shape for the effect of “covering” the eyes). We use a toothpick to make wrinkles for him - he’s old. Don't forget about the wrinkles around the eyes (I didn't do them here - I added them in at the end with an acrylic marker).
4. Making the face. Roll out the sausage and pinch (narrow) it in the center. We flatten one edge and make a small cut in the middle (there will be a pug). We stretch the other end a little more into equal parts - there will be cheeks. The result is a kind of letter “T”. Using a toothpick, draw the mouth in the same way as the wrinkles.
5. At this stage, I slightly bake what we have already got at a temperature of 110 degrees. literally for 5-7 minutes - to fix the shape (it’s more convenient for me to work this way).
6. Now it’s easier for us to make a stripe on the nose (add a little black to the dark gray and mix). Place this flat strip on the muzzle and smooth it with your finger. All that remains is the nose itself - we form a ball out of black clay and make a simple nose using the same toothpick. To make raw parts stick better to a lightly baked product, you can use Liquid Gel (Fimo).
7. We make eyes from two small yellow balls of the same size and insert them into our eye sockets.
Stage two: Making the body of the wolf.
1. Make two balls. One large ball of dark gray color, we don’t skimp on clay (our wolf is no longer hungry, but quite “gorged”) and one small light gray (belly). We make a thin flat cake from the small gray one and place it on the large round one. We squeeze, we smooth. The result was a light tummy.
2. Our wolf is sitting waddling, so we pinch the top of the ball with our finger and crush the core - the head will be in this depression. In this “condition” there is no talk of a neck. My head was on a toothpick, so I pierce the body and insert the head.
3. Let's start with the paws. His paws are completely simple, without any shape. We simply roll 4 sausages (2 are a little longer - these will be the legs) and attach them directly to the place where the head and torso connect. Smooth it with your finger. We form the desired pose.
4. Same thing with legs.
5. Our tail is neat (despite his age). We also roll out the sausage, narrow it at the edges and use a toothpick in one direction to make indentations - the relief of the tail.
6. The wolf is ready! There is nothing particularly complicated in its design, just a moment with the muzzle and that’s it! The hero is very recognizable, and I am sure that you will do no worse, and maybe even better! Good luck!
Variations of the hero according to the same scheme in my works:
Toys and crafts made from salt dough: we make them with children
Kids have a genuine interest in salt dough, because creating toys from it is a unique combination of applied art and culinary skills. In addition, modeling is a great way to develop fine motor skills along with origami, creating toys from pasta, etc.
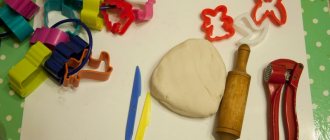
In the simplest case, almost any child can make New Year's toys from salt dough with their own hands. We take gouache, cookie cutters, and a rolling pin. We proceed like this:
Step 1. Roll out the dough into a layer up to 1 cm thick.
Step 2. Cut out several parts with a mold.
Step 3. Make a small hole in the center in advance, tighten a beautiful ribbon, with which we will then hang the toy on the Christmas tree.
Step 4. You can leave it as is and simply dry it in the oven until it turns beautifully brown. It is better to lay it out on parchment paper rather than on a bare baking sheet. Dry until the oven cools completely.
Step 5. Attach the ribbons - and you're done.
What to do if there are only 3-4 molds in stock? No problem. Let's take cardboard, draw or print any figure, and then cut out the dough with a sharp knife along the contour.
Salt dough is a very convenient material, because it is in many ways reminiscent of plasticine, which even the smallest can easily handle. And sometimes you don’t even need to use molds to work - you just need to put your palm on it, and then cut it along the contour or in a circle and color it as your imagination dictates.
General recommendations for sculpting for beginners
Before you start creating, you need to familiarize yourself with the rules that guarantee the success of sculpting:
- If the finished product is planned to be colored, then it is better to use wheat flour in preparing the dough, but it is not prohibited to use rye or corn flour.
- It is better to use regular table salt, and under no circumstances use iodized salt - the products may begin to spread when dried.
- It is convenient to color large pieces of dough during the kneading process. This way the product will turn out better and more noble. Regular food coloring or honey watercolor are suitable for this.
- The finished dough must be stored in a bag or film to prevent air from entering the surface. Otherwise it may dry out.
- If the dough turns out unsuccessful, it can be revived. To do this, you need to add the missing ingredients (flour to liquid, water to thick) and knead thoroughly until you get a smooth, soft lump.
- If the idea involves surface coloring of the product, you should not add fat or hand cream to the dough. Otherwise, the paint may lie unevenly, which will ruin the appearance of the craft.
- Do not store the finished material for more than 2 days in the refrigerator. It will lose its properties, and it will be inconvenient to work with it.
- It is best to assemble crafts that are too large on a wire frame so that they firmly hold their shape and do not fall apart.
- It is best to paint the surface of salt dough with gouache or acrylic paints. In this case, watercolor can ruin the craft, as it tends to soak the application surface.
- The place where small parts are glued must be moistened with water using a brush. This way they will fit more firmly onto the main part.
- The finished product must be coated with colorless varnish to preserve its integrity and appearance for a long time.
Important!
You should not place the figures on the radiator so that they dry out faster. This may cause the surface to crack, causing the toy to fall apart.
How to decorate salt dough toys
At the stage of creating the model, it can be decorated with various decorative elements. They should not be plastic, otherwise you will have to dry the toy without an oven - the beads may simply melt.
The result is an interesting, beautiful toy made from salt dough, which is easy to make with your own hands.
And here is an option with gouache.
What other elements can be used for decoration? Variety. These could be cereals, shells, buttons. Thanks to various combinations, even from one mold you can make many toys that are not similar to each other.
And another simple, but at the same time interesting way to decorate is an ordinary ribbon or thread. To tie it, you need to think in advance about the location of the holes on the workpiece.
Another simple way to decorate is with glitter. Apply a thin layer of glue to the surface of the dried workpiece (you can use a regular pencil) and glue the glitter. It turns out to be a truly festive toy for the Christmas tree.
And acrylic paints are really good.
And so that the craft pleases not only the eye, but also the sense of smell, you can decorate it with fragrant elements - cloves and cinnamon sticks. The result is an interesting combination of aromas that is reminiscent of mulled wine.
Such a toy will always attract attention. Please note that during drying it is better to choose the least high temperatures (about 50°C). You can even dry it first and then glue all the decorative elements.
And it’s really good to see everything with your own eyes – a video will help with this.
Decor ideas
In addition to coloring, there are many ways to decorate future toys. Just do this before you dry them. For example, cut out different holes with a straw.
Or make prints and imprints with stamps or some kind of figures.
Decorate with beads, beads or sparkles!
Dough crafts decorated with cosmetic glitter look very festive! You need to cover the dry finished product with PVA glue and then cover it with glitter. You can buy them at any nail fashion store, they cost from 60 to 120 rubles.
Or you can decorate the products with cloves, cinnamon sticks, and other spices! This way they will not only decorate the Christmas tree, but also give it a special New Year’s scent!
Oh, and don’t forget to make holes for threads to hang your crafts on a beautiful Christmas tree!
Do-it-yourself voluminous toys: the best models
Three-dimensional toys can also be made from such material. You can’t hang them on the Christmas tree, but you can put them under the New Year’s tree or on the table.
Christmas tree
First you need to make a cone out of cardboard - this will be the base of the tree. And then a layer of dough is applied to it, from which branches are then fashioned. You can clearly see the whole process in the video.
Candle and candlestick
You can also make New Year's candles on a cardboard base. We roll the sheet into a tube, glue it and cover it with dough. We form a tongue of flame and decorate the candle.
You can also make candlesticks for real candles - we use the same molds for stars or hearts, only we make them plumper.
Wicker basket
And another interesting three-dimensional craft that can be used to beautifully present a gift is a wicker basket. You can do it in different ways - one of them is shown in the video.
And the second one is in the photo. It is made of several identical elements - ears, which are fastened together overlapping and attached to a base in the shape of a regular circle.
Father Frost
What would a New Year be without kind Grandfather Frost? Making it from salt dough is much easier than it might seem. The figurine consists of a semicircular base, which will then turn into a face.
Separately, we sculpt and paint a cap, which we attach to the upper third of the face. We make the beard from small sausages, and the cheeks, nose and eyes from ordinary circles painted in the appropriate colors.
Christmas tree toys with artistic painting
You can make both simple and quite complex figures from the dough. In form they are practically no different; the only difference is in the design. The material provides a good opportunity to try yourself as an artist.
The dough is white and paint adheres well to it. It is enough to use any template - and you can get real small masterpieces.
And for decoration, the technique of squeezing a certain pattern onto a workpiece is used. You can do this manually or use a template, as well as special stamps that can be purchased at a hobby store.
The result is such relief images.
You can also make a Christmas tree and make toys for it separately. Moreover, some of them do not even need to be made - just make a few depressions and paint them in different colors.
How to paint the finished product?
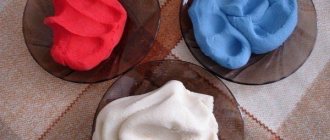
There are several ways to make products multi-colored. Dry cosmetic pigments and water-soluble food coloring, which are used to make handmade soap, are best suited for this. If they are not available, then you can use Gouache or watercolor paints.
After the salt dough is colored, you need to carefully roll it out with a rolling pin and cut out the desired shapes using molds. Products made from dough of different colors look very interesting (as in the picture). Kids have a lot of fun doing this kind of mixing.
Another way is to make crafts from white dough and then decorate them - there are many ways. Kids will do this with gouache, older children can draw beautiful patterns with felt-tip pens or a gel pen.
Acrylic paints are a great decoration! If you use silver paint to decorate your crafts, they will look like real Christmas cookies! Paints with shiny pigments look very good!

