Articles
All photos from the article
Celebrating the New Year with a Christmas tree has long been a tradition, so before its arrival at Christmas tree markets you can buy just such a forest beauty that can decorate your home. However, now, instead of living trees, many people prefer to give preference to artificial ones, although they are often more expensive. There is a third option - to make it yourself; a DIY plywood Christmas tree will be a real original surprise for your household.
We'll talk about how to do this below.
Plywood Christmas tree for home decoration
We would like to offer you two options that differ in the appearance of the finished product. Each of them can be supplemented or improved with your own ideas. You can also additionally make decorations for the Christmas tree from plywood, coloring them as you see fit.
Christmas trees made of plywood and boards
A Christmas tree made of plywood or boards is a decor that will last for years. From these materials you can make a large, main New Year tree in the house. But you can make several small tabletop Christmas trees to decorate each room.
You will need:
- plywood or board;
- saw or jigsaw (preferably electric);
- sandpaper (sandpaper) or sanding machine;
- paints, stain, varnish - depending on the chosen decor.
A Christmas tree of an interesting shape can be made on a stand. In a thick block we make a slot in which we fix the trunk of the tree.
Christmas trees cut from single pieces of plywood are primitive, but effective due to their dark green color.
Small Christmas trees made from pieces of board are good for a New Year's table composition. But you can cut a large spruce by first knocking down a shield from boards.
We fix miniature triangular Christmas trees in the slots of round stands. We glue small flat toys. They can also be cut out of plywood or bought.
Volumetric 3D plywood Christmas trees are actually easy to make. First, we cut out the flat elements of the New Year’s craft and make slits in it (see template). We assemble the Christmas tree by inserting the elements into the slots. You can additionally secure it with pins, but even without them the Christmas tree will be strong.
What will you need?
Before starting work, it is important to prepare the materials and tools that will be needed at each stage. It is recommended to prepare everything in advance and place it in one place, next to you. This way it will be much more convenient to work, and if necessary, you will not have to look throughout the house for the desired object.
You will need to stock up on the following items from materials:
- a sheet of plywood (the material must be of a high class, free from defects and damage, erased areas or “burrs”);
- It is advisable to have a special radiator paint with a water base;
- A bright LED garland of one or more colors wouldn’t be out of place either.
The master will also need some important tools, namely:
- a circular saw;
- manual electric jigsaw;
- pencil and carpenter's knife;
- spray bottle for more convenient and uniform distribution of the coloring component;
- glitter;
- you can choose the appropriate spray paint;
- a sheet of sandpaper and a brush.
Sometimes people use an electric sander instead of sandpaper. If you have this useful tool at home, then you can use it while making a plywood Christmas tree. Experienced craftsmen advise using only high-quality tools that do not have damaged or loose parts. The fact is that such devices can fail the user at the most crucial moment, and this will negatively affect the appearance of the homemade product.
It is also recommended to buy sandpaper with different degrees of grit (if you will be sanding with this device).
Usually, processing is first done with sheets with large “grains”, and finished with small ones.
Christmas trees made of cardboard
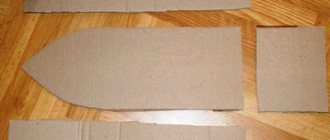
Small tabletop cardboard Christmas trees are an excellent New Year's decor. To strengthen crafts, you can make them by gluing 2-3 layers of cardboard. The work process follows the same principle as with plywood Christmas trees, only instead of a jigsaw or saw we use scissors. We decorate the trees with miniature toys, ribbons, bows, etc.
Wrapping with twine is a simple decoration. You can attach a magnet to the back of the craft.
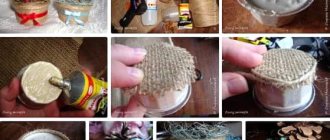
Christmas trees made of cardboard, covered with burlap. Decorations - beads, lace ribbons, bouquets of artificial flowers. We attach the triangle to a straight branch that will imitate a trunk. We plant a Christmas tree in a pot.
You can cover Christmas trees with fabric of any color. It is important that the decorations contrast with the background.
An option for decorating a cardboard Christmas tree is cotton papier mache. It’s simple: we glue layers of cotton wool onto a cardboard base using PVA glue.
Peculiarities
Nowadays, crafts made from plywood have become incredibly popular. Many people enjoy working with this material, constantly improving their initial skills. Often, after some time, craftsmen move on to working with wood.
Plywood has a number of advantages that make it so popular among lovers of original homemade products.
- It is dense and durable. This material is multi-layered, due to which it has a sufficient degree of rigidity.
- Plywood is pliable. Even very complex structures can be made from it. The main thing is to have drawings, an action plan and use the right tools.
- The material in question produces attractive crafts that can be left untreated, or can be painted or varnished to make them look even more attractive and brighter - each craftsman decides for himself how best to proceed.
- Plywood is an environmentally friendly and safe material. It cannot harm human health. Crafts made from plywood sheets can even be displayed in children's rooms.
- The material is available.
It is sold in many stores and boasts affordable price tags.
Christmas trees made of slats and branches
Regular branches can be obtained anywhere. Reiki is also not a scarce material. The crafts are simple, the whole secret of their beauty lies in the unusual designs and brightness of the toys.
Towards the top of the tree, the branches become shorter.
We secure the branches to the trunk with carnations.
This Christmas tree can also be fixed in a pot.
Above are three wall-mounted Christmas trees made of branches. Although slats are also suitable for creating them. Branches or slats are tied together, the structure is hung on one nail in the wall (at the top).
Cute slatted Christmas trees are easy to make. We fasten the slats with screws. Various toys can be placed inside such structures. Complex fastening, as in the picture, is not necessary - you can stretch cords (rope, twine) between the slats of the triangle.
New Year's decor set
The next set of templates is a series of New Year's decorations that can be used as Christmas tree decorations or as independent interior decor. The set includes several types of figurines, which are a kind of designer set: they can be combined in different combinations or used separately as full-fledged New Year's decorations.
The first set of figures are simple stylized Christmas trees in two design solutions: with straight and figured geometry. They can be hung on the Christmas tree or used as regular home decorations.
Stylish Christmas trees for hanging with straight and shaped geometry. Material: birch plywood, 4 mm thick. Finish: acrylic paint + glitter spray paint.
Complete your holiday decor set with figured spirals. These are stylish and truly multifunctional New Year's decorations. By cutting out several figures of different sizes, you can use each spiral separately, make a pendant from several pieces, or combine them into a voluminous decoration, as in the photo. Working with curved cuts will require certain skills. For best results, we recommend using #2 or #3 files and working with not very thick workpieces.
All finished figures can be combined into beautiful rotating pendants. To do this, you will need to additionally cut out decorative crossbars in the form of shooting stars, as well as individual stars. To keep the structure rigid and rotate better, thin wire is used for hanging.
Stencils for cutting
Christmas trees from pots
The simplest New Year's crafts. You will only need:
- flower pots of different sizes;
- dye;
- small toys for decoration - stars, flowers, etc.
We paint the pots - not necessarily with green paint, because the Christmas tree is decorative. When the paint is dry, glue on the decor. To increase the stability of the Christmas trees, you can insert some kind of pin or thin round stick through the drainage holes in them.
If you don’t want to make anything (or don’t have time for it), we use the pot as a container in which we plant a spruce branch. It will be enough to decorate the top of a small New Year's tree with a star.
Garland
Christmas tree beads are an element as important as the toys themselves. This also includes elegant garlands for a tree or room. They can also be made from plywood using the same principle as described above.
Some tips:
- The garland for the Christmas tree should be made in a simple form so that the decoration fits organically into the overall composition. Choose flags, circles and other simple shapes. This will help save time - there will be a lot of elements for cutting and decorating.
- Use satin ribbons and decorative ropes to connect the elements so that the appearance of the product remains solemn.
- To fix the fragments on the rope, tie knots at the location of the element. This way it will maintain its position no matter how inclined the thread is.
- Make loops at the ends of the rope to make it easy to hang the garland.
What are the results
A couple of hours of work, satisfaction from the perfect process and pleasure from the result - all the emotions in a plywood toy. Add the attention of household members and guests to a hand-made product and success is guaranteed. Handmade products never go out of fashion; they are passed down from generation to generation, carrying with them a piece of memory. Have you ever seen such a set of values and emotions contained in a mass-produced plastic toy?
On New Year's Day it is customary to give each other gifts. The master provides you with detailed instructions on how to make a Christmas tree as a gift with your own hands. An unassembled gift takes up little space and can easily fit in a small bag or envelope. The wooden craft was made from a photograph of one online store where you could buy this handmade miracle for $37...
Christmas tree made of sisal
Sisal is often used in floristry. This fiber can be purchased at flower shops or craft departments. Christmas trees can be made from it in different colors.
We form a cone from sisal and secure it with tape. Decoration is at your discretion.
DIY Christmas tree on a frame
This technique allows you to make a medium or large Christmas tree.
You will need:
- frame made of metal mesh or sticks, slats;
- branches of spruce, pine or other coniferous plant (for example, juniper);
- decorations - just like for a regular Christmas tree.
It’s not difficult to make a frame from a mesh, but you can simply buy a cone-shaped topiary mold at a garden and landscape supply store. If this is also difficult, we fasten even sticks or wooden blocks into a cone. They should not be too thin for the tree to be stable.
Materials
- Regular plywood 1525x1525x15 mm 600 rub. It was possible to take better plywood, Finnish or Lithuanian, but it would be twice as expensive.
- Pine block 20 x 20 x 100. I got the scraps from the store. You can buy it without any problems.
- Self-tapping screws 2 cm (10 pcs) and 5 cm (3 pcs)
- Small steel angles 90 degrees (6 pcs)
- Flat steel connecting plates 2 pcs
- Dowel-nails. In my version, the tree will be attached to wooden boards, but someone will have to attach it directly to the wall.
- Paint, varnish
Currently reading: Electric jigsaw - how to choose the best tool (80 photos)
Felt Christmas trees
It’s good to make such a New Year tree if there is a small child in the house. It is also educational - the baby can hang toys on it independently.
Another option for a developing Christmas tree is a wall-mounted one.
And these are just tabletop soft felt Christmas trees that a child can play with.
tools and auxiliary elements, manufacturing subtleties
It’s hard to imagine celebrating the New Year without a beautiful forest guest. The tree unites the whole family, who gather to decorate it for the holidays. Children eagerly wait for Santa Claus to hide gifts under it.
If you want to be original and decorate your home in an unusual way, then you can try making a tree with your own hands. We suggest working with natural materials - we will get a wonderful Christmas tree made of plywood.
There are many options on how to make a Christmas tree with your own hands. This method is interesting because the result is a solid and large structure that can really replace a living tree. It is easy to assemble and disassemble: after the holiday, the parts can be put away on the mezzanine so that next year you can take it out again and decorate the house with it.
But the work will require a lot of materials and tools. This is the case when skillful hands alone cannot do it.
Therefore, you first need to prepare:
- sheets of plywood measuring 1.52 by 1.52, 15 mm thick;
- pine beam 5*5 cm;
- self-tapping screws;
- twelve steel angles;
- small connecting plates made of steel;
- paint and varnish chemistry;
- jigsaw;
- pencil, ruler;
- roulette;
- Sander;
- screwdriver
If you take plywood and timber of a different size, then the Christmas tree will turn out higher or lower. In this case we are talking about a craft about one and a half meters high. Some tools can be replaced: if you don’t have a jigsaw, you can use a regular hacksaw. Without a screwdriver, the screws will need to be tightened with a screwdriver. The sanding machine will be replaced by a piece of sandpaper. But naturally, a power tool speeds up the work process.
Step-by-step instructions for making crafts
The first step is to draw a template. We depict it with our own hands on one sheet of plywood. This will be the outline of half the tree: the simpler the drawing, the easier it is to cut out the details. If you draw intricate drawings, then the craft will turn out curly and very elegant.
Let's get started with the task: carefully make the first workpiece with a jigsaw. It is necessary to go along the edges with a grinding machine to avoid nicks and roughness.
The resulting part can be used as a template: we transfer the image onto the remaining sheets of plywood with our own hands. There should be a total of six halves of the tree. You need to connect them together to get a three-dimensional tree. If you want to make a product in a natural green color, you should first paint the parts, and then begin assembling the structure when the paint is completely dry.
Now you will need corners and screws. They connect individual workpieces with their own hands in two places, distributing the load evenly. The tree is almost ready: you need to make a trunk and a cross for it.
To do this, we use a beam, from which we need to cut four pieces of 0.3 meters each. Another piece can be of any length - this will be the trunk. It is necessary to fold four parts of 0.3 m each so that between them you get a square hole into which the “trunk” fits tightly. All that remains is to connect the beams together with self-tapping screws into a cross.
When the tree is assembled, you can start decorating it. As an option, balls, snowmen, and other toys are painted on plywood. If you have the skills and tools, you can cut shaped holes in the sheets.
The Christmas tree will be completely transformed if it is illuminated with a garland or LED strip. To do this, just hang the wires with your own hands and secure them with hooks or other fasteners, and then turn on the lighting equipment.
When working with electrical appliances, you should remember safety! Do not use garlands that get very hot.
Finally, a plywood Christmas tree can be decorated with ordinary toys. To do this, just make narrow holes in different places. Then various balls, houses and other decor are hung, hooked with small wires or tied with strings. The kids will definitely love dressing up this homemade beauty!
This master class presents a Christmas tree of an original design. Unlike most artificial symbols of the New Year holidays, this product is easy to assemble, looks interesting and requires very little storage space. In terms of cost, it will not be expensive. To make it you will need a piece of plywood and some decorative materials.
Materials
To make a Christmas tree from plywood with your own hands, you will need:
- plywood, 3 mm, 30 x 20 cm;
- dye;
- brushes;
- wood varnish;
- glitter;
- hand tools for cutting and processing wood.
The size of the tree will be small.
The diameter of its base is 14 cm, and its height is 20 cm. Step 1
. You will need to transfer the given template onto a piece of plywood and cut out the component parts. The most convenient and fastest way is to load the template into a laser cutting machine; in the absence of one, transfer the template manually and carefully cut everything out. Work especially carefully with the spiral, which imitates the crown of a tree.
Step 2
. After cutting out the parts, process them so that there are no protrusions or roughness anywhere on the surface.
Step 3
. Take a piece that imitates a tree trunk and insert its top into the groove in the center of the spiral.
Step 4
. Gently straighten the spiral, lowering it down to the base of the trunk. Insert the bottom of the crown into the side grooves on the trunk.
Step 5
. Secure the star to the top of the tree by inserting it into the prepared groove.
Step 6
. You can start decorating the Christmas tree. There are several options here. The Christmas tree can be left in its natural form by simply covering it with varnish. You can paint it and the star on it in traditional colors, and if you want to make the figure festive and solemn, add a little sparkle of the appropriate shade on top of the paint.
Ready! At the end of the holidays, the figurine is also easy to disassemble and put away until the next New Year.
The tradition of decorating a home with spruce began in the 16th century and took root well in Russia. New Year is a family holiday, which is associated with home comfort, tangerines, joy, gifts and, of course, a decorated New Year tree.
But what to do if there is no Christmas tree? This happened to us when we vacationed in Egypt for the New Year and spent the winter in Thailand. The holiday becomes dull without the spruce. Garlands look dull and awkward on palm trees. You will say: you can buy an artificial one and not worry about it. Indeed, our family has been using an artificial Christmas tree for years, which sometimes looks better than a real one. But it so happened that this year the tree ended up in one place, and we were in another, and we didn’t want to buy a specially artificial tree. Fortunately, your arms are straight and your tools are with you.
Materials
- Regular plywood 1525x1525x15 mm 600 rub. It was possible to take better plywood, Finnish or Lithuanian, but it would be twice as expensive.
- Pine block 20 x 20 x 100. I got the scraps from the store. You can buy it without any problems.
- Self-tapping screws 2 cm (10 pcs) and 5 cm (3 pcs)
- Small steel angles 90 degrees (6 pcs)
- Flat steel connecting plates 2 pcs
- Dowel-nails. In my version, the tree will be attached to wooden boards, but someone will have to attach it directly to the wall.
- Paint, varnish
Tool
Standard home handyman kit:
- Jigsaw
- Pencil
- Ruler, square
- Roulette
- Sanding machine
- Screwdriver
- Gloves and glasses
Instructions
Draw a plan or sketch.
I chose a very simple tree shape and drew it on paper. Straight lines are easier to cut. You can make it more curvy, with rounded corners, or even something unusual. A jigsaw is designed to cut out uneven lines.
The maximum length of the tree will be 150 cm, which will allow you to leave
playard.ru
Christmas trees on a cone
Options for cones for Christmas trees:
- cardboard cone;
- foam cone;
- metal mesh or ready-made frame for topiary.
We cover the cone with burlap and decorate the top with lace.
How to decorate a cone with burlap? One of the options:
How to wrap a cone with twine?
Christmas trees made of sweets and tangerines
Delicious New Year's trees are often made to decorate the table. Subsequently, the decoration turns into dessert. We wrap a cone made using any technique (from cardboard, mesh, etc.) with rain that imitates pine needles, and then attach candies in bright wrappers.
Place tangerines on wooden skewers. You can use shish kebab halves. Both ends of the skewers should be sharp. We plant a tangerine and stick the other end into a foam cone.
To pair with the tangerine tree, we will make tangerine snowmen .
New Year's gnomes
Make a series of these easy Christmas gnome ornaments and use them individually or as a makeshift garland.
DIY New Year's gnomes. Material: plywood. Finish: oil paints
Pattern for the New Year's Gnome project
Wall Christmas trees
We drive nails into the board to form a triangle. We stretch a wire between them. toys on it .
To make a Christmas tree panel, draw the silhouette of a New Year's tree on a wooden or plywood board, and stick toys inside it.
And here are just colored stripes pasted on the wall. It is convenient to use self-adhesive paper.
Isn't that an interesting option? Christmas tree on canvas or any fabric by printing. Order one, and for several years there will be no problems with New Year's decor. After the holidays, we roll up the canvas and hide it until next year. You can draw a Christmas tree yourself if you have fabric paints.
Read: How to make an inscription on fabric. What paints to use
Set of decorations in Christmas style
A set of three ornaments inspired by traditional Christmas motifs. The set includes a pair of stylized angels and an openwork Christmas tree assembled from two halves. The latter can be used as a pendant or as a free-standing decoration.
Such toys look good in their natural form, with an open wooden texture. Therefore, linseed, mineral or any other non-tinted oil is best suited for finishing.
Stencils for cutting
The width of the central slot should correspond to the thickness of the workpiece used. To ensure a good fit between the two halves of the plywood Christmas tree, cut the groove a little smaller, then carefully file it with a file or sandpaper until it fits snugly.

