Each of us loves money in our own way, but there are people for whom it is not just pieces of paper and coins as a way to acquire everything they want, but a whole source of inspiration and material for creativity. It was these people who created the art of money origami, like the creation of various figures from banknotes of different denominations and affiliations - Moneygami. A shirt made from a real banknote with a decorative tie can be made quickly with your own hands; all you have to do is read our instructions!
- We make a shirt from a banknote with a tie with our own hands with diagrams and descriptions
- Video lesson on the topic of the article
As it is said about this art online: “The value of an origami figure is determined by the denomination of the banknote from which it is assembled.”
- Traditionally, money is made from paper. Initially, such an idea was born in the minds of the Chinese, and they nicknamed them “flying coins.” And the famous traveler Marco Polo, when he came to China, wrote about this discovery like this: “In the city of Kambul there are coins of the Great Khan, about whom we can say that he knows the secret of alchemists, because he knows how to make money from paper. When the paper is ready, it is cut into pieces of different sizes and, depending on the size of the piece of paper, the denomination of the bill is determined.” Here is a parable about the appearance of the first banknotes. As a result, the Chinese idea to create banknotes from paper led us to the fashionable direction of rolling up money. Some works are amazing in their execution.
- The technique of folding origami models from money has long attracted people around the world. Entire communities are being formed that collect amazing models only from this paper format and even organize competitions.
- We invite you to keep up, join in a little with those who like to fold various kinds of crafts and try to assemble a craft in the form of a shirt from a banknote.
- An unusual and stylish shirt made from an origami banknote will be an original gift for your friends and acquaintances. It will also look quite funny as a tip left.
The craft is put together quite simply and quickly. A dollar shirt looks the most interesting, but first it’s better to practice on paper or a small denomination banknote.
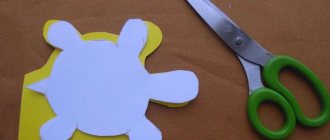
To make it clearer what we are talking about, we offer you a photo of such a craft:
We make a shirt from a banknote with a tie with our own hands with diagrams and descriptions
So, you will learn how to make a stylish souvenir in step-by-step instructions.
Let's mentally divide the bill into left and right parts. Let's start with the left.
1 - The bill is folded in half along the long edge,
2 - The two left edges are folded towards the center according to the principle of a paper airplane,
3 - The resulting triangle is bent towards the middle of the bill,
4, 5 - A tie is formed: for convenience, you can take a ruler or visually draw two lines symmetrically from the center in both directions, bend the triangle along them so that the inner part moves forward in the shape of a tie (see diagram),
6, 7 - The bill is folded on both sides towards the center,
8 - The corners of the tie are pulled out,
9 — This is what the left side of the bill looks like.
Now let's look at how to fold the bottom (right) part of the shirt:
10 - The right side of the folded bill is bent 1 cm towards the cent,
11, 12 - The banknote is turned over, its right side is visually divided into four segments a,
the two outermost ones bend towards the center,
13 - The bill is placed face up,
14, 15, 16 - The bill is folded in half, face inward, then straightened to make sleeves,
17 - The right side rotates to its original position up to step 11.
18, 19 - The central part of the right side is unbent between the resulting bends, and again bends towards the center at the site of the former bend,
20 - The former fold turns back,
21 - The bill is folded in half from the center,
22, 23 - Collars 1, 2 are pulled out. The shirt is finished.
Second part of the work
Everything that needs to be done next is generally the same as for folding a traditional shirt without a tie. The lower part of the bill is bent a centimeter, then you need to fold its side edges towards the center. Then you need to bend the paper, bending the bottom third inward. Now the inner edges are turned out from the center, the shirt is folded in half and sleeves are obtained. That's it, the talisman with the tie is ready. In principle, if you really want, you can fold a shirt not from a banknote, but from plain paper, paint it, even cover it with sparkles or rhinestones. It all depends on the flight of fancy. However, it is the money shirt, as many believe, that gives its owner good luck not only in money, but also in all other matters. And it looks much more interesting than all the other options.
When not to give money
- It is believed that on gender holidays (March 8, February 23, February 14, Mother's Day, Father's Day) giving a gift in money means showing that you are not particularly fond of this person. Because these are the most convenient occasions when you can especially clearly show your love and care.
- Men don't like accepting money from women because it shows that he earns less than she does. This does not apply to relatives.
- For the same reason, younger people should not give money to elders.
- Based on subordination, you should not give a monetary gift to your superiors. It looks stupid: most likely, the boss earns more than you.
Goldfish, natural resources, technological wonders and flights of fancy
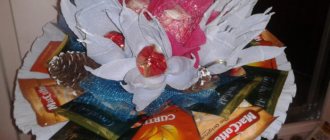
Suite design is a treasure trove of ideas for giving money in any form. For example, a goldfish, made with his own hands from sweets and floral organza (mesh, corrugated paper - to the taste of the creator), definitely has the right to promise to fulfill not just three, but as many wishes as he wants, since he swims in money “waves”. The sweet theme can be played out in another way - by making a multi-tiered cake out of banknotes. Three cardboard circles of different diameters are glued together to form a base. Each bill is rolled into a roll and attached to the base using a paper clip. The finished product is decorated with ribbons, flowers and decorative paper. If desired, you can hide any other gift inside the cake, or leave it hollow.
Read also: Why do dogs wag their tail?
If you develop a fairy tale theme, then why not make a magic pot, clearly hidden once by a cunning gnome or leprechaun, because it is full of chocolate gold and real money - both paper and metal. You can buy a real clay pot, or make it yourself from scrap materials. A “Pirate Chest” made from a box, cut out of polystyrene foam or glued together from cardboard, covered with gold and silver corrugated paper, decorated with precious stones from rhinestones and beads, full of chocolate gold coins and real bills will be a wonderful gift!
A sea shell made of straw, foil or cardboard hides inside a “pearl” folded from banknotes, a candy mill rotates with wings made of banknotes, an office briefcase made of cardboard and floral paper is tightly stuffed with money - does anyone else doubt that cash gifts can be given beautifully? !
Simple manufacturing options
Experienced origami masters have come up with a huge number of ways to make a money shirt. All of them are quite simple and do not require special skills. During the creative process, the minimum amount of materials and tools available to everyone is used. Their cheapness allows even people with limited financial resources to engage in this type of creativity.
Men's shirt
This option for creating a shirt from money is the simplest and most frequently used. In the process of work, a small number of items are used that can easily be found at home or purchased at the nearest stationery store. Such a shirt can be made from banknotes of any denomination. The most common shirts you can find are shirts made from dollars.
The finished craft turns out very beautiful and is ideal for a birthday gift. It will be much more pleasant for the birthday person to receive a money shirt than a simple envelope with banknotes. The process of creating this item of clothing is very simple and consists of the following steps:
The dollar bill is placed on the work surface and positioned vertically. Then it folds in half from right to left. To obtain a straighter fold line, you can use a ruler. The bill unfolds and its right side is folded until the edge touches the center fold line. All the same steps are repeated for the left side. The banknote straightens out again and clear fold lines appear on it. After this, a few millimeters (no more than 5) of the upper part are folded onto the back side. The remaining visible part of the bill is conventionally divided into three parts. The lower third is neatly folded onto the front side. Along pre-designated lines (points 3 and 4), the banknote is folded into the center. On the reverse side, another 5 millimeters of the top are bent. The resulting workpiece is smoothed and turned over. The upper corners of the product are bent at a slight angle
It is important that their tips touch on the center line. The result of all these actions will be a formed shirt collar. The next step is making the sleeves
To do this, the free lower ends of the bill are folded away from the center of the craft. The entire lower part of the structure is folded so that its edge rests under the collar of the shirt. These simple manipulations will allow you to more securely fasten the product. The finished craft is placed under an even and heavy load. After several hours the product takes on its final appearance.
With a wide tie
Many people believe in various signs, so they carry a certain banknote in their wallet. It not only brings them happiness and good luck, but also helps them keep their wallet full at all times. This attracts new money and allows the owner to live comfortably. However, wallets come in different sizes and it is not always convenient to carry a large banknote in them. Therefore, you can fold a shirt from a banknote with a tie. Action plan:
A little about the main thing
There are several techniques in the art of origami, namely:
- Simple origami;
- Modular origami;
- Wet folding technique
- Folding origami according to a pattern.
Simple origami speaks for itself. This folding technique is very simple and perfect for beginners. Also, this type of needlework is suitable for people with limited mobility. Using this type of origami, simple figures are obtained using valley and mountain folds.
Modular origami is considered one of the popular types of folding paper products. Their creation involves assembling a whole figure from several monotonous parts. In origami language this is called a module. To begin with, modular parts are assembled using a simple or classical method, after which they are nested into each other and, thus, a finished figure is obtained. As an example, using modular origami you can make three-dimensional stars, balls, and various types of boxes.
A rather interesting way to create figures from paper is the wet folding technique. It is very convenient in order to be able to give the product the greatest smoothness, as well as to soften the lines. This technique is performed with slightly dampened hands. Thanks to her, the figures acquire expressiveness. For example, this technique is more than suitable for folding animals, because with its help the products will be most similar to the original. For the wet folding technique, it is worth choosing thick paper, since it contains water-soluble glue.
Pattern folding is a so-called diagram on which all the necessary fold lines for the future figure are outlined.
This folding technique is used when developing and creating any new models. The pattern, despite the presence of already outlined folds for folding, is considered more complex compared to simple origami.
For adults
Good housewives will always please their husband with a delicious dinner on February 23rd. But you need to correctly calculate your strength and allocate time for the presentation. A regular origami tie attached to a box will already add creativity and showiness to the image.
If you add a stylish collar to it, then simple shoes will be presented in a unique way. A jacket postcard can come as an addition to the main copy and include wishes or plans for the evening that will soon come true.
Any intriguing design will add zest to the presentation and evoke genuine feelings. Gratitude for your efforts will be a good mood and a smile on the face of a respected person.
Factory boxes are not particularly presentable, but having mastered handicraft skills, you can easily make dramatic changes and give the model some piquancy and style.
The tie stencil can also be found in the photo in the article. The accessory is quite personal, so all the nuances of its creation may not be clear to some women.
Holiday style shirt and tie card
You will need: A4 colored cardboard, scissors, glue, markers, a simple pencil, decorative elements (buttons, glitter, threads).
Master Class
- Make the base of the card from a piece of cardboard by folding it in half.
- Draw a folded shirt on a piece of cardboard of a different color.
- Cut out the shirt.
- Glue the shirt onto the card.
- Draw a tie or bow tie on cardboard and cut it out.
- Glue a tie or bow tie to your shirt.
- Write your wish and decorate it to your taste.
I recommend watching the video master class!
DIY POSTCARD | GIFT FOR DADDY - COOL CARD “SUIT” |Ideas for February 23
How can you determine which banknote will be your lucky one?
Here are some ways.
According to the ancient Chinese teachings of Feng Shui, the most money number is 8. This is the number of financial well-being! A banknote with many 8's is a powerful magnet for attracting money. If you see three 888s in a row in the serial number of the banknote, then it will definitely be lucky! The position is strengthened if 888 is at the beginning or end of the number series. Another lucky bill is the one with at least 4 eights that clash with other numbers. In general, the more eights on the bill, the better! I have such a bill!
Read my book that will help you achieve happiness, success and wealth
1 unique personality development system
3 Important Questions for Mindfulness
7 areas for creating a harmonious life
21 vectors for effective development
Read a book
A banknote that brings financial success is considered to be one whose number contains three sevens 777. The most ideal option is if they are located immediately after each other. Seven as a number represents success, but not achieved through one’s own labor, but by chance, that is, thanks to luck. And every person needs luck and luck in life, including you. Therefore, look for such a banknote. Personally, I already have one!
It is generally accepted that a bill with the number 128 can be successful. According to Japanese beliefs, she can attract money to your home. Each of these numbers has the energy necessary for this.
It's great if you can find a banknote with a serial number that matches your date of birth. For example, I have 02/02/1989. I need to find a bill with the digital code 2021989! But I think it's very difficult! The probability is very low!
A banknote is considered lucky if its letter series matches your initials. For example, I am Nikolai Sysoev, then a banknote with the letter series NS will be my monetary talisman. You can take the first two letters from the initials and find two lucky bills with the letters NI and SY. Yes, the main thing is “don’t piss” and there will be money)))
You can also use Simoron techniques in your life to attract money and good luck. You should find three or more bills, serial letters in which all together add the words BO-GA-TA, BO-GA-TЪ (Ъ) or ET-OB-OG-AT-ST-VO.
Lucky bills should never be changed or spent. Some even manage to sell banknotes with beautiful numbers, asking for a lot of money for it. But I believe that it is better to save such money, because in the long run it will attract more money than the immediate benefit of selling such a lucky bill.
Be careful when telling people that you collect lucky bills. Many may not understand this and “twist it at their temples.” Such people include those for whom there is only the material world, where they need to work 24/7 in order to have a good income
But there is also an immaterial world (metaphysical), in which completely different laws operate. This does not mean that you need to collect only lucky bills and do nothing. No. This is just a way to accelerate the achievement of prosperity and financial independence in your life.
Personally, everything works for me.
When a lucky bill with three 888 appeared in my life, the cash flow expanded and my income began to increase!
And don’t forget to believe in the magical power of attraction of lucky bills! By faith it will be given!
I wish you more happy notes in your wallet!
What is a bouquet of money?
Non-standard bouquets made of various materials are a feature that came to Russia from the West. For people who are accustomed to gifts, such a present can lift their spirits and surprise - this is the essence of money bouquets.
Doing them yourself is problematic, because mastering the technique can take up to a couple of weeks. This is where private entrepreneurs come to the rescue, ready to make a similar bouquet to order in any quantity in a short time.
Please note: products made from banknotes symbolize wealth in the home. By receiving a money bouquet, the giver shows respect to people and wishes financial well-being to the family.
As a rule, such bouquets are given by men (if we are talking about a wedding or other major event). The male sex acts as the breadwinner of the family, which is why the gift acquires additional spiritual value.
Reasons to give a bouquet of money:
- money does not spoil, and the gift will remain in a prominent place for a long time, reminding people of the person’s generosity;
- the gift can also be made by hand - this will save money on the services of decorators + will bring additional value to the gift;
- the bouquet will allow you to stand out from other gifts. Many guests of the celebration will want a photo with such a remarkable gift;
- The intrigue remains regarding the amount of money, because it is physically impossible to recognize all the bills and make payments at once in such gifts.
An ideal wedding gift for newlyweds. Usually, for such celebrations they take cash envelopes, but imagine how much more impressive the same banknotes will look, but in origami design.
How to fold the base
If this is your first time doing something like this, it's better to use a template. The shirt card is made from the usual rectangular format, although the folding options still differ. The following photo shows the sequence of steps you need to follow to get a shirt with a collar and sleeves.
If you add an outer layer of another contrasting color, you get a jacket. Using the appliqué method you can glue on a vest or tie. Having mastered one template and folding method, you can easily make many different models, changing the color and texture of the paper, as well as the decor. You can easily make your own collection of samples, such as those shown in the first photo in the publication.
The most complex technique is origami. A shirt postcard made using this method turns out to be quite voluminous, and the paper can be folded so that the tie appears as one piece with the base.
This craft can be given as a stand-alone original souvenir, or can be used as a part of a postcard. By the way, it is quite acceptable to place several such elements of a paper wardrobe on the latter.
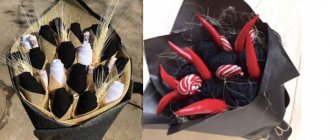
Balls with money
If you want to give money in an unusual way, you can do it this way: put it in empty balloons, which you then inflate, tie in a bouquet and give a colorful and valuable bouquet to the birthday person. This is how you can congratulate a young girl on her birthday. Looks very nice and doesn't ruin your money
As an option, you can give a huge box (from under the refrigerator) of inflated balloons, inside of which there will be money rolled up into a tube. Of course, cover the box with gift paper and tie it with a bow. Ask people to help carry it out, it is supposedly very heavy. This gift can be delivered. It will be very original!
"Two in one"
The model is quite complex, so practicing on a simple sheet of paper is a must. With many operations, the figure turns out to be miniature, which does not make the task easier. The work requires precision folding, but with care and precision, an excellent result is guaranteed.
Step-by-step instructions for folding an origami shirt:
Again, take a rectangle that imitates a dollar bill, measuring 15.5x6.6 cm. Place it with the short side facing you. And we denote the vertical axis with a fold.
We bend the upper corners to the previously marked center. Next, we make a “mountain” fold along the line marked in red. We get a triangular valve with the top down. We outline the shape of our tie with a pencil. We draw the contours very easily, without pressing, so as not to damage the bill. The width of the accessory can be any, but its side lines must connect at the top edge of the figure. Open the last fold again and turn the workpiece with a triangle towards you. Make a fold along the pencil outline outlining the tie on the right. We repeat the operation on the left. Lower the triangular valve down again. Fold the tie in half. Close the fold with it to the right. This will cause the left corner to move down, marking a new fold line. We open the accessory and fold it in the opposite direction, as shown in the figure.
Repeat steps 10 – 13 on the other side of the workpiece. The tie is already clearly drawn. Fold the left and right edges towards the center. We get the basic shape of the “door”. Opening the left side. Our task is to make a repeated bend, but aligning the points indicated in the figure. We do the same on the right side. We bend the bottom edge by 1 cm. Turn the workpiece over to the reverse side.
Make side folds as shown in the picture. We get a collar. We turn the workpiece over again. The tie should be at the top. Fold the bottom part so that it almost touches the top. The distance between the extreme points should be about 3 mm. Unfold the last fold. We stretch the two side flaps to the sides and return the lower part to its place. This creates sleeves. Turn the workpiece inside out. Fold in half so that the points indicated in the photo in the step-by-step instructions match. We bend the top layer, lifting the collar above the workpiece.
All that remains is to turn the model over to the front side.
You can see again how an origami shirt and tie is folded out of paper in the video:
Costume
The costume couple using the manigami technique looks great. Without further ado, it is clear what the “eloquently” presented bills should be spent on. Unlike a shirt, trousers fold in just a few steps and will not cause any difficulties, even for those who are little familiar with Japanese papermaking.
You will need a dollar bill or any other bill. By folding, we outline the longitudinal axis. We bend the long sides towards it (the “door” shape). We fold the resulting workpiece in half again “valley”.
Now we bend this long narrow strip in the middle at an angle, as shown in the photo. The trousers are ready.
With creative thinking, you can come up with a wide variety of variations on the theme of an origami costume. Like, for example, Andrew Jackson playing guitar from Japanese master Hasegawa Yosuke.
Formal shirt and tie card
You will need: A4 colored cardboard, scissors, ruler, glue, markers, a simple pencil, decorative elements (buttons, glitter, threads).
Master Class
- Take a rectangle of cardboard and make a 2cm wide cut at the top for the collar.
- Trim the excess edges of the strips on both sides.
- Draw and cut out the tie on another piece of cardstock.
- Glue the tie under the collar.
- Write your wish and decorate it to your taste.
I recommend watching the video master class!
Postcard - DIY tuxedo for a man
Are banknotes with numbers 222, 555 lucky or not?
Please note that repeating numbers in the serial number does not always have a good effect on your financial situation. Banknotes with numbers 222, 555, lucky or not:
Banknotes with numbers 222, 555, lucky or not:
Separately, it is worth paying attention to the repetition of numbers, in particular twos, as well as fives and sixes. That is, if you saw several twos, fives and sixes on the bill, then you should not expect good luck in financial matters. Try to get rid of such bills as soon as possible.
They promise instability, as well as financial losses. Three units in a row attract money, but all funds will not come to you consistently, but in certain periods. So look for notes that have repeats of sevens, eights and nines. The repetition of other numbers is either unsuccessful or one that promises only temporary earnings, and not permanent financial well-being.
Magic money
It is imperative to keep in your wallet the bill that you received from a rich person. This could be payment for services provided with best wishes to you. It is best if this is payment for what you do in business or at the start of your own business. Money from the hands of a very rich person carries the positive energy of material values. Therefore, with their help you can attract good luck and improve your financial situation.
Shirt postcard for dad on February 23: step-by-step implementation
Hi all! Today we will talk about a card for dad in the form of a shirt. Well, who hasn’t given homemade cards to dad on February 23rd, perhaps that’s all. So last weekend my son and I decided to keep ourselves busy and make a postcard for February 23rd, but not a simple one, but in the form of a shirt.
In the meantime, I’ll digress a little from the topic and tell you how we congratulated my sister’s husband on his birthday.
In September, our son broke his iPhone 5, didn’t want to have it repaired, so we bought him an Android. So my sister’s husband tells us, “Why do you need it broken, give it to me, I’ll repair it and use it.” My son’s phone number, so we asked him.
Grigory thought a little and said: “No, let it lie, and when I get married and have children, I’ll repair it and show them what kind of phone I had, my childhood photographs and the music I listened to will be saved there.” Well there is no way. We refused our son-in-law, to which he replied, “Greedy, you can’t even beg for snow in winter.” We laughed and that was all.
- New DIY postcard templates for February 23 and Victory Day
- Volume postcard book for February 23
- Beautiful poems for dad from daughter and son
Last weekend it was this same son-in-law’s birthday, and luckily it snowed. So there you go! I took it, put snow in a bag, well, not without monetary reward)) and gave it to him, reminding him of the phrase “Greedy, you can’t beg for snow in winter.” This is how we congratulated him. Now let's get back to the homemade card for dad on February 23rd. It is done very simply, but it turns out very bright, unusual and beautiful.
Postcard as a gift for dad on February 23
- For this job we will need:
- Colored corrugated cardboard
- Colored paper
- Glue
- Scissors
- Two buttons
- Desire and good mood
And so we begin our creation. To start, we take a sheet of corrugated cardboard in the color you like and fold it in half. On one of the halves we make small cuts on the sides. We bend the corners inward and we get this wonderful shirt collar.
Now we move on to the tie. It is necessary to cut out a small square and fold it as shown in the photo.
Then we proceed to bend the tip; this will be the so-called “knot” of the tie.
After finishing the tie, we glue it to the shirt.
We glue two buttons onto the collar of the shirt postcard and decorate the tie.
This is the beauty we got. I think you liked our shirt, postcard for dad on February 23rd.
I would be grateful if you click on the social network buttons and share with your friends! I wish you good luck and good mood! Thank you!
Source: https://detkisemya.ru/otkrytka-pape-v-vide-rubashkihtml
Last manipulations with the product
To finish the job, you need to again spread the product along its entire length. Then place it so that the tie is in front. In the center of the workpiece you can see the seam where the edges of the money meet. 0.5 cm below the tie, carefully bend these edges, making bends at an angle of 45°. There should be a large notch. The same is done on the other side of the shirt collar. There is no need to retreat here. As a result, instead of a seam you should get a deep boat.
Next, you need to bend the paper in the center of the boat so that its side edges form small sleeves of the future souvenir. Turn the workpiece over to face the table and bend it exactly in half. The result was a shirt made from money with a tie, but without a collar. Again, unfold the bill with its back side, where it is necessary to bend the collar towards itself so that it is located exactly above the tie. All folds should be ironed well so that the finished product holds better.
Pay attention to the collar
Now you need to take the souvenir in your hands with the front side and pull out the edges of the collar over the hangers, correct the fuzzy lines. All manipulations have been done.
Any master brings something new and original to the process, so how to make a shirt out of money is up to everyone to decide for themselves.
Such unique souvenirs can be made with your own hands from any material. Shirts made from small bills look great. But they look more presentable when large denominations of money are taken for work. The manufacturing process for the product remains the same, the denomination of the banknote simply changes.
Detailed instructions will help you make an original holiday gift for a friend, relative or loved one. A hundred dollar shirt makes a great substitute for any gift.
Advice from professional craftsmen
Before you make a shirt from a banknote, you need to choose the right source material. The ease of operation and attractive appearance of the finished product will depend on its characteristics. In addition, it is important to take into account the advice of experienced origami masters, which will help beginners avoid most simple mistakes. Professional origamists recommend the following:
- To create any crafts from money, you need to choose banknotes that will bend well and retain their shape.
In order to make a shirt out of money, you need to use banknotes with thick paper. This will help avoid tearing during folding.- It is best for beginners to begin their acquaintance with this type of art not with real money, but with simple paper. It must first be cut into blanks that will be exact copies of real banknotes.
- Those who are confident in their abilities can get down to business with real banknotes. If you do not have sufficient experience in this matter, then first you should make a craft from small money. In case of failure, this will help to avoid large financial losses.
In addition to the banknote itself, you will also need some tools for the job. First you need to prepare a ruler, a simple pencil, paper clips or clamps.
Master class: how to make origami out of money with your own hands
Origami butterfly
You should start with an origami butterfly, because it is very easy to make. This is the simplest, but very interesting option, for it you will need two bills and a wire (any wire, as long as it is thin and flexible) about 5 cm. The scheme for working on origami from money is as follows:
- First, the upper part of the craft is completed.
- Take the first bill and fold the bottom left corner up, then the bottom right corner up. The result is a trapezoid.
- Fold the trapezoid in half horizontally.
- Cut each half in half.
- Next, all the quarters must be folded in half.
- Using the created creases, fold an accordion of eight parts.
- Bottom of the product: take the second piece of paper and fold it in half.
- Then all the halves and quarters.
- Next, each 1.8 in half and each 1.16 in half.
- Using the created creases, begin to create an accordion of 32 parts.
- Fold 2 accordions together and twist them with a wire in the center, twist the wire at the ends in the form of a mustache and straighten the product.
DIY flower applique: techniques and master classes
simple heart
If the first master class was simple, then this one is even simpler. A heart-shaped craft is a pretty cute idea for Valentine's Day, but it doesn't have to be a gift for this particular holiday. You can give this gift to your favorite teacher. Description of work:
- To create such a craft you will need one bill.
- First, fold the bill horizontally in half.
- The halves need to be folded in half towards the central part.
- The quarters are also halved towards the central part.
- You will get a strip.
- Bring the edges together to form a small circle.
- Leave the junction to the side and start arching the heart.
This is how easy it is to create a small heart from banknotes.
Men's shirt made of money
Many people want to make a shirt out of money with a tie, but not everyone knows how. Before spoiling banknotes, you should take a regular piece of white paper and practice, following all the notes in the instructions.
The first time, of course, nothing may come of it, because a shirt with a tie made from a banknote is a very complex craft. However, a few serious attempts and the shirt will be created.
A shirt made of money will not only highlight the chic imagination of its creator, but will also delight others. What kind of money is best to take for a shirt?
In principle, you can take absolutely anything, but the best and most interesting option will come from the dollar. This is because it has the most suitable sizes for this. Shirts made from any other banknotes will be of a different shape and type.
DIY paper pinwheel for children
Complicated version
If you want to create something more interesting, a shirt with a tie made from banknotes would be an excellent option. The material is taken, folded in half along the long side, then the fold is unbent. Now the upper corners should be folded to this fold, making a triangle, and fold it inward, towards the center of the sheet. From the center of the top of the bill, two lines are drawn using a pencil and a ruler to the edges of the resulting triangle. This is a blank for a future tie. The next step is to carefully bend the bill along these pencil lines and straighten it again, forming quite noticeable folds. At the same time, the rest of the brim is slightly bent to make the tie convex against the background of the shirt. Now the long edges of the future talisman are bent inward, towards the central fold. In this case, they need to be folded so that the edges are under the tie, without covering it.
Master class: how to make origami out of money with your own hands
Origami butterfly
You should start with an origami butterfly, because it is very easy to make. This is the simplest, but very interesting option, for it you will need two bills and a wire (any wire, as long as it is thin and flexible) about 5 cm. The scheme for working on origami from money is as follows:
- First, the upper part of the craft is completed.
- Take the first bill and fold the bottom left corner up, then the bottom right corner up. The result is a trapezoid.
- Fold the trapezoid in half horizontally.
- Cut each half in half.
- Next, all the quarters must be folded in half.
- Using the created creases, fold an accordion of eight parts.
- Bottom of the product: take the second piece of paper and fold it in half.
- Then all the halves and quarters.
- Next, each 1.8 in half and each 1.16 in half.
- Using the created creases, begin to create an accordion of 32 parts.
- Fold 2 accordions together and twist them with a wire in the center, twist the wire at the ends in the form of a mustache and straighten the product.
DIY flower applique: techniques and master classes
simple heart
If the first master class was simple, then this one is even simpler. A heart-shaped craft is a pretty cute idea for Valentine's Day, but it doesn't have to be a gift for this particular holiday. You can give this gift to your favorite teacher. Description of work:
- To create such a craft you will need one bill.
- First, fold the bill horizontally in half.
- The halves need to be folded in half towards the central part.
- The quarters are also halved towards the central part.
- You will get a strip.
- Bring the edges together to form a small circle.
- Leave the junction to the side and start arching the heart.
This is how easy it is to create a small heart from banknotes.
Men's shirt made of money
Many people want to make a shirt out of money with a tie, but not everyone knows how. Before spoiling banknotes, you should take a regular piece of white paper and practice, following all the notes in the instructions.
The first time, of course, nothing may come of it, because a shirt with a tie made from a banknote is a very complex craft. However, a few serious attempts and the shirt will be created.
A shirt made of money will not only highlight the chic imagination of its creator, but will also delight others. What kind of money is best to take for a shirt?
In principle, you can take absolutely anything, but the best and most interesting option will come from the dollar. This is because it has the most suitable sizes for this. Shirts made from any other banknotes will be of a different shape and type.
DIY paper pinwheel for children
So, take a dollar or other banknote. Fold over a little less than a third of the banknote on the left side. Then, without unbending anything, bend the paper in half along its long side, and then unfold the fold. Then you will need to bend both sides to this line in the center.
The second step begins with unfolding 2 folded folds. The material must be turned over and a thin strip no more than 1 cm wide bent to the right. How to make a craft from money, having done everything already described? Turn it over and fold the long edges back toward the line in the center. Bend over another small strip to the right.
Cuffs and finishing work. The entire left side of the banknote needs to be unbent, and small strips should be folded along the edges, which will become cuffs. Then the long edges need to be bent inward again.
On the right side, the corners must be bent forward so that their lines connect with the horizontal line in the center. In this way, a collar for a shirt is formed. And on the left are sleeves: the internal flaps must be turned outward.
At the end of the work, the edge on the left must be bent so that it can be pushed under the collar. The craft is ready. This is how easy it is to fold a shirt from a banknote.
DIY vase decoration
Shirt options. When figuring out how to make a craft from money, it is worth remembering that you can fold not only a shirt, but also additions to it. For example, trousers made from the same banknotes, a skirt, paper flowers, little people. An unusual craft can become a real masterpiece.
You can also make a more complex craft, such as an origami dress
The diagram can help in creating many crafts, so you should pay special attention to it
If your craft seems plain to you, you can paint it any color you like
The most important thing in any job is patience and endurance. If you try, you will definitely succeed
Handmade souvenir
A money shirt is made using the origami technique. To do this, you will need a paper bill of any denomination and a little patience.
To fold the bill correctly, you must follow the instructions:
- They take the money and fold it in half along the long edge.
- Press down well and straighten to get a clear line in the center.
- On one side of the rectangle, carefully bend the edges to the center line so that you get a triangle.
- The same edge is folded towards itself along the base of the figure.
- Now they make a shirt and tie. A narrow tie is formed from an inverted triangle.
- Before bending the paper, draw the lines of this element with a pencil, only then lift the top of the figure, which looks down
- Use your fingers to bend the drawn edges of the tie.
- A little paper is folded under it on both sides and the folds are ironed. In this case, the base of the figure (top edge) no longer looks like an even horizontal line, but beveled at an angle of 20-25°.
- To continue working on a money shirt with a tie, you should place the bill with the tie facing up in front of you, then bend the side edges in half towards the central fold. It turned out that the tie remained under the paper. Now it should be carefully pulled out so as not to tear the money.
- This part of the money needs to be left. Start forming the other end. To begin with, the opposite edge is bent inward by 0.5 cm, so that later you get a beautiful collar. Next, turn the workpiece over so that the completed shirt elements are turned towards the table. Randomly choose the height of the future souvenir and fold it so that the edge of the collar remains free (approximately 2.5-3 cm). Usually it is worth dividing the product into 3 parts, and from the side of the tie, fold the first 2 parts exactly in half, after which the third (collar) will protrude freely.
- From the collar side, you need to bend the corners to the central fold to form narrow inverted triangles. They should reach the intended hangers.
What techniques can you use to give such a gift?
As a rule, a card-shirt is made of paper; accordingly, you can work using the appliqué method, when the cut-out parts are connected together, or by folding origami. The second option is more complicated, but looks more impressive.
As for decoration, the most suitable technique is scrapbooking. This is how commemorative albums with photographs were originally designed, but this is also a suitable method for making postcards.
By the way, the shapes of the products may also differ. Use single options with a vertical or horizontal fold. The postcard is made directly in the form of a shirt or contains it as an additional element glued on top of a rectangular sheet.
A very complex souvenir - a suit package with a tie. You should start making it only after mastering the flat gift.
What is needed for making
To make the simplest version of a postcard-shirt for February 23, you need to prepare the following materials:
- double-sided colored or regular A4 office paper;
- a small piece of paper or cardboard 10x10 for making a tie;
- scissors, ruler, pencil;
- PVA glue (glue gun) for application;
- If necessary, you can use thread and a needle to attach buttons and other accessories.
If desired, the gift can be decorated with decorative elements:
- buttons;
- rhinestones;
- beads;
- satin ribbons.
Advice! To create an original present, you can also use other materials: velvet, textured cardboard, scrap paper, banknotes, fabric, whatman paper, even pieces of wallpaper.
How to make a shirt card for February 23rd with your own hands: step-by-step master class
In order to please your beloved man, dad, grandfather or colleague with a special gift, you don’t have to spend money on expensive gifts or give stamped cards. You can make an extraordinary gift for February 23rd with your own hands within 1 hour. With a minimum of effort and a little imagination, you can make a special gift from available materials and put a piece of your soul into it.
In origami technique - method one
A postcard for Defender of the Fatherland Day made using the origami technique seems complicated only at first glance. The process of making it is very exciting and simple.
detailed instructions for making an original gift step by step:
- bend the prepared sheet in half lengthwise and open it.
- Fold first the right and then the left part towards the center of the sheet (towards the fold line).
- Fold the upper right corner as shown in the picture (step 3).
- Fold the left corner in the same way.
- turn the folded sheet over to the reverse side, bend the bottom edge of the workpiece by 8-10 mm.
- turn the folded sheet over to the right side, fold the right corner as shown in the picture (step 6).
- Fold the left corner in the same way to create a collar.
- fold the workpiece in half crosswise, secure the lower edge under the collar.
Small buttons or stars can be attached to the shirt collar using glue or thread.
It turned out to be a neat shirt. to make a large postcard for February 23, you need to prepare a large rectangular sheet of paper or whatman paper.
To give a homemade shirt postcard a festive look, you need to decorate it with a neat tie, buttons, pockets, and a bow tie. You can also decorate the product with rhinestones and beads.
To make a tie, you can use the following simple scheme:
- prepare a sheet of 10 x 10 cm, fold it diagonally.
- Unfold the workpiece, bend the corners inward, as shown in the picture (step 2).
- turn the leaf over again.
- bend the corner of the resulting small triangle in the opposite direction, as shown in the picture (step 4).
- Fold a trapezoid-like figure in half to the fold line.
- turn the resulting workpiece over and bend the right and left parts towards the middle.
- If desired, the finished tie can be decorated with stickers, drawings, and appliques.
important!
Postcards for February 23, made using the origami technique, always look impressive and unusual. A voluminous card-shirt can be attached as an appliqué to the base, placed in a small frame, or used separately, with money, tickets or a certificate inside, for example.
simple card-shirt - method two
Above is another option for making a shirt card for February 23rd with your own hands.
You can make an unusual and stylish gift with your own hands in just 5 minutes:
- Fold a sheet of colored paper (preferably double-sided) or loose cardboard in half lengthwise and cut the sheet along the fold line.
- bend the resulting workpiece in half again, as shown in the picture (step 2).
- Departing 3 cm from the fold line, draw marks on both sides with a simple pencil, make 2 cuts 2-2.5 cm long.
- bend the corners so that they form a collar.
The tie can be cut from any material or made using the origami technique. Buttons can be glued or sewn to the collar.
version with applique
applique is another simple option for making a holiday card for February 23rd with your own hands.
making such an unusual gift couldn’t be easier. To do this, you need to perform the following simple manipulations:
- fold a rectangular piece of paper or thicker material crosswise.
- Unfold the workpiece, and on the right side at the top, measure the middle and set it 3 cm down using a ruler.
- Fold the corners outward to create a collar.
- cut a tie to the size of the resulting shirt and glue it under the collar.
- All you have to do is write your congratulations inside the card and the gift is ready.
To make a handmade card look more elegant and festive, you can cut a jacket or vest from a separate sheet, and also decorate it with pockets. a paper tie can be replaced with a bow tie made of satin ribbon, or a small handkerchief can be made from it.
shirt card ideas for February 23
A handmade postcard for Defender of the Fatherland Day will become even more interesting if you put your soul and a little imagination into it.
A laconic card made of colored cardboard in an official style.
Original shirt made using origami technique from banknotes.
- Elegant postcard-shirt made of scrap paper and textured cardboard.
- Volumetric postcard-shirt for February 23rd made of colored paper.
- 12
- Original postcard applique made of soft paper and cardboard.
- A touching card-shirt made using the origami technique with appliqué.
Conclusion
Any gift made independently has incredible energy of kindness and love, so a colorful DIY card-shirt for February 23rd, given to a dear person with all your heart, will remain in his memory for a long time. It doesn’t matter what technique the craft is made in, since a postcard-shirt always looks impressive and touching.
Source: https://mimiledi.ru/razvlecheniya/prazdniki/otkrytka-rubashka-k-23-fevralya-svoimi-rukami.html
Lucky bills 777, 888, 999
Repeated numbers should also be given great importance. It is best if the repetition goes in sevens, eights and nines.
Lucky bills 777, 888, 999:
- The combination of numbers 7, 8 and 9 is magical. It is best if they are located in order on a card or banknote. The eights also performed well. This is a symbol of infinity, so money will flow to you like a river.
- It is best if there are a huge number of eights on the banknote, on the serial number. The nines showed themselves in exactly the same way. But besides these repeated numbers, other combinations have a pretty good effect on the financial situation.
- It is believed that if you see three threes at the end, then that kind of money is conspiring to sell. If you work in business and some goods are lying around, you can use a bill like this. Soon you will sell a product that you could not sell for a long time. Other numbers also work very well on success.
Money