How to choose material for making papier-mâché
The main “ingredient” is paper or cardboard and is used depending on the desired result:
- gray or white toilet paper and newsprint - for small crafts, since the surface is smooth;
- thick sheets, glossy magazines can be used to prepare paper dough mixed with softer types of paper;
- cardboard is indispensable for creating frame crafts such as boxes and furniture;
- packaging and trays for eggs - for forming large products or for decorative plaster, in these cases the lumpy surface will not be a hindrance.
Egg boxes and trays
Connecting components:
- PVA glue should be used in a ratio of 2:1 or 1:1 with water, depending on the thickness;
- It is better to prepare wallpaper glue according to the instructions on the package;
- starch or flour paste: take 4 parts water to 1 part flour or starch, mix until smooth, bring to a boil, stirring constantly and cook until thick.
The result in the finished product will be the same, so the choice of mixture is not important, use the option that is more convenient for you.
Chewed paper pointe shoes
Basic materials and tools
1.Paper:
- newspaper
- office
- toilet
The fact is that there are two ways to obtain a paper layer on a form: a set of layers with pieces of paper and applying a homogeneous mass. Sometimes both techniques are combined in one work.
a) We tear the paper into pieces. The smaller the product, the smaller the size of the pieces. Just don’t cut it into equal squares!)
A little life hack: alternate layers of paper of different colors. This way you will know exactly what layer you are using!
Apply 2-3 layers and let dry thoroughly.
b) You can make a mass from toilet paper.
At the same time, the mass will acquire the desired color shade if the paper has been tinted.
- Pour 250 ml of PVA glue into a bowl. If it is very thick, then add water. We tear the paper along the perforations and add one leaf at a time to the glue. Knead until a homogeneous, thick, dough-like mass is obtained. You will need about half a roll, approximately 40 grams if you weigh it.
- Add to the mixture 1 tablespoon of liquid soap and 2 tablespoons of refined vegetable oil as a plasticizer. Let's knead!
- Add 50 grams to the mixture. starch and 100 gr. premium wheat flour. We lightly moisten our hands in oil and continue to knead the mass like dough, sprinkling the table with flour, until smooth. It shouldn't stick to your fingers.
- If you plan to store it for a long time, then add 1 teaspoon of lemon juice to the batch and store it in the refrigerator, wrapped in plastic.
2. We use any wallpaper glue, PVA, or flour paste.
It’s easy to make a paste yourself from flour:
- Boil 1 liter in a saucepan. water. While the water is boiling, dilute it in 0.4 liters. cold water, add flour and stir well with a spoon. You should get a saturated cloudy solution, but not very thick!
- Pour our solution into boiling water with constant stirring. Be careful not to get scalded!
- After cooling, filter the resulting jelly through a sieve. Store in the refrigerator and in a closed jar.
3. Single-color plasticine. You can buy a ready-made sculptural one, but it will be cheaper to take a colored one and mix all the colors until smooth. We will make a model from it.
4.Containers for glue and water.
5. Flat brushes made of bristles of different sizes and thin round brushes, kolinsky or synthetic, stacks.
6. Rags (rags), foam sponges.
7. Scissors, a knife with removable blades, medium and fine sandpaper (zero).
8. Plaster. The papier-mâché technique requires a base on which layers of paper will be applied. Most often, a form is used, in or onto which layers of paper coated with glue are placed. If you need a large number of identical products, then it is best to use plaster molds, as they will absorb excess moisture and the product will dry out faster!
9.Metal culinary foil, gouache or acrylic paints, tempera, decorative cords, rhinestones, sparkles, beads, silicone moldings, toothpicks.
Based on the materials, it seems that everything is ready to begin!
Cutting out the details of the soft toy “Baby Camel”
View the contents of the document “Cutting out the parts of the soft toy “Baby Camel””
Topic: Cutting out the details of the soft toy “Baby Camel”
Familiarize students with the history of the toy, the features of working with patterns on fabric; stitching technology; promote the development of accuracy and perseverance.
—
Study the technological sequence and labor techniques for making a soft toy.
— Repetition with students of the technique of performing hand stitches.
— Formation of skills for independent work with scissors.
— Development of creative imagination, aesthetic taste.
— Fostering independence in the selection of materials and tools, accuracy, and responsibility for the work performed.
— Fostering the basics of behavior in a team that promote cohesion.
Materials and equipment:
- pictures of a camel;
- a sample of a camel soft toy.
1. Organizational part
- Hello guys! Today in class we will review safety precautions when working with scissors and needles. And I'll tell you who we'll be cutting today. Or rather, you yourself will guess the topic of our lesson with the help of a riddle.
1.2. Safety precautions when working with scissors and needles.
Before we begin, we will review the safety precautions with you.
2.1. Setting the goals and objectives of the lesson.
- Today in class we will make a pattern of an animal, and try to guess which one.
Without water it's like walking across a plain
he walks through the desert.
Does it eat prickly grass? (camel)
- Right! It's a camel!
Many of you already know where camels live, what types of camels exist, what they eat, how they sleep, the characteristics of their behavior and why they have humps.
Since ancient times, the companion of the southern nomad was the camel - an unpretentious, hardy inhabitant of deserts and semi-deserts.
Camels belong to the genus of herbivorous mammals of the artiodactyl order.
Only two types have survived to this day:
Dromedary camel or dromedary;
And the two-humped camel is a Bactrian, named after the ancient state of Central Asia, Bactria, where the unpretentious “ships of the desert” were first tamed by humans.
An adult animal can go without food for up to 30 days, accumulating nutrients in its humps and subsequently subsisting on them.
- I'm sure you can handle it! If it doesn't work out, I will definitely help.
Before we begin the practical work, I suggest you do an eye warm-up.
Eyes up, down, right, left, opened wide in surprise, closed their eyes tightly, blinked.
- Well done! Now let's move on to the second part of our lesson - the practical one.
2.2. Practical work on patterning a soft camel toy
To make a soft toy - Baby Camel, you will need pieces of fabric - we have prepared felt.
Pattern templates are made from cardboard. I have already prepared them for you. Now you can apply the patterns to the fabric yourself.
Place the pattern on the wrong side of the material and trace it with a pen or pencil. Make the lines precise and thin to avoid distortion. If the pieces are paired, turn the pattern over to the other side and trace it again.
Whichever of you has applied the design to the fabric can begin cutting out the sample.
After the patterns are ready, I suggest that the students begin assembling (stitching) the soft toy blanks.
- Well done boys! We completed the task.
The music is turned on and the students repeat the movements after the teacher.
Sew parts made of felt, felt, drape on the front side using a loop stitch. The seam should be very neat, the hole for stuffing should be minimal (1-1.5 cm).
The best material for stuffing is pieces of padding polyester or padding polyester, foam rubber.
The toy should keep its shape, but not be hard. Stuff parts of the toy such as paws, torso and tails gently.
If necessary, I help the students.
Accessories
- this is a lot of beautiful little things, without which it is impossible for us to complete the production of a toy, to make it expressive, to give it an individual character.
For small animals, eyes can be made from beads, beads; eyes can be bought ready-made.
3. Final part
— Guys, your camel patterns have been collected. You worked for a long time, everyone coped with the task well, well done! I'm very pleased with you!
— At the end of our lesson, please tell me what new things you learned and learned?
Questions to summarize the knowledge gained:
—What types of camels are there?
- Why do camels have humps?
— What animals are camels: predators, herbivores or omnivores?
— What difficulties did you have when cutting out a soft toy baby camel?
— Thank you everyone for your work! I look forward to seeing you at the next lesson, where we will continue to work on making a soft toy baby camel.
Source
Required materials and tools
To make a “Camel” craft, you need to stock up on paper or cardboard. You will definitely need a pencil, scissors or a stationery knife.
To begin, carefully draw on paper your favorite picture of an animal with humps. Now you need to carefully cut it out.
You can draw your animal according to your taste.
You can also supply paint of any color you like. And when the craft is ready, carefully cover it with paint.
Examples of ready-made crafts
Camel crafts are made from just about anything. They are cut out of cardboard and assembled according to the details, like a 3D constructor. Or they are folded from one sheet of paper, making folds. Even among children, there are often works that are performed like appliqués. These are quite unusual and beautiful crafts.
Cardboard craft
Paper modeling
Corrugated cardboard craft
3D puzzle
Paper model
Broken applique
Step-by-step photo lesson:
Take a sheet of paper and fold it diagonally.
Next, bend it in half to the left.
Turn it back in half.
Turn the corner inside out and fold the top side down.
The result is a figure resembling a rhombus.
Bend the corner to the left into a square.
Bend the sides in the middle. We bend the top corner on them. Then we will open all the folded sides.
Take the top layer of the bottom corner with your fingers and turn it upside down. We fold the sides into the middle and get a diamond-shaped figure.
We do the same on the other side.
We bend the upper sides towards the middle.
We bend the lower corners into the middle of the craft so that they are on the sides. To do this, bend them first in one direction, then in the other. Open it up and easily place the corners in the middle.
We bend the right side down and then inward. Let's get the hind legs of a camel.
We bend the largest corner down and get the front legs.
Now let's make the head. It should be bent down at an angle. Next, bend it inward. We bend the left corner a little back to create the correct camel head.
We also bend the upper right corner inwards of the craft.
Finally, draw the camel’s eyes.
This paper camel made using the origami technique is ready to please little fans of Africa and the hot desert.
Preparing material for work
For machining and modeling techniques, it is enough to tear the paper into strips or scraps, but for modeling you will need special paper dough. Let's take a step-by-step look at one of the options, suitable for large crafts:
- Tear 10-12 egg boxes or trays and 2 glossy magazines into small pieces.
- Place the paper pulp in a bucket or basin, add water and leave to dissolve for a day.
- Mix the soaked mass with a household or construction mixer until it becomes a homogeneous puree.
- Strain out excess liquid through a cloth, but make sure that the mixture does not dry out.
Ready! Keep in mind that you can prepare a lot of this mass at once, and soak it with water before use.
Important! The prepared paper dough must be mixed with PVA glue immediately before modeling. Wallpaper glue can be added immediately after draining the water, but this mass must be stored in the refrigerator
Paper dough
Here is an option for making paper dough for small and thin elements:
We sculpt a camel from plasticine step by step
At the stage of preparation for work, select suitable blocks of plasticine: orange and brown. You can also use yellow as the main color if you wish.
Knead the orange piece for sculpting the body, using a significant portion of the prepared plasticine on it.
Pull the mass into an oblong body, slightly lift the front part up.
Next you need to prepare the curved neck of the camel. You should get an s-shaped tube. Attach this tube in the form of a protruding neck.
Add a head – elongated and flattened on both sides.
Place two humps on your back. Or you can make one hump, depending on what kind of camel you are sculpting.
Soft plasticine is unlikely to hold the entire mass of the body, a voluminous neck and head (even though it is small) are sufficient. Therefore, to sculpt stable legs, prepare matches. Place orange plasticine tubes on each match.
Attach four legs. Attach brown hoof cakes to the bottom. Attach the tail to the back.
Decorate the head. Use a stack to highlight the nostrils and eyes, then use your finger to lower the nose slightly downwards. Make holes for the eyes and insert black and white grains into them.
Use a stack to go along the bottom of the neck and along the tops of the protruding humps.
A plasticine camel is ready to make a long journey through the desert.
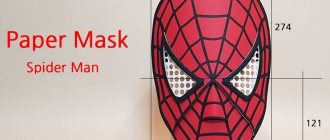
Carnival mask
We make a preliminary accurate sketch on a scale of 1:1 on thick paper. We cut it along the contour and get a template. Using it, we mark the contours of the mask with a pencil on a plywood tablet; To save plasticine, we place wooden or foam blocks in the center of the future model. They should not protrude beyond the model; We begin to gain volume to the desired size. Based on the sketch, we sculpt all the details; Important point! All parts of the model must work for the exit, that is, have no depressions or locks that will interfere with the removal of the product! When leveling the surface, you can use a piece of hacksaw blade, and for perfect smoothing, use Vaseline. After the model is ready, we proceed to the main part: collecting the paper layer. Now you need to choose which technique to use: sticker in pieces or in bulk? The fact is that when you type in pieces, the surface of the product turns out to be uneven. If it works for the image of the mask and enhances it, then good. But if a smooth surface is required, then after drying you will need sanding, and this is a very labor-intensive process. In this case, the mass that we kneaded will help us out. It will ultimately give a smooth and even surface! Coat the model with Vaseline
Spread the paper dough evenly. Important point! After drying the layer, we make slits for the eyes and holes for fastening until it dries completely! After the polymer dries, this will be much more difficult to do! Modeling using this technique makes it possible to immediately work out all the small details! After complete drying, carefully remove the mask from the model. If you can’t separate them in any way, then it’s better to sacrifice the plasticine base and remove it from the mask piece by piece; We clean the edges with sandpaper, removing all burrs. We paint with gouache with PVA or acrylic in the desired color
We add decorative and theatrical elements necessary to create a certain image, ribbons or elastic for fastening.
You can go to a masquerade ball!
⇡#Nanoorigami: DNA instead of paper
Not so long ago, in the spring of 2006, American biologist Paul Rothemund from the California Institute of Technology announced an amazing discovery, which the young scientist called DNA origami.
Paul Rothemund
The biologist touched upon the holy of holies of genetics—molecular programming. Paul figured out how to shape the deoxyribonucleic acid molecule into a specific shape. To do this, he used complementarity (the property of nitrogenous bases to form pairs of certain types using hydrogen bonds during the interaction of nucleic acid chains). In his experiment, Rothemund used so-called “paper clips” - short synthetic DNA strands. The scientist calculated these auxiliary “clips” on a computer and then ordered their synthesis in the laboratory. During the experiment, synthetic DNA strands were attached in strictly programmed places, pulling the main DNA into the desired shape.
To effectively demonstrate his discovery to others, Rothemund began to “fold” DNA strands, obtaining completely recognizable forms - letters, signs, figures. And based on the ring-shaped thread, he even made many smiling emoticons.
What is this fun with building DNA figures for? When Paul Rothemund began to study origami at the nanoscale, he did not particularly think about this question. The scientist even laughed it off in an interview, claiming that he was very lucky in life and was simply fooling around, and also getting paid for it. However, this hobby of his opened up new prospects for creating nanodevices for humanity.
Rothemund's colleagues from the same California Institute of Technology made a functioning switch (transistor) using the DNA origami technique. This switch is ten times smaller than similar elements in a modern PC. It is clear that in order to make an entire DNA computer, billions of times more such switches will be needed, but a start has been made. In addition, the process of creating the intended DNA forms is extremely simple: assembly occurs almost automatically, following the basic principles of double helix formation. Strands of DNA are placed in a solution that is brought to a boiling point, after which it is slowly cooled to form the desired shapes.
A few years later, scientists improved the DNA origami method and began to create three-dimensional objects - a box, gears and other interesting things. For example, they managed to make the smallest jug in the world, the volume of which could fit 800 thousand water molecules.
Through the use of this technology, it has become possible to transport medications to the desired part of the organ with perfect accuracy. In the future, this will undoubtedly increase the effectiveness of drugs and reduce the number of side effects.
Camel on the coat of arms
So camels are not lazy creatures, but quite the opposite – incredibly hardworking creatures. People appreciated this quality by placing the image of a camel on the coats of arms of countries and cities. It is even in Russian symbols. This animal, for example, adorns the coat of arms of Chelyabinsk. Why camel? After all, they don’t live there at all.
It's simple. In the old days, Chelyabinsk was a center of trade with Asian countries. It was there that numerous caravans came. Thanks to this, the city actively developed. And the townspeople decided to place a camel on the coat of arms as a sign of respect for this hardy and hardworking helper of man. That is why the coat of arms of Chelyabinsk depicts a camel. When the city became the center of the entire region, it was time to come up with the coat of arms of the Chelyabinsk region. “Why can’t a camel be depicted here too?” – the residents thought and kept their favorite animal on this symbol too.
How to make a camel from plasticine with your own hands
In this lesson we will show you how to make the king of the desert - a camel from plasticine in stages. Such animals are either double-humped or single-humped. And the hump serves as a pouch for them, in which they store water. Camels diligently transport caravans across the sands, as they are quite hardy animals. If your child has never seen a camel, for example, in a circus, then he will be incredibly interested in creating this craft.
How to make papier-mâché at home
You need to start working with papier-mâché with objects that are simpler in shape. A vase or saucer would be perfect. If you manage to recreate a saucer or vase from paper, then you should take on more elaborate figures: a dinosaur, a human head, a Christmas tree toy, etc.
From toilet paper and glue
We discussed earlier how to prepare a papier-mâché mixture from toilet paper and glue. The main secret is to squeeze the paper well before adding glue to the composition. Next, we take the vase, wrap it in cling film and begin to apply the composition. You need to completely cover the vase and make sure it is even. Now you need to leave it until it dries completely. Sometimes this takes several days. We take the dried workpiece and cut it into two halves with a stationery knife. We try not to damage the template vase. Both halves at the ends of the cut are coated with glue, and strips of napkins or other thin paper greased with glue are additionally applied on top to cover the places where the papier-mâché layer separates. The seam should also be allowed to dry before you begin painting the vase.
From the newspaper
Let's take a plate as a base. You need to apply a layer of Vaseline or cling film on it. Newspaper, torn into pieces, is dipped into prepared paste or PVA glue. The pieces soaked in glue are placed on the plate from the bottom, if you need to get a slightly larger craft, or from the inside, if the product is needed a little smaller than the template. A second layer is applied to the first layer of paper, after which the work is dried. Then you need to apply two more layers of newspapers, etc.
To make a papier-mâché object durable, you will need 10–12 layers, or even more. This depends on the original thickness of the newspaper sheet. Crafts made from thicker paper take longer to dry, so it takes more time to fuss with them. But thin material will require more layers to achieve suitable strength.
From paper clay
Working with paper clay is done in almost the same way as with papier-mâché from napkins. Only the stage of preparing the mass is simply omitted. Since paper glue is sold ready-made, you need to study the instructions for working with it on the packaging. In particular, if a template or frame is needed, how the mass will interact with it will become clear from the instructions.
If a figure is molded from paper clay, like from plasticine, that is, without cavities, then you need to pay special attention to the proper drying of papier-mâché. After all, moisture will evaporate from the depths of the product for a very long time
You may have to create the figure in stages, as if in layers. First, sculpt a certain frame, dry it, and then cover it with a new layer, giving it the necessary shapes and bends. Dry again, then apply the finishing layer with all the subtleties of the relief.
Waste material or wire base
When making a bird or animal figure, you can use several bases as a frame, connected together with tape or masking tape. For example, a vase can be made from a balloon and a paper cup attached to its top.
They use cardboard tubes from toilet paper or kitchen napkins, parts cut from corrugated packaging cardboard or wire frame structures. To make them voluminous, several turns of fabric, bandage or masking tape are wound on top of the wire and wrapped with cling film.
Then the entire surface of the frame is covered with pieces of paper or paper clay, layer by layer. When the figurine has the desired shape, its outer shell is rubbed down, leveled using the methods described above and prepared for painting.
How to make a camel from paper and cardboard
Camel crafts made from cardboard are gaining momentum in popularity every time. Even ardent connoisseurs of paper and cardboard animals will like them.
Step-by-step assembly of a three-dimensional craft
Making a camel out of cardboard is quite easy and simple. To begin, remove the figures from the base. We lay out the resulting parts in front of us - it’s easier and faster to see them in this state.
Origami of a simple camel with diagram
This paper craft will definitely not go unnoticed. And a child who is at least a little interested in the origami technique will undoubtedly want to repeat it.
Camels are proud and leisurely animals. They are often called "ships of the desert." Their step is firm and confident, but not hasty. They seem to know where they are going.
Also, camels are the hardiest animals. Even wandering in the desert for several weeks, they can easily survive without food and water. They are the indispensable helpers for a person when it comes to carrying weight.
Your child will really like this craft. He will definitely want to play with her. Such a camel will perfectly decorate any nursery interior and fit into any color scheme (if it was originally made of paper in a neutral shade).
- First you need to take a piece of paper in the shape of a square. Connect opposite corners one by one. (Picture 1).
- Now, having folded the square in half, with opposite hands facing each other, you need to connect the remaining opposite corners to each other. (Figure 2)
- Now, holding a sheet of paper as shown in the figure, you need to take one corner of it and fold it along the side lines. (Figure 3)
- Now you need to smooth out the edges of the resulting square and turn it over so that all the fold lines are at the bottom. (Figure 4)
- We do the same with the other free corner. (Figure 4-7). At the end of this stage, you should end up with a smaller square (or rhombus).
- Now, holding the resulting diamond in front of you, you need to lift the upper corner and make manipulations with it, which are shown below in the figure.
- Now place the figure in front of you. At this stage it is necessary to straighten all the fold lines.
- Raise two corners up (Figure 14). Smooth out the lines. Now we lower the right corner. These will be the hind legs of the animal (Figure 12). Now we lower the left corner.
- Now you need to slightly modify the head so that the resulting animal looks like a real camel. To do this, lower the corner of the strip of paper on the left. (Figure 13).
- Now we add more folds next to the head. (Figure 14).
- The origami Camel figure is ready. You can carefully draw on the eyes, mouth and design it your way.
If suddenly the origami didn’t work out. Or it’s quite difficult to follow the pictures, we present the video below. With it you can learn how to make an origami camel.
Applications for children
Children love these animals very much. And after training your hand a little, the Camel drawing will be easy and simple.
"Applique for children Camel."
Drawing of "Camel" using handprints.
Templates for cutting (and drawing)
To make the task easier for very young craftsmen, various templates for cutting and drawing are collected below. With their help, you can follow your own imagination and allow your child to do so.
Children will have a blast learning about animals through a variety of games. And after they get beautiful crafts, the children will be satisfied for a long time.
By following simple master classes with step-by-step descriptions, camel crafts will turn out beautiful.
They can be added to the animal collection. Or decorate the children's room by painting it in a color that will optimally fit into the interior of the child's room.
The child will be able to assemble a 3D construction set, cut out images of camels, color them, decorate them, etc.
And also have fun trying your hand at creating appliqués on a sheet of paper.
Master class “Desert Inhabitant - Camel”, non-traditional appliqué technique from newspaper tubes
Yulia Fedoseeva
Master class “Desert Inhabitant - Camel”, non-traditional appliqué technique from newspaper tubes
Probably, many people have newspapers that have nowhere to put them.
Today I will show you what applique can be made from old newspapers , it is not much different from the traditional one, the only difference is that the material is always available. Crafting from newsprint is also interesting. This activity teaches perseverance and the ability to see things through to the end. In addition, the applique allows you to show imagination, creative imagination, trains fine motor skills and design skills. And also to develop cognitive activity, deepen and expand children’s understanding of the diversity of living creatures inhabiting our planet, introduce them to the camel, a desert inhabitant ,
Material and tools:
Newspapers , glue scissors, colored cardboard
Execution order:
camel template on colored cardboard .
Cut out the image of a camel along the contour
Cut the newspaper
Let's prepare material for our craft, namely, we'll make newspaper tubes . Newspaper is thin and curls well. the corner of the newspaper at the angle shown in the photo and begin twisting to the end. Apply a little glue to the corner of the strip and secure the tube .
The preparatory work is completed, you can create a craft, for this we take a template, apply glue to it and lay tubes .
Turn the template face down.
We begin to cut off the tubes that protrude beyond the contour.
«Desert Dweller»
ready.
Create together!
Thank you for your attention!
Technique of weaving from newspaper tubes When I first saw products made from newspapers, I was simply amazed: how it is possible to create such works of art from an ordinary newspaper. Adenium. Desert resident on my windowsill For several years now I have been growing exotic plants. One day, I read an article in a magazine about an amazing indoor plant.
How to dry the finished product
Making papier-mâché means not only sculpting a masterpiece, but also subjecting it to high-quality drying, which provides almost half the success. If ceramics need to be fired at high temperatures, then with papier-mâché everything is different. The material does not tolerate too rapid heating. It must be remembered that the base is paper, a flammable material, so the figures should be removed away from open fire. There are recommendations on how to dry papier-mâché in the oven of a gas stove, but it is better for beginners not to use this method.
The material dries well in the open air near the radiator, in the sun, next to (but not close to) an electric heater, in an extinguished but heated stove. The oven can be used if you have an electric or combination stove. You should first heat up the gas oven, turn it off, and only then place the papier-mâché product there. You should not close the door completely, because air circulation is important so that water vapor is carried away from the product.
If papier-mâché consists of many layers, then it is better to glue no more than 3-4 of them, and then leave the work for a day so that it dries completely. Only then is it possible to take on the next layers.
Houses
I'll start with the video of the master class - wonderful!
Now photo master class
To make a house, we need:
- Additionally, you may need foil to construct parts from it. But if the mass is elastic and is well attached to the base, then all the parts are made from it;
- instead of a balloon, use a jar for the base;
- not newspapers, but a mass of papier-mâché.
How to do it. Simple instructions:
- First, we cover the jar with “plasticine”, taking into account the doors and windows.
- Level the surface.
- We apply a pattern in the form of masonry or make convex “bricks”.
- Let's decorate.
- The author of the master class is Svetlana, she has her own shop at the crafts fair.
Do you want to make a two-story house?
After the figures are made, it is worth paying attention to alignment. To do this you need to sand the craft
Then you can start painting. Otherwise, unevenness and bumps will be noticeable due to lumps in the mass or due to layers. Such irregularities can be disguised with decor.
Peacock using papier-mâché technique - master class
We bend the frame from wire in the shape of two circles (small - head, large - body) connected by wire. We wrap it with foamed polyethylene and synthetic padding and secure it with threads. We add wire to the large circle for future paws. We wrap everything with padding polyester to obtain the desired shape.
We make a beak out of cardboard and attach it to the peacock’s head. We wrap everything with threads again, you can use paper tape. We make feathers. We cut the wire 20-25cm, wrap it with yarn of the desired color and secure it with a drop of glue. Next, select the yarn of the desired colors. We wrap each color in turn around the palm of our hand and cut it into pieces. We tie each piece on the wire with two knots, moving them tightly towards each other until we get a sufficient length.
We comb each feather, giving it the desired shape, and secure it with PVA glue (diluted with water 1:1, you can use starch). Dry and repeat the operation on the other side. After drying, use scissors to give it the desired shape.
Making a frame for the peacock's tail. This is a wire that is as long as the finished tail and has cross wires on it for attaching feathers. We wrap the wire with strips of fabric or yarn in the main color.
We fasten it with threads and glue to the frame, starting with the lowest feathers. To make the tail more fluffy and aesthetically pleasing, repeat the operation on the other side. We imitate the plumage with satin ribbons. On the head and neck we sew woven “baubles” from ribbons together and glue them. We make a hat from a scrap of fabric and embroider knots on it with yarn using the rococo technique. Glue it. We cover the rest of the carcass with triangles made of ribbons. The wings are cut out of cardboard and covered with ribbons. The paws were wrapped in yarn. We glue in the beady eyes, paint the head, checking the photo of the peacock.
We make the vase from a cardboard tube from a fireworks display; we cut out the stiffening ribs from cardboard circles of different diameters. Fill the space between the circles with crumpled paper.
Level the entire surface with papier-mâché strips. Dry it. We coat it with putty, dry it, sand it, and decorate it with stucco. We paint, add colors by rubbing in silver or bronze dust. And varnish it. Peacock using papier-mâché technique
ready. We fix the peacock on the vase and admire the work.
Peacock made using papier-mâché technique. Photo
Kondratova E.M. | Comments to the news “ Peacock on a vase using papier-mâché technique. Master class with step-by-step photos
» is already 0:
Master class Sewing Souvenir “Camel” Fabric
A camel is a voluminous souvenir. It is made from cloth of gray, white, brown, coffee color. The bottom is made of cardboard and main fabric. The mane, tail and chest are made of fur. The decoration is a twisted cord made of woolen threads of two colors in several folds. The blanket is made of any bright fabric. The camel is decorated with various beads, beads, embroidery, etc.
Here is a pattern of a dromedary camel. We need to cut out the body of a camel 2 parts Bottom of a camel 1 part Blanket – 1 part Ears – 2 parts Eyelashes – 2 parts Mane – 1 part Tail – 1 part
The same number of parts is required for a Bactrian camel.
I didn’t photograph the process of making the camel, but I think everything will be clear.
Work sequence
1. Sew 2 parts of the body together along the contour. 2. Sew a mane, breast, and fur tail to the camel’s body along the marked lines. 3. Sew eyelashes and ears along the marked lines. 4. According to the markings, glue the camel’s eyes with PVA glue under the eyelashes. 5. Stuff the camel's body very tightly with cotton wool, starting from the camel's muzzle. 6. In order for the camel to be more stable and the bottom to be more even, it is recommended to additionally insert a cardboard bottom that is smaller than the fabric bottom by 0.5 cm along the contour. 7. Connect the bottom of the camel to the body along the contour with a seam “over the edge.” 8. To decorate the camel, you can sew a blanket from bright fabric, the edges of which are decorated with twisted cord in several folds. 9. Draw the nostrils with a black pencil, draw the highlights in the eyes with putty. 10. Sew a twisted cord in several folds along the contour of the bottom of the camel. According to the markings, glue the eyes with PVA glue. 11. Make a bridle from a twisted cord and sew it to the camel. The camel can also be decorated with beads, embroidery, tassels, etc.
As a result, we get these souvenirs.
Source
Technique options
Papier-mâché is made in two ways: by gradually gluing pieces of paper in layers and by fashioning figures from wet paper dough. The art of making such figures requires care and patience, the material takes 2-3 days to dry, and finishing takes up to 2 days.
Step-by-step gluing of pieces in layers (machining)
When mashing, the prepared form is pasted over with pieces of paper.
- You need to prepare soft paper, maybe newspaper.
- Tear the paper into small pieces with your hands.
- It is not recommended to use scissors, since the thick edges of the paper do not align in the dried product.
- The first layer of paper is applied and glue is applied on top.
- About 10 layers are required.
- After applying 2 layers, let the previous ones dry.
- The edges of the pieces should overlap each other, repeat the surface, and not form unevenness.
Machining can be internal or external. For external machining, the model is pasted over from the outside; for internal machining, the model is pasted from the inside. If the mold for the cast is supposed to be left inside the finished craft, it is covered with glue; if not, then with Vaseline.
Small parts of the craft are made from a mixture of glue and paper; when dry, they shrink in size. To achieve the desired size, you need to add the required number of layers to the parts.
It is necessary to dry the figures for 2 days at an air temperature of no more than 22-25 degrees. The product will crack if it is dried near heating devices that are turned on. The last layer is made from scraps of white paper.