How to choose apples
We select fruits without visible damage. The choice of color and size depends on the idea of the craft. The colors of apples go well in any combination, but for a snowman it is better to take light-colored fruits, and for a caterpillar to choose fruits of the same color.
The size and shape of the fruit can give you ideas for crafts. You can use small and large fruits. If you are planning a figurine with a head, use a larger apple. There are no strict rules here, give free rein to your imagination.
Important! Before starting work, wash the fruit thoroughly and dry it with a towel.
Benefits of using apples for creativity
All kinds of apple crafts for children and adults are a good way to get creative, show or develop your creativity. A variety of products can be created from this material.
They are suitable for decoration, for food, and also as an indicator of the author’s capabilities. Apples are easy to work with. They are endowed with a pliable structure. There are many varieties of this fruit, which have different hardness, color, and shape.
Apples are successfully used in edible bouquets, children's crafts, and complex carvings are made from them. Another undeniable advantage of using apples for crafts is their prevalence and accessibility.
Which knife to use
To make work enjoyable, you need good tools. Choose a small knife that fits comfortably in your hand and has a sharp edge. If you want to make beautiful cuts on the peel, a special carving knife will come in handy, but such work requires skill.
Important! Do not allow children to use the knife independently. This may cause injury.
How to strengthen branches from splinters?
Heavy fruiting, strong gusts of wind or large amounts of snow are often the main causes of branches splitting.
And this is bad both for this very tree and for the volume of harvest both this and next year.
The simple remedies described below will help you avoid splitting branches on how to raise the branches of an apple tree.
Supports for a young apple tree.
Do not tighten the branches too much; a pinched branch may dry out!
Natural and decorative materials
Using additional material, you can create not just a craft, but also an entire composition.
Cardboard will be needed for a stand for the craft. If you are planning a large craft, you can use a shoe box lid for the stand. First you need to decorate it: paint it with acrylic paints or gouache, cover it with paper.
Cones, leaves, twigs must be clean and dry. Wash the coniferous branches and dry them with a paper towel. The leaves can be dried by placing them between the pages of a book or ironed between paper sheets. Fresh leaves and ornamental grasses will quickly wither and the craft will look ugly.
Plasticine will help to create and attach paws, eyes, and other additional elements of the figure to the apple. Bows and beads will decorate the apple hero and help create cheerful images.
To create small details, colored paper is useful. Hats, ties, feathers, eyes, and noses are made from it.
If creating decorative elements is difficult, use colored markers to create an image of the craft. You can buy ready-made eyes, umbrellas, bows and decorations that are used to decorate cocktails.
Important! Applying any non-natural materials to an apple: glue, plasticine, markers, paints makes the craft inedible.
Topiary made of corrugated paper
A corrugated paper topiary will be an excellent accessory for decorating a holiday table. It will fit perfectly into any decoration of the room on the occasion of a celebration and will make it special.
Artificial flower topiaries include this variety of tree of happiness. This is due to the presence of flowers made during the work process from corrugated paper.
How to make topiary with your own hands? First you need to decide on a list of materials for work:
- Corrugated paper in several colors.
- Yellow acrylic paint.
- Brush, scissors, glue, foam.
- Lighter, plastic cup and small cap.
Instructions for making topiary from corrugated paper, step by step:
- On a sheet of foam plastic you need to draw the outlines of any flower . To make your work easier, it is recommended to use a ready-made template.
- Using a knife, cut out the flower along the outline .
- It is recommended to make deep grooves between the petals . This will allow you to examine the relief of the finished product.
- Don't forget about the circle that serves as the core of the flower.
- Before you start trimming, you will need to design the bases of the flowers of the future product. They need to be covered with yellow corrugated paper.
- To decorate the core, it is recommended to choose orange corrugated paper.
- The role of the stem will be played by a bamboo stick . You need to apply glue to its sharp part, then insert it into the flower blank made of foam plastic.
- Now is the time to prepare a stable position . Then there will be no inconvenience when trimming the flower. It is necessary to prepare a plastic cup, insert a suitable foam circle into it, then pierce it in the center with a barrel.
- Afterwards, corrugated paper of different colors must be cut into strips . Their width should not exceed 2 cm.
- These strips need to be cut into squares . Each side is 2 cm.
- Each of the squares must be correctly screwed onto a tube , dipped in glue, and pressed to the desired location.
- This process is called trimming . The core should have orange corrugated paper. For the rest of the design, it is recommended to use the same paper, but yellow.
- It is necessary to trim the foam flower on both sides , do not forget about the side edges.
- The last step is to beautifully design and decorate the pot .
New Year's topiary
candy topiary It will decorate the interior, complement it and bring with it a festive and cheerful mood.
Christmas tree topiary is a familiar accessory. It looks nice, but not original. To make an unusual tree of happiness for the New Year you will need to use:
- Any candy.
- Styrofoam.
- Glue.
- Wire.
- Cable.
- Decorative components: paper, beads, balls or sequins.
How to make topiary with your own hands for the New Year? Instructions:
- Wrap the cable with decorative tape and make a bundle.
- Attach a bell to the wire and wrap it with decorative tape. Don't forget about fixation.
- Prepare a foam cone. Starting from the bottom edge, wrap it with sisal. Sisal topiary always looks attractive.
- You need to wrap it tightly and periodically secure the sisal with glue. Sisal topiary looks original, but it is not so easy to make.
- On top of the cone you need to insert a ready-made wire along with a bell.
- Attach a cable to the bottom , then decorate it with candies.
- a small glass as a stand . It must be decorated with beads and ribbons.
Autumn topiary
Autumn topiary made from leaves can become not only a beautiful decoration for decorating a room, but also a wonderful gift. Natural materials are used for its production. For example, topiary made from maple leaves, twigs and even berries.
Fruit topiary looks beautiful, but to make such a tree of happiness you will need to use strong glue.
Materials to make your own topiary tree:
- Autumn leaves.
- Wooden stick.
- Glue.
- Scotch.
- Pot.
- Two foam balls.
How to make topiary from maple leaves, instructions:
- Place one foam ball in the pot . He must sit tight. Otherwise, you need to fix it using glue.
- Next, you need to insert a wooden stick . It should touch the bottom of the pot.
- The next step is to tape the foam ball located inside. Paint the trunk of the future tree and the pot in bronze or golden color.
- The remaining foam ball must be attached to the top of the stick . This will be the crown of the tree of happiness.
- glue maple leaves, berries, and blades of grass to it Here you should use your own imagination and arrange all the elements beautifully. The end result should be a well-thought-out and designed composition.
Don't forget about decorating the pot . It plays a big role, because the appearance of the topiary largely depends on it.
What crafts can be made from apples?
Making crafts is an interesting and creative activity. Invite your child to it, it will bring him a lot of joy. Trust him with some of the work. Connecting parts and decorating crafts is quite within the capabilities of even a child.
Note! Apple cuts darken quickly. This occurs from the interaction of the iron contained in the fruit with air. In order for the craft to retain its attractive appearance longer, you need to sprinkle the cuts with lemon juice.
Arc support of branches
Often apple trees produce such a bountiful harvest that their branches, unable to withstand the mass of apples, begin to burst. To avoid this, gardeners place arc supports in the crown.
To do this, cut out pieces of thick rubber from a conveyor belt or tractor tires and fix them on the branches, and between them (upper and lower) arcs of either stainless or thick steel wire are placed.
“cocoon” emerges . If the branches are small, rubber from a bicycle inner tube will suffice.
The protective material is cut with a hacksaw or chopped with an ax, and a sharpened slate nail is used to punch holes in the rubber.
Arcs can also be placed in a position from 35 to 56 degrees from the plane.
Carefully! Never support the edges of apple tree branches or just their base! Do not lift the branches themselves too much and do not disturb their original position.
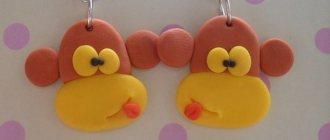
Making an owl
Remember with your child what an owl looks like.
To make it you will need 3 apples of the same color and size, 2 grapes or raisins, and toothpicks.
Body and wings of an owl
Place the apple with the wide part down. Cut off a small round part of the apple. The result is a body - an apple with a flat part that looks like a tummy. Cut the same part from another apple. We attach both remaining elements to the apple from different sides, with the peel facing out, using toothpicks. We deepen the toothpicks so that they are not visible on the wings. You get wings.
Head
- For the head we take a new apple. We make the cut the same as for the tummy. Turn the apple a little and cut off the same part. On one side there will be a connection of slices, on the other there will be a whole part.
- Another variant. Two large circles are cut out next to each other in an apple. When determining the location of the cutout, imagine that these are the eyes.
- We make ears on the same head. To do this, make cuts in the peel and bend them upward. The cuts should capture some of the pulp.
- Eyes. Using part of a toothpick, secure small grapes or raisins in the center of the cut out circles.
- We connect the head and body using toothpicks. For strength, make the connection using 2 toothpicks.
Now you can start decorating. You can make a wise owl with glasses and a book, or you can collect a whole family of owls and owlets by selecting fruits of different sizes.
Green frog
You can make a frog from an apple, grapes (you can use different varieties) and cucumber.
The selected apple must first be washed and dried. After which the prepared fruit should be slightly trimmed at the base and an incision should be immediately made, forming the mouth of the future frog.
Next, you need to make paws from grapes, attaching them symmetrically on both sides of the apple using toothpicks.
And the final stage is creating grape eyes, which are also attached to toothpicks.
If you wish, you can make a cute crown from a cucumber, turning an ordinary frog into a princess from a fairy tale.
Cheerful caterpillar
The number of apples depends on how long the caterpillar is. You can take 6 pieces of the same size or 8 - 10 and make a caterpillar with a bend. You will get a beautiful caterpillar if you select the fruits according to the principle from large to small, starting with a large apple and ending with a small apple.
Additionally
- carrots 1 pc.;
- grapes 8-10 pcs.;
- toothpicks;
- decor for decoration.
For crafts, it is better to take round varieties. Your imagination will tell you the color. Before starting work, you need to remove the stalks.
The largest apple is the caterpillar's head. We attach it vertically to another apple. Next, secure the apples horizontally one after another using toothpicks. You will get a chain.
For stability we make legs
- We cut the carrots into equal circles, up to 1 cm thick. We count the number of legs by apples, 2 legs are needed for each.
- We attach the legs to the caterpillar. We stick half a toothpick into the carrot circles, closer to the edge. We strengthen the entire structure into an apple. You may have to look for a place to attach the leg for greater stability.
We make antennae on the head. We attach 2 toothpicks and string grapes on them along the entire length.
The eyes and mouth can be drawn with a marker or glued on. Now we decorate the caterpillar. You can make hair, hats, bows. Hang beads and there will be a lady caterpillar. Make a cylinder out of plasticine and secure it between the mustaches, glue a paper bow tie or tie - you get a gallant gentleman.
If you place the craft on a beautiful stand and add natural materials, you will get a great exhibit for an exhibition in a kindergarten or school.
Types of supports for apple trees with your own hands
Carefully! Do not use sticks or poles that have not been tested for strength; it is better to find something long that is metal. For when the support breaks, the entire branch of the apple tree will break off from the trunk!
Stand with slingshot
Simple stands for apple tree branches - in the form of rogulin , from “horned” branches from the forest - this is the simplest device for supporting overloaded apple tree branches.
And so that it does not spoil the layer of bark on the apple tree, rubber tubes cut lengthwise from an old garden hose or bicycle tire are pulled over it.
A more advanced idea on how to support the branches of an apple tree: connect a plank and a piece of wood from a flyer. The board is placed down, and an overloaded branch of an apple tree is placed on the flyer in the shape of the letter U, then the flyer is attached with two screws to the thick board underneath so that the end of the flyer does not sink into the ground.
This way the supports for the apple tree branches will be of the required length. And it is best to attach pieces of hoses of a suitable diameter to the slingshot, and if they are not there, then wrap them with rubber. After picking apples, the wooden supports should be put away in the barn or under the roof, because they will come in handy more than once and will work longer.
IMPORTANT ! To prevent apple trees from being overloaded with apples, some of the ovaries are removed by vigorous shaking.
In this video, watch how to make supports for apple trees with your own hands. An experienced gardener shares his secrets.
Umbrella chat
It is allowed to use supports for apple trees by tying the branches to a specific central support pipe (or pole) dug close to the trunk of the apple tree.
Wire “strings” already extend from it, which are attached to the branches of the apple tree through loops or branch rings.
These can be parts of old tires, branches are placed in them. To install such a support along an apple tree branch, you definitely need a garden stepladder.
The central stand of the support for the branches of the apple tree itself should be 35-45 cm higher than the tree being tied up and steel or plastic “support strings” are already attached to it, and the branches are tied to their end through rubber rings or other devices similar to them.
But how to support the branches of an apple tree if its trunk is twisted or the type of tree is small? In this case, a kind of “mast” : an iron pipe or a strong plastic pole, the length of which will be equal to the tree or slightly higher.
But first, at one end of the “mast” (which will be at a height), a circle of strong steel wire is strengthened.
The opposite end of the “mast” is buried quite deeply into the soil. Apple tree branches with softening pads are tied to the upper ring using ropes or pieces of soft wire (wires in insulation). Assembling the “mast” and tying the branches is done with four hands to ensure an even load on the tree and to balance the entire structure.
It is allowed to use the following as gaskets to protect the bark layer on apple tree branches from friction defects:
- Elastomer;
- Rubber bandage;
- Tire tubes;
- Pieces of hoses;
- Dilapidated tires from a scooter or moped.
They are cut across the ring into 10 cm fragments and in each such fragment a pair of holes is punched at the edge. After this, a section of the tire is applied to the shoot from below (the holes should be on top). A wire or wire from the “mast” is threaded through the holes and tied in a knot.
Advice. This device remains under the apple tree for the winter and works throughout the whole year, protecting the branches of apple trees from breaks and splinters during strong winds and after heavy snowfalls.
Supports in the form of a ladder
There is also a type of support installation, which is more like a ladder or a shelf. Two sticks similar to “J” are placed on both sides of the apple tree trunk at a distance of half a meter.
The lower points of the sticks are even and deepened by 10-12 cm , and they are fastened together at several points with sticks and a “staircase” is obtained. Apple tree branches are attached to sticks supported by soft wire or wire.
There is no need to tie this “ladder” to the trunk if the branches grow evenly throughout the entire crown. The branches placed in different directions play the role of “guy wires”, due to which the entire structure gains stability.
Some gardeners use 3 or 4 poles instead of two . This configuration is really hardy, and it’s more convenient to use for a small garden. And if the crossbars are made strong, then it will really stand in place of any ladder.
How to support apple trees is up to the gardener to determine. But logically, for those apple varieties that are distinguished by systematically abundant fruiting , it is better to install fixed supports that will last for several years.
And for varieties with small and irregular fruiting , as well as for young trees, it is wiser to use temporary supports, when it is possible to quickly place them under a certain branch and, again, quickly remove them.
Telescopic support
For such a support, it is necessary to purchase plastic or metal-plastic water pipes of such diameters that one pipe easily fits into another .
Having inserted them, drill holes in two pipes at the same time with a diameter of half to one centimeter (depending on size).
This is necessary in order to more easily adjust their height as needed. Next, after the desired height , you need to insert bolts with nuts of the required diameter into these holes and tighten them.
Having bought plastics in the form of planks and heated them, bend them so that fragments similar to the letter “C” come out. Fix them flat at the end of thin pipes and stick softening material on the inside (for example, buy thermal insulation and cut it).
Collect everything and place it under the branches of the apple tree.
The second option is a pipe mount. Duralumin pipes in the form of a “matryoshka doll”. The smaller one ends with hooks at one end, and the second edge is placed in a larger pipe.
TIP: To obtain the required length, the pipes are spread apart, twisted and fixed. For this purpose, holes are drilled in them at equal intervals, into which bolts or locking wedges are inserted.
The diameter of small pipes is half an inch, large ones are 3/4 or 1 inch. The configuration of the hooks makes it possible not only to bend or bend the branches of apple trees, but also to throw nests of moth caterpillars off them and get rid of mummified apples.
The “thickness” of the rolled steel wire for these hooks is up to 1 centimeter.
T-shaped support
It is obtained by connecting two poles with the letter “T”. And if the branches of the apple trees are large and full of harvest, then this “structure” is also fixed by nailing 2 more crossbars at both edges at an angle - from the edge of the crossbar to a vertical post.
Then they bring this support under the branch, trying to position the structure so that its “main” burden falls on the support.
A perpendicular pole is placed in a hole to a depth of 15 cm and then buried. If necessary, install several supports.
Reliable supports for apple trees are quadrangular pyramids. With them it is possible to unload heavy branches of an apple tree at any height.
To make such a pyramid, you need to install two pairs of trapezoids under the apple tree opposite each other.
The distance between the frames themselves should be the same as the distance between the lower ends of the frame posts. This way you will get a neat quadrangular pyramid. The upper ends of the frames are tilted and fastened. The branches of apple trees with ripening apples are laid on them .
TIP: There is also a way to support an apple tree: A thick, strong pole is cleared of bark and placed close to the trunk, deepened by 17-20 cm. Next, take the end of a thick natural rope or thin rope, fix it on the top of the placed pole, and the other The end of the rope is wrapped around the desired branch of the apple tree with a locking knot. This design can unload up to 6 apple tree branches .
Metal supports for apple trees
It is necessary to especially carefully monitor the condition of the branches of adult apple trees, especially if they are loaded with apples, and urgently take measures to support them. This is tying the branches to the supports and placing supports under the branches, and connecting the branches to the trunk and to each other.
Metal supports are the most durable . These supports can be made independently from metal pipes of any diameter, but this will undoubtedly be more expensive and the mass will be considerable. Using used pipes, you can significantly reduce the cost, and by using aluminum as a base for the pipes, the weight itself. And most importantly, guess the length of the supports.
How to properly make supports for an apple tree:
- Cut off the pipes at approximately half the required length;
- Drill a few holes;
- By setting the smallest diameter pipe with a “fork” attached on top to the required height;
- by aligning the holes and strengthening them with a thick nail driven through, they obtain support.
TIP: Initially, supports are installed (especially in areas unprotected from strong winds) under the upper, and then under the lower branches of those apple trees that bear fruit first (summer), and then under the winter apple trees.
In this video, watch how to make stands for apple tree branches. Professional recommendations.
Apple Snowman
The “White Fill” variety is well suited for a snowman because of its light shade of skin. But you can take any other color combinations.
Additionally
- peppercorns;
- carrot;
- toothpicks.
The craft can be made from 2 or 3 apples, the main thing is to choose the size in descending order.
A smaller apple is attached to the largest apple. For stability, you can cut off the base of the first one.
Cut the carrots into pieces 5 mm wide. Use the tip of a knife to cut out the shape of the mittens. Attach to a toothpick and secure into an apple. Leave some space between the mitten and the apple.
We decorate the snowman with peppercorns. We use them to lay out the buttons on the apples, eyes and mouth. The nose is a triangle cut out of a carrot.
You can place a piece of apple on your head, in the form of a semicircular cap, or a cylinder of carrots. You can leave the tail of the stalk, it will give the snowman a perky look.
How to raise a fallen apple tree?
After bad weather, an apple tree fell . To determine the possibility of its “reanimation”, it is worth knowing the answer to several questions:
- How old is the apple tree?
- In what part of the trunk did the fracture occur?
- What happened - did the trunk split, broke completely, or is it still hanging on to a fragment of wood?
- How much time has passed since this happened?
- Is it thickly covered with apples that are not yet fully ripe?
- Is it possible to leave the tree like this and wait for the apples to ripen?
If the apple tree is young and not completely broken , then you can save the apples on it, but it is better to decide how to strengthen the apple tree and remove the apples themselves, otherwise the tree will die from overstrain.
Watch the video on how to help a cracked apple tree: step-by-step algorithm.
If the tree is uprooted from the soil and this happened no more than a couple of hours ago, then it is necessary to raise the entire tree to the maximum possible from its previous height and support it with supports.
Further, if the root core and trunk are intact, then in this case it is necessary to throw a pile of highly nutritious loose soil onto the large-rooted part so as to completely cover all the “dislocated” roots with soil.
Afterwards, protect this hillock with shields from erosion by rainfall. Constantly water it with fertilizers for seedlings to supply the roots with easily digestible nutrition. Read more about fertilizing apple trees during fruit ripening here.
Further, if active growth becomes noticeable , then let the tree remain growing in this position and the gardener will have an apple tree with a horizontal or crooked crown.
But if the flake is more than 2/3 of the diameter of the apple tree trunk or it occurred a long time ago, then it is pointless to connect and save the crop, only removing the flaked part, painting over the entire wound with red lead and natural drying oil and nursing the remaining living branches.
Be sure to remove all apples!
Simple and fast: step-by-step master class
If you don’t have time to make a craft or have doubts about the result, use simple options.
Funny hedgehog
We use 1 apple and 1 cranberry.
- The fruit is cut in half, the core with seeds and the stalk are removed.
- Place one part cut side down on a plate or base.
- We break the toothpicks in half and stick them tightly into the apple with the sharp ends up.
- A small volumetric triangle for the muzzle is cut out of the second part. We attach a cranberry to the tip of the nose.
- We attach the muzzle to the part with the needles. For beauty, you can put an autumn leaf on the needles. All!
Design options for hedgehog needles:
- string grapes of the same or different colors onto toothpicks;
- cut triangles or straws with a sharp tip from the apple pulp. Strengthen with toothpicks.
Ladybug
1 apple will make 2 cows. Additionally – 7 grapes.
- Cut the apple into halves, remove the seeds and stems.
- To imitate wings, make a cut in the middle of each half and remove the peel.
- Using the tip of a knife, make 3 indentations in the pulp on each side of the cut.
- Cut 6 grapes in half, place the halves of the berries in the recesses, cut side down.
- We make heads from the remaining berries, securing them with a toothpick.
- Place on a plate or tray. All is ready.
Creating crafts from fruits and vegetables is exciting and enjoyable for both adults and children. Such activities develop children's imagination and fine motor skills. And for adults, they can be the beginning of an acquaintance with the art of creating edible beauty.
Crafts for Apple Savior for the older group
Children from the older group can be given slightly more complex versions of products on the theme of Apple Savior. However, they are quite simple for almost all kids, so they can also be used in the younger group.
Hedgehog with apples
Hedgehogs love apples, and apples love hedgehogs. Let's create a simple applique from circles folded like an accordion.
To make the hedgehog more beautiful, you can prepare a template in advance and print it. And the kids will make the rest of the elements with their own hands - and the result will be such an interesting picture.
You can print this template:
The needles on a hedgehog can be made voluminous if you follow the instructions in the video.
Volumetric paper apple
Now let’s experiment in 3D style and make a three-dimensional apple out of paper. To do this, you need to print out such a template - you will need 9 pieces for 1 craft.
Next we proceed like this:
We trace along the contour and cut out 9 pieces - you can have the same color or different ones.
We fold 8 blanks in half, putting the ninth one aside for now.
We glue all the halves together in 4s, and then both of these halves together.
Cut out a twig and a leaf - preferably also from cardboard.
Glue the twig onto the base - this is the ninth part.
On the back side of the base we glue a blank of 8 modules.
Well, now all that’s left is to glue the leaf – and you’re done. An interesting and simple DIY craft for the Apple Savior.
In the same way you can make any other fruits and berries - for example, a couple of cherries.
In some ways they resemble the famous countesses Vishen from Cipollino’s “onion” fairy tale.
Origami apple
What’s a craft for Apple Day without an origami-style apple? Any child can make such a fruit with their own hands - the diagram is attached.
You can then round off the edges with your fingers and glue a green leaf on top. You can make such an apple from white paper. In this case, it would be nice to paint it or even come up with an applique.
Application made from cardboard fragments
Here’s another very impressive craft - you can create an applique out of cardboard with your children with your own hands. At the base is a black apple figure. To fill, take cardboard of 2-3 shades of red (for a leaf - green, for a twig - brown). It turns out to be an interesting mosaic.
Artificial home apple tree
It is advisable to place such decorative artificial trees only in enclosed spaces, because their flowers are made of yarn.
- Glue;
- Wire cutters;
- Cardboard;
- Hook;
- Scotch;
- Wire;
- Pencil;
- Cement or plaster;
- Scissors;
- Brown and green fabric;
- Pot;
- Red and brown threads.
- Using wire cutters, we cut off six wire blanks of 30 cm, five of 25 cm, and twenty-two of 4 cm;
- Attach 3 small ones to a large wire branch with tape. We make several preparations. The branches can be wrapped in fabric, such as velvet or fleece;
- Cut strips 2 cm wide from brown fabric. We wrap the branch blanks (several pieces) with them, leaving 3 cm free at the bottom. We fix the ends of the material with glue;
- We collect the blanks into a single “apple tree”. We cut a strip of 3 cm from the fabric, wrap it around the fabric and branches connected to each other. We also secure the fabric ends with glue;
Apple wood products
Apple wood makes very beautiful products. With proper wood processing, the product will serve faithfully for many years.
View a selection of various apple wood products:
Subscribe to our Yandex.Zen channel
Felt apple garland
An absolutely wonderful, pleasant and beautiful idea that will decorate the interior of your home easily and unobtrusively. By the way, such a garland is created as easily and unobtrusively as it looks - the work will bring a lot of pleasure, because working with felt simply cannot be different. Cool material, cool idea, cool execution. Be sure to take the time to complete this project!
How to make an apple garland with your own hands - master class from Нandmadecharlotte