DIY paper cube
Paper cubes are great for a variety of projects, children's games, or just decoration. Do you want to learn how to make a paper cube with your own hands ? In this article you will find 12 simple examples with step-by-step photos, diagrams, templates and other useful information.
There are several ways to make a paper cube. Folding a few leaves to make an origami cube is not difficult, which is why this art is very popular today among both children and adults. You can also make a paper cube by drawing and cutting out a template from one sheet of paper and then gluing it into a cube shape. So choose what suits you best and good luck with your home projects.
Simple paper cube
To make this simple origami cube, you will only need one square sheet of paper 20 x 20 cm. The cube is a simple shape in origami, but still, you need to at least know what a valley fold and a mountain fold are.
In short, the valley is to bend the sheet in half towards itself; in the diagrams this fold is indicated by a dotted line. And a mountain fold means you need to fold the sheet away from you; in origami diagrams this is a dotted line. If you know these two origami techniques, then you will not have problems not only with the cube, but also with more complex models. Photo source: www.origami-make.org/origami-cube-simple.php
Make a photo cube with your own hands
Small anti-stress cubes are now available for sale. A cube assembled in a special way can be rotated endlessly. But if you make it larger and stick photographs on it, you will get a double effect, a real anti-stress. It especially delights children. Flipping through the photographs on the cube, it evokes warm feelings in adults.
Before writing this article, just in case, I scoured the Internet in search of other options for assembling and sticking photographs. For various reasons, the order in which I viewed the photos did not quite work for me. And the way I want to share with you seems to me to be the most interesting. It loops and constantly returns to the first photo, holds 10 photos and is fairly easy to assemble.
First, you can watch the video to make it more clear, and then I will describe step by step the entire algorithm for assembling the cube.
Other types of paper crafts
From the resulting cubes you can make various three-dimensional crafts:
- Garland. It can be assembled from a large number of colored cubes. These cubes can be assembled either according to a template or in origami style. The main thing is to pierce them and put them on a string, and then you will get a very beautiful garland.
- Dice is very simple to make. It is necessary to make a small cube using one of the proposed methods. And then you need to draw points on each side of your cube.
- The robot is also very easy to make. You need to make 2 cubes - large and small. The large cube will serve as the head of the robot, and the small one will serve as the body. You also need to make 4 volumetric rectangles. We need them to make arms and legs for our robot. To make your robot move, connect all its parts using a toothpick.
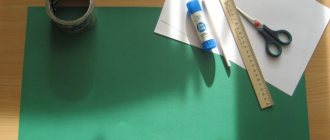
Surely very few people know that you can make a paper Rubik's cube with your own hands. To do this you will need the following items:
- Colored paper.
- Ruler.
- Pencil.
- Scissors.
- Transparent tape.
Stages of executing a Rubik's cube:
- Take 6 sheets of colored paper with different colors.
- From each sheet, cut out 8 squares measuring 4*4.
- On each square you need to draw a center line and fold its edges towards the center.
- On the resulting workpiece, also draw a center line and bend the edges of the workpiece to this line.
- You need to collect the first cube. Arrange the colors in the order you like.
- Collect a cube from six blanks of different colors.
- Repeat this step for the remaining pieces.
- Make 8 resulting cubes into 4 pairs.
- The color that is at the top of the first two pairs should be at the bottom of the next two pairs.
- Glue each pair so that the cubes can move.
- Take two pairs and turn them on their sides. Glue the top two faces of the cubes together.
- Do the same on the reverse side of the glue.
- Do the same with the remaining two pairs.
- You now have two main parts of your product. Now they need to be connected.
- To do this, place them in the same order as they lay before gluing.
- The two central pairs must be glued together.
- Next, fold them into a cube, and glue the sides that you see directly in front of you.
You have a transforming cube. It can be solved like a Rubik's cube and can also be turned into a rectangle.
Now you know how to make a paper cube with your own hands and you can make it yourself without any problems. Your child will be pleased, because all the shelves in his playroom will be filled with various crafts. I wish you success!
Putting it all together
One of the visual dominants of our machine will be its visual design, or more precisely, the stickers on the body. In order for everything to turn out beautifully, we go to the graphics editor, take images and prepare them for layouts on a scale of 1 to 1 with the print size. Set the CMYK profile. In an ideal world, it is better to have a print resolution of 250-300 pixels per inch, but, in my case, the sources had a resolution of only 95 pixels per inch, and, ahead of events, I will say that it also turned out great and even close to a special “soap” No.
We go to the printing house and order all the stickers on self-adhesive film. I chose a glossy paper-based film. Definitely with lamination. Moreover, this is vitally important for those surfaces with which the players’ hands will come into contact, that is, at least for the panel with buttons. If there is such an opportunity, then we do floor lamination for the panel with buttons and sticks. Alternatively, the panel is sometimes covered with plexiglass, but for me, for home use, this is unnecessary. You can also use so-called translucent film for signs, which will transmit light. But, alas, almost all printing houses refused to print a small piece (20x50cm) for me, or for this small piece they asked for a price comparable to the rest of the print combined. As practice has shown, a two-meter LED strip has more than enough light even when using ordinary film glued to plexiglass. So there is no point in a translucent whip.
When the film arrives, slowly paste the film onto all surfaces, gradually expelling the remaining air with a soft cloth. We cut off the excess film (along the contour) with the sharpest knife possible, or, better yet, with a razor blade.
We actually install the buttons on the pasted panel with buttons. Unscrew the nuts and screw them back into the panel. We insert the buttons, and connect four wires to the buttons: two for the button and two for the backlight. Plus and minus. We attach the sticks to the screws, and then insert the sticks and all the buttons with 4-pin connectors into the encoders - from K1 to K12. The order is not important, everything is then configured in EmulationStation upon boot anyway. The only difference between players will be one additional button for the first player - hotkey. There is no such button for the second player (and in general it is not needed).
In general, if you look at the encoders, in addition to connecting four more buttons (for the 10-button version (+ two Select and Start buttons)), it is possible to connect four more toggle switches - turbo, auto, mode, clear, and there are also four two-pin connector for a 2-pin joystick (up-down-left-right), plus a remote power connector. But the wires are included, and there are no toggle switches themselves. Well, the output to the raspberry is a connector and a miniUSB - USB cable. So we connect the wires from two encoders to the Raspberry Pi USB connector.
And finally, we assemble the body. Everything is simple here. We take a screwdriver, corners, and self-tapping screws and assemble all adjacent surfaces together.
The matrix is attached to the front panel using thin, shiny aluminum profiles.
In the rear panel I have a hatch on a rail loop with a lock, where the fan is also installed. I used a 120mm fan from an old computer (I didn’t buy a new one), and it rattles like a rusty bucket of nails at startup, but after a minute of operation it becomes almost inaudible. But it cools perfectly. Well, it fits perfectly into the retro theme. In general, the hatch is needed both for ease of assembly and for servicing, if necessary, all the electronic components inside. All components and wires are secured with clamps. Yes, some of them are visible through the slit, but the EO even gives a warm lamp shade of “cyberpunk”.
We cut out the glass for the front panel (very carefully - plexiglass is fragile). We place the glass on the front panel. The glass can be placed on screws or glue, but in order not to spoil the appearance, I simply press the glass against the bottom bar of the sign.
Last but not least, we install the glass on the display window, having previously hidden the speakers under it, glued into the bottom bar of the sign. We cover the speakers with a mesh. Well, the machine itself is ready. We launch it, set up the buttons (if you haven’t set it up before) and play.
Disclaimer: all links provided in the article are provided solely for information and to indicate certain parts that I used to assemble the machine (or their analogues). They are not of any advertising nature and no one paid me for advertising (but they could have). And, although at least one of the retailers is present on Habr, I have nothing to do with them.
Based on the prices at the time of purchase, the cost of the machine without taking into account labor, tools (saws, drills), electricity, as well as the laptop matrix was: ~24,000 rubles, which is comparable to the cost of a modern set-top box or a ready-made machine from AliExpress on PandoraBox. But... making something with your own hands and unique is priceless


