Making a stand for dishes
A beautiful and cozy home is the desire of every housewife. This does not always require a maximum financial investment. You just need to try to make beautiful crafts with your own hands. It’s best to make things useful for the home with the whole family.
A very useful and easy craft for the kitchen is a stand for dishes. The main material for its production is jute.
To make a craft, you need to use the following list of materials:
- jute 1 cm thick (10 m);
- glue gun;
- scissors.
All that needs to be done is to lay the rope around the circumference, lubricating it with glue. When the desired size of the stand is reached, the end of the rope is cut and glued to the base.
The home craft is ready!
Unusual pumpkin
Step-by-step instructions on how to make crafts will be useful to you in creating this unusual figurine from a garden pumpkin.
Name day gift
On your birthday you always want to receive an unusual gift made by yourself. One of the brightest ideas for such surprises is preparing a piece of cake with sweet wishes.
By making beautiful paper crafts with your own hands, you can convey all the warmth and love to a loved one.
For homemade creativity you will need the following list of tools:
- ruler;
- scissors;
- pencil;
- thick paper (cardboard);
- glue;
- decorative elements (ribbons, beads, flowers, etc.).
All that remains is to find out how to make a beautiful craft.
Creativity lessons
The first thing a child who gets acquainted with school dreams of is for it to be interesting. And what could be more interesting than labor lessons, where children create a wide variety of compositions with their own hands from scrap materials?
Looking at the photos of crafts for a labor lesson, you can see many options for paintings, applications and three-dimensional figures.
Children really like to realize their ideas by creating original interior decorations or any other homemade items.
Craft technology
So, the work is carried out in the following sequence.
- Draw an image of the cake according to the template on a sheet of cardboard, then cut it out.
- Bend the cardboard along the marked lines using a ruler.
- Make a cut at the back of the cake to allow it to be closed later.
- Glue the desired parts of the cake using PVA glue.
- Decorate the craft with a variety of decorative particles: beads, ribbons, flowers.
You can insert an envelope with wishes or money into the inside of a piece of cake.
- Craft mug: 135 photos and video master class on how to make beautiful crafts with your own hands
- Crafts from spoons - 125 photos and videos, tips and tricks with step-by-step instructions on how to make crafts
- Crafts from cotton pads - 125 photos of beautiful crafts, features and videos of new cotton crafts
Children's crafts using papier-mâché technique
One of the interesting techniques for creating children's crafts. Using the papier-mâché technique, you can create almost any shapes or compositions, you just need to stock up on a lot of paper or newspaper, glue and patience. The technology for creating crafts using the papier-mâché technique involves layer-by-layer gluing pieces of wet paper onto the desired object, model. It is necessary to create three or more layers for the resulting work to be practical.
To get acquainted with this technique, you can first try to create a saucer. To do this you will need: sheets of newspaper, glue, water, saucer, paint and a brush.
Note!
- DIY airplane craft: the best options for creating an airplane from paper, cardboard and plastic. 120 photo ideas
- DIY crafts for March 8 step by step - a review of the most beautiful crafts for International Women's Day (120 photo ideas)
Diaper cake for a girl - 180 photos of ideas for original diaper cakes + DIY instructions with examples of finished products
You need to tear the newspaper into small pieces, about 2-3 cm. Turn the saucer upside down, and carefully paste the newspaper scraps over the entire surface, after moistening them in water. When the first layer is applied, cover with a thin layer of glue. To make the saucer more durable and solid, you need four layers. Leave the saucer to dry overnight. Carefully separate the saucer from the paper blank. Paint the finished saucer model in several layers of paint, decorate it, or decorate it as desired.
Crafts for the garden
What gardeners don’t do to decorate their plots. Many of them like the beautiful design of flower beds. For this, ordinary plastic bottles are often used, although there should be a lot of them. Moreover, all bottles must be the same size.
To keep the containers strong, sand should be poured into them. You can use ready-made bottles to fence a flower bed and then paint them in the desired color. If the containers are dark in color, they do not need to be painted.
A beautiful fence made from plastic containers is ready!
Crafts from old things
Anyone who wants to can give a second life to old things. You need to put a minimum of effort into this, and the result will definitely please you.
Ladder shelf
Let's take a closer look at what has been stored for a long time, but was not taken out, for example, from the garage.
If you have a stepladder, a long tall ladder, a folding ladder, or even a rope ladder, this is an excellent opportunity to design some interesting shelving.
Actually, the structure itself is almost created; all that remains is to securely fasten the ladder to the wall or ceiling, using metal brackets, hooks or dowels.
Do not forget that a strong fastening will not allow your things to fall off the newly made shelf and will not disappoint you in the future.
The design options are as varied as the ladders available in the arsenal - a straight one, attached horizontally to the wall, turns into a stylish hanging shelf.
You can store books, photographs, pencils and markers, vases or pots of indoor flowers on it. If the composition is wooden, you can open it with stain or varnish.
A stepladder can become a modern shelving unit if only you attach boards to each step. If you turn it over like the letter “V” and install it against the wall, then everything will take on a completely different look, and if you take two or three stepladders at once, the structure will develop into a designer composition.
You can decorate the outside by finishing the boards in an antique style or, conversely, by treating the wood with enamel in fresh tones.
Even cable cars can be hung from the ceiling and shelves can be laid between them. Looks very creative. It is important in this case to calculate the correct number of shelves: if there are two of them, then fastenings to the ceiling are enough, if it is a huge rack, it is worth fixing the ropes in the floor too.
Wine cork stand
Wine corks are formed from the bark of the cork oak tree - this is an environmentally friendly wood, it has antimicrobial properties and is hypoallergenic. Such properties are very useful for the atmosphere in the kitchen, so this stand will be very useful on your dining table.
To prepare for creating a cork rug, it is important to decide what you want it to be, how thick it is and what it will be used for. Everything is simple with the form - whatever you like, we’ll make it.
The thickness can be different: from whole corks, from cut in half or from sliced plates or circles. How hot the dishes that you place on the mat will depend on how the plugs will connect to each other.
For cup holders, glue is suitable, with which the parts are glued together or glued to the formed base; For very hot food and drinks, it is worth taking something instead of glue, for example, you can sew them together with an awl and thread.
Combine beauty and practicality in your product so that there are no more traces of wet dishes left on your table.
Cardboard box organizer
Creating an organizer is a special field for activity. On the one hand, everything is very simple: take a box, cut it, add suitable partitions or additional boxes, glue it together and that’s it.
But you can decorate it endlessly - use whatever your heart desires: you can cover the cardboard with colored sequins, sparkles, lace, you can trim it with ribbons or wrap it with a cord.
Shelf made of tin cans
Used cans of coffee, tea, condensed milk or canned food are great for recycling, especially in the hand-made sector. Shelves are easy to create from them - fasten the cans together.
Now you can cover everything with ribbons, lace patterns, strands, or simply paint them.
Such shelves are suitable for cutlery, screws, beads or beads for weaving.
Putting things in order in your space is easier than it might seem at first glance; you don’t have to spend extra money from your budget to do this; it’s enough to allocate just a little time and effort for painstaking work.
Upholstering furniture with old clothes
Another opportunity to recycle old items and at the same time update the furnishings is to decorate furniture with outdated clothes. It is better to choose a thicker one so that the upholstery or cover does not have to be cut again in a week.
Small samples can be made from one piece of material, for example, for the seats of chairs, strong trousers or even a coat with a fur lining would be good.
If your skills allow you to upholster an ottoman or armchair, then you can safely introduce the “patchwork” style and sew the fabric of the required cut from individual pieces.
Flower pots
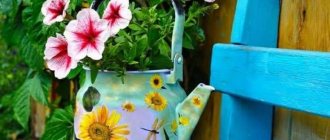
This garden craft in the form of a plant pot has a beautiful appearance. Options may vary.
So, you can cut a small hole from the side of the bottle and pour soil into it. A living flower is placed in the prepared container. After planting, it is better to hang the pot on the wall.
- Cardboard crafts - 135 photos of useful and beautiful crafts for children and adults
- Unusual crafts: we make cool and original things from scrap materials (120 photos and videos)
- Crafts from stones - 145 photos of examples of stone crafts from minerals and pebbles
The plant in its original form can be left outside or moved into the house. Several pots combined give a very unusual and beautiful effect.
Scratching post with cat house
You can build a house for your pet yourself along with a scratching post.
Product manufacturing process:
- Initially, on paper you need to estimate the configuration of the future building.
- For production you will need an OSB sheet (12 mm thick) and 1 linear m of carpet.
- Cut the wood board according to the dimensions shown in the drawing.
- The next stage involves assembling the house using corners and screws.
- The penthouse can have 1 or 2 tiers.
- After forming the floors, it is necessary to cut out the entrances.
- From the remaining paper rolls from under the carpet you need to make a scratching post, fixing it inside with a wooden plate, and attach it to the base of the house.
- Then you should cover the craft with carpet and secure it with a construction stapler.
- Finally, wrap the scratching post tightly with a thick rope.
DIY funny piggy
This craft can decorate any garden plot with its appearance. To make it you will need plastic bottles of different sizes.
First you need to make the body of the pig. To do this, take a large water bottle and cut off its side. There will be flowers in this place.
Then the pig's ears should be cut out from the cut piece of plastic.
Four 1.5 liter bottles must be used as legs. Their tops are first cut off. The legs are attached to the body of the pig with a wire.
The next step is to paint the piglet pink.
When the paint is dry, you can fill the inside of the animal with soil, and also make small holes on its tummy.
You can grow seedlings or flowers in this craft. All that remains is to place the beautiful pig among the rest of the flower beds in the country house.
From glass jars
Glass jars are used to make original and beautiful crafts for the home.
Method of making an oil lamp:
- Take a small glass container and fill it 2/3 with kerosene, then close the lid.
- Place the rope in the oily liquid and leave it for 1 hour to soak.
- Make a hole in the lid and stretch the soaked rope through it.
How to decorate a shiny vase:
- Cover the jar with strips of tape in the desired direction (horizontally, diagonally or vertically)
- Remove the adhesive tape.
- Sprinkle the container with glitter; it will stick to the adhesive surface.
Decorating a vase in vintage style:
- Cut a rectangular piece from light brown burlap and glue it to the glass container.
- Cut a strip of white burlap and cover the jar with it.
- Form inflorescences from twine. To do this, take the edge of the twine and gradually twist it. Then the flower should be fixed with glue. In a similar way, make several blanks of different sizes.
- Attach the blanks to the container with glue.
- It is recommended to decorate the vase with lace and beads.
Original pot made of shells
You can also make beautiful crafts from shells at home. One of them will be a flower pot. Let's figure out how to make this unique thing suitable for everyday use.
- Broken shells should be wrapped in a cloth and crushed into small pieces using a hammer. The craft should be done by an adult, not a child.
- The pre-selected stand must be coated with glue, then sprinkled with ready-made shell crumbs.
- Whole shells should be fixed to the outside of the pot with glue.
- After time has passed, when both parts of the craft are dry, you should connect them to each other.
A beautiful flower pot is ready! To strengthen the layer of shells, it is allowed to apply varnish or golden paint to them.
Button cockerel
At home, everyone has a lot of buttons that lie idle. You can collect them and make a beautiful cockerel out of them.
Find a beautiful picture of a bird on the Internet and print it out. Buttons should be of different colors, preferably bright. You can dilute them with rhinestones and other decorations.
Buttons need to be glued using PVC glue. If you are not sure that it will hold heavy buttons, then buy double-sided tape.
Craft for Christmas
A homemade star would be a great Christmas gift. Orthodox people are familiar with the fact that it was the star that guided the Magi along the right path to find the Savior. Therefore, if children are going to carol, they will definitely need these stars.
To work, you need to have on hand a small stick, felt fabric, sequins, threads and needles, scissors, glue and a brush, cotton wool.
Chicks
Making little chicks in a nest is very simple. Everyone has Kinder Surprise capsules on hand. There can be three or five, at your discretion.
Make paws, wings, a scallop and a beak from plasticine. Place the important parts in their places and place the finished chicks in the nest.
The nest can be a small basket of twigs. They can also be placed on a branch.
The process of making a star for Christmas
First of all, you should cut two stars of the same size from fabric material. Using glue and decorative elements, you can decorate the outside of the star. We also decorate the stick with glitter using glue.
Give the craft time to dry.
At the tip of the skewer you need to attach a piece of cotton wool the size of a star to the glue. To make the star look three-dimensional, you need to make two blanks and fasten them together. Ready!
In the photo of beautiful crafts you can choose the option you like. Make your loved ones happy - give them an original, attractive present.
Paper aquarium
Paper crafts in a craft class will never get old. Let's start making an aquarium. Cut out a round aquarium from a piece of blue cardboard. Glue small pebbles to the bottom.
Paint vertical algae with green paints. Draw the silhouettes of the fish separately. Color them and bend their tails and fins a little. Glue them in random order onto the base, and the curved parts will create the effect of movement.
Photos of beautiful crafts
Tell your friends
