Decorating a wedding celebration is one of the most important points that should be given special attention. Nowadays, due to the popularity of handmade products, brides often create wedding decor with their own hands, involving their girlfriends in this process. In addition to the ceremonial decoration of the room, special attention is also paid to individual attributes. In this lesson, you will learn how to prepare original wedding decorations from satin ribbons using the kanzashi technique with your own hands, using the example of a champagne bottle, boutonniere, basket (bag) and wedding glasses.
Materials and tools
To work with tapes, you will need a set of simple tools that can be found in every home. If this is your first experience in decorating bottles, then it is better to start with simple design solutions to get the hang of it. To work you will need:
- Sharp scissors.
- Glue that adheres well to glass. It's better to use "Moment".
- Braid, lace, scraps of fabric.
- Accessories: beads, beads, buttons, cabochons.
- Tweezers for creating miniature elements.
- Ribbons.
The basic material also has a number of variations:
- Satin. Most commonly used due to its pliability and elegant aesthetic appearance.
- Silk. Thinner and more slippery material.
- Satin. They have a denser structure, and the fiber pattern is visible to the naked eye.
- Jacquard. Decorated with original drawings.
- Organza ribbons. The material is translucent and airy.
- Cotton. They hold their shape well, so they are suitable for creating three-dimensional compositions.
Each of the above types is used by needlewomen to decorate bottles, but the most popular material is satin. It combines the optimal ratio of quality and price.
Complex compositions made from combined materials look original. For example, cotton flowers surrounded by satin petals or the same background.
Decorating wedding bottles with velvet
You can decorate champagne for the newlyweds' festive table using velvet. This luxurious and elegant material looks great.
Even an ordinary container is transformed thanks to the velvet decor.
Decorating champagne for a wedding with your own hands is very easy to do. You only need stretch velvet, thread, paper and a pencil, as well as two bottles and decor.
ADVICE. It is better to lightly burn the pieces of fabric needed for processing along the entire perimeter.
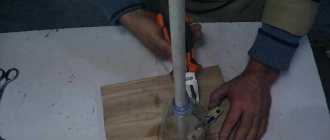
Bottle preparation
Both empty and full containers must be properly prepared for the procedure. First, remove the label and any remaining glue along with it. There are two methods for performing this procedure:
- Soak the label paper in hot water and then quickly tear it off. The method is not considered the most effective, since often the glue remains on the glass and has to be scraped off.
- Heat the label with dry, hot air and slowly tear off one centimeter at a time. A hair dryer turned on at full power can act as a source of flow.
After cleaning the glass, it is thoroughly washed and dried. Then the surface of the bottle is wiped with a cotton pad soaked in alcohol. This way the glass will be degreased, which will ensure good “adhesion” to the glue. Tapes are usually pre-cut after measurements are taken.
Types of decor for wedding bottles
Designing and decorating champagne bottles for a wedding can be done using several methods.
Types of decor:
- ribbons;
- photos;
- polymer clay;
- fabric trim;
- engraving;
- decoupage;
- paints;
- rhinestones.
Before carrying out it is necessary to prepare all the tools, as well as the bottle itself. The surface must be cleaned of labels and thoroughly degreased. This will help achieve high quality results.
Note. When decorating, it is recommended to adhere to the general style of the hall in which the celebration is taking place.
Decoration with ribbons
Decorating a bottle of champagne or wine with your own hands is not such a difficult task. Several master classes with a step-by-step description of the work will tell you about popular techniques and the features of their implementation, and the novice designer can only choose. The simplest option is to create a fabric covering on the glass in “layers”. Work starts from the neck. A “loop” is made from a piece of tape, which is placed on the thinnest section of the glass container.
Its ends are trimmed if necessary and glued to the surface of the bottle. Then they take the next strip, create the same “loop”, partially lay it on the previous layer (so that the base does not show through) and attach it in the same way. In this way, a continuous fabric covering is created with beautiful joints (overlapping). Colors and materials are combined. Then the resulting background is complemented with other decorative elements.
Creating relief
Another technique is creating a relief texture. The effect is achieved by gluing tapes or pieces of textile to the surface and then squeezing them with your fingers. As a result, folds are formed that most accurately imitate the thin fabric of clothing. It is necessary to glue the entire piece completely, and not its individual parts. As a base, paper or other fabric of a neutral shade is attached to the glass.
Kazashi technique
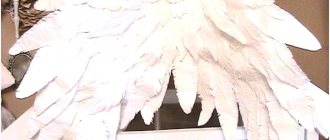
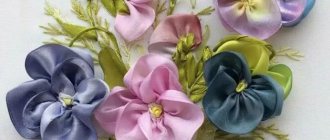
To create flower arrangements, they use the Kazashi (Kazashi) technique, which originated in Japan, where girls crowned their heads with similar decorations. Many have seen complex floral arrangements with hanging “buds” on long threads, adorned on the high hairstyles of Eastern women. The essence of the method is to specially fold shreds and pieces of ribbon in such a way that sharp and rounded ends of leaves and petals are obtained.
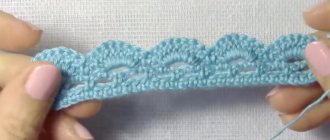
They are carefully collected with tweezers, and the free ends are fixed to the surface with glue. Elements with multi-layered flower buds look the most beautiful. In the Kazakh technique, they collect petals and place blanks of the same type on top of each other, but of different sizes and colors. This way a volumetric effect is achieved. Kazashi flowers are combined with openwork, beads, and braid.
Shibori technique
Another gift from Japan is shibori ribbons. Most often they are used to create body jewelry (necklaces, earrings, bracelets), but they are also suitable for bottles. The ribbon is a “crumpled” piece of fabric that is dyed in different colors with an ombre effect. When creating the material, it is crumpled and tied into knots so that the result is a rainbow color, opening the way for the artist’s imagination. Shibori tape is usually glued to a fabric base, but in the case of a bottle it is attached directly to the glass. It is worth noting that material without additional decor looks impressive, but boring. Ribbons are always surrounded by various kinds of accessories, among which beads, cabochons and glass beads to match the main color prevail. The composition gains volume due to the folds of the material and looks festive and solemn.
We decorate wedding glasses and other attributes
Decorating a wedding table is not limited to decorating bottles with your own hands with ribbons. Most often, they are decorated in the same way with other decor - boutonnieres, candles, etc.
It is better to buy glasses separately rather than take them from a set. Most often, they are stored for many years as a memory of the wedding, without washing away the decoration. Next, we decorate the glasses, like the bottles, with satin ribbons with our own hands so that they form a single set. Decorative elements may differ, but it is worth tying bows from the same ribbon that is woven around the champagne on the stem of the glass. Next, the small decor is attached with transparent glue.
In addition to wedding bottle decor with satin ribbons, we offer a master class on making a basket (based on soap and pins).
See alsoBamboo in the interior - use cases
Ribbon costumes
On the most “masculine” day, a non-trivial gift for a representative of the stronger sex will be a bottle of cognac, which is “dressed” according to its uniform. Such a gift will be of particular importance for a military man, rescuer or police officer. Satin ribbons are used to make a jacket, which is decorated with miniature chevrons, shoulder straps, buttons and ties with clips.
The costume is created using the technique of overlaying ribbons on top of each other. The first white layers are formed near the neck, which imitate a collar. Then the uniform is decorated with green, black or blue stripes (depending on the type of troops). Some craftswomen sew it separately from fabric and then simply put it on the bottle. Special attention is paid to the neck and plug. They are decorated with tiny berets, peakless caps, budenovkas, caps or caps. The elements are sewn separately and the finished miniature of the headdress is simply attached to the neck.
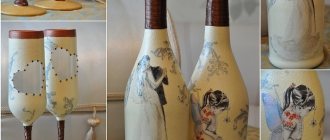
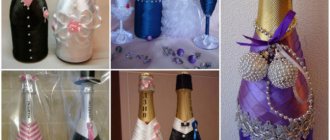
Bottles for a wedding
The bride and groom are always given two bottles of champagne for their wedding. This is an established tradition, the roots of which can no longer be found. At a wedding, they act as decoration on the festive table. After the celebration, they are hidden and the first one is opened exactly a year later, and the second one is opened upon the birth of the couple’s first child. As a rule, the container is decorated either in the form of a symbolic bride and groom, or to match the general theme of the wedding. The necks are decorated with doves (symbols of fidelity), rings and satin bows. They try to make the costumes of the “bottle” bride and groom look like the originals.
Men's clothing - a black jacket or tuxedo, with a ribbon, a bow tie, button beads and miniature cufflinks. To imitate a bride's dress, they use lace, openwork, airy fabrics, tulle, and sometimes even wire crinoline. Bottles decorated in a wedding theme are wrapped in layers of ribbons of beautiful colors, which are combined with artificial pearls, openwork stripes, beads, bows and voluminous flowers. The neck of the “female” container is decorated with a miniature tiara with a veil, and the “male” container is decorated with hats or top hats.
Compositions with candlesticks and glasses, which are decorated in the same style, look interesting. Some weddings also use boutonnieres, baskets woven from ribbons, or paraphernalia around the wedding chairs in the same color scheme and with similar motifs.
How to braid a bottle with satin ribbons as a gift or for a holiday table. Author Anna_Solo
Braiding bottles with satin ribbons. Will be a good gift for the New Year, wedding, anniversary, etc...
We will need a satin ribbon about 3.5 m; gold brocade ribbon 1.5m; "moment crystal" glue, scissors; a bottle of champagne. I specially selected champagne with gold foil without any inscriptions on the foil. The amount of tape consumed depends greatly on its width. I have a 2.5 cm wide ribbon here. If the tape is narrower, then its consumption is greater.
So, we take the bottle, the tape, and by simply applying it to the neck, we measure out how much is needed for the first layer.
Let's cut it off. We put glue dots. There is no need to apply too much glue, but too little is also bad.
There is too much glue in the photo if you use single sided tape rather than double sided tape.
Now we take our piece and wrap it around the bottle. It is important to glue it so that the wrapping paper does not peek out. We stretch the tape so that the edges do not puff up.
Then we again measure the piece of tape we need. Since the neck widens towards the bottom, the length will be different.
Glue and glue the second layer. A very important point: glue the ends of the tape in the same way as on the first layer. I have the right tip on top and the left one on the bottom. Then the “pigtail” will be even.
Also the third and fourth layers: measure, cut, glue and glue. And we move on to the brocade ribbon. It is very uncomfortable - hard. Doesn't stretch well. So we'll use it quite a bit. But the algorithm is the same. We measure, cut, glue.
There are only 2 layers of brocade tape and I'm almost at the edge. Or rather, at the transition line from the neck to the bottle. I'll also put gold on the bottom. I also measure, cut and glue. But I glue it so that the seam is exactly in the middle at the back. And oh joy! No more measuring! We cut 7-8 blue ribbons to the same length!
- And glue them with tension.
I overlap the layers one on one until somewhere in the middle. That is, only half of the layer sticks out.
As a result, you should get a completely untidy seam at the back, and one empty space for 1-2 layers.
Let's seal this sloppy seam. Using a thin knife, we make room for the tape.
- We glue the very edge of the ribbon and insert it into the slot.
- Now we coat the tape with glue, especially at the edges, and press it tightly with both hands.
- That's it, all that remains is to glue the last layers of tape.
The corners sticking out at the front can be trimmed. And that’s it, the base for decoration is ready! Add lace and beads for your unique bottle!
Source: https://samodelkinoblog.com/414879833350736628/kak-oplesti-butylku-atlasnymi-lentami-v-podarok-ili-na-prazdnichnyj-stol-avtor-annasolo/