How to sew a hedgehog costume with your own hands
The first one is the simplest. We select trousers and shirts that match the color scheme (red-brown with gray, black). Take trousers, a checkered vest in matching colors and a plain shirt in yellow, light green or cream. We will create the image of the hedgehog using a headdress. To make it, take a panama hat or cap. The headdress should be light and suitable in size. We cut off the visor from the cap, and the brim from the panama hat. Now we need to decorate it with needles, which we will make from black, brown or gray fabric, cutting it into triangles and sewing them into cones. You can fill the sewn cone with cotton wool or padding polyester to give it a shape. The cones must be sewn by hand to the headdress in a circle, starting from the bottom. Determine the number of needles yourself, depending on the size of the cap. Take a light, dense fabric, sew a cone out of it, and stuff it with cotton wool. Sew on the eyes, nose and mouth - this will be the face of a hedgehog. Attach it to the front of the hat. You can decorate the hat by sewing leaves or apples cut out of paper to the needles on top.
As a result, we will get a children's carnival hedgehog costume for a boy with our own hands. You can also make another version of the costume.
The second type of costume requires a little more time and materials to make. It consists of a jumpsuit with a hood, sewn according to a pattern of the appropriate size from corduroy, velor or other suitable fabric. Fasten the front with a zipper or buttons. Cut an oval out of light fabric (fleece) that imitates the belly of a hedgehog. Attach it to the overalls using Velcro. Sew ears onto the hood by sewing them from two pieces of fabric - the main one and the fleece used for the belly. Sew the spines of the head directly to the fabric of the hood. They can be made using the method described in the first version of the costume or, for example, by cutting needles out of foam rubber and painting them with brown gouache. It is also possible to make needles by cutting out triangles from dark polyethylene, gluing the cones and filling them with cotton wool. The spines can be sewn directly onto the back of the overalls or onto other fabric cut to the shape of the back and then attached to the back of the overalls using Velcro. Additionally, you can decorate the costume with artificial apples and leaves.
Using any method, you can sew an excellent carnival hedgehog costume with your own hands, which will definitely delight your child.
At any costume party, New Year's or dedicated to the Autumn Festival, you can meet kids in a hedgehog costume. This look is equally suitable for boys and girls. We will tell you how you can make a hedgehog costume with your own hands quickly and easily.
Making a hedgehog costume
There are many sewing options. We will talk about those that require minimal time, material and physical costs.
The gray hedgehog is very happy: He dressed up in a jacket. Covered in needles in front, Covered in needles behind. Runs through the grass in the forest, collects apples, mushrooms, leaves, nuts, and flowers for pins...
Here are the main features - gray, prickly, economical. The most important thing is, of course, a fur coat with thorns. The color scheme, in addition to gray, includes black and shades of brown. Let's take a closer look at how to make a do-it-yourself hedgehog costume for a child. The basis of the masquerade outfit will be a vest-cape with a hood, imitating the character’s fur coat.
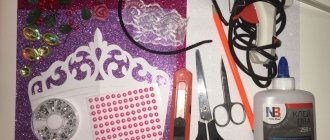
You will need:
- A piece of fabric of the appropriate color, one meter is enough;
- Braid, approximately 50-70 cm or button;
- Fleece in three colors, foam rubber (1cm thick) or Christmas tree tinsel to imitate thorns (choose one);
- Threads, needle;
- Glue gun;
- Multi-colored felt for making gifts of the forest or pictures.
First of all, you need to decide what you want to make the hero’s needles from. If your choice falls on Christmas tree tinsel, you may not be too strict in your choice of fabric, since the tinsel will completely cover the lining and the material will be practically invisible.
So let's get started:
- Cut out the base of the fur coat. It could be a cape-vest or just a cape. Please use the attached diagrams:
Connect the parts along the indicated lines.
- The hedgehog costume pattern N1 involves assembling the model using braid. Cut holes and thread the string through them. It is also necessary to prepare holes for the hands.
- Pattern N2 consists of two parts, they will need to be sewn together. Make a clasp under the hood.
- After assembling the vest, you can work on the spines.
- The simplest thing is to use matte Christmas tree tinsel with a white coating. Hand sew it tightly all over the fabric. It should look something like this:
Or like this:
Our hero, it turns out, may also be red-haired!
- If you decide to make needles from foam rubber, first paint the material on both sides. The color of the outer side should contrast with the inner layer. Acrylic paints are perfect for painting; after drying, they do not crumble. Dilute them with water 1:1 for ease of application and savings. If you don’t have acrylic on hand, prepare the following composition: a jar of gouache + 5 tablespoons of PVA glue + one glass of water. Apply it to the surface, being careful not to overdo it so that the inside of the foam does not stain. This coating will also not crumble or crumble after drying. When the paints have dried, the sheet must be cut into small pieces in the shape of straws or elongated triangles.
Hand sew them around the entire cape. You can arm yourself with a glue gun; the work will be completed much faster with its help. The result should be something like this hedgehog coat:
- Another way to make something like thorns is to make them out of fabric. Use fleece for this, it is thick enough, its edges do not fray during processing. Cut the material into triangles, then sew them around the cape along the back and hood.
You can also prepare strips of fabric of three different shades: dark, medium and light tones, approximately 10 cm wide. Cut them along the entire length and lay the resulting multi-colored fringe on top of each other, as shown in the picture below. Sew stripes onto the main outfit along the back and hood. The result might look something like this:
Carnival hat cylinder made of cardboard
Is carnival coming soon? Will your child be dressed as a magician or a gentleman from London? Or maybe she will be a real lady who cannot go out without an elegant miniature hat? Then you definitely need to learn how to make a cylinder hat out of paper. Of course, plain paper will not work for this job. The material should be denser, it is better to use cardboard.
What else is needed for this job:
- the main material (cardboard) is selected according to the theme of the future costume;
- pencil for making marks;
- PVA glue;
- adhesive tape;
- fleece;
- To create a beautiful shimmer, use varnish and a wide brush.
Before you make a paper hat with your own hands according to the instructions, you need to prepare for the upcoming work. It is impossible to make a top hat without measurements, of course, unless it is a miniature hat to decorate your hairstyle.
You are required to:
- measure the circumference of the child’s head with a sewing meter;
- think about what height of the finished product you need; making a very high cylinder is not recommended, it can cause discomfort when worn.
Now we’ll explain step by step how to make a paper hat with your own hands:
- We transfer the obtained measurements onto paper. The first thing to do is to cut out a cylinder (the top part of the hat) according to the circumference of the head.
- Based on the resulting cylinder, we cut out the bottom and crown. Glue the parts together (Step 2)
- Let's start making the cylinder fields. We attach the blank to the cardboard and trace it. We cut out several identical parts. The second part will be attached to the crown of the finished cylinder. Don't rush to cut the first one. Draw another circle inside this circle with a diameter smaller than that at the base of the workpiece. We cut out the parts and cut the inner circle with a large fringe. Glue the elements together.
- Almost done. You need to attach the previously obtained “teeth” to the base with glue. To ensure that the finished hat fits tightly to your head, glue a layer of fleece inside.
For a spectacular result, coat the cylinder with varnish and leave until completely dry. Now you know how to make a cylinder hat out of paper with your own hands. But this option is suitable for little gentlemen, but what about ladies?
The second version of the universal hedgehog costume is this:
- overalls or shirt (shorts) with trousers;
- light shirt or white turtleneck;
- for needles we use a vest;
- tie and bow tie for boys;
- hedgehog mittens;
- hedgehog slippers;
- makeup;
- hedgehog scarf
For this costume you will need overalls, a checkered shirt or a plain gray sweater.
If the hedgehog costume is made for a girl, then instead of overalls and a shirt, you can choose a plain, dim dress from your daughter’s wardrobe and sew a small apron to it. There is very little left to do: a hat, a cape with needles and accessories in the form of bright autumn leaves, mushrooms and rosy apples in a basket.
How to sew a vest with “needles” for a hedgehog carnival costume?
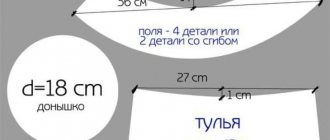
We sew a vest from the following types of material: cloth, flannel, fleece, velor.
The sizes in the diagram are for children 4-8 years old.
Pattern for sewing a vest for a carnival hedgehog costume
Attention. In the diagram, the dimensions are given without seam allowances, and there is no fastener bar, so when cutting the fabric you need to leave about 5 cm for the seams and the bar.
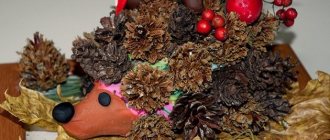
When the vest is ready, you can attach needles made in the form of cones from dense material, as well as mushrooms, apples and other gifts of autumn that the thrifty hedgehog has collected.
Vest for a hedgehog carnival costume with leatherette “needles” and gifts of autumn
So you can sew mushrooms, apples from felt, fill them with cotton wool for volume, and sew them to the vest
A hedgehog's fur coat may look like this:
Vest with fabric “needles”
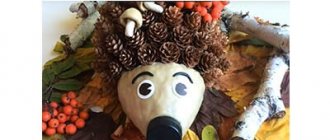
Making a headdress for a hedgehog
The hat is made on the basis of an old panama hat or cap. Needles are attached to it, which are simply made from foam rubber strips for insulating windows.
This strip is cut into pieces of the required length.
Sew the needles to the headdress starting from the top of the head in a spiral, and then tint the tips of the spines with acrylic and leave until dry.
In a similar way, needles are attached to a cape - a rectangular piece of fabric with a drawstring at the collar into which a ribbon is inserted.
Bright leaves are cut out of colored cardboard and glued to the cape. It will be difficult for a child to carry a basket with real apples, so you will have to make light fruits from polystyrene foam, which is used for wall insulation.
Apples or mushrooms are cut out with a regular stationery knife and painted with acrylic paints. Several of these apples can be glued to the needles with silicone glue.
Educational video master class on sewing a hat for a hedgehog costume:
For the bunny girl you will need:
- white sweater;
- plain skirt;
- ears on a hairband and a ponytail.
The following options are also suitable:
- with a dress, for example, white or pink;
- white T-shirt with a tutu skirt and a vest or jacket;
- white or light-colored dress trimmed with fur.
How to make a tulle skirt is described in detail with photographs in this article.
Festive hairstyles for girls for a matinee are described in detail with video tutorials in. When creating a costume, take care of a beautiful festive hairstyle. If you still haven’t decided what kind of costume your child wants, then we recommend the always popular Christmas tree costume for girls, as well as detailed instructions for creating it with your own hands.
If you have the opportunity, make a small white faux fur vest, but your bunny may feel hot during outdoor games near the Christmas tree, and this is completely unnecessary.
Video on how to create a bunny costume with your own hands without a sewing machine
Costume for girls
Girls are less likely than boys to choose or receive the role of a hedgehog at matinees. But making a hedgehog costume for a girl is also easy. For small hedgehogs, all materials and techniques for their use that can be used in boys’ costumes are suitable. Shirts and trousers can be replaced with blouses and skirts. But there are a few ideas that will help you create a unique girly hedgehog costume.
In this video you will learn how to make various animal costumes for children.
Organza
To create a hedgehog costume for a girl you will need:
- wide elastic band;
- brown and beige organza;
- crochet beret (beret with holes).
The skirt consists of three levels. To create them, you need pieces of organza 15-20 centimeters wide. The length is selected based on the required length of the skirt level, multiplied by two. The length of the elastic will be equal to the baby’s waist circumference minus 1-2 centimeters. The ends of the belt are sewn together and put on the back of the chair for ease of work. First, take the longest strips of fabric, form loops from them and tighten them around the elastic. The same loops are made from medium-length fabric, tightening them in the gaps of the loops of the first layer. In the same way, a row of short strips is made. To make the skirt even more reminiscent of hedgehog spines, the free ends of the material are sewn together.
The hedgehog's head is made from strips of organza measuring 5 by 10 centimeters. Loops are formed from them and tightened in the holes of the beret. The costume is complemented by a gymnastic leotard with long sleeves or a blouse of a suitable color. Makeup is applied to the baby's face.
Hairstyle
Needles can be made from short and medium length hair . To create this hairstyle you will need: styling wax, hairspray, hairpins or bobby pins. Each strand must be treated with wax, rolled into a rigid strand, which is folded in half and secured in a vertical position with hairpins and bobby pins. For greater hold, the hairstyle is sprayed with hairspray.
Any parent can make a beautiful and creative hedgehog costume with their own hands. There is no need to be afraid to fantasize and experiment with materials; it is enough to put in a little effort, because the most minimal creative skills are required. And if you make a costume together with a child, then this activity will become an interesting adventure for him, which he will remember even in adulthood.
How to make ears for a bunny?
So it turns out that you will only have to work hard on making the ears, which are always on the top of the bunny’s head; sometimes in stores they are sold in ready-made form.
Don't forget about overalls, they are suitable for very little ones who also want to be bunnies.
- The base for the ear is cut out of thick cardboard and covered with white fabric or faux fur.
- A small piece of fur is left for the tail.
- The inside of each ear is made of colored fabric: blue is suitable for a boy, and pink is suitable for a girl.
- The finished ears can be sewn to an elastic band that is tied under the chin, but it is much more convenient to attach them to a plastic hairband.
Video on how to make ears from a headband?
Bunny costume for girls for school
Not only kids dream of a New Year's fairy tale. The bunny costume is deservedly popular among older girls. To create the perfect playful or romantic look, you will need a minidress with white fur trim along the collar and hem of the dress.
If everything is in order with the dress, then now you should make the ears on the head, cuffs and tail.
In a bunny costume, it is not at all necessary for the ears to be on top of the head. They can be omitted, then you can do without cardboard inserts.
The ears, cuffs and fluffy little tail are made of white fur. And if you have a black bow tie in stock, believe that success is guaranteed! Makeup will help highlight plump lips and big eyes. And don’t forget about the mustache, which you can draw with an eyeliner pencil. They will give the image of a bunny a special charm.
Squirrel costume
Most often, you need to make a squirrel costume for a girl, but you can also try to make a mischievous boy squirrel. To make a squirrel costume, you will have to purchase a piece of red faux fur.
A terracotta-colored dress or suit will become the basis for creating an image. In addition to this, you will need ears - triangular pieces of fur, which for a girl are attached directly to the tops of their braids, rolled into snails, and for a boy - on a small knitted hat.
The main decoration of any squirrel is, of course, a fluffy tail.
How to make a tail for a squirrel?
First, a frame is made from wire. A cover made of faux fur is pulled over it and sewn to the hem of the dress or the panties of the suit. To prevent the furry miracle from falling down, otherwise it will turn out to be a fox instead of a squirrel, it should be raised and secured with thin fur harnesses like a backpack.
The boy will really like this papier-mâché acorn, reminiscent of the one that the prehistoric squirrel from the funny cartoon “Ice Age” was constantly running around with.
The squirrel girl will not refuse a basket containing nuts in gilded foil, almost like in “The Tale of Tsar Saltan.”
Squirrel costume for girls:
- Tutu skirt, white lace blouse, necklace, ears on a headband using the kanzashi technique and a tail made of organza or tulle, socks or knee socks, shoes or slippers.
- We recommend adding a big bump to this suit, so the image will be brighter.
- Hairstyle: a braid or 2 buns on the sides, or 2 braids, it is important that the headband stays in place and does not fall off.
- To make the tail stand, we sew a button on the dress or skirt and take a hat elastic or any other thin one and sew it to both sides of the tail. So that they are worn like a backpack to match the blouse and then are not visible.
Video ideas for a squirrel costume:
Detailed video on how to make ears on a hoop for a squirrel costume:
Squirrel Costume Necklace:
Paper hedgehog costume. Spiny hedgehogs
Mothers who know about the baby’s special love for the hedgehog will want to make their babies their favorite characters for the New Year holidays. Where to start and how not to spend a fortune on 1 hedgehog costume? How to make it beautiful and suitable for wearing on other holidays? How to modify existing clothes?
If your child decided to be a hedgehog out of great love for the hedgehog from Smeshariki or Sonic, then here are detailed instructions on how to make this costume.
What does a universal hedgehog costume look like?
1. Option of a hedgehog for a handicraft mother:
panties, shorts or overalls; shirt or turtleneck, blouse; vest embroidered or covered with needles; headdress; makeup; mittens; tights or knee socks; sandals or boots.
2. Simplified with a cloak or cape:
option with a cloak and hood or headdress; jumpsuit or other option; decorations made of mushrooms, leaves, fruits.
The cape can be held on the hood and be embroidered with needles.
3. Hedgehog costume for boy:
jumpsuit in dark colors: black, gray, brown; a white shirt (with a black bow will be a real gentleman) or a turtleneck; pants or shorts, for a creative hedgehog we choose checkered shorts; the vest will match a suit, you just need to decorate it or trim it with needles; the hat can be with or without a hedgehog face; decorations for the entire costume; makeup on the face.
4.Hedgehog costume for girls:
Dress; a headdress made of paper with needles, reminiscent of a cape; tights; sandals; makeup.
5. The second version of the suit without a dress for a girl:
a suit of light-colored shorts and a vest; headdress; everything is embroidered with needles and mushrooms and leaves are added; socks or tights; sandals.
6. Third option for those who know how to knit:
A hat made of gray or black grass decorated with berries, fruits, mushrooms; vest made of the same threads; a tutsie skirt (no need to sew) or shorts; light blouse; tights; sandals; makeup.
The hedgehog has ears, so it’s better to tie them on, this will make the costume look more realistic!
How to make needles on a hedgehog costume?
Fur
Any important moment will do; varnish or water with sugar will do to give it a kick, but option 1 is preferable, and the effect is immediately noticeable.
Artificial or natural, depends on the availability in home bins. Sew a piece onto the back (overalls, vest, blouse) and head (hood or hat) and give them the stable appearance of needles.
Foam needles:
1. Cut the foam into 2 by 2 sticks, then make sharp ends.
2. Decorate with gouache. To do this, mix gouache and PVA glue. It’s better to make them 2 colors, so they look more realistic and three-dimensional.
3. Allow to dry and sew or glue to a vest, raincoat or other product.
Tie needles:
1. We use grass threads and do not make needles separately. 2. We knit with elongated loops, but then they will look hanging, which does not look beautiful.
Garbage bags
The same problem as with knitting is hanging needles.
We tie the cut bags onto a knitted mesh or scarf. We receive needles in large quantities.
From paper:
1. Cut strips and fringe each part. 2. Glue it onto a paper cloak and decorate it with gouache. 3. Make cones and glue or sew to the desired piece of clothing.
Sew from fabric
A similar problem is that the needles do not stand, but hang down.
Fabric needles:
1. Make it in the shape of triangles; 2. We cut the fabric in the shape of diamonds and sew it to the fabric in the middle; 3. Cut strips of fabric, cut each into needle-like edges and sew to the product.
From rain or tinsel
True, the amount of such starting material should be large and in approximately the same color.
From an artificial Christmas tree
For those who have an old unwanted artificial tree, use its branches, we recommend painting them from green to brown or gray.
How to knit and sew a hat for a hedgehog?
For sewing, you need a pattern and an idea of how your hedgehog will look.
Take a baby's cap, it's better. Try simply sewing a hedgehog’s face with eyes and ears on top.
We knit a hat for a hedgehog:
1. Take the finished baby’s hat and draw a sketch. 2. Select the necessary threads and start knitting in the round. If you are using grass threads, then you already have needles. 3. Knit the cap according to the principle of a children’s cap, adding strings.
Other options for creating a hedgehog hat:
1. A hedgehog is made from a bottle, for those who are not good at sewing or knitting, we show a ready-made version, all that remains is to repeat and decorate.
2. From cones, glue cones onto the base; they can also be used for needles on the back. Just consider their weight so that they are not too heavy for the child.
3. Using salt dough, make a body into the shape of the head so that the child’s head can easily fit into it. When the hedgehog is baked and varnished, all that remains is to select the inside and cover it with fur or fabric.
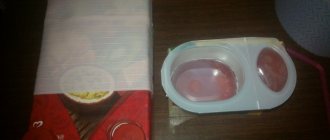
Quick option from plastic dishes
4. A hedgehog is cut out of a plastic plate, painted and sewn on both sides of a cap or other cap. Try gluing both halves together and putting them on your head like a cap.
What should be the makeup for a hedgehog costume?
Use exclusively cosmetics with ingredients that are harmless to children's skin. Another option is to limit yourself to drawing a nose and mustache.
For those who master the art of painting, we offer this option:
The basic tone is darker than the skin, brownish, darker towards the edges of the face; make the outline dotted with needles, mix black, gray and white paints; black tip of the nose with bulla speckling; repeat over centuries.
We hope that you will be able to find the right costume for your baby or toddler!
Fashionable animal hats today do not leave either children or adults indifferent. Both of them are happy to wear headdresses in the form of charming animals - bunnies, bears, owls, etc. We did not stand aside and invite you to knit such an animal hat yourself, which will undoubtedly be exclusive.
Knitting such an animal hat will require the following materials: hook No. 2, sand-colored “Vera” yarn (brown, gray, black), any black yarn of medium thickness, “Travka” yarn for decorating needles, embroidered eyes on a textile base, needle and thread, padding polyester and scissors.
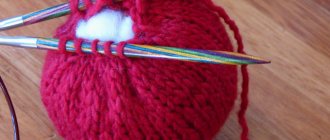
We start knitting by knitting 5 air loops.
We close the resulting chain into a ring, and then begin to knit single crochets in a circle, in the first row making additions in each loop, in the second - through a loop, in the third - every three loops.
To determine whether decreases need to be made, apply the flat disk that was tied earlier to the top of the child’s head. If one edge reaches the level of the crown, then you can move from knitting the crown to knitting the side walls of the fur hat.
In this case, we make decreases only a few times - 1-2 decreases per row during knitting two rows. There is no need to make them anymore, since due to knitting without additions, the product will fold on its own. Of course, this largely depends on the yarn, but in most cases, such a transition requires no more than 2-3 rows with decreases.
Now you will need to tie an elastic band so that the hat is securely fixed on the baby’s head and does not turn from side to side even with active movement. To do this, we knit 3 air loops for lifting, and then we knit 1 row of double crochets.
Next, we knit the elastic band itself, which consists of embossed double crochets - front and back. These stitches will alternate in a 4×1 ratio, that is, first we knit 4 front relief stitches, and then 1 purl stitch.
To make a front embossed double crochet, make a double crochet and then insert a hook under the double crochet of the previous row as shown in the photo:
To make a raised purl stitch, make a yarn over and then insert a hook as shown in the photo (from the reverse side):
By knitting an elastic band in the same way, we get this pattern:
Now fold the hat in half and measure its length with a centimeter.
From “Grass” yarn we knit a chain of air loops, the length of which is equal to the length of the hat folded in half.
We knit a fabric from double crochets.
Once the rectangle is ready, we knit a small protrusion on the side:
We do the same on the other side:
We put the “needles” aside and start knitting the parts. To make a spout, we knit 5 chain stitches, close them in a ring and knit 2 rows of single crochets with an increase in each loop. In the third row we make 2 decreases and knit single crochets. In the fourth and subsequent rows we make 3 additions so that the knitting takes on the shape of a cone.
We knit in the same way until the hedgehog’s muzzle reaches the desired length.
The ears are knitted as follows: we cast on 5 air loops, close them into a ring, and then knit single crochets only up to half the ring.
The holidays are already coming
literally on your heels and urgently need a costume for a matinee in kindergarten or school.
What is offered in stores is not always pleasant: the child wants to be individual, not like others. Therefore, it is worth sewing a hedgehog costume with your own hands
.
Necessary materials
To start making a costume, you need to look through your child's wardrobe. Since for the first version of the costume the main detail depicting a hedgehog will be a cap or panama hat, the shirt, vest and pants are selected from the son’s clothes. Clothing should be brown or reddish. And from an old Panama hat, cutting off the brim from it
, sew the hedgehog itself.
Needles, needles
Triangles are cut out of dark fabric
, rolled into a cone and stitched.
They stuff a little cotton wool into them and start sewing them to the Panama hat from the bottom in a circle. How many needles are needed and how often to sew them is up to you
.
The more often, the more beautiful. Next, the muzzle is sewn: a larger cone is cut out of light fabric, stitched, stuffed with cotton wool, and painted. You need to attach the muzzle to the Panama hat, from the front side. DIY hedgehog costume
- made.
Complex option
Another version of the costume will require more strength and skill from the needlewoman. Yes, and we need to prepare a lot of material. For sewing, you need to prepare velor fabric and sew a jumpsuit with a hood
.
Make the fastener in front with a zipper and Velcro. From white velor you need to sew an oval belly, which will also be attached with Velcro. Now we need to deal with the needles. They are made from foam rubber
, painted with brown gouache and sewn to the back and hood. You can make needles in the same way as in the previous version: sew cones, stuff them with cotton wool and sew them on. Ears, combined from two colors, are also attached to the hood.
To add brightness to the costume, you need to sew mushrooms and apples and secure them among the needles on the back and head. Another version of the costume is ready.
Craftswomen's proposals
A lot of options with patterns and instructions can be found on the website, in the “ do it yourself”
"
If you follow the instructions and advice
, you can sew more complex options.
For children of school age, primary school, the outfit will be larger, and you will spend
more labor. But the effect of a suit that was sewn jointly with my daughter is always higher than that of a store-bought one. The beige hedgehog version presented below involves large needles, which are sewn on a sewing machine, stuffed with padding polyester and manually sewn to the back and hood. The belly is cut out of yellow fleece and sewn on the front. The classic option for a girl is a hedgehog.
Fur hedgehog
The most convenient option for sewing a hedgehog costume is to use faux fur in brown or dark gray colors. For a suit, you need to sew a dark-colored vest and trim it with fur along the entire perimeter and along the edge of the sleeve. A hat is sewn separately, to which the ears are sewn. Mushrooms, leaves and apples are produced separately. They can be made from fabric, stuffed with cotton wool. Or maybe from colored paper. Ready-made forest fruits are sewn onto a hat and vest. And on your face you need to do makeup in the shape of a hedgehog’s face. Just draw a “face”, a muzzle. This suit is complemented by a beautiful white shirt and trousers to match the fur. The result is a nice and complete image. This option also has a lot of room for the needlewoman’s imagination!
DIY hedgehog costume
- ready.
On the website of needlewomen, visitors can use all the patterns offered by the masters and learn how to sew and knit outfits for their children. The main thing is that everything will be made with love and imagination.
You will need
- - cap or Panama hat;
- - dense fabric of gray and brown color;
- - light dense fabric;
- - needle;
- - threads;
- - colored paper;
- - PVA glue.
Instructions
Choose clothes in a reddish-brown color scheme: a shirt, overalls or shorts; a vest and tie will give the hedgehog some respectability. Complete the costume
headdress with spines, like a
hedgehog
.
Choose fabric in gray and brown shades. It can be drape or cloth from an old coat, or corduroy and denim. Cut the fabric into fairly long strips three to five centimeters wide. The length of the strips may vary. Cut the finished strips crosswise every 3-5 cm, not reaching the edge 0.5 centimeters. Fold each part of the strip into a triangle and iron it, sewing the open edge.
Sew the blanks by hand in a circle, starting from the bottom of the cap, moving the needles of each next row. Make several individual needles and sew them with a blind stitch at the top of the head. Cut out leaves, apples and mushrooms from colored paper and glue them to the needles with PVA glue.
Make a hedgehog's
. Cut out an equilateral triangle from light fabric, fold it in half and sew along the long side. Turn the piece right side out. Fill the resulting bag with filler: cotton wool or padding polyester. Sew two round buttons in place of the eyes. Embroider the nose with black thread and the mouth with red thread. To prevent the hat from flying off your head during the holiday, sew on strings or a hat elastic.
The hedgehog is a cute little inhabitant of the forests; children really like this image, and if they have heard a hedgehog stomping and puffing, they will be happy to imitate his habits at a matinee, dressing up in a funny costume with spines on the head and back.
You will need
- For a jumpsuit with ears and a belly:
- - brown corduroy or spandex;
- - long zipper;
- - Velcro tape;
- - a piece of pink satin fabric;
- - a piece of fleece.
- For thorns:
- - scraps of fabric in brown, black, gray.
- - thin foam rubber;
- - brown gouache;
- - Super glue.
- For decoration:
- - pieces of felt red, yellow, green.
- For a hedgehog costume consisting of a hat, vest and pants:
- - cap or panama hat;
- - vest and trousers in brown or gray;
- - half a meter of black fabric for the “spines”;
- - pieces of padding polyester or cotton wool;
- - a piece of black faux fur;
- - pieces of felt of different colors for decoration;
- - 20 cm of light fabric for the “muzzle”;
- - 3 black beads for eyes and nose.
Instructions
If you have opted for an old unnecessary shirt, strip it open, leaving only the front and back. Cut to the required length, then give the edges of the shelves a semicircular shape.
Carefully fold the fabric so that the wrong side is on the outside. Place the pattern pieces on the fabric and secure the pieces in this position. Use needles or pins to secure.
Cut out the details of the vest, leaving 4-5 cm on the sides (about 2 cm for the seams, and 2 cm for “reserve”; this way the vest will not hinder the child’s movements). By hand or using a sewing machine, overcast the edges of all pieces. Then sew the shoulder parts of the front and back. This must be done from the wrong side. Also, on the wrong side, sew the side seams.
Using an iron, smooth out all the joints of the vest parts. To cover the armhole, use bias tape in a color contrasting with the main fabric. Sew it around all the edges of the vest (start and end in the middle of the back). Sew on a detachable snake or sew buttons on one side, sew on false loops from the binding.
Cut out patch pockets, trim them with bias tape and decorate them with appliques, embroidery or fringe. If necessary, sew on patch pockets. Depending on the style of the vest, the pockets may be made of fabric of a different color or tone. The children's vest is ready.
Video on the topic
Sources:
- sew a vest in 2017
A children's carnival mushroom costume for the Autumn or New Year holidays can be bought in a store, but it is much more fun to make it yourself with your child. Working on a costume is a pleasant experience and immediately puts you in a festive mood.
You will need
- Shirt, trousers or skirt, red or brown fabric 1 m, white fabric 0.5 m, foam rubber 0.3 m
Instructions
The fly agaric costume looks bright and elegant, and it’s quite easy to make. You need a beige, white or yellowish shirt and trousers. Gather the sleeves and bottom of the pants with an elastic band. Draw blades of grass and leaves on green fabric or paper, cut them out and sew or glue to the bottom of the trousers. Make a shirtfront from red fabric with large white polka dots (you can draw polka dots on the fabric yourself). You can complement the fly agaric costume with a cape made of the same fabric.
For a girl, sew a fluffy red skirt and a white blouse. Decorate the cuffs and collar of the blouse with blades of grass made from green fabric. Decorate the hem of the skirt with an applique of mushrooms.
The main detail of the costume is the hat. The easiest option is to make a hat out of paper. Take thick paper: whatman paper, thin cardboard, cut out a circle with a radius of 40-45 cm, roll it into a cone and glue it together. Paint the hat red and scatter large white circles across the red field. Attach ribbon ties or an elastic band to the hat.
You can also make a fly agaric mushroom cap from an old felt or straw hat with a brim. Take a piece of red fabric and cover the frame. Paint large peas on the fabric with white acrylic paint.
Similarly to the fly agaric mushroom, you can make a children's boletus mushroom costume, the difference is in the color and shape of the hat. A white shirt, brown trousers and vest are suitable for both boys and girls. To make a hat, take foam rubber or batting; use a hat with a brim as a frame. Cover the crown with foam rubber to give it a convex-rounded shape and cover it with brown fabric. Line the inside of the hat with foam rubber trimmed with white fabric.
A more complex option is a beret-shaped hat. From white or beige fabric, cut out a base - a strip 10 cm wide and a length equal to the circumference of your head. Fold it in half and line it with adhesive fabric to give it shape. Cut the top of the hat into a circle from brown fabric and cut the same circle from light fabric. Cut a hole in light fabric with a diameter equal to the circumference of your head. Place the circles right sides together and sew them together, then turn them inside out. Similarly, cut out the lining and connect it to the top.
Cut two circles from foam rubber: one with a diameter equal to the diameter of the top of the hat, the other slightly smaller. Connect them together and make a hole in them around the circumference of the head. Insert the blank into the cover, between the lining and the top, and sew this entire structure to the base. The boletus mushroom cap is ready. Based on these ideas, you can make your own original mushroom costume.
Video on the topic
When going to a party, children want to be like their favorite cartoon characters. Most often, bunnies and squirrels no longer suit anyone; children want to appear as a ninja
or Spider-Man.
costume
in stores , which is probably expensive, but you can sew it yourself at home.
You will need
- Green and red satin fabric, Velcro, scissors, thread, needle, measuring tape, foam rubber, green thick fabric for the shell, elastic band, album sheet, pencil.
Instructions
Make a pentagon pattern with trapezoids and apply it to green fabric. Leave some space around the edges.
Fill the rectangle with trapezoids with foam so that it holds its shape, and sew 2 straps with which it will be put on the body.
Sew a rectangle consisting of two identical parts and also stuffed with foam rubber onto the front side of the straps.
Video on the topic
note
To prevent the foam from coming loose, use superglue or sew on backing fabric. Make the straps with ties so that you can put on the shell more freely, and then choose the height of the straps yourself.
Helpful advice
The Ninja Turtle costume will look even brighter if you make the shell out of leather. If you remove the shell, you will get an ordinary ninja, who just needs to take a weapon with him and the image will be complete.
Belly dancing is a mysterious and attractive art that is becoming increasingly popular among modern girls who want to perfectly control their body and amaze others with the art of oriental dance
.
Everyone knows that an integral element of dance
, without which complete immersion in its style is impossible, is
costume
.
Costumes for oriental dances cost a lot, but you can sew a costume
with your own hands, and it will delight you with its originality and uniqueness for a long time.
Instructions
First of all, you need to determine the style. There are many styles of suit
ov for
dancing
, and you need to choose a style based on your body type. The suit should highlight your assets.
Different types of skirts are suitable for different figures - it can be a circle skirt, a year skirt (fish style), a flared skirt, a skirt with slits on the sides, and instead of a skirt you can sew a suit
and bloomers.
Some dance
do not use a bodice with a skirt, but a long, covered dress.
Bloomers with slits will be a good idea for girls who have an elegant and slender figure. However, the skirt has always been considered a universal dance
suitable for any body type. Choose the style of your skirt and the fabric from which you will sew it.
Then choose a sewing technology, depending on the selected skirt style. The skirt can be either full or single-layer, with or without flounce, whole or with slits. Depending on this you will calculate the amount of fabric.
Not a single suit
for oriental
dance
it will not look complete without a richly embroidered belt. For the belt, make a pattern in advance, and using this pattern, sew a base of thick fabric that will fit well on the figure.
Hedgehog image
- respectable, solid, solid. It would be good if the boy for this costume was not skinny.
Top
. The shirt is plain (blue, white, yellow). The vest is colored, with a pattern (you can sew stripes of patterned, even glittery, braid onto a plain vest). For “solidity,” you can tie a small pad or something thick under your shirt.
Bottom
. Pants can be plain or striped, which should be in harmony with the vest and the rest of the suit.
On foot.
Elegant “respectable” low shoes.
On the head.
The hood-cape is sewn from fabric such as a flannel or gray cloth (Fig. 1). If possible, it is better to sew this part on a lining (colors - black, gray, and possibly red or white, if it is in harmony with the rest of the costume details).
Needles
- from black plastic bags. Cut and fold the pounds (Fig. 2), glue them with universal glue (Moment, etc.) and sew the wide flattened end onto the fabric of the finished hood-cape. The hood is fastened with 2 buttons under the chin. You can attach a butterfly bow to one of the buttons (after making a loop on it). You can simply attach the butterfly with an elastic band. The color of the butterfly should be contrasting with the shirt and hood.
Mask
— from cardboard (see manufacturing technology in the chapter “Making masks”), but you can do without it. It is covered on top with the same fabric from which the hood is sewn. The nose is a piece of foam rubber, covered with black jersey (a piece of old black tights) and sewn to the mask. You can make a mustache at the very end of the nose. To do this, you need to thread pieces of thick fishing line through the nose. Secure them in the holes so that they do not pull out with glue (from the wrong side). You can make an outline around the holes for the eyes: stick a narrow black tape or simply outline the holes with gouache with the addition of PVA glue or black ink (Fig. 3).
The mask is attached with an elastic band, and the hood must be put on the mask so that there are no gaps.
Makeup for children's New Year's costumes
All that remains is to warn parents about the makeup. You can draw a nose, mustache or other details that will highlight the image. But for this you need to choose high-quality paints so as not to get a banal allergic reaction instead of the happy feeling of a fairy tale.
So, if in your dreams a child already sees in his hands the main prize of the New Year's holiday for the best carnival costume, do not let things take their course. Call on your creativity and start creating an exclusive costume for your child with your own hands.
Very soon the most favorite holiday for children and adults – New Year – will be knocking on our doors. And with it, it’s time for matinees in kindergartens and at all kinds of New Year’s trees. It's time to think about creating an original and fun costume for your beloved children, grandchildren, nephews and godchildren.
One of these options could be the image of everyone’s favorite hedgehog (photo), especially since you can recreate its characteristic features in a huge number of ways. And it is not at all necessary to resort to the services of sellers of ready-made suits. Creating a holiday outfit will not take much time, a variety of materials can be used, and the result will definitely bring joy and childlike gratitude, which no amount of money can buy.
How to apply facial makeup for a hedgehog carnival costume?
Makeup for a hedgehog costume on a child’s face can be done using makeup pencils or paints used by film actors. Since the makeup will be applied to small children, it should be made from natural ingredients. Water-based face painting is well suited for this purpose.
If you don’t have such paints, then you can use women’s makeup pencils and dark powder, but first you need to give your child an allergy test on the wrist. If there is no allergy, then we begin to apply makeup from the middle of the face to the chin and hairline. At the end we draw needles with dark pencils.
The makeup goes well with the “hedgehog pin” hairstyle.
Makeup for a hedgehog carnival costume
So, we are convinced that every mother or father can make a carnival hedgehog costume for their child, even if there is no time to tinker with it for a long time, in this case the costume will be simple to make.
How to make a hedgehog costume with your own hands from scrap materials
Depending on what you have to create a New Year's costume, you can make different versions of this outfit. Three variations are commonly used:
- Vest and hat.
- Vest with hood.
- Cape with a hood and mask (or without a hood and with a cap).
There are quite a lot of materials from which the above options can be made:
- Knitted fabric
(when the parts of the product can be knitted using knitting needles or a hook). Usually for such costumes a yarn called "grass" is used in combination with a plain regular thread. - Artificial wool
in combination with velor or fleece. - Any fabric with “needles” sewn onto it
(which can also be made from all kinds of materials).
And really handy tools include “rain” garlands, clothespins, old sweaters, and you can even just focus on a child’s hairstyle. All decor is sewn onto a ready-made children's item, or the item of clothing is made independently using knitting or sewing.
Examples of DIY children's hedgehog costumes
How to sew a hedgehog costume for a boy
We offer you one of the simplest options for a hedgehog costume for boys.
, the creation process of which involves stitching together parts from different materials.
One of the features of making any clothes for children is that you won’t spend a lot of effort on cutting and sewing, even if you don’t have a sewing machine at home. Therefore, such a costume can be easily made even in one evening. Such a kit will look like this:
It consists of two parts: a vest made of velor and faux fur with long pile and a hat.
The longer the pile, the easier it will be to form it into needles. Also, to decorate the hat you will need a piece of black fabric (for the nose) and eyes from a soft toy or multi-colored felt for making them yourself. Large round buttons are also suitable for this detail. In general, use for creativity those materials that you have on hand or that are not difficult to buy.
To decorate the back, it would be very nice to use felt decorations depicting the standard “prey” of a hedgehog: apples, mushrooms, autumn leaves. You can also use real leaves for decoration, attached to the vest using hot glue. Another option is to cut out all the above-described elements from colored paper.
Examples of vest decor for a hedgehog costume
Hat with “needles”
The hat is also made of artificial wool and velor (which, by the way, can be replaced with fleece). For this we need:
- Printout of Scheme 1.
- Faux fur and velor fabrics.
- Some black fabric for the nose.
- Sewing elastic band.
- Sintepon or cotton wool.
- Thread and needle or, if possible, a sewing machine (having one will greatly speed up the process of creating a hat).
- “Eyes” for the hedgehog’s face.
Scheme 1 – Pattern of a hat from a hedgehog costume for a boy
The above Diagram 1 should be printed on an A4 sheet, placing the drawing on the entire sheet (this function is in the menu for printing files on your computer).
Important!
Please note that the details are given without additional distance for allowances, so add 1 cm in the area of the side seams, and for the elastic around the circumference of the head - 3 cm at the bottom.
Then you need to cut out 6 parts for the hat itself (faux fur), 2 parts for the muzzle (velor), 4 ears (velor) and 1 for the nose.
After this, we will assemble the hat by sewing six wedges on the sides of the parts, bend the bottom 3 cm for an elastic band (the length of which corresponds to the circumference of the child’s head), insert it and stitch it.
Then we sew the details of the muzzle to the mark on the pattern, fill it with padding polyester or cotton wool and sew it to the main hat. After this, we sew 2 parts together and sew the ears to the “muzzle”. We fill the nose with soft material and sew it to the front of the hat. We sew on the eyes last.
Advice!
If buying faux fur is not an option, replace it with an old sweater in a matching color. In this case, you will need to process the edges of parts made from it.
It would also be useful to decorate such a hat with the decor that we wrote about above. This technique can also be applied to a vest, the manufacturing process of which will be described below.
Vest
Whatever materials you choose, the vest can be sewn using a standard pattern, such as the one shown in Diagram 2. Here are options for three vest sizes.
They should be suitable for most children, for whom such a costume would be appropriate based on age.
Scheme 2 – Patterns for vests of different sizes
The child for whom the costume is being sewn needs to measure the chest circumference and, based on this, choose one of the pattern options suggested in the diagram. If necessary, add or subtract 1-2 cm from the width of the parts.
The material consumption will be the desired length of the product and another 5 cm. These models do not have a fastener. If you want to add buttons or a zipper, add another 1.5 cm on the front side of the zipper.
To cut out the parts, you need to add 1.2 cm to the seams in those places where the back and shelves will be sewn together. Let us remind you that the back is a part with a fold made of faux fur, the shelves are 2 parts without folds made of velor or other velvety material.
Reference!
A part with a fold is an element of a product in which the pattern involves placing fabric on the fold in such a way as to create a part of symmetrical parts.
For example, the back pattern is applied with the straight side to the fold of the fabric and secured to it with eyelet pins. The contours of the back are transferred to the fabric using chalk or a piece of soap. The pattern is then removed and the piece is cut out and unrolled. A part without bending involves all the same operations, only without bending the fabric. That is, the shelf pattern is transferred to the fabric twice without folding.
How to make a hedgehog hat for a child with your own hands photo
3. Assembling a six-piece hat: sew all 6 wedges along the side seams to each other, process the bottom if the fabric is loose (I sew from a sweater, so I do all the seams on an overlocker)
4. Bend the bottom of the hat 3 cm, pull in the elastic (around the circumference of the small hedgehog’s head).
5. Sew the muzzle to the mark, stuff it with padding polyester, and sew it to the hat. Since I used fleece for the muzzle, there is no need to process the edge - the fabric does not fray.
7. We stuff the nose with padding polyester and sew it on.
I think that MK will gain the greatest popularity before matinees dedicated to the day of autumn or the New Year. In any case, I wish all children good roles in productions, and all mothers patience and imagination, since this is not the first and far from the last costume that we have to compose and implement. And that's great! Invent, create, and in 20 years you, together with your now completely grown-up child, will laugh remembering all these hedgehog hats and ninja turtle costumes from improvised means. Warm memories, moms!
Hedgehog costume for girls: quick and easy
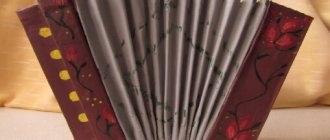
It is quite easy to repeat the idea of a cape costume, which, of course, can be used for boys and girls with equal success. But still, a costume in the form of a cape will be more interesting for little princesses in the sense that such a thing can easily be worn on any beautiful dress.
By following the instructions for making a cape, you can get the following result, changing the materials to your taste and their availability in the house.
Examples of ready-made capes for a hedgehog costume
Cape with “needles”
As they say, everything new is well forgotten old. Here we will offer a design option for a children's carnival costume, which was taken from a book of the late twentieth century. This product is quite easy to reproduce. To sew a cape you will need:
- Any fabric of a suitable color (fleece, velor, fleece, cloth).
- Material for needles. The authors suggest that craftswomen use plastic bags, but you can also use just fabric that has a different texture from the main fabric. These needles can also be stuffed with filler, then they will stick out and further enhance the resemblance to hedgehog spines.
- Cardboard and elastic band for a mask.
- Glue, thread and scissors.
The hooded cape can be fastened with buttons or strings, and the nose can be made of foam rubber, a large round button, or similar materials.
Pattern and description for a hedgehog costume in the form of a cape with a mask
Preparing for work
Before you start making an outfit, you need to consider a few points:
- kids are very mobile, so you should avoid heavy and bulky costumes;
- if you have a jumpsuit or pajamas of a suitable color, you should use ready-made clothes, making only accessories and a “fur coat”;
- It is easiest to sew from soft, non-flowing fabrics, such as thin fleece or plush;
- In addition to fabric, a basket, apples and mushrooms, to create the image you will need special makeup that is safe for children.
If a girl needs a costume, then instead of pants and overalls, you can sew a simple “peasant” dress with an apron. Then the fur coat of the future hedgehog is secured to a cape and complemented with a prickly cap.