House on chicken legs out of a box
This is the simplest solution. The assembly sequence is as follows:
- Choose a box of the right size.
- Cover it with white paper.
- Draw the logs.
- Mark the windows and door. They can be made using the appliqué technique.
- Make a roof from the corner part of a cardboard container. Can be stationary or removable.
- Make chicken legs and attach them to the hut.
In a similar way, it is possible to create an “ice hut” craft. You just need to remove the chicken legs and use white and blue paint to draw frosty patterns and icicles.
It is also appropriate to decorate the building with carved paper snowflakes.
Yaga's home
By inviting your child to make a “Baba Yaga’s hut” craft, you will keep him busy for a long time. After all, during the manufacturing process you can tell interesting stories about it.
Fairy tales about a mischievous and treacherous old woman with magical powers have always been very popular among children.
However, it is not only the heroine who is entertaining. The house where she lives is very colorful.
It stands, according to legend, on real chicken (chicken) legs. He is also an animate object and can carry out various orders.
Today there are many exhibitions dedicated to this topic. Theatrical productions on such themes are also not uncommon.
Stitched hut
A hut is not necessarily Baba Yaga’s home. You can make a rather cute “Zayushka’s hut” craft with your own hands using multi-colored woven scraps and thread and a needle.
Such impromptu can be done not only by an adult, but also by a child.
The house is a combination of natural materials and clothespins.
Required:
- dry moss;
- any bumps;
- dried and ironed leaves;
- berries (rowan, rose hip, hawthorn);
- clothespins (made of wood).
Buy glue, preferably liquid nails.
Progress:
- Take apart the clothespins and form them into a hut. Glue is suitable as a fixing material.
- Place the house on a cardboard base. Cover the surface of the base with moss. Place it on the roof of the building. For decoration, add leaves and berries.
- Paint the cones in a pale blue tone - these will be blue spruce trees.
- Make residents. Here you can use plasticine, foam plastic, twigs, pine cones.
House on chicken legs out of a box
This is the simplest solution. The assembly sequence is as follows:
- Choose a box of the right size.
- Cover it with white paper.
- Draw the logs.
- Mark the windows and door. They can be made using the appliqué technique.
- Make a roof from the corner part of a cardboard container. Can be stationary or removable.
- Make chicken legs and attach them to the hut.
In a similar way, it is possible to create an “ice hut” craft. You just need to remove the chicken legs and use white and blue paint to draw frosty patterns and icicles.
Pumpkin house
Here's a quick guide:
- We decide on the design.
- Prepare the pumpkin by removing the seeds and pulp.
- We mark with a marker the places for the windows and doors.
- Carefully cut out the parts with a knife. For greater effect, you can use curly nozzles.
- We make a roof from half a zucchini. We install a chimney made of fir cones. Decorate with glitter and dried berries.
- We are preparing the installation. We place the house on zucchini cut into rings and decorate with leaves, dried flowers and herbs.
To summarize, we will answer the question of how to make a craft hut. All you need is a developed imagination and perseverance. Nothing else. No expensive materials or special skills.
Pantyhose Witch
There are many versions of Baba Yaga on the Internet. The most popular of them is an old lady with a realistic flesh face. This photo of the craft shows Baba Yaga made from tights.
For this you need the following materials:
- Craft angel - 105 photo ideas on how to make your own angel quickly and easily from scrap materials
- Crafts from matches - 125 photos of original ideas for professionals and simple crafts for beginners
- Crafts with children: a review of interesting and exciting ideas for creating toys and decorations (115 photos)
- Tights or other nylon fabric;
- Sintepon;
- Wire;
- Some fabric;
- Thick gray yarn.
The doll begins to be made from the head. To do this, a padding polyester is placed in the fabric, and a spout is made of wire. After this, the spout needs to be wrapped with padding polyester. Next it is sewn to the base - the head. Gray yarn is wrapped around - future hair.
The doll's arms will be made of wire, and any durable material can be used as the body.
An integral part of the image of the magical old lady is her house - a magical hut with chicken legs. You can also make this attribute yourself.
paper and wood options
You can make original and beautiful crafts from natural materials. Children love to take part in this kind of work. They make various decorations, toys and souvenirs, little animals and people. In today's article we will make Baba Yaga's hut with our own hands. We hope that this idea will interest not only children, but also adults who will also want to participate in the process of creating this craft with their children.
For work you will need the following tools and materials:
- Colored cardboard;
- Stationery glue;
- Super glue;
- Bark of tree;
- Tree branches;
- Cones;
- Plasticine;
- A piece of fabric;
- Scissors;
- Paper;
- Markers;
- Threads;
- Pine branches;
- Cardboard box.
When everything you need is prepared, you can start working.
First, let's take cardboard, which will become the basis for the future craft. Glue the yellowed leaves onto the cardboard. Pay attention to the photo.
Now let's start building a wooden house. To do this, take branches of the same length and thickness and use glue to make a house out of them. The glue must be allowed to dry and set.
Next, you need to cut out the roof from paper. Colored cardboard is also suitable for these purposes. Fold the cardboard in half. In order for the roof to hold, you must first attach the base and then glue the roof onto it. The base in our case was a cardboard box of plasticine.
The roof needs to be decorated. To do this, we will use dried tree bark. We will glue it to the cardboard roof on both sides.
As you know, Baba Yaga's hut is on legs. In order to make them, we will make two holes in the base of the house so that two branches can be firmly fixed in them. To make the hut more stable, take thicker branches.
We will make a stupa from a small log, onto which we will glue Baba Yaga’s cone-torso onto plasticine. We will make a face out of plasticine, tie a scarf on our head, which we will make from a piece of fabric prepared in advance. Let's take thin twigs and make hands from them, also fixing them with plasticine to Baba Yaga's body.
For Baba Yaga you also need to make a broom. Let's take very small branches and tie them together with threads. Then we attach them to the branch-base of the broom. Let's attach it to Baba Yaga's hands with threads.
Now let's start making the stairs. To do this, take two long branches and 4 short ones, which we will fasten together with threads.
For decoration, we will make a Christmas tree, which will be located near the hut. Take small pine branches and tie them together with threads. To fix the Christmas tree, you need to insert a twig into its top and attach plasticine to the base.
Let's make an owl. To do this, take a small chic and turn it upside down. We will make the owl's wings from the leaves, and we will make the eyes and beak from plasticine. We'll put the owl on a branch and decorate it. In our example, physalis flowers are used for decoration.
Now the composition needs to be put together. Let's take our base with leaves and install our hut on plasticine. We cut out a window and a door from colored paper, which we attach with glue. Next to the hut we will install a branch with an owl. Let's attach the ladder. Near the hut we will also install a Christmas tree and a stupa with Baba Yaga.
You can imagine many options for creating Baba Yaga's hut. You can make an applique, a massive craft, or even a whole hut that can easily accommodate a child.
It is very important to take part in creating such crafts with your child, then he will feel family help, love and support. It must also be said that such joint work brings parents and children very close.
It would also be a good idea to simultaneously study fairy tales with Baba Yaga and create similar crafts, then the child will have a better idea of what they read to him or what he saw in cartoons.
As you have already seen, to create such an original and very “live” craft, you did not need to purchase a lot of materials for the work. All that was used were natural materials that can be collected in the garden, local area or park, and threads, scissors and glue are always available at home.
The main thing is the desire to create something with your own hands, a creative mood, good company and quite a bit of free time.
I would like to end this article with a useful video collection in which we will present some more interesting ideas for creating Baba Yaga’s hut. We hope you will like some of the options and want to repeat it with your child. Please take a few minutes of your time to watch the video on this topic.
Craft house: master class on how to make a decorative house with your own hands (85 photo ideas)
Every child needs toys for his full development. You don't have to buy them in the store. It is enough to know how to properly make the same house with your own hands in order to please your baby with a new toy with which he will tinker and not make noise for a long time.
The most accessible materials for production are cardboard, paper, plasticine. But you can also make a house from pumpkins, chestnuts, zucchini, eggplants, clothespins and various shoe boxes, household appliances and appliances.
What kind of house can you make?
You can see many photos on the theme of “House” crafts. The following wonderful toys are made for your child from improvised materials:
- Hut on Chicken Legs - made of clothespins;
- Old Man-Lesovich's hut;
- A hut in a clearing, decorated with chestnuts;
- Forester's hut made of natural materials;
- Build a pumpkin house;
- Using twigs, weave a tower.
There are a lot of ideas and all kinds of instructions for making houses, your imagination is limitless. A little skill and patience - and the craft will be ready!
- Let's look at the most popular models and try to make them together.
By understanding what these toys can be made from and how to begin this simple process, you can create a work of art. Let the house be far from perfect the first time, but every time it will turn out better and better!
A hut on chicken legs
Children love fairy tale characters. And they will be happy to help in making a house for their beloved Baba Yaga. For this craft we will need the following components:
- Dried moss;
- Opened spruce or pine cones;
- Pre-prepared (ironed) leaves;
- Dry berries;
- Clothespins;
- Plasticine;
- Glue.
Making a Hut on Chicken Legs with your own hands
We will show you a simple diagram on which you can assemble this beautiful house for Baba Yaga. You can use other templates, but this one is the simplest and will not cause any difficulties in making for either an adult or a child.
So, step by step instructions:
- We take apart the wood chips and glue the house together. It is best to use “liquid nails” for this;
- Place the assembled Baba Yaga's Hut on a piece of cardboard and cover the space around it with moss;
- We glue the leaves of the berries onto the roof. We also place the remains of the moss there;
- We paint the cones green and glue them to the cardboard. These will be our Christmas trees;
- We sculpt various animals - bunnies, squirrels from plasticine.
The scenery and creation of the atmosphere of a fairy-tale forest are important here, because we are creating Baba Yaga’s hut, which, according to the fairy tale, is located in a place inaccessible to outsiders.
Old Man-Lesovich's hut
Making such a house together with your child may take several days. Spending time together like this brings parents and their children closer together. So what can you make such a craft from?
Let's list the main components that we need and get started with the process:
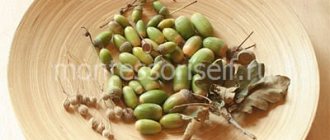
- You will need pastry packaging for a cake or cookies. We decorate it with the remnants of old wallpaper, creating an autumn forest background. Using matches, acorns, and cones, we make forest inhabitants - Lesovich himself and his friend the hedgehog.
- We make the house from a kefir box, and cover the walls themselves with large dill sticks to create the effect of logs. The hedgehog will live under stumps, which can be made from cutting branches.
- We make a path leading from the house to the pond using colored semolina and bean grains. We create the effect of water using colored paper, and pebbles using plum seeds.
- We decorate the forest and clearing with pieces of moss, dry twigs and leaves.
Hut in the clearing
We will hold another master class on crafts on the theme “House”. This time the design will be more complicated, and the pleasure can be extended for a long time.
For this we need:
- Scotch;
- Cardboard box;
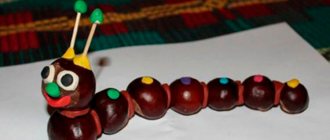
- A couple of kilograms of chestnuts;
- Dry branches;
- Glue;
- Berries;
- Pen;
- Multi-colored fallen leaves;
- Scissors;
- Needles;
- Wire.
Hut in the clearing: making it step by step
- Let’s start making the next craft together with our child, instilling in him useful skills and curiosity.
- We assemble this toy in the following sequence:
We are making the foundation on which our house will stand. To do this, use a cardboard box. We prepare a square 400x400 mm.
We cut out the elements of the house from cardboard and connect them with tape. We attach it to the base.
We cut out windows and doors from pieces of snow-white paper. Glue it. We draw curtains with a pen. We decorate all the walls with chestnuts. We design the roof and ground around the house using colorful leaves, pine needles and berries.
Thus, you can make a house from almost any material by connecting the necessary components into one whole using tape and glue. Or - cut from pumpkin, watermelon, zucchini, eggplant.
There are many manuals and master classes on this topic on the Internet. Many lessons are accompanied by excellent explanations of what and how to do correctly in order to assemble a good and high-quality toy.
The new time spent together will delight the child, and he will enthusiastically help in collecting it for a long time. And then – have fun playing!
Photos of crafts houses
Source: https://clubsamodelok.ru/podelka-domik/
House with paper logs
Materials:
- corrugated cardboard;
- ordinary cardboard;
- White paper;
- glue Moment;
- PVA glue.
Operating procedure:
- Make a hut frame from corrugated cardboard: two pentagonal walls (together with an attic), a floor, two side walls.
- Choose the sizes yourself.
- Glue the parts together. Mark the door and window.
- Using a pencil, roll the paper into tight tubes. Tape them around the edges to prevent them from unraveling. Some of them will need to be cut to beautifully cover the frame of the house.
- Connect everything with Moment glue.
- Cut suitable strips from thin light cardboard and paste them over the joints of the parts - corners, edges, slopes of the future hut.
- Make a roof out of ordinary cardboard. Cut out a rectangle of suitable size and bend it in the middle.
- Make chicken legs. Roll two wide-diameter paper tubes. Glue them to the foundation of the hut - a thick piece of cardboard or other material. Roll up a couple of thinner tubes and insert them into the thick supports.
- Make holes in the bottom of the hut. Thread thin tubes into them. And glue the upper edges of the thick ones to the bottom. As a result, the house should be stable.
- Make it out of paper and glue 3-fingered paws to the hut.
- Attach a cardboard threshold to the door. From it, lower a ladder made of the same cardboard to the ground.
Where to start making crafts?
First you need to decide on the material from which the craft will be made. When making it with your own hands, you can use different natural materials . The base (house) can be made in the following ways:
- in the form of a painted cardboard box
- twisting paper tubes into logs and assembling walls from them
- assemble from materials taken from nature (straw, sticks and bark are suitable)
- knit or sew
Choose any method that you like best. A hut on chicken legs is quite easy to make with your own hands. The most common problem during creation is the construction of the “foundation” . It must be strong and stable to support the weight of the house and have an appropriate shape and design.
The chicken legs on which the decorative house will stand can be made voluminous or flat. The creation of flat legs is carried out by cutting special shapes from cardboard, paper, wood or foam. Volumetric legs , which will look more natural, are made in the following ways:
- sculpt using plasticine;
- we tie a frame made of rods and sticks;
- wrap threads around tubes, wires and sticks;
- we use driftwood found in nature;
- we make a metal frame , decorating it with satin ribbons;
- make a papier-mâché mold;
- we make it by modeling, using gypsum of a thick consistency;
- we assemble from balls, beads or beads using a wire frame.
Baba Yaga's hut made of paper logs
To create a toy house, ordinary paper can be used. This option is a little more complicated, but it looks very impressive.
The “paper hut” craft is made like this:
- Cut the paper into rectangles, the length of which should correspond to the dimensions of the house.
- Roll the blanks into tubes. For reliability, coat the joint with glue.
- Cut circles for the ends of the prepared tubes. Collect logs.
- Fold the walls and frame.
- Make a roof from a sheet of paper.
- Paint the finished product in the chosen color.
If you choose white, you will get a “winter hut” craft.
Cut out the door and windows, glue them to the appropriate places, draw the details.
If desired, make chicken legs from plasticine and attach them to the house.
Using paper vine
When weaving a hut from newspaper sticks, the result is a decorative and very original craft. This method is a simple and cheap alternative to using willow vines. Sticks are made by rolling newspapers, and a small box will be needed for the base of the hut. This is the box we will braid.
To begin with, you need to make only half of the house, and then all the frame elements are secured with paper clips or clothespins on top of the box. We braid the racks, going around them alternately in front and behind with a working tube. As soon as the “vine” begins to end, we begin to increase it to the required length. It is better to hide all the joints of the tubes inside and glue them well. You can paint the hut both after weaving (coating the paper with the desired color) and before twisting. Legs, roof and decor are made using any of the above methods.
DIY Baba Yaga's house photo
Everyone in childhood read fairy tales, where one of the main characters was Baba Yaga and her hut on chicken legs. A hut seems to be an inanimate object, but miracles happen in fairy tales, so the hut can become a living character. For productions or exhibitions, you may need just such a hut. In this article we will tell you how it can be made from different materials.
Cardboard hut
The simplest option for making a hut involves using an ordinary box, that is, the hut will be made of cardboard.
We find a box of a suitable size, first make a base out of it from glued white paper. Afterwards we paint its walls and make them look like logs; the most convenient way to do this is with paints. We finish drawing the windows and doors. For a more impressive look, add convex elements to the walls. The roof is also made from a box, cutting off part of it and leaving only one corner.
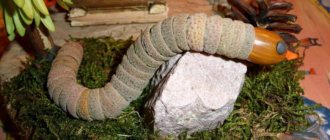
The legs are made of driftwood or a frame; you can also use the papier-mâché technique.
Natural hut
If you want to make a hut from natural materials, then for this you will have to collect small pieces of natural materials. Let's collect small quantities of moss, thin branches, a few cones, and find a small, stable snag.
First, as in the first case, we will make a frame from cardboard, and we will glue natural materials onto it. It is convenient to use a heat gun for such purposes. Branches are suitable for the walls; stack them one on top, imitating the logs of a real hut, and cover all the walls.
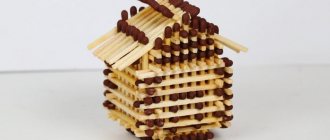
If you decide to use cones, first soak them in the adhesive solution. Moss is suitable for decorating the roof. And a piece of driftwood that is quite stable will replace the legs of the hut. This craft is as close in appearance as possible to a natural fairy-tale hut. You can sew a pipe from matches, and use pieces of colored gray cotton wool to depict the smoke coming from it.
Stitched house
Sewing lovers can make their own version of the hut. Making it with your own hands using a thread and a needle is simple, especially since for such work you only need scraps of fabric. Even a child can make a sewn hut. In addition to the sewn house, you can crochet Baba Yaga; for this you will need a hook, a pattern and threads.
Original version
We will show you a master class with photos on how to make an interesting hut. You will learn how to make a whole composition - a hut, Baba Yaga and even a mortar with a broom.
For such a composition you will need the following things:
- Set of colored paper, plain paper;
- Glue for paper, Glue moment;
- Leaves, slightly dried, a small piece of tree bark, branches, cones, moss;
- Fabric, thread, scissors;
- Felt pens and plasticine;
- And also a box for making a model.
The work begins with creating a base; we cover a regular cardboard lid with dry leaves. These can be the leaves of absolutely any tree.
Then we move on to creating the walls. The collected twigs are cut into sticks of the same length and the box is covered with them on all sides. After each side, give the glue time to dry and set well.
The roof is made from a sheet of cardboard. A rectangle of the appropriate size is bent in half and the walls are covered with it. When we glue the roof and it dries well, we decorate it with bark. We stick the legs to the bottom of the box and secure them well.
A piece of a very thick branch or a small log will serve as a mortar for our future Baba Yaga. We will mold it from plasticine. Let's take a color similar to your complexion - beige or any other light color. Let's glue parts of the face onto it, also from plasticine. Let's make the eyes black, with lighter pupils, the nose the color of the body and the mouth. We will tie a scarf on our head. Thin branches are quite suitable for hands.
We will put the finished Baba Yaga in a mortar. Now let's create Baba Yaga's indispensable tool - her flying broom.
Let's collect the thinnest branches and gather them all around one larger one and tie them together. Using threads or glue that dries instantly, attach the broom to the Yaga’s branch arms.
- The house should be supplemented with a ladder, which can be built from threads and branches.
Just four short crossbars and two long twigs are enough. Since we are preparing a composition for the purpose, and the house is located in the forest, we will make small pines from pine branches. To do this, we connect the prepared pine branches into a triangular shape, just like real trees.
- Let's put a sitting owl made of pine cones and plasticine on a branch.
Now let's put the whole composition together. To do this, next to the hut installed and secured with plasticine, we begin to install all the prepared elements. We secure the owl's home - a branch with colorful lanterns. We install the stairs and glue the paper doors. Not far from the house we put a pine spruce, and next to it is Baba Yaga in a mortar.
Both children and adults will really like this hut with its inhabitants, and you can make it with the whole family.
Cardboard hut
The simplest option for making a hut involves using an ordinary box, that is, the hut will be made of cardboard.
We find a box of a suitable size, first make a base out of it from glued white paper. Afterwards we paint its walls and make them look like logs; the most convenient way to do this is with paints. We finish drawing the windows and doors. For a more impressive look, add convex elements to the walls. The roof is also made from a box, cutting off part of it and leaving only one corner.
The legs are made of driftwood or a frame; you can also use the papier-mâché technique.
House on a summer cottage
Such a fairy-tale house, although not so often, is still found in summer cottages. For adults, such a structure may not be of any use, but for children it causes a lot of delight.
The easiest option is to order a log hut from professionals based on your own sketches. That is, find a company that cuts log huts. You can complicate the task and simply order some log blanks and then assemble them yourself. It will undoubtedly be cheaper this way.
So, a hut on chicken legs, with strictly vertical walls, made of purchased logs.
- For the greatest resemblance to the hut of the real Baba Yaga, it is necessary to install a pair of “chicken” legs. These can be rhizomes of old coniferous trees (pines or spruces). These roots must be thoroughly cleaned of soil and bark. Then soak it in several layers with antiseptics and cover it with an anti-rotting agent.
- To make the hut stable, its legs-pillars, after antiseptic treatment, are deepened 50 cm into the ground and, if possible, concreted.
- A large role is given to the base - the frame of the hut. You need to put powerful beams with a cross section of 20/20 cm across the legs. And secure them with anchor bolts and washers. The third support will be a porch with two steps in front of the front door. The floor is lined with edged boards. Walls made of timber are mounted on it. The walls are paved with tow.
- The gables of the house will look more natural if they are also made of logs. The settlement of the house lasts about a month. In this case, it is best to tap the logs with a sledgehammer several times to ensure complete settlement.
- It is not recommended to make a ceiling; it will reduce the volume of the room. Therefore, roof rafters should have only rafter legs, without bases.
- The hut window and door should be made small in accordance with the style of ancient Russian architecture. Door and window frames are made from edged boards 15 centimeters wide.
- Making window and door units can be difficult for a non-professional. In this case, to speed up the process, they can be ordered from a sketch workshop.
- The roof of the hut should be stylized as antique.
- The roof overhangs are made with a margin so that rain does not flow in and wet the walls.
- Wooden surfaces must be coated with any light-colored composition that emphasizes the structure of the wood.
- The door handle and hinges are overhead and massive.
- The hut can be decorated with two or three crafts made of wood and other materials.
- Wooden figurines of Baba Yaga herself, the Serpent Gorynych, a cat and an owl are perfect. They can be placed both outside and inside. The photo shows several options for such huts.
Simple hut
Since there are several possible manufacturing methods, we will consider them in turn. You can make a wooden version, in which case you will need a log house or boards. It is better to give preference to boards, they are easier to work with, but the log house will of course look more like a real hut, but it will also be more difficult to process.
Construction has certain stages:
As described in the step-by-step sequence, let's start construction from the feet. For them we will need two logs, they should be approximately a meter long. To protect the legs from premature wear, we thoroughly saturate them with a rot-protective agent. Now let's dig two holes in the ground, half the length of the logs - half a meter each. And having firmly secured the logs there with small stones, we fill everything with cement.
Related article: DIY coin painting: detailed master class with photos
Alternatively, you can use pipes rather than logs, which after installation are decorated with driftwood.
Once the concrete is completely dry, it's time to install the subfloor. In this master class it is proposed to make a hut 1.8 m long. Therefore, it is precisely these beams that are taken and secured, stretching through two logs. The width of one bar is 20*20 cm.
The walls are also created from logs or boards; the inside can be covered with paper. To secure, use self-tapping screws rather than nails.
Since the building is not large at all, think about whether you need a ceiling in it, because you can simply make a roof. This will save more space.
When installing a ladder, it is important to check its stability and, if necessary, secure it with concrete.
And now, when the entire structure is ready, you can begin decorating and decorating the hut. Here you can rely on your taste or on the description of fairy-tale houses. In any case, it will turn out very original and unusual.
Natural hut
If you want to make a hut from natural materials, then for this you will have to collect small pieces of natural materials. Let's collect small quantities of moss, thin branches, a few cones, and find a small, stable snag.
First, as in the first case, we will make a frame from cardboard, and we will glue natural materials onto it. It is convenient to use a heat gun for such purposes. Branches are suitable for the walls; stack them one on top, imitating the logs of a real hut, and cover all the walls.
If you decide to use cones, first soak them in the adhesive solution. Moss is suitable for decorating the roof. And a piece of driftwood that is quite stable will replace the legs of the hut. This craft is as close in appearance as possible to a natural fairy-tale hut. You can sew a pipe from matches, and use pieces of colored gray cotton wool to depict the smoke coming from it.
Granny Hedgehog's Hut
To choose a manufacturing method, you need to decide on the purpose of the craft - whether it will be a tabletop house or a decoration in the country.
From the box
To make a craft from a box, first select the materials:
- any box;
- cardboard (for the roof);
- scissors;
- stationery knife;
- glue;
- pencil;
- paints;
- brushes
When all the materials are prepared, you can proceed directly to assembling the hut. This method is the easiest and fastest.
- After selecting a suitable box, we clear it of tape and paint over any extraneous inscriptions with a thick layer of paint.
- Draw the door and windows. If you cut them out, you will have to process the edges of the holes so that the cuts look neat. Self-adhesive paper of the desired color or tape is suitable for this.
- Next we create the roof. It can be either removable or rigidly attached.
- We make a chimney from paper or cardboard.
- Chicken legs are made from any available material. Cutting from wood or foam is best. After all, the box house is quite voluminous and needs a lot of fastening.
From paper logs
The next method is more labor-intensive. However, the result is an unusually voluminous and authentic fairy-tale hut.
The following materials will be required:
- whatman;
- colored paper;
- scissors;
- glue;
- dye.
To begin with, we determine the dimensions of the future structure. Then:
- Whatman paper is drawn into equal segments (with allowance for overlapping paper when gluing).
- Then the resulting strips are cut out. Tubes are glued from them - these are logs. Then neat circles are cut out to cover the side “cuts” of the logs.
- We received logs of equal size. Their quantity must be calculated in advance. The logs are painted brown or covered with paper.
- Glue them together. Get the walls of a wooden hut.
- Windows and doors can be prepared in advance. Or you can cut it out after completing the walls. As an option, glue blanks with painted windows and a door.
- The roof is made of cardboard folded in half. Then it is painted with a tile pattern.
- Chicken legs are made from any available material. Cutting from wood or foam is best.
If the craft is small, you can decorate it with animal toys or make an additional fence out of cardboard.
From natural materials
Literally everything that is found in the forest can be used to make Baba Yaga's hut.
Materials of natural origin, such as:
Natural materials can be used both independently and for decorating ready-made crafts.
In our case, we will cover the box with bark or branches so that as few cardboard spots as possible are visible. We assemble the walls of the future hut from unopened fir cones, attaching them with glue.
In order for the cones to keep their shape longer, they must be soaked in an adhesive solution immediately after being brought home from the forest. Moss and bark will make a beautiful roof, and driftwood will be suitable as chicken legs.
This craft matches the fairy-tale image as closely as possible.
Do it yourself: Baba Yaga's house with a real swamp
“> We decorate the interior to the delight of ourselves and the children in an absolutely non-trivial way - we are making a house for Baba Yaga with a soft green swamp. Create your own fairy tale at home!
Where did it all start? Back in the summer, I accidentally saw 20x20 slats with a length of 200 mm on the market for 35 rubles apiece - a rare size - and I couldn’t pass it up, I bought it to “think about it.” During the New Year holidays, my hands were itching to cut, especially since the weather was favorable - I could safely do dusty work outside. I’ve been working with wood for a long time, I have enough tools, but I haven’t made models of buildings before. We must try it sometime!
Main process steps
At first I used a circular saw, a milling machine and a Soviet model machine “Skillful Hands”, which I somehow found in the bins of my homeland. I sawed blanks for the walls of the same size with a circular saw, “With skillful hands” I made cuts in the timber (let’s call it that) and used a milling machine to slightly remove the corners, giving the timber a natural look. I removed the excess with sandpaper and sharpened the ends.
Baba Yaga’s house, as usual, is shabby and crooked, so the blank had to be “aged” - for this I used a gas burner. I burned the walls one by one and let them cool, then I cleaned each element of the model with an iron brush and numbered the timber.
I drew windows and doors on the inside and disassembled the model.
I decided to assemble the model with a layer of tow - for the surroundings. The beams were fastened together with small finishing nails - it turned out securely and crookedly, just like a real Baba Yaga. I decided not to bother with the roof gables and made them from furniture panels. There is no rafter system as such, I just glued 3 bars from each slope between the gables and attached the roof to them. I made the roof slopes from “boards” - cut pieces of larch decking boards into sticks of equal thickness and placed them on glue. In fact, this design is far from perfect, but I did not redo the roof, I left it as an experience for the next models.
The chicken legs at the house are purely nominal: I sawed off the slingshot, trimmed it and installed it. I prepared a base for the model from a piece of furniture - I attached the slingshot to the base for stability.
And what would Baba Yaga’s house be without driftwood on the roof? I found a suitable one in the forest, cleaned it, trimmed it and installed it.
Let's move on to "makeup"
First, using scissors, a knife, a blade and a lighter, I trimmed the tow that I used to lay the timber. I made window and door jambs from larch scraps. I adapted bamboo kebab sticks for the “crosshair” of the window. I glued the door together from several scraps and added “fastening” boards.
The gables and roof slopes were covered with boards from below. It took about 3 hours to make the porch with the stairs - I used the already tested “aging” technology using nails, glue, a saw and a miter box. And then an interesting thought came to mind: shouldn’t we make a “swamp” around the house?
The children had an almost unused sandbox at home, and they decided to donate it to art. What grows in the swamp? That's right, moss!
The moss was not yet covered with snow, so I carefully cut it off with a garden shovel and placed it in the sandbox. At the same time, I studied options for growing moss at home - I don’t know how it will behave, whether it will survive, but so far the result is pleasing to the eye.
I stained the roof and gables with vinegar with a metal mesh for washing dishes soaked in it - this is a known method of giving wood a grayish color to naturally age. The color initially turned out brownish, but after sanding it took on a gray tint.
I worked a little more with sandpaper, and here and there with ebony stain and decided to call it a day. In total, the work took approximately 3 full working days.
In terms of materials, it turned out to be budget-friendly: I spent only on the “timber”, stain, glue and nails, the rest was assembled from leftover scraps. And once again I was convinced how much having the right tool simplifies the job!
This is how Baba Yaga “settled” in our house. True, she has not yet flown to her new possessions, but the children really hope to see her.
Vladimir Shashkov
Check out other master classes on working with wood:
Making a feeder with your own hands
Hurry up to hang your birdhouse before the end of March!
Life hacks
If a person wants to make something with his own hands for the first time, but has zero knowledge of homemade, modern technologies come to his aid. In craft stores you can find convenient options for houses that can be assembled in a couple of minutes. If you add a little creativity, you will get an excellent craft option. To create a house, the main thing you will need is to purchase a blank for it.
Craft stores have the following options:
| Name | Description | Price |
| “Astra & Craft” wooden blank for decorating “Baba Yaga’s House” L-652. | Beautiful blank for crafts. Width – 12 cm, length – 13 cm, height – 14.5 cm. The set includes parts of the house and decorative ornaments: an owl, a cat, a stand for crafts. | From 300 rub. |
| Rectangles 150x93 mm, 140x90 mm. | Such parts are sold without additional decorative details. From these you can form the main parts of the hut. | From 20 rub. for 1 piece |
| Blank for a wood mill house. | Pine blanks for a wooden house. The size ranges from 5 to 8 cm in width, from 3 to 4.5 cm in thickness and from 5 to 10 cm in height. | From 10 rub. for 1 house. |
| Wall for a house made of plywood from dljatvorchestva | Wooden blanks for a house with windows already cut into it. Size 9 by 10 cm. | 5 rub. for 1 wall. |
Purchasing such a blank greatly simplifies the process of creating a house.
An approximate master class using such material will additionally require:
- Paints.
- Twigs.
- A piece of fabric to imitate curtains in a window.
- Dry berries.
- Moss.
- Glue.
Process of creation:
- Fabric is glued to the inside of the house blank, simulating tulle.
- Assembling a house blank from Astra & Craft.
- Using paints they paint the hut.
- Let the paint dry.
- Using glue, decorate the roof of the house with twigs, pieces of moss, and berries.
- Under the hut they make a clearing of moss.
This is the fastest craft option, which even with zero knowledge of creativity will turn out beautiful and neat. Very often, parents in kindergarten are asked to participate in various handicraft competitions. A craft in the form of a hut on chicken legs can surprise even the most fastidious jury. In addition, creating such a masterpiece with your own hands will allow you to take time and get closer to your children.
We sew a hut
If you often do needlework, then you probably have some extra scraps left over. They are suitable for creating not only a hut on chicken legs, but also any fairy-tale character. Even a child can cope with such work, since instead of using a needle and thread, you can simply glue the rags to the cardboard base. You can use absolutely any fabric. Crafts made from fleece and felt look original. Using fabric applique, you can make any flat crafts, and using thread and a needle, you can sew logs or other parts of the hut.
It’s easy to turn such a craft into an entire educational toy. Make doors and windows with buttons or Velcro, and when making the roof, use some rustling material. If you also make the roof removable (for example, using a zipper), then the interior space is perfect for storing various small items in the toy.
DIY hut on chicken legs
Making a layout:
After the entire diagram is drawn on paper, all that remains is to cut out the future building, bend the lines marked with a blue dotted line and cut the windows with a construction knife. Use a modeling board. It allows you to cut out parts from cardboard and then glue them together much more conveniently. The scheme presented in the photo above is suitable for the production of the simplest houses. A more complex structure will literally have to be made up of several parts. By the way, the layout can also be made to open (so you can see the interior of the house). It is on this principle that children's doll houses are made, which can be purchased in the store.
To make such a layout (photo), it is advisable to use the thickest cardboard you can find. In order for part of the wall to open, an appropriate fastener is used (this can be found in old Soviet-made boxes) or simply a piece of cardboard bent in half. Doors can be made to open in the same way.