Photo frames Provence
Free landscapes of the south of France, filled with rustic charm hidden in simple things, are embodied in design solutions for the interior design of country houses.
Memorable moments captured on film should not gather dust in albums. Placed in frames in Provence style, the pictures will delight you every day, creating a mood.
Photo frame for Provencal interior
The interior of Province, where the emphasis is on natural materials and natural colors, is unthinkable without accessories that are dear to the heart. Among them:
Provence is characterized by not just photographs, but those arranged and hung mixed with paintings. In this case, Provence creates all the conditions for trying your hand at designing, if not the entire room, then individual accessories. Such, for example, as Provence photo frames. For this, techniques such as decoupage, craquelure, appliqué, etc. can be used.
The romance of Provence is natural materials and light pastel shades of natural tones. The most common ones are:
- white;
- milky shades;
- grayish;
- light pink;
- blurred mint, etc.
Wood carvings in the form of flowers, curls, and butterflies can be used in the design of baguettes. Aging is visible in the design:
- in half-erased paint;
- light gilding on protruding elements;
- tinting;
- decoupage on a floral theme;
- drawing;
- decor with flowers, butterflies, birds, etc.;
- overlays and monograms.
Depending on the location of the photo frame, it can be:
Photo frames in Provence style can have different shapes and can even be designed for several photographs.
Master class on decorating photo frames
For decoration, you can choose a variety of techniques, for example, quilling. A photo decorated in this way will look beautiful and unusual. To work with this technique, you need a frame that matches the size of the image. The materials you will need are the following: velvet paper for decoration and special paper for quilling in several sizes - 5 or 7mm, quilling tools, scissors and glue. It is worth considering that the colors for the composition are selected from matching shades.
First, preparatory elements are created: roses, leaves, fluffy flowers, curls. To create a composition you need 5 roses. To make one, take a 7 mm strip and fold it a couple of times. Thus, a center is formed, and then the petals are laid, bending the material spirally. The folds are the edge of the petals. The end of the strip is glued from the inside. The size of the flowers is up to 2 cm.
Lush flowers need 8 pieces. The same paper is used to make them. But you need to take into account a nuance - the fringe is cut with small scissors. The thinner, the fluffier the element will be. After this, the strip is rolled up and the edge is secured with glue. The fringe is fluffed only after drying.
Using a quilling tool, leaves are made in the amount of 10 pieces. Having rolled the strips into a roll shape with a diameter of 15 cm, flatten and move all the turns to one side. It won’t be difficult to make six curls after making more complex elements. To do this you will have to cut the strips into 3 parts. The edge of one is twisted like a spiral, and the other is bent with your fingers.
Once all the elements are ready, start decorating. A sheet of decorative paper is placed on the wrong side, where the frame is placed. Use a pencil to outline the area for the photograph. After this, cut out the allocated area, not forgetting to make a reserve, and cut the corners diagonally. Lubricate the prepared surface with glue, glue the paper on top, and fold the edges inside out. After the glue has dried, you can lay out all the prepared elements as intended, and only then glue them.
The photo will also look impressive when decorated using the quilling technique in the second version, although the elements for it are easier to make. In this case, you need to prepare: paper, a frame, an unnecessary magazine and a hot gun. It is best to degrease the surface of the base for plastic, and to clean it with sandpaper for wood.
Magazine sheets are cut into 2cm strips and rolled lengthwise. They also make circles of different diameters from 1 cm to 2.5 cm. Having made the required amount to cover the area of the frame, they are attached with a gun. They should be arranged in dense rows. A photo enhanced in this way will look unusual.
Large frames
Relatively large frames may have smooth lines along the outer edge, decorated with elegant carvings. Light shades of baguette are especially suitable for such models. Light tinting with gold adds sophistication and creates the effect of former luxury.
A large frame in shades of old gold with ornate carvings will look solid and noble on a large free section of the wall. This frame, more than others, requires space.
You can even decorate the simplest rectangular wooden frame in Provence style with your own hands. To do this, stick a silhouette of a bird cut out of designer cardboard onto the top corner.
How to decorate a photo frame - step-by-step instructions for beginners (30 photo ideas)
Despite the development of technology and the transition of images to digital format, everyone enjoys admiring photos of their loved ones. To decorate it beautifully, you should choose a frame. It can be made in various styles, which will allow it to fit perfectly into the interior.
In stores you can find frames for every taste. But if you make such an item yourself, this will give it greater value, because a piece of the soul will be invested in it, which will evoke pleasant emotions.
There are various ways to decorate a photo frame with your own hands. After looking through the ideas proposed below, you will definitely be able to choose something for yourself.
Frame with clothespins
The forged models, painted in light pastel shades, look unusual and airy; they represent a frame reminiscent of a projection of a birdcage. In this case, the photographs will be attached using wooden clothespins, which is very much in the spirit of Provence. Such models will look great in combination with the rest of the Provencal decor of the room, for example, flowers, signs with antique inscriptions.
Frame for several photos
Combining several photographs in one frame with an overall calm color of the baguette will be perhaps the main accent of style in the room. Such a photo frame can have carved decorations in the form of flowers, bows, or intertwining branches. The mat itself can have slots for photographs not only of different sizes, but also of different shapes.
Another option for a frame for several photographs can be a regular wooden frame with several bindings. Each window contains a separate photo. This Provence style frame is best suited for decorating a cottage or summer kitchen.
Original frame made from ceiling plinth
For large wall mirrors and Baroque-style interiors, massive, thick frames with complex patterns are ideal. They are mainly made of wood, but this is quite expensive, and the weight of such a frame is not small. At home, you can make an imitation of the ceiling plinth, which after a few simple manipulations will look no worse. But it should immediately be noted that this technology works best with rectangular and square mirrors - for an oval one it is impossible to bend the baseboard along the entire perimeter.
To start making such a frame, you will need to select a ceiling plinth that suits your width and pattern, the length of which will be equal to the perimeter of the mirror without any additions. For decoration we will use putty, acrylic white paint, furniture paint in brown and gold colors (or black and silver, depending on the color scheme of your room), as well as acrylic varnish, a sponge and auxiliary tools - scissors, a shoe knife, a straight edge, glue gun If you want to make an additional mount on the mirror, you will need to purchase a sheet of plywood and special glue for mirror panels, as well as thick twine.
The starting stage is working with the frame frame. The plinth is placed around the perimeter of the mirror and cut into 4 parts exactly according to its height and width. Then from each end you need to remove parts that interfere with the correct addition of the parts: for this you need a ruler-corner. Thanks to it, the plinth is cut diagonally, so that it looks like a very elongated trapezoid, with a long base on the outside and a short base on the inside, directed towards the mirror. If everything is done correctly, all 4 parts will easily fit together into a rectangle with no gaps. At the joints, the ceiling plinth is fixed with a glue gun. The frame frame is then removed from the mirror.
When the glue has cooled, work with the baseboard continues. The putty must be diluted with water so that the resulting mixture is thick enough to resemble sour cream, after which it is carefully applied to the frame from the outside and inside. To dry, it is recommended to keep the product in a vertical position, maybe at a slight angle: this will take several hours, but until the putty has completely set, you cannot move further.
Now comes the stage of designing the frame. The entire baseboard, including its internal zones, is thickly painted with brown acrylic paint, and it is again given time to dry. If your interior has a cold color scheme, you can use black paint. Then, using a smaller brush, the frame should be coated with acrylic varnish, which should also dry well. After which comes the turn of golden paint, applied with a sponge - this will create the effect of flying gilding, which means it will add “age” to the “wood”. After the new drying stage, you will also need to fix the result with varnish. Now all that remains is to place the frame on the mirror and fix it as you wish.
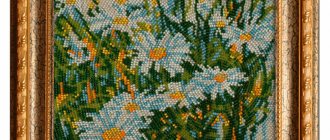
Flowers of Provence
The abundance of fresh and dried flowers, as well as their images, is one of the characteristic features of the Provencal interior. Drawings of flowers on the frames – tenderness and simplicity of rustic design. If, for example, the room is designed not just in light colors, but with an emphasis on a blue tone, then the frames can be decorated with floral paintings in blue shades.
Cutting off the corners
Let's cut it off! Since we used a circular saw, the 45 degree angle was not a problem for us, but if you don't have one, then just join the frame at a 90 degree angle (straight cuts).
Trying it on
After you have cut off the long parts of the frame at an angle, you can bring them to the mirror and try them on.
Measuring the short sides
This step is kind of just a double check, but it's a good idea. After placing the long part of the frame on the mirror, measure the length of the top and bottom parts and repeat the above steps.
Putting it together
Even if you have a measurement error, all the pieces will come together beautifully. All that remains is to simply place the mirror in the center behind the frame.
Vintage
The antique design is a photo frame with decor in the form of painted butterflies, birds and flowers with capital letters on a grayish background that looks like an old letter. Such frames will look good against a plain background.
Provence style is one of the most cozy and comfortable for living. It is reflected not only in the global interior design, but even in accessories such as photographs. Surrounding yourself with photographs that capture memorable and bright moments, you can feel a surge of tenderness and peace for your family, your children. In a caring attitude towards your loved ones, it sounds the same, simple and complex Provence.
Basic principles of decorating mirrors
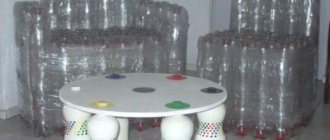
DIY mirror decor is made using a variety of materials, including those that are usually sent to the trash container, and if purchased, cost very little. For example, tubes from old newspapers or magazines. In some cases they are used without dyeing, in others they are painted. Spray paint is more convenient - it is applied in an even thin layer, painting occurs many times faster than using a brush. You can also use broken china, mirror, colored glass, shells, pebbles, rhinestones, glass drops, buttons, ropes, plastic bottles, branches, wooden planks and sticks, plastic spoons and other strange things.
All this wealth is usually glued onto transparent silicone. It is sold in construction stores and is available in small tubes or larger cartridges for a construction gun. It’s more convenient to work with a gun - it’s easier to control the force and get the right amount of glue, which is problematic with a regular tube.
Please note that silicone can be acidic or neutral. The acidic one smells very much like vinegar until it dries and you can only work with it in a well-ventilated area. Neutral silicone sealant does not smell like anything, but is more expensive. Still acidic, until it hardens, it can corrode the paint that is applied to the decor. When purchasing, pay attention to the setting time. This is the time during which you can still fix something, move something forward. As soon as the glue begins to polymerize, nothing can be done - it is covered with a hard film. The average time for the formation of a surface film is 10-20 minutes, but there are also more “long-lasting” compositions.
There are two decorating techniques:
- The decor is outside the mirror. In this case, a base is cut out of thin fiberboard or thick cardboard, which is larger in size than the mirror. It can be any shape - round, square, arbitrary shape. The decor is glued to the base, after the glue has dried, a mirror is inserted into the finished frame.
- Decorating the mirror around the edge. In this case, the glue and all fragments are applied directly to the mirror surface.
There seem to be small differences, but the design looks different in different techniques. The second allows you to get an openwork decor of the mirror, which seems to be illuminated by reflection.
DIY Provence style accessories: ideas in the photo
Craftsmen post a lot of photos of hand-made Provence style accessories.
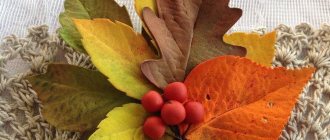
The symbol of Provence style is lavender. So if you add things with these colors to your design, you can get the true mood of French Provence. These can be boxes, decorative bottles, pillows, artificial branches or just lavender shades.
Provence is a rustic style. Therefore, decorative items made from twigs, bouquets and all kinds of bundles, fastened with white or lilac ribbons, would look appropriate in a kitchen in this style.
Plates, watering cans, vases and buckets with images using the decoupage technique look very impressive. Making such a product by hand is very simple: you need to take rice paper, PVA glue, glue the picture to the surface and cover it with varnish.
Using the decoupage technique you can decorate napkin holders, photo frames and even furniture.
Well, the aerobatics are homemade interior linen dolls. These are planted in a corner of the living room, on the window, at the head of the bed or on the refrigerator. They are also very easy to sew, and they look very impressive.
As it turns out, you can create many accessories yourself to complement the Provence style room. And what’s especially pleasing is that everything is done simply, you just have to start.
Types of shelves
Shelves in the kitchen are the most functional element. With their help, it becomes possible to place a lot of necessary items, and to do this in such a way that they are always within reach. And their spectacular appearance makes the shelves also a decorative element.
If you have at your disposal the most ordinary wooden shelf (the design does not matter), you can easily turn it into an interior element in the French country style. How? There are at least three simple ways:
- Painting with light paint.
- Using the craquelure or decoupage technique.
- Artistic painting.
The latter option is ideal for those who have at least basic art education or skills. Although, in fairness, it is worth noting that Provence does not require you to create artistic masterpieces. So, if drawing a delicate bouquet is not a problem for you, you can start decorating the shelves and cabinets.
The main thing is that the size of the shelf matches the dimensions of your kitchen. Agree, a huge wooden structure in a kitchen of modest square meters looks, at the very least, ridiculous. Not to mention that such a shelf will be inconvenient to use.
The shelf must match the size of the kitchen.
Based on the location of the shelf and its appearance, the following options are distinguished:
- Floor or wall.
- Closed or open.
- Wide or narrow.
- With stands or hooks.
- With drawers or doors.
Open shelves
A distinctive feature of the Provence style is the abundance of decorative elements. Numerous figurines, vases, candlesticks, framed photographs (it is better if the photo is slightly faded, with a hint of antiquity). Thanks to such cute little things, the room is filled with an atmosphere of comfort and warmth. It is clear that all this miniature splendor should be put on public display. And open shelves are perfect for this purpose, by the way.
Open shelves serve to display dishes and decorative items.
Open models have a number of advantages:
- They help create a unique, soulful design.
- Due to the fact that the shelves do not have doors, space is saved, as well as time for their operation.
- The items you need are always at hand.
Open shelves have several advantages.
Such designs play the role of a kind of showcase in which souvenirs and gifts about people dear to the heart are displayed, or dishes are beautifully arranged.
Designs without doors can be used as a display case for souvenirs.
The main disadvantage of open models is that dust invariably accumulates on them. And you have to wipe not only the surfaces, but also the objects that are placed on them.
Open shelves require more frequent cleaning.
Closed shelves
Most often, such designs are distinguished by deliberate roughness and massiveness. They are valued for their spaciousness and ease of use. It is best to place closed shelves in large kitchen spaces.
The main advantage of such shelves is that they do not require frequent wet cleaning. In addition, if there are children in the family or pets live with you, the closed design will ensure the safety of kitchen utensils and fragile decor.
Closed shelves provide better storage of items and protect from dust.
DIY picture frame in Provence style
Hey everyone
I finally got around to my favorite activity. I made a picture frame here, as promised. I'll show you. Well, I’ll tell you briefly, maybe someone will find it useful))
1. I needed: 3 jars of acrylic paint (it doesn’t smell, so you don’t have to be afraid of the indignant exclamations of your household) dark gray, light gray and white, to be honest, you can easily get by with 2 colors; You will also need different types of sandpaper (coarse and fine), a bristle brush (preferably two for each color, so as not to clean it every time), by the way, acrylic paint is diluted with water. Next, you will need a dry sponge for rubbing the paint and acrylic varnish.
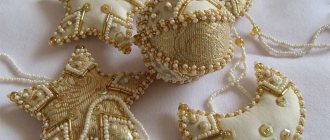
Idea No. 4. Mirrors with stucco
For historical styles (baroque, classic, empire, retro, etc.), gypsum stucco or its modern imitation - moldings with characteristic curls that are covered with gilding - are perfect as interior decoration.
Required materials: 2 sheets of MDF/plywood; Mirror; Stucco elements; Silicone sealant; Gypsum powder; Plasticine; Acrylic paint (white); Gold, silver and pearlescent tinting powder.
1. To make a frame, cut two holes in the MDF sheets: one the size of the mirror, the second 1 cm smaller for the gap for fasteners.
2. Cover the wood with white paint.
3. Some of the modeling elements can be prepared with your own hands (for example, oval medallions). To do this, you need to take plasticine impressions from the finished fragment, cover them with silicone sealant, smooth them with a brush and leave them to dry for a day. After the mold, fill it with a gypsum mixture diluted with water and get the finished parts.
4. Attach the modeling elements, remove the remaining glue with a sponge, “gild” and “silver” the modeling to your taste, carefully painting all the fragments.
5. To give an “antique” effect, apply pink and green mother-of-pearl to the base with a sponge.
It is difficult to imagine a cozy hallway or a comfortable closet without hangers. These simple devices help us compactly place umbrellas, hats and…
And today we want to tell you how to make a frame for a mirror
made of solid wood and reveal the secret of an interesting aging mixture that can transform this frame in a very original way. In order to make this frame you do not need to have many complex tools or unprecedented training in carpentry. Everything is done as simply as in the first two cases; it’s up to you to decide which path is easier to take.
Materials:
- large frameless mirror;
- vinegar;
- Black tea;
- brush;
- sandpaper;
- L shaped corners;
- glue;
- screws;
- saw.