International Women's Day is coming very soon. On the eve of this holiday, I would like to wish all the girls more tenderness, purity, spring mood, bright sunshine and happiness. On this day, a bouquet of flowers is expected by a girl, a girl, a mother, and a grandmother. It is not necessary to give fresh flowers; you can make tulips from sweets and corrugated paper with your own hands; it is simple and at the same time very exciting.
Thus, we will have a 3-in-1 gift: a sweet treat, a bouquet of flowers, and interior decor that will delight the eye for a long time.
Absolutely everyone likes delicate buds, and those made with your own hands will definitely be remembered for a long time. You will like : The most beautiful crafts for March 8: TOP 30 best ideas with templates and step-by-step photos
Bouquet of tulips made of corrugated paper with Raffaello: step-by-step master class
Let's make a delicate pink bouquet with Raffaello, these chocolates are ideal for the size of the bud. Such a gift will convey your sincere feelings and love and will take its rightful place on the owner’s shelf. Let's get creative.
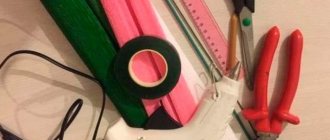
Prepare in advance:
- Corrugated paper, density 180 g, packaging
- Raffaello sweets
- Scissors
- Threads
- Skewers\wire
- Glue gun
- Dry pastel
- Brushes
- Artificial greenery
Progress:
- For one flower we need one rectangle of dimensions: 6 by 8 cm and six rectangles of scale: 4 by 8 cm. We fold the largest piece in half and round the corners, making a recess in the center for the candy.
- We wrap the blank around the candy and tighten it with thread. We straighten the resulting tail and cut off all excess, leaving only a piece to glue the stem.
- Now cut out the petals from the remaining squares. We make the shape of a rounded droplet and press down the center, giving volume to the element. We glue the petals in two rows of three pieces in a checkerboard pattern.
- We wrap the stem with a strip of green material. We cut out the leaves from strips of scale: 4 by 21 cm. For symmetry, fold the piece before cutting. We stretch the sheet only in the middle.
- To make the bud more voluminous, rub a suitable color of dry pastel with a brush at the base. When assembling a bouquet, add artificial greenery or small flowers.
- We fix all the flowers together with glue and a strip of material. Let's pack the surprise, tying it with a ribbon on top.
Our most delicate bouquet is ready!
Crepe paper is different from corrugated paper, are there any differences and what are they?
Often in a store, a buyer who has asked the seller for crepe paper is given a roll marked “corrugated”; it happens the other way around - instead of corrugated material, they “slip” a product marked “crepe paper”. And if you use one of these words in a query for an Internet search engine, the second will inevitably appear in the results.
Why is this happening? Are so many people simply confused, unable to differentiate between two completely different types of paper?
In fact, these are synonymous names, that is, two words have the same meaning. Such paper comes in different densities and thicknesses, it can be stronger or, on the contrary, it can tear easily. The material’s tendency to deform depends on its smoothness - specimens with deeper folds have better stretch, while smoother ones allow only slight bending and stretching. In general, both words mean paper with small folds. The word "corrugation" is of French origin and means the process of creating folds. And “crepe paper” comes from the English “crepe paper”, which literally translates as “corrugated paper”.
Some craftswomen even conduct entire professional studies to prove that “crepe” and “corrugation” are the same thing.
DIY paper tulip buds
Let's make another bouquet with a surprise inside, but this time we'll make still young, unopened buds. They, like nothing else, personify tenderness and the arrival of spring. And they will delight the representatives of the fair sex on this significant holiday.
For production we need:
- Corrugated and packaging papers
- Round candies
- Scissors
- Threads
- Skewers\wire
- Glue stick
- Scotch
Let's get creative:
First, we cut strips 3 cm wide, from which we will make petals, so choose the shade you like best. We cut the elements into equal parts, the length of which will be about 15 cm.
We look for the middle of the part, fold it like an accordion, and then twist it.
We stretch the part to the right and left to give it the desired shape.
We form the remaining petals in the same way. For one tulip we need 3 elements. Then you need to take the green material and cut it into strips 1 cm and 1.5 cm wide.
We cut strips one and a half centimeters wide into three parts. We also cut out several sheets of paper.
Let's start assembling the plants. We fix the candy on the skewer using threads. Place the petals tightly on the candy one after the other.
We wrap the threads around the base. Next, we decorate the leg of the plant with stripes that were not cut earlier.
We twist the stem to the middle, attach a leaf and twist further.
We make the rest of the flowers in a similar way, put them in a beautiful vase and present them to family and friends on this holiday.
Here's what we got:
Beautiful tulips with your own hands: video master class
You will also find it useful : Children's poems for March 8 for grandmothers from grandchildren (short and beautiful)
Materials for roses
You can use spoons to make almost any flower. For example, a rose. True, for this you need to work with fire. Therefore, this method is not suitable for small children. But for everyone else it's easy.
To make a beautiful rose - a craft from disposable spoons, stock up on the following tools and materials.
- 13 plastic spoons in your desired pink color. You can take the white ones and color them, but only at the end when the rose is formed.
- Pliers or wide-nose pliers.
- Scissors.
- Candle or lighter.
- Glue gun.
What else to read: Master class “Making attributes for the role-playing game “Shop” and “Cafe”. Project on design, manual labor (middle group)
The easiest way to make tulips with candies
The following craft can be done in literally 5 minutes, simply and very quickly! This express option will be more elegant, bright and rich than the others described in this article, and will definitely delight your mothers, grandmothers, sisters and girlfriends on a special spring day.
Required materials and tools:
- Corrugated paper
- Round candy
- Scissors
- Threads
- Skewer
- Glue gun
- Scotch
- Satin ribbon
Let's get started:
- First, let's prepare the parts for assembly; you need to cut out 2 red squares measuring 8 by 7 cm, and a green rectangle measuring 9 by 4 cm. We glue a satin ribbon to the candy with tape; with this design, the candies can then be easily pulled out of the composition.
- We round off the scarlet squares at the top. We superimpose the elements one on top of the other with a difference of one centimeter. We wrap the candy, stretching the paper in the middle.
- Using a glue gun, glue the skewer and petals at the base, and additionally secure with thread. For beauty, turn the edges of the petals outward.
- We stretch the green leaves of the flower and fold them like an accordion. Next, cut out sharp leaves on one side and twist the ends. Glue the resulting part to the plant. The flower is ready, we do the rest exactly the same way following the instructions above, then we collect a beautiful bouquet!
Interesting ideas for crafting a tulip
Sometimes the most unusual ideas for crafts are created from familiar materials at hand, and the result exceeds all expectations. Original ideas for making a tulip craft:
- Bouquet of spring tulips from pink foamiran.
- Graceful tulips made of satin ribbons.
- Volumetric flower buds made of fabric.
The most unusual ideas can be easily brought to life if you have a minimal set of materials on hand, ready-made step-by-step work plans and the desire to create an original bouquet as a gift.
Flowers with a surprise made of corrugated paper: step-by-step master class
Corrugated paper is an excellent material for making artificial floral arrangements. It is light, airy and velvety to the touch. Making a tulip from it is quite simple. We recommend involving children in creativity.
The younger generation will enjoy the process of needlework itself, in which real works of art are obtained from improvised materials. An attractive hand-made spring bouquet of tulips is a wonderful gift not only for International Women’s Day, but also for any occasion.
We will need:
- Corrugated paper
- Round candy
- Scissors
- Threads
- Skewer
- Glue gun
- Scotch
- Satin ribbon
Let's get creative:
For a workpiece 6 by 7 cm wide, round the two upper corners. We stretch the purple petal in the middle and add sweetness. We fix the skewer and twist the bud at the base.
Let's make two strips measuring 30 by 6 cm. Fold the element several times, cut it not completely, rounding the resulting strips 1.5 cm wide and unfold the part like this:
We press each rounded part with our finger and stretch it to give volume. We wrap the bud and fix it with a glue gun.
We do the same with the second purple stripe, but cut it into wider strips (2 cm) and attach it to the base with a second layer, so we will get a more magnificent flower.
We secure the base of the bud with a wide green stripe, and decorate the wooden skewer with the rest of the green material. We straighten the petals. The products turned out to be simply beautiful, right?
Sweet gift in beautiful packaging
In addition to flowers, any girl, girl, woman will gladly accept candy as a gift. But simply giving a bouquet and a box of sweets is not as interesting as packing each delicious treat in an original package. A simple master class on making tulips with candies inside will help with this.
You will need some patience and the following materials:
- wrapped candies;
- corrugated paper for buds of any color;
- corrugated green paper;
- wire;
- transparent tape;
- glue gun;
- tape;
- scissors.
Let’s start preparing a delicious present; see the step-by-step process below. But such a bouquet will look beautiful even without sweets. We cut the corrugated paper into strips 20 cm long and 2 cm wide. Carefully twist them in the middle and fold them in half.
We attach the candies with tape to the wire.
Next you need to be careful and careful. We attach three petal blanks to the base of the future bud around the candy using tape. In this case, the wings on the fold remain free. Next, adding a little volume, we also fasten the remaining part. As a result, you will get a tulip with three petals. Instructions with photos will help you cope with the task.
Related article: Crochet ribbon hat - creative fabric items
Cut out leaves from green corrugated paper. We tightly wrap the wire-stem with it. You can use fabric of a suitable color for this. Thus, we create several tulips with a pleasant sweet surprise and combine them into a composition, decorating them with leaves along the entire perimeter.
This bouquet is in no way inferior to the florist’s signature creations, and the sweets inside will delight any lady.
If desired, tulips can be placed in a basket using a floral sponge or polystyrene foam as a holder. Looks very natural.
Artificial tulips will delight the owner for a long time. You can create a real work of art in a couple of hours without investing a lot of money.
How to do
Cut out six strips of paper 2.5 cm wide and 10 cm long.
We round each detail on both sides, turning it into a petal. Then we pull out the petals in the middle so that they take the shape of a cup.
And after that, use thread or tape to twist the petals around the candy on a stick.
Cover the notes and tape with green paper or tape. Decorate the entire flower stem with them.
We decorate the flower with petals made of green corrugated paper. The craft is ready.
Tulips in origami style
Everyone knows the ancient Japanese art of folding paper products. As a child, everyone made an airplane that was launched out of a window, or a boat that went on an exciting journey through puddles.
Tulips are one of the simplest types of origami, the creation of which requires only paper. If you follow the step-by-step instructions, even a child can handle creating a bud.
Origami method 2
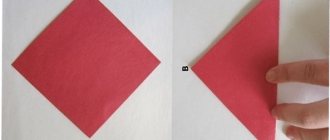
If you're afraid you won't be able to handle the previous assembly method, try an easier option. You will also need a square sheet of colored paper for the bud.
It needs to be folded diagonally once. Then fold the side corners overlapping and bend the corner formed at the bottom.
We make a stem from a green sheet of paper. Fold the sheet diagonally. We position the workpiece vertically and bend the wide angle side in half. Carefully smooth out the seams.
After this, we unfold the workpiece and fold the opposite corners of the rhombus along the folds towards the center. We wrap the bottom part towards the top. It turns out a stem with a leaf.
We connect the bud with the stem. The tulip is ready.
This is how you can make beautiful crafts with tulips in just a few steps.
How to do
Making a paper tulip with your own hands is done in several stages. To begin, cut identical strips of paper.
Their height should completely cover the candy. It is desirable that the flower be 2-3 times larger. This is necessary in order to twist and wrap the paper around the candy.
We fix the sweetness itself on a skewer or wire.
We tie each petal strip to the base of the flower using tape. The work must be done carefully. Excessive strips of tape spoil the appearance of the flower. Alternatively, you can secure the buds with green adhesive tape.
Try to make voluminous petals. We place the corrugated tape there so that it can be wrapped in the opposite direction.
After the petals are collected and secured, we wrap the flower stem with green adhesive tape or satin ribbon. We fix the latter with tape.
You can put together a whole bouquet from these tulips.

