CHECKMATE
There are things that cannot be bought, but can be made with your own hands.
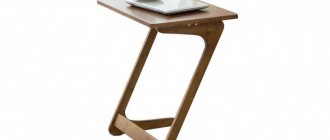
This is our elegant chess table
it is durable, light, comfortable, beautiful and safe.
Self-esteem
The product is made in-house, easy to use, and much cheaper than in the store. Improves the interior of the room, does not take up much space. All technological operations have been followed. The manufactured product fully corresponds to the intended purpose.
Bibliography
- Samorodsky P.S., Tishchenko A.T., Simonenko V.D. Technology. Technical work: 7th grade: Textbook for students of general education institutions.-3rd ed., revised/Ed. V.D. Simonenko.-M.: Ventana-Graf, 2008.-160 pp.: ill.
DIY chess table
The body of the table for playing mines is made of walnut wood. The front walls of the drawers are edged with walnut veneer, their side walls are made of oak, and the bottom is made of sycamore. The chessboard on the lid is made from squares of white sycamore and dark rosewood. Black insert strips are inserted between them, and the side walls of the box are decorated with sycamore inserts. After final polishing, the four types of wood complement each other, resulting in an impressive effect.
Step 1. Assembling the frame
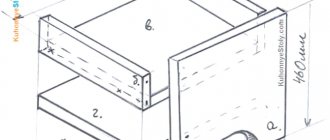
The frames surrounding the two drawers are assembled using half-wood joints, sawn by hand or with a router using a homemade device. The assembled frames are secured in folds selected at the ends of the side walls. Having assembled all four parts, you need to make sure that you get a rectangular box. Before gluing the parts on the side walls, at approximately a height of 4 mm from their lower edges, I select: 6 mm wide grooves for the plywood bottom. In addition, before assembly, grooves for sycamore inlay strips are milled into the side walls of the box.
When selecting long grooves for inlay inserts, the cutter and ruler are precisely aligned. Short grooves are milled using a ruler pressed against the wall. The depth of the grooves should be such that the inserts protrude slightly above the surface of the side walls and can be sanded flush. Before attaching the inserts, their ends are cut with a small sharp chisel at a right angle. Having prepared all the parts and the bottom, glue the box and tighten it with clamps. Having measured the diagonals, check the correct assembly and leave it to dry.
Step 2. Moldings
While the glue dries, the box and checkerboard moldings are made. For this, two small cutters are used - a rounding cutter and a “jib” (S-shaped).
The lid molding is made with the same cutters, but its edge is rounded with a small hand plane and sandpaper. In addition, before sawing parts of the molding “on the miter”, a narrow inlay strip is inserted into it.
Having made the moldings, saw off the four parts edging the box along the length and file their ends “on a mustache” before gluing them in place. Before the glue has hardened, remove all excess glue, otherwise it will interfere with polishing at the final stage of work.
Step 3. Making boxes. Installation
.
Drawers are made using a dovetail cutter. The front wall is made of walnut wood with a walnut veneer crown, and the side walls are made of oak wood. The base of sycamore wood is fixed in small grooves selected in all walls.
As a main decoration, as well as to protect the veneer, a small bead is glued around the perimeter of the front wall. This is a narrow strip of walnut wood planed to a thickness of 4 mm.
Before gluing it into place in a small miter box, the bead is sawed down, and the edge of the edging is cut to fit it with a sharp knife and chisel. Drawers can slide into openings on both sides of the box. They “walk” on oak slides glued to the plywood bottom and planed flush with the upper ribs of the lower lintels of the box frames.
Having inserted the drawers into place, they glued their guide—a 6-mm oak strip. At the same time, so that the front walls of the drawers are flush with the frames, limiters are attached.
Step 4. Cover - chessboard
It is made from 50mm squares of rosewood and sycamore wood, glued onto 6mm plywood measuring 430x430mm. Before sawing into squares, strips of rosewood and sycamore are first planed to a width of 50 mm and then planed to a thickness of 3 mm. Glue the squares and use an inlay cutter to select all the grooves in one direction. Each pass must be made exactly along the ruler. And although the depth of the grooves is only 2 mm, it is better to select them in two passes.
The black inlay inserts are attached with glue applied to the bottom edge, as otherwise the excess glue will be squeezed out and ruin the surrounding wood. (This work is best done with a wallpaper roller.) When the glue dries, sand the fibers to sand the inserts flush with sandpaper. When sanding inserts, very fine dust is generated, which easily contaminates white sycamore wood. To avoid this, before taking out the grooves, the pores of the plane tree are covered with two or three layers of pale shellac polish.
Having sanded the inserts in one direction, the same operation is repeated with inserts going in the other direction. At the intersection of the planks, the joint is processed very carefully.
Having typed the chessboard, it can be polished, which is easier to do before gluing it to the place of the edging.
When the glue dries, the plywood base may move a little. To avoid this, two oak strips are attached to the underside of the chessboard with screws and glue. They should be placed so that the screws screwed into the plywood protrude outward from the inside of the side walls of the box. If they are accurately planed to the thickness of the upper frame jumpers, they will serve as bumpers that prevent the boxes from falling out in the open position.
The front right square above the drawer should be white and this will determine the direction of the bumpers under the board. Having assembled the lid with the board, saw off the edging parts to length and glue them in place.
Step 5: Finishing
The table is covered with a 50/50 mixture of linseed oil and turpentine, applied with a swab. The mixture gives a slight darkening of the walnut, but does not affect the inlay.
When the mixture has dried, apply three layers of pale varnish to the table with a brush, sanding between layers with sandpaper. The last layer is polished with a sander. The lid is glued to the side walls after polishing is completed. Then brass legs are attached to the corners and the entire table is covered with wax and polished to a matte shine.
3.9 / 5 ( 90 votes)
Similar articles:
- DIY soap – Blue windows
- DIY papier-mâché maracas
- DIY funny children's backpack "Minion"
- DIY drawing on a T-shirt
Design options
The first question that arises for a home craftsman is what is the best material to make a table from. Many rightly believe that wooden tables are the best option.
The design can be made:
- made of wood;
- laminated chipboard;
- from plywood;
- made of metal;
- from pallets;
- boxes;
- from chipboard;
- from boards, etc.
Article on the topic: Do-it-yourself lifting table
Make it simply from scrap materials, or specially purchase the same wooden boards of the required size and quality, decide for yourself.
Wooden tables can be used for different purposes and spaces, but not only. Usually tables are made:
- for the street;
- to the gazebo;
- kitchen table;
- writing;
- dining;
- tennis;
- to the dacha;
- for the living room, etc.
When planning to make a table yourself, decide in advance where it will be located. The same tabletop for an outdoor table must be treated with protective coatings such as stain or varnish. Like the legs themselves, if they are also wooden. You can even coat it with epoxy resin, but that's a different topic for another day. If you have a metal support in your design, give preference to stainless materials.
But I propose to tell you about a fairly simple dining table based on natural wood.
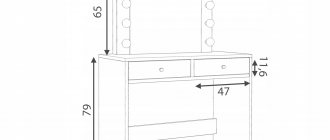
Round table options
We will not list all the variations of the round table, because there are countless of them. However, there are several classic variations that are always relevant:
- A small round table with one massive leg in the middle.
- Classic table with 4 legs.
- A table with 4 legs that has several “floors” for storing books and magazines.
Article on the topic: DIY electromagnetic table
However, tables are not limited to legs alone. Furniture stores in our country offer models with hidden recesses and folding shelves.
How to make chess from wood
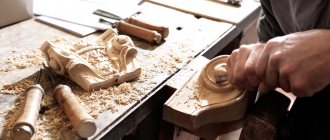
If you have previously been involved in wood carving or at least have an idea about this process, then making three-dimensional figures from this material will not be difficult. The detailed video tutorial describes all the intricacies of creating chess pieces and presents personal recommendations from the master.
The first thing you need to do before manufacturing is to prepare sketch templates, wooden blanks, a set of special tools (cutters, chisels), grinding and decorating materials. After this, you can safely proceed to watching prepared video lessons from Konstantin Belyaev, who is a master of wood carving:
- pawn creation:
- creating a horse:
- creating an elephant:
- creating a queen:
Konstantin Belyaev cuts all chess pieces by hand, without the use of special equipment or expensive tools. The main material used is linden boards, the width of which varies from 25 to 28 millimeters. When all the chess pieces are ready, they need to be sanded with sandpaper. If desired, you can burn or decorate with acrylic paints.
See also: Chess and music
In order for chess pieces to be fully used, it is necessary to make a playing base for them. You can make a chessboard from natural veneer. If there is no such material, then ordinary plywood 5 millimeters thick is suitable as a replacement. The frame can be made of slats. The playing field should be drawn out and painted with black acrylic paint. The entire manufacturing process is described in this video:
Article on the topic: How to make table numbers with your own hands
Giant wooden chess
Among big fans of strategic board games, exclusive chess sets of very large sizes are increasingly in demand. They can decorate spacious halls of houses or garden areas. If you try to purchase such a set in a store, you will find that the price is unacceptably high, so those who want to own giant chess pieces manage to make them with their own hands. It's not as difficult as it might seem at first glance.
To make large wooden chess, you need to purchase a pine beam, the width of which can vary from 10x10, 30x30 centimeters or more. The wood should not have cracks or knots, as this may affect the quality of the product. To make the figures you will need a lathe and sandpaper. Details of the entire process can be seen in the video created by wood carving master Valery Grishin:
Let's start with cells
1. From 6mm birch plywood, cut four blanks measuring 83x610mm for dark cells A
and six blanks measuring 51x610 mm for light cells B
(Fig. 1).
Note.
We chose birch plywood due to its lack of voids and relatively thick face veneer, allowing for small chamfers on the edges of the cages.
2. Glue two pieces of 19mm MDF board measuring 152x152mm and 64x152mm together to form an L-shaped stop (Photo A).
Secure this stop with a clamp in front of the saw blade and adjust its position using the light cell blank
B
to cut lengths of 51 mm.
Then make 32 dark squares A
with a length of 51 mm. Use the remainder of the blank for the dark cells as a template for a new setting of the stop stop. In the same way, cut out 32 light cells B, 83 mm long.
With the light cell blank B next to the saw blade, adjust the position of the rip fence until the scrap fence touches the workpiece, as shown on the left. Fix the longitudinal stop and saw off 32 parts from the blank for dark cells A, placing its end against the stop-limiter, as shown on the right.
3. Make small chamfers on the front side of all cells A, B
using a sanding block or small plane. Then proceed to tinting the dark cells (see section “”).
