Working with a template
To continue working with the craft, take a drawing that depicts a horse; you can draw it yourself, cut it out from a children’s coloring book, or print it from the Internet. You will also need a stationery knife, a thin brush, paints or gouache, a toothpick, super glue or PVA, a board for working with plasticine or cardboard wrapped in foil; if you don’t mind, you can use regular kitchen foil. Since this method of making crafts will be carried out using salt dough, you can add a magnet, so you should get a horse on a magnet.
It is necessary to cut out a horse template from paper, preferably it has a streamlined shape. Next, you need to attach the cut out image to the rolled out dough, carefully cut along the contour with a stationery knife, then remove the excess strips of dough and leave the figure on the board.
Using a toothpick, you can apply a relief pattern to make the figure more expressive. Carefully draw grooves with a toothpick, highlighting the mane, tail, hooves, eyes, nostrils, ears, and so on. Leave the product to dry on the windowsill for 15 hours. After this, you need to grease the figure on one side with PVA glue, and then wait until it dries completely. The same must be done on the other side, leaving the horse for another 5 days for perfect drying.
You can speed up the technological process by sending the figurine to the oven, heated to 80 degrees, and leaving it for an hour and a half. After the horse is completely dry, you can paint it with paints and glue a magnet. With the help of such simple manipulations you can get a beautiful and exclusive craft with your own hands.
Master Class. Salt dough horse
Master class “Horse - the symbol of 2014” made from salt dough
Author: Shigapova Gulnaz Ilyazovna, teacher of the MBU Preschool Children's School of Children's Art School of the Atninsky district of the Republic of Tatarstan.
Audience: the master class is designed for children of senior preschool and primary school age, their parents and teachers. According to the ancient eastern calendar, the symbol of 2014 is the Blue Horse. The horse is characterized by such qualities as hard work, devotion, assertiveness, dynamism and energy. And the blue color reflects peace and tranquility. I bring to your attention a master class on making a Blue Horse. Let's work hard and rejoice together. Beautiful is a horse standing in a stall, Beautiful is a horse flying across a meadow, Beautiful is a herd grazing in a field, Beautiful is a foal rushing across a clearing... Horse, a wonderful creature of nature, I feel a close unity with you... Four hooves, carrying horseshoes, Soft lips, sugar those who take... The eyes of a horse will look into the soul, From the eyes of a horse the sorrows will fade. (Vera Vdovina) The gaze of a cat is predatory and calm, The gaze of dogs is angry or betrayed. Only the horse looks at the world differently, Because the world is in its eyes. (Vera Vdovina) Materials:
- dough - aluminum wire - tape - napkins (paper, wet) - PVA glue - foil - sponge - gouache - water jar - brush - pen - shiny hairspray
the dough according to this recipe: 1 tbsp flour, 0.5 tbsp fine salt (“Extra”).
I took cold water and poured it in parts into the mixture of flour and salt, kneaded the dough with my hands in the same way as we usually do for baking. To prevent it from drying out, the finished dough should be stored in a plastic bag. Step-by-step description of the work
First step
We assemble the horse frame from aluminum wire. The frame is a kind of “skeleton” of the Horse. We connect the frame elements (legs, head and neck) with tape.
Second step
To create volume, first wrap the wire frame with ordinary paper napkins. To prevent the napkins from slipping, we wrap them with threads. Then layer by layer small crumpled pieces of foil.
Third step
We work with the dough.
We pinch small pieces from a piece of dough, knead them a little with our fingers and begin sticking to the foil (the surface of the Horse). First, apply an even layer to the legs, then to the head, neck and entire body. Thus, we “cover” the foil with dough. The main product is ready. We send it to dry. We placed it under the battery. Fourth step
When the base of the product is dry (in about a day), we begin decorating.
First we draw the decorative elements with a simple pencil on the base. Then from the pieces of dough (to avoid drying out, we take a little from the bag) we form the necessary elements: leaves, circles, flagella. We glue them to the main product with PVA glue. We form the leaves from teardrop-shaped pieces of dough, and mark the veins on them using stacks. Press down the balls and flagella with the tip of a pen. Fifth step
Form ears from pieces of dough. To do this, take a small piece of dough, divide it into two even parts and roll out balls. Using a pen, press down the balls and form the ears. We glue them to the head very carefully and evenly.
Sixth step
Let's start shaping the mane. Roll out pieces of dough into flagella, one end of which is thinner than the other. Glue them to the base with the thick end. Let's start from the bottom. To prevent the mane-flagella from sticking to each other and appearing curly, we insert small crumpled pieces of foil between them.
Seventh step
We form the tail in the same way as the mane. Using foil, lift the tip of the tail. This gives the Horse a form of playfulness. The horse is ready. We put it under the battery again and wait for it to dry.
Eighth step
Paint the dried product (after a day) with blue gouache.
Without waiting for the gouache to dry completely, first wipe the Horse with a sponge, then with a damp cloth. After this, lightly paint the decorative elements with white gouache. The final touch: cover our product with shiny hairspray. Here is the symbol of 2014 - the graceful Blue Horse is ready. According to Chinese horoscopes, the horse is a symbol of wisdom and pure reason. Make a Blue Horse. May it bring good luck, happiness, wise decisions and good deeds; will bring optimism, energy and prosperity into your life! Work option
We recommend watching:
DIY Unicorn toy
Horse magnets made from salt dough. Master class DIY horse made from waste material DIY salt dough horse. Master class with step-by-step photos
Similar articles:
DIY paper horse
How to make a horse with your own hands
DIY New Year's paper crafts. New Year's souvenir
DIY paper horse. Master Class
DIY New Year's crafts
Creating with your child
Modeling takes place on a special board or baking sheet. Prepare in advance a small rolling pin for rolling out the dough, a brush for moistening the dough with water, as well as other details, depending on the direction of your work. For example, paints, beads, threads, etc.
If this is your first time modeling with your baby, choose simple patterns to make it easy and interesting for your child to practice.
First, you can show the child how this is done, then show it with his own hands, and then give the child the opportunity to create a figurine on his own.
To develop your child, you can come up with fairy-tale stories about a molded character together. For example, by making a caterpillar, you can create its entire family, and then play with it.
You can see a master class on making caterpillars from salt dough on our website.
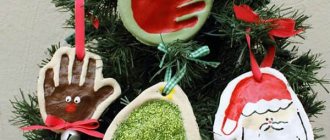
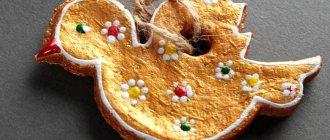
Beautiful toy for the Christmas tree:
1. Make colorful pieces of dough in advance.
2. Roll them out well and use molds to make figures of the required format.
3. Make a small hole for the thread. If you make a lot of holes, you will have an openwork figure.
4. Decorate the product. This can be done using cereals, shells, buttons, and so on (but plastic cannot be used). You can sprinkle glitter on the glue layer and decorate it with varnish.
Create a souvenir hand or foot print of your child. On the back, write how old the child was. Photo of a leg print made from puff pastry.
With our master classes, you will be able to create original compositions from salt dough, which will be the best gift for any occasion, and will also create a cozy atmosphere in your home.
Toy coloring book
When talking about how to make a Dymkovo toy from salt dough, we must not forget about the principles of coloring it. This is indeed a very important moment, since the value of the smoke is not only in the shape of the figure, but also in its color design.
Traditionally, craftsmen painted haze with natural-based paints that they made themselves. Today, gouache or acrylic paint in bright colors is quite suitable for painting figures made from salt dough. Moreover, we must remember that patterns and colors have always carried certain symbolism. Thus, white is the personification of purity and goodness, green is life and unity with nature, red is strength, fire, health.
You need to paint the toy after it has completely dried. The finished product can be coated with a layer of varnish on top - this will give it shine and greater strength.
Now you know how to make a Dymkovo toy from salt dough. That’s why you can invite your children to create one of the masterpieces of folk crafts together with them – the famous smoker.
Source
Preparing the basis for work
The easiest way to make play dough is to take equal proportions of salt, hot water (they need to be mixed first to form a saline solution) and flour. Moreover, the finer the salt, the more plastic the dough will be. You can make toys initially colorless, or you can paint the dough in different colors in advance by adding a little food coloring or gouache diluted in water. The finished material for modeling should be kept in a plastic bag so that it does not ventilate in the air and a salty crust does not form on its surface.
Now you can proceed directly to making the Dymkovo toy itself from salt dough.
Let's sculpt a horse
The master class contains several models and methods of sculpting a horse, from simple to complex.
A simple model of a horse is made using stacks of a block of plasticine, for example brown, and matches. You will also need plasticine for the mane, hooves, and eye.
Progress:
- Form an ellipse from a small ball (you can combine and smooth two balls) - this is a blank for the head;
- Make triangular ears and eyes from cakes of brown, white and black colors and attach to the head, make nostrils with a stack or a match;
- Roll a large piece of plasticine into an oval (horse body) and insert a match on one side;
- Wrap enough plasticine around the match to make a neck and attach the finished head;
- Roll four identical sausages (legs) and attach them to the body, smooth them;
- Add a black cake to each leg - hooves;
- Roll thin flagella from yellow or white plasticine and make a mane out of them (glue them in rows and on top of each other).
An elegant horse can be made from white and brown plasticine.
Progress:
- Roll out blanks from plasticine, as in the photo:
- Attach the conical legs, neck and head to the oval body, smooth it out (it is important that the horse stands on all four legs and does not fall over);
- Flatten the brown balls and attach them to the legs in the form of hooves;
Related article: Baptismal dress for a girl: knitting pattern and description
- Attach an even arched tail;
- Using thin sausages (you can use a garlic press), make a mane, not forgetting the bangs;
- Make eyes on the muzzle from black and white cakes;
You can decorate such a horse with bows or make a saddle for it.
How to blind a young lady
The most popular image of a smokey woman is a busty beauty in a bright outfit. We will talk further about how to make a Dymkovo lady toy from salt dough.
The first step is to prepare the base of the figure - the dress. It consists of a bell skirt (can be hollow, which will save on dough, but should be quite stable) and a bodice. At the same stage, the figurine can be decorated with a frill apron: for this, a piece of dough is first rolled out into a rope, which is then turned into a ribbon by lightly tapping it with the edge of the palm. A special feature of a smokey lady is often her ample breasts, so you should not forget about this detail of the figure.
The next step is to attach two flagella to the body. These are hands. They can be crossed on the chest or rested on the sides - it all depends on the imagination and how the image of the lady will be completed. At the final stage, you can give her, for example, a baby, a basket or a rocker.
Now you can attach the head, decorated with braids of intertwined strands and a kokoshnik, to the body. Or an intricate hat, if the image of a city-dwelling young lady is created.
