Kamila_Feodosya
6786 0 0
Kamila_Feodosya August 7, 2016Specialization: professional approach to architecture, design and construction of private houses and cottages, new products on the market of building materials and finishing. Hobbies: growing fruit trees and roses. Breeding rabbits for meat and decorative breeds.
The main thing is comfort
Maximum comfort and the desire to anticipate all desires are the motto of modern industry. Therefore, a bath stand is no longer just a necessary building material, but a useful and convenient little thing, which is sometimes difficult to do without.
Assembling the frame with your own hands: general technical details
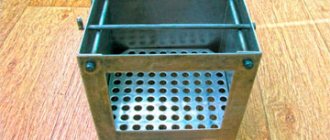
Assembling a wooden podium frame for an oval bathtub
First of all, it’s worth understanding what bathtub stands are. Representing a non-solid supporting structure, the bathroom frame has racks and lintels that evenly distribute the load of the main weight. Such frames can be called trusses, since approximately such a system, closed around the entire perimeter, will have to be assembled indoors before the bathtub is installed on the frame.
So, how to make a frame for a bathtub with your own hands, the main features:
- Take measurements, decide on the choice of material (section of timber or profile pipe, if the frame for the bathtub is made of metal profiles). As for the metal profile for drywall, it is better to choose UD and CD. But it is good to make a wooden frame for a bathtub from a material with a cross-section of 20x100 mm (profile pipe 20x40 mm). The key size is exactly 20 mm, since this distance is standard for the side of the ditch and the bend of its side.
- The remaining dimensions (length and width) are taken from the bottom side of the font from the hem of one side to the inner curved edge of the opposing side.
Installing a brick base
The next step that is necessary to make a frame for a corner bath is to measure and lay the supporting perimeter determined according to the above parameters. If the supporting stand for the bathtub is made of a plasterboard profile or timber, then everything is simple: nail the pieces cut to size to the floor (with dowels)
If there is a frame made from a profile for a heavy bathtub, lay the tubes on the floor and weld them into a rectangle. Now it is important to know how to assemble a bathtub frame. Installation of corner support posts does not take much time, but the work must be done as carefully as possible, since it is on them that the main load of the bowl, water and person’s weight will fall.
- Next, you need to start assembling the upper support triangle, which is necessary to evenly distribute the load of the bath across all support posts. The design completely replicates the assembly of the lower support. Place the profiles or pipe on the corner posts and secure them using self-tapping screws or welding.
- A frame for a metal bathtub, like a stand for a bathtub made of acrylic or cast iron, cannot be without additional load-bearing racks. They serve as a reinforcement for the structure and allow it to support the mass of the bowl plus everything that is there. The racks are installed and strengthened in increments of up to 0.5 m (no more) along the longest side of the truss.
An example of a combined frame for a corner bathtub
Making the frame is half the battle; you also need to know how to install the bathtub on the frame. But there are no big difficulties here if the frame itself is assembled correctly and mounted in the place where the bowl will be located. You can lift the font and lay/place it in a plasterboard or metal frame for a bathtub yourself, but it is best to ask for help; together, this procedure will be faster and easier. In particularly difficult cases, trusses are made around the font, raised on an additional support
After the structure is ready, the supports are carefully removed and the bowl is lowered onto the frame
To see what a stand for a steel bathtub is or to understand how to make a frame for a bathtub from cast iron or acrylic, look at the photos below.
Whatever support you make, remember: the number of additional supports for the truss depends only on the material from which the frame itself is made. A step of 0.5 m is suitable for profiled pipes and timber, but for a plasterboard profile the step is narrowed to 0.3 m, as in the case of using timber with a section of 100x200.
Decorating a farm is a matter of taste and opportunity. Plastic, drywall, tiles - use what you like best.
https://youtube.com/watch?v=WWZ9hcNjoVU
Dependence of the complexity of a structure on its shape
It is clear that the more complex the shape of the bowl in plan, the more work an independent craftsman will have to do.
According to the degree of complexity, the arrangement methods can be divided into the following options:
- Regular rectangle. Its construction will not cause difficulties, especially if the frame is installed in a niche or in a corner formed by two adjacent walls.
- Triangle with a curly outer side . Similar designs are suitable for corner baths. The sides converging at right angles are usually located in the corner of the room, the frame is constructed along the outside, and includes several interconnected frames.
- Oval . It is arranged along the contour by installing a large number of frames or broken strapping. Although there is a simpler method.
To ease the effort when installing oval and fancy-shaped bathtubs, a rectangular structure with gypsum fiber lining is constructed.
A hole is cut out in the horizontally laid top sheathing panel for the bowl so that its sides rest completely on the frame.
Image gallery
Photo from
Arrangement of an oval bath
Specifics of frame construction
Forming a hole for the bowl
Template for marking the hole on the panel
Most homemade products do not require repeated assembly/disassembly. They are arranged in a non-disassembled form, although sometimes the possibility of dismantling and subsequent construction in a new place would be very useful for those who like to move frequently.
The frames supplied with acrylic bathtubs can be easily disassembled and reassembled many times. They include, as standard, a welded frame and adjustable supports in the form of steel threaded rods with plastic attachments. They come with fasteners and instructions with a detailed step-by-step description of the actions.
The procedure for installing an acrylic bathtub on legs
Installing an acrylic bowl on legs is easy to do, but this design has a number of disadvantages: due to the small number of support points, the bottom can sag during use, and the legs can slide on the floor tiles.
Marking
The bathtub comes with 4 legs, fasteners and 2 strips that form a simplified frame. Metal strips are attached to the bottom perpendicular to the long axis of the bowl.
To install the planks you need:
- find the center of the planks and mark it with a marker;
- mark the center and longitudinal axis of the bottom of the bowl;
- lay the strips, measuring an equal distance from the center of the bathtub and retreating 3-4 cm from the edge of the reinforcing plate, aligning their center with the longitudinal axis;
- mark the fastening points on the bottom through the holes in the slats;
- drill 4 holes 0.8-1 cm deep along the marks (the diameter of the screws should be 1-2 mm larger than the drill);
- align the holes, screw the metal base.
Holes in the reinforced bathtub bottom can be drilled in advance. In this case, you just need to align them with the holes in the planks, and then screw in the screws.
Putting the legs on
The legs are assembled in the same way as in the example with the frame. Each leg is attached to the bar with a lock nut, the height is adjusted with a second nut.
Having installed and adjusted the height of the racks, you need to turn the bowl over and place it on the floor. After adjusting the height, the horizontality of the sides of the bath is checked with a level. Holes for dowels are marked on the walls. The markings must be applied so that the edge of the plate is 3-4 mm below the top edge of the sides.
Using the marked marks, holes are drilled into which dowels are inserted. Fixing plates are mounted on them. After this, the bathtub is raised, placed on the wall mounts and placed on its legs.
The decorative screen is installed on wall and L-shaped supports or only on wall hooks. The number of supports depends on the configuration of the legs.
Shopping
So, you are convinced that you need a children’s toilet seat cover and have even read the recommendations for choosing them. Now, finally, we can go to the store.
Next, I will give you a few examples that you may encounter during your shopping process:
- The “Roxy-kids” model is a classic child toilet seat with a step, which every child and his parents will appreciate. It is easy to use, reliable and very attractive:
| Parameter | Description |
| Weight | 1600 g |
| Material of manufacture | High quality plastic |
| Length | 590 mm |
| Width | 370 mm |
| Height | 230 mm |
| Price | 1800 rubles |
Sample model "Roxy-kids"
- Model "Froebel with ladder":
| Parameter | Description |
| Weight | 1200 g |
| Material of manufacture | High quality plastic |
| Color | Pink |
| Price | 2100 rubles |
Children's toilet stand "Froebel"
- Model "KID HOP":
| Parameter | Description |
| Country of manufacture | Russia |
| Weight | 1900 g |
| Material of manufacture | High quality plastic |
| Color | Green |
| Price | 1400 rubles |
Sample model "KID HOP"
- Model "Polymerbyt":
| Parameter | Description |
| Manufacturer country | Russia |
| Weight | 150 g |
| Color | Orange |
| Material of manufacture | High quality plastic |
| Price | 107 rubles |
Sample model "Polymerbyt"
- Model "Little Angel":
| Parameter | Description |
| Manufacturer country | Russia |
| Weight | 200 g |
| Color | White |
| Material of manufacture | High quality plastic |
| Price | 107 rubles |
Sample of the "Little Angel" model
- Model "Ducka":
| Parameter | Description |
| Manufacturer country | Italy |
| Weight | 800 g |
| Colors | White and yellow |
| Material of manufacture | High quality plastic |
| Price | 845 rubles |
Sample of the "Ducka" model
- Model "Luma":
| Parameter | Description |
| Manufacturer country | Netherlands |
| Weight | 250 g |
| Color | Blue |
| Material of manufacture | High quality plastic |
| Price | 560 rubles |
Sample of the Luma model
- Model "Tega Baby Little Princess":
| Parameter | Description |
| Manufacturer country | Poland |
| Weight | 200 g |
| Color | Blue |
| Material of manufacture | High quality plastic |
| Price | 530 rubles |
Sample model "Tega Baby Little Princess"
Installing an acrylic bathtub on a frame
A different frame is developed for each bathtub, so the assembly nuances are different for each case. Even within the same company, for different models of the same shape, the frames are different. They take into account the geometry of the bathtub, as well as the distribution of loads. However, the order of work is general, as are some technical points.
Example of frames for acrylic bathtubs of different shapes
We twist the frame
A frame is assembled on which the bottom rests. In some cases, it comes welded and does not require assembly. The frame is placed on the bottom of the inverted bathtub until it is secured with anything. It is set straight, as it must be fastened.
- Washers with fasteners are installed on the racks. Racks are either pieces of profile (square pipes) or metal rods with threads at both ends. They must be attached to the sides of the bathtub. Firms usually develop fasteners of their own shape. The photo shows one of the options.
- Racks are usually installed in the corners of the bathtub. There are plates in these places; there may or may not be holes - you will have to drill them yourself. The number of racks depends on the shape of the bathtub, but at least 4-5, and preferably 6-7 pieces. First, the racks are simply assembled and placed in their assigned places (we are not fastening them yet).
- The second side of the racks is connected to the frame supporting the bottom. A threaded nut is mounted into the end of the rack; we screw a screw into it, connecting the frame and the rack.
- After installing the racks, use bolts to level the position of the frame. It should be positioned strictly horizontally, and the bottom should rest on it tightly, without gaps.
We attach the bathtub to the frame
Once the frame is level, it is screwed to the reinforced bottom of the acrylic bathtub. You must use self-tapping screws of the recommended length, which come with the frame.
Fix the frame to the bottom
- The next step in installing an acrylic bathtub is aligning and fixing the racks. They have already been adjusted in height, now we need to set them vertically (we control them with a building level on both sides or check the accuracy of the alignment with a plumb line). The exposed racks are “seated” on self-tapping screws. The length of the fasteners is indicated in the instructions for each bathtub, but usually they are shorter than those that fixed the bottom.
- Next, install the legs on the frame.
- On the side where there will be no screen, a nut is screwed onto the pin of the leg, after which they are inserted into the holes in the frame (hanging on this nut) and secured to the frame with another nut. The result is a height-adjustable design - by tightening the nuts, you can set the bathtub to the desired position.
- The assembly of the legs on the screen side is different. The nut is screwed on, two large washers are installed, a screen stop (L-shaped plate) is inserted between them, and the second nut is screwed on. We got a screen support adjustable in length and height. Then another nut is screwed on - the support nut - and the legs can be placed on the frame.
Screen installation
This is not quite the installation of an acrylic bathtub, but we rarely do without this step: installing the screen. If you purchased this option, it comes with plates that will support it. They are placed along the edges and in the middle. Having placed the screen and adjusted the stops on the legs, secure them in the required position. Then the places where the plates need to be secured are marked on the bath and screen, then holes are drilled for fasteners and the screen is secured.
We place the screen mount on the side
- Next, you need to install the fasteners for the acrylic bathtub to the walls. These are curved plates to which the sides cling. We move the installed and leveled bathtub to the wall, mark where the sides will be located, and place the plates so that their upper edge is 3-4 mm below the mark. They are attached to dowels by drilling holes for them in the walls.
- During installation, the sides of the bathtub are placed on screwed plates. Once installed, check whether it is level and adjust the height with the legs if necessary. Next, we connect the drain and the last stage - we screw the screen to the plates installed on the side. At the bottom it simply rests against the exposed plates. The installation of the acrylic bathtub is complete.
Installation of an acrylic bathtub with your own hands is completed
Next, you will need to make the junction of the sides of the bathtub with the wall airtight, but this will be discussed below, since this technology will be the same for any installation method.
How I learned to make warm toilet seats
Greetings, comrades!
In the previous post about the boiler, some commentators wondered “why did you buy nichrome, and not this or this?”, They were worried about the time I wasted and doubted my logic. By the way, thanks to the guys for the ideas, there were some interesting ones and some outright nonsense, but thank you for your interest, I’ll try something if the opportunity arises. In general, closer to the point. After that incident, my aunt actively began to complain that her toilet seat was very cold in winter, and damp in the fall and spring. I don’t know, maybe I’m exaggerating, but my mother started trying to get me to do something. Well, as always, I went to bow to the “tube” and found an interesting option.
The remaining nichrome was useful to me, fortunately my aunt didn’t throw it away or lose it. I came to her in the summer, it was hot, it was the best time to use the toilet when it smelled terrible and there were flies everywhere. The situation was further complicated by the fact that she had no light in the toilet, so she had to pull the air vent to the corner of the outhouse roof (threw a wire through the air and wrapped the wire around it, it lasted for 6 years, if I’m not mistaken), fortunately the toilet was not far from the shed . I also needed a plug to turn on the heating pad; I cut it (along with the wire) from an old kettle. So, all the preparatory work was done and I started insulating the toilet seat (where you need to sit, that’s what it’s called, I think).
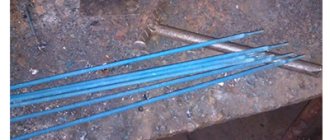
First of all, I tightly laid non-flammable cotton wool (it didn’t seem to be glass wool, but it was slightly prickly), and secured it to the toilet seat with electrical tape. Then he began to wind nichrome all over the cotton wool at intervals
0.5 cm. This is an important point, because if you wind it close (if the turns touch), then they will heat up and the whole idea will burn out, and if they are far from each other, it will heat up quickly and not very evenly, and this will cause the backside literally burn. I fiddled for a long time, I wanted to do everything exactly. After that, I wrapped everything with ordinary cling film to fix the nichrome, and on top of it there was reflective gold tape (available on Ali) so that the toilet seat cover would not burn when the wire was heated. I went over the tape again with cotton wool, secured it again with electrical tape and finally with cling film. The ends of the nichrome were driven into the terminal blocks, and they were connected to the wire from the kettle. Here, in fact, the homemade pop warmer is ready!
Now the most important thing is the connection. I made a switch and an outlet in the toilet. The socket is powered from a switch for convenience. All you have to do is turn it on and enjoy the warmth!)
Installation technology
When starting to assemble the frame for the bathtub with your own hands, the optimal height of the upper edge of the bathtub, recommended by sanitary standards, is 60-56 cm, and the minimum possible distance from the floor to the bottom of the product, sufficient to connect the siphon, is 15 cm. To work, the master will need a building level , tape measure, marker, saw, wooden beam, deep penetration antiseptic, hammer drill, dowel-nails and hammer. The structure is assembled according to the following scheme:
- First of all, you need to carefully take measurements from the bathtub. Determine the height, length and width of the frame, the number of vertical posts.
- Then the timber is cut. You can cut wood with a regular saw, grinder or circular saw. It’s easier to work if you have a frame diagram with all the dimensions in front of your eyes.
- The timber is impregnated several times with an antiseptic drug or coated with moisture-resistant paint.
- First, the bottom trim of the frame is made. To prevent the bathtub from moving around during operation, the timber is fixed to the floor using dowel nails.
Expert advice
If you do not want to purchase a ready-made footrest for the toilet, then you can easily make it yourself with your own hands. Often the creation of such products is not the most expensive and does not require much time. You can choose plastic or wood as the main material.
Abroad, footrests have long come into use; they are considered must-have items for the toilet, which is why, for the greatest comfort, you should purchase this kind of product only from trusted sellers, and best of all, in specialized stores and pharmacies.
Characteristics
There are many options for round baths, each of which has its own characteristics, ranging from size to internal arrangement. Thus, after going through all the possible options, you can choose your “ideal” barrel sauna.
The smallest bathhouse, located horizontally, is 2 meters long. Its design implies the presence of 1-2 rooms. You can undress here at the entrance if the bathhouse has a porch with a canopy. The weight of such a building is about 1.5 tons.
The largest barrels reach a little over 6 meters. There can already be up to 3 rooms: a dressing room (with a well-thought-out resting place, a table, clothes hangers, benches), a wash room (with a shower or water containers), a steam room (with comfortable benches and loungers); or in the case of a sauna, the washing room can become a relaxation room. On average, the length of each room will be 1-2 meters.
Classic round baths can be of the following sizes - up to 2, 3, 4, 5, 6 meters in length, about 2 meters in diameter (1.95 m is the internal diameter). Quad and oval baths may have slightly different parameters: 4x4, 3x6. Almost any bathhouse can accommodate comfortable sun loungers with a width of 500 mm.
In two-meter baths there is only one room. In the three- to four-meter ones there are already two – a small locker room and a steam room. The largest ones have space for three rooms.
As for height, even tall people can take a steam bath in this type of baths. The ceiling height is more than 2 meters.
The classic shape of a barrel bath is a circle, or rather a cylinder, located horizontally.
Less common are oval, square or rectangle shapes with rounded corners. In addition, there are options for baths with a semicircular top and rectangular bottom.
The entrance to both oval and quad baths can be from the front or the side. The entrance can be framed by a canopy or equipped with a gazebo. And the barrel sauna can be additionally enclosed in the frame of a gable roof.
Double-rounded baths have a rectangular outline. Vertical barrel baths are most often round-shaped buildings, less often oval or rectangular with rounded corners.
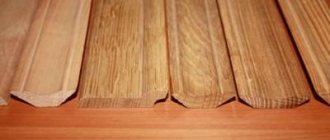
The main performance characteristics of a bathhouse depend on the materials from which it is made. The bathhouse is built from wood, or rather, specially processed profiled timber with a moongroove or tongue-and-groove fastening. The following types of wood are usually used for construction:
- Oak is a very high-quality material that becomes even stronger when exposed to water. It has excellent properties and can serve for many years. It has a beautiful structure, but is very expensive.
- Linden is an excellent material for a bathhouse. Known for its medicinal properties. Unfortunately, poorly treated wood of this species is easily susceptible to rotting and other negative effects.
- Aspen is an analogue of linden. With its help you can also create a favorable microclimate. But unlike linden, it is more resistant to harmful effects.
- Larch is a material that does not rot, and therefore will last a very long time. True, the price for round timber of this breed is quite high.
- Cedar is the only conifer that is highly recommended as a building material. It can also be used to create a healing microclimate. It has a beautiful unique structure. It has one drawback - it is quite expensive.
- Spruce, pine and other conifers are not recommended as building materials for baths. This is due to the fact that when exposed to high temperatures, wood is capable of releasing resins, which can cause burns. However, this effect only occurs from temperatures exceeding 100 degrees. Moreover, if such wood has undergone good chamber drying, then this process is minimal.
- Alder and birch are not suitable for building a barrel sauna, as they get very hot.
It is worth noting that it is possible to use several tree species in construction. For example, the floor is larch, the top is linden, and the trim is aspen. This solution will help save a little on construction.
In addition to wooden elements, you will need ties, which are made from iron tape (strip), or steel hoops. Of course, metal corners, screws and other fasteners will be needed.
Toilet cover: 5 most popular options
The toilet is used by all members of the family living in the house or apartment, as well as guests and, in especially unique cases, pets. At the same time, the size of the bowl usually has the same standards, which are not suitable for everyone. Special toilet seat covers can solve this problem, which we will talk about in this article.
Overlay with ladder for children
Overview of possible options
A toilet seat cover for children ranks first on our list and for good reason, since a child is the most important member of the family.
Option No. 1: for children
Children's soft pad with handles
For a child, such devices are used primarily, since in a classic bowl he will simply fail, and his desire to grow up faster, repeating everything after his parents, cannot be stopped. It also makes life easier for adults, eliminating the need to regularly take out the children’s potty. So, accustoming your baby to the toilet with the help of an appropriate pad is absolutely the right decision.
Photo of an anatomical toilet seat for a child
Manufacturers offer several types of baby attachments:
| Name | Description |
| Traditional | They are the same oval as adult seats, only with a smaller inner diameter. There are both soft and hard samples. They are attached either under the main circle or above it. |
| Anatomical | A model of this type is an almost full-fledged toilet of children's size. Its surface follows the shape of a sitting child and is additionally equipped with a backrest, and the lower part has special fastenings. The price of such pads is at least slightly higher, but the comfort they create is also noticeably superior to traditional models. |
| Consoles | This is an even more complex and comfortable design, which is a full-fledged comfortable seat, secured to special supports and equipped with steps so that the child can climb onto it himself. In this case, there is no contact with the adult toilet at all, which is most ideal from a hygiene point of view. |
| Road | This option is useful for traveling, since public toilets for children are almost impossible to find. These models fold up and easily fit in a travel bag. |
Travel children's toilet seat cover
Tip: when purchasing a traditional pad, it is recommended to opt for a model that is fixed on top of an adult seat, as this option is much more hygienic.
Option No. 2: for cats
Toilet cover for cats with perforated circles of different sizes
Some may rashly call such a device a whim, but let’s soberly evaluate its effect, thanks to which you get rid of the constant purchase of new cat litter. If you calculate the amount of money that you will save over several years thanks to such a device, it will be a very significant amount.
The design itself is a polypropylene oval in the shape of a toilet bowl with several internal perforated circles.
Instructions for taming a cat look like this:
- First of all, we place the cat's litter box in the toilet so that the animal finds its way there.
- Next, we place the pad with the filler on the closed toilet.
- After the cat adapts to the new place, we move the device to the open bowl.
- As the pet further gets used to it, we remove the circles, increasing the through hole.
- The last step is to remove the lining from the toilet completely.
This is how you can easily and simply save yourself from the cost of maintaining a cat litter box. (See also the article How to train a cat to use the toilet: features.)
Option #3: to increase functionality
Automated bidet overlay for toilet
This option is already for an adult, and its main task is to make visiting the toilet as comfortable as possible. This equipment is quite expensive, but provides residents with a whole range of amazing additional functions:
| Function | Description |
| Bidet | Several water jet modes will solve any issues related to personal hygiene when visiting the toilet |
| Water heating | Controls the temperature of the supplied water |
| Drying | Eliminates the need for toilet paper completely |
| Heated seat | Makes areas of contact with bare parts of the body warm |
Bidet control panel
Installation is easy to do yourself:
- Remove the old cover by unscrewing the fastening elements.
- We connect the water hose to the T-shaped adapter located on the device.
- We connect the second hole of the adapter with another hose to the drain tank.
- We fix the seat itself.
- We turn on the device into the network. (See also the article Toilet with bidet function: features.)
Advice: the use of the described device is especially recommended for people suffering from dilated hemorrhoidal veins, as it is a prevention of this disease.
Option No. 4: for disabled people
Orthopedic toilet extension
Damage to the musculoskeletal system creates enormous inconvenience when visiting the toilet. Deep plastic pads with built-in handrails and fixing elements have been developed especially for people with such injuries. Thanks to such orthopedic structures, disabled people or people with broken legs can sit quite comfortably on the toilet without assistance.
Option No. 5: for one-time use
Disposable paper toilet covers
This wonderful invention will allow you to avoid acquiring various types of infections when visiting public toilets, which, unfortunately, quite often have simply catastrophically unsanitary conditions. Cheap and compact, easily fitting even in your pocket, they will become an excellent companion both on a long journey and on a regular walk around the city. Remember that your health is priceless!
Conclusion
We have looked at the five most popular toilet seat covers.
With their help you can:
- Make the toilet accessible to children, cats and the disabled.
- Increase the functionality of the toilet, making its use more comfortable.
- Eliminate the possibility of contracting infectious diseases when visiting public latrines.
Help your child grow up
In the video provided in this article, you can familiarize yourself with additional materials that are directly related to the topic presented. A toilet cover for the disabled, like any other, will improve your life.
Making a frame for drywall on the wall
Drywall is mounted on the wall to level the surface and hide communications - pipes, wires, ventilation systems. The frame for plasterboard on the wall can be made from a metal profile or wooden blocks.
For a wooden frame you should prepare the material:
- Treat each block with an antifungal compound;
- Dry all wooden frame elements;
- Remove unsuitable bars that have knots, cracks, material with defects can break and damage the frame;
- The size of the block must be at least 30 mm by 50 mm, while the drywall is screwed onto the wide side of the block.
If the frame on the wall is made of profiles, then you should use exclusively wall racks and profile guides. They are specially reinforced with an additional stiffening rib. Guides are attached to the ceiling and floor, which serve as a frame for the frame. Rack profiles are attached to the guide profiles in increments of at least 60 cm.
Upon completion of the installation of the frame, you can lay communications and insulating materials into the body of the frame and cover the wall with gypsum plasterboard sheets.
Is it possible to buy a toilet seat for children under one year old?
For babies, there are models designed for use from six months. These are Italian-made Cam pads. Their distinctive feature is the presence of special sides that form an ergonomic backrest and railings, as well as a small diameter hole. These covers are easy to fix and fit standard toilets.
Prices are in the average range and fluctuate around a thousand rubles. An important role is played by the fact that the material with which the child’s skin comes into contact is hypoallergenic, and many colors will help you choose a model for both girls and boys.
Recommendations for selection
An important point: the correct choice simplifies installation and increases the comfort of use.
By what criteria are bathtubs classified?
| Parameter | Meaning and tips for choosing |
| 105x70, 120x70, 130x70, 140x70, 150x70, 160x70, 170x70, 170x75, 180x80. Choose the length and width of the bath taking into account the size of the room and the height of the residents. Try to ensure that the product is adjacent to the opposite walls as closely as possible, this will greatly simplify the installation process. |
| 110, 120, 123, 136, 150, 170, 195, 210, 240. Volume directly depends on depth, and this parameter affects the height of the edge. If elderly people or children live in the house, then you should not buy a large bathtub; it is difficult to get in and out of. In addition, a large volume will require significant losses of hot water. But, on the other hand, the more water, the longer the comfortable temperature remains. |
| Type of fastening of standard legs | On bolts or double-sided tape. The first option is used by serious manufacturers; bolt-on mounting is more reliable and in most cases does not require additional reinforcement or installation on bricks. Legs with tape are a budget option and are not stable. The legs can help level the bathtub horizontally; to increase the reliability of fixation, installation on brick linings is recommended. |
| Internal surface coating | All steel bathtubs are covered with enamel. But the quality of the coating is different. Domestic manufacturers cover the worst. Insufficient enamel thickness and poor quality of the composition in terms of physical strength reduce the service life. As a result, there is a need to restore the enamel (long and unreliable) or replace it. |
We invite you to familiarize yourself with the best acrylic bathtubs made in Russia
Choose the size of the bath responsibly, taking into account the characteristics of the residents and the room. Poor quality enamel can be recognized by several signs.
Run your hand over the surface. The surface must be perfectly smooth. Roughness or “sea waves” indicate a violation of the annealing conditions. Such a coating will quickly get dirty and requires constant cleaning. View the coating from different angles
If the standard thickness is not observed, then in some places the shade of white changes. Pay attention to the area of the bottom near the drain. There are cases when the drain is in the same plane or protrudes slightly above the surface
In this bath, the water will not drain completely; a small amount will always remain near the drain. After drying, calcium is deposited in these places, and over time it acquires a yellow tint.
The best manufacturers of steel bathtubs
Kaldewei Asymmetric Duo steel bathtub
Bathtub Roca “Swing Plus”
steel bath
It is necessary to take into account the ratio of strength and quality of the bathroom, as well as the number of support points for the frame. It is believed that the thinner the bathtub, the better support it needs. A fully welded product indicates a lack of strength. It is desirable to have 4 points. If the font has an unusual design, then a special platform is needed, since a standard frame will be unreliable.
steps
Stands with steps are best purchased for children over two years old. The simplest options are considered to be products without handrails, but with them they are considered more comfortable and in demand. Using them, the baby will quickly learn to climb onto the toilet.
Many parents, when they look at toilet ladder designs, think of them as bulky, but in fact, when they are attached to toilets, they look neater. But the main thing is their functionality and convenience. These stands are easy to put on and take down if necessary. These types of stands are compact and very easy to fold.
If you are unsure whether such a product is suitable for your baby, it is best to consult a specialist.
Advantages and disadvantages
- The water remains warm for a long time (loses 1 degree in half an hour), which is ensured by a high level of thermal insulation.
- The products perfectly absorb sounds, so drawing water does not cause discomfort.
- Low risk of injury due to non-slip surface.
- Acrylic has antibacterial properties that ensure hygiene.
- Possibility of installing additional massage attachments.
- Convenient price range (the cheapest models will cost from 5 thousand rubles).
- Light weight (the average product weighs from 15 to 45 kg).
The disadvantages of acrylic bathtubs include mechanical fragility (under the influence of heavy objects the surface can bend or crack); low resistance to high temperatures and heavy loads, which threatens deformation; sensitivity to abrasives and household cleaners.
When is it necessary to install a frame under the bathtub?
Standard bath frames.
The structure consists of several vertical supports with 2-3 horizontal strappings. Industrial production models are designed for statistical averages, taking into account human weight and the volume of liquid in the tank.
Some builders make the mistake of installing bathtubs too low. This prevents normal drainage of water. In such cases, due to the frame, the container rises to the required height.
The area of standard legs is 10 cm². Some people seek to create an additional supporting surface to stabilize the bathtub. For these purposes, a factory frame kit or a structure made independently is suitable.
For bathtubs of a non-standard configuration, the support not only serves as a means of protection against tipping, but also performs a decorative function. The construction of a podium around the jacuzzi begins with the installation of a supporting device. If you want to assemble a screen to mask communications, you cannot do without a frame.
Scope of application of hygienic coatings
Disposable toilet seat covers are used in toilets:
- office buildings;
- shopping centers;
- healthcare institutions;
- cinemas;
- large chain stores;
- administrative buildings;
- buildings of transport companies, airports, railway stations.
Hygienic coverings greatly simplify the use of the toilet for the elderly, disabled, overweight people, children, and women. Polymer lining provides additional softness and protection from contact with bacteria.
Using disposable toilet covers makes cleaning in public areas much easier. Thanks to them, cleaning company employees spend less time keeping the bathroom clean.
Some “pre-installation” rules
You can begin installing a steel bathtub yourself only after completing the floor installation work. By this time, waterproofing should be completed, the floor level should be leveled and the floor covering should be laid.
In old houses, the floor in the bathroom was made with a slope of 1-2% from the door, referring to the current Construction Norms and Regulations, according to which the direction of the slope was placed in such a way that wastewater, when discharged into channels, did not cross the passages.
Modern current standards only require the presence of a threshold between the bathroom and the corridor, which must be at least 2 cm. Such an obstacle with a room area of 3-4 square meters can hold up to 50 liters of water.
Ideally, it is still better to arrange the floor in the bathroom, providing a uniform level difference, which is 2 mm for every meter of length
Before installing a steel bathtub, it is necessary to check the condition of the sewer system. By detecting and correcting problems, you will prevent yourself from troubles after installation is completed, which can only be eliminated by dismantling the system.
The structure must be placed in such a way that it can easily connect to all necessary communications.
Rectangular steel bathtubs are most often installed on stands included in the product package, the material for their manufacture is galvanized steel, which has increased resistance to moisture.
Models of non-standard curved shape require more reliable fixation, the role of which can be fulfilled by the included supports and an additionally constructed frame.
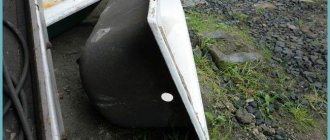
Baby bath + a little creativity: decor with thoughtful functionality
Don't rush to throw away your old baby bathtub. With its help, it is easy to create stunning decor that can be successfully used not only to decorate a site, but even indoors, if there is enough space. The idea is to create an original aquarium with a waterfall or mini-fountain.
To implement the idea you will need:
Having turned the bath over, we lay it around the perimeter with flat cakes, placing them end to end.
If there are gaps, close them with small lumps. The last row should rise above the bottom of the bath.
Youtube | No1 IDEAS
We pour mortar onto the bottom, level it and lay a mesh for reinforcement, then concrete the bottom flush with the cakes and leave the bath to dry.
Youtube | No1 IDEAS
We use the remains of pipes to create a decorative stand. We give the plastic the desired shape and fill it with solution.
Youtube | No1 IDEAS
After the concrete has dried, we assemble 2 pairs of legs and, if necessary, paint them.
We disconnect the dried concrete container from the bath and paint it in the desired color.
Youtube | No1 IDEAS
We form a structure from plastic pipes for supplying water and fastening the decor and fix it on the side of the bath using cement.
Youtube | No1 IDEAS
We fill old gloves with cement, place a jug on top of them to set the desired shape, and then let them dry. Add a cement fragment to the gloves, complete with a hole for water supply.
Youtube | No1 IDEAS
We make a cut in the jug for a better fit and a corresponding hole.
Youtube | No1 IDEAS
We cover the gloves with an additional layer of cement, let them dry, and then paint them. We connect our palms with the jug, fix the resulting decor on the water supply stand and run the hose from the aquarium pump inside.
We complement the area under the fountain with stone decor, and then fill the container with water.
Youtube | No1 IDEAS
Then everything depends on desire. The resulting container with a fountain can simply be filled with decorative algae or fish can be released into a mini-pond.
Youtube | No1 IDEAS
More details regarding creating a designer aquarium in the video below:
Source
Making additional reinforcement
The walls of the bathtub can be deformed under the weight of water and the body immersed in it. Therefore, when installing a steel bathtub, making an additional reinforcement structure will definitely not be superfluous. The materials for making the frame can be:
- wooden beams with a cross section of 20x100 mm;
- galvanized profile UD or SD with a section of 20x40 mm;
- metal corners 25 mm.
Calculation of the dimensions of the structure
The size and design of the frame depends on where the bath will be located. It can stand alone or be placed close to the wall. Installing a steel bathtub near a wall is preferable, since this placement allows the load to be distributed more evenly.
The frame is a structure on racks located at a distance of 500 mm from each other, the upper chord of which is made along the perimeter of the bathtub
When planning to place the bathtub directly against the wall, on the side adjacent to the vertical surface, you can refuse to install support posts. In this case, the upper belt must be fixed to the wall itself.
When carrying out measuring work for rectangular bathtubs, keep in mind that the outer layer will be mounted flush with the front edge of the side of the structure.
The installation height is considered to be 600 mm, but it may vary depending on the placement of plumbing fixtures, as well as the characteristics of communication systems
Having measured the dimensions of the structure, add a margin of 10% to the resulting value. This will not significantly affect costs, but at the same time it will help prevent possible problems in the future associated with a shortage of material in the event of its damage.
Wooden beams or metal corners are cut into frame elements using a hacksaw. The cutting angle should be 45°. When working with wooden blanks, before installing a steel bathtub, it is advisable to coat the frame elements with protective enamel. Treating the elements with a special primer will help prevent metal corrosion.
Assembly and installation of the frame
The prepared elements are placed on the floor and preliminary fitting is carried out. The wooden base of the structure is secured to the floor using anchors or dowels. When making a frame from a profile, the metal elements are connected by welding.
Vertical posts are fixed to the base frame. On the short side of the bathtub, only one rack is provided, placing them exactly in the middle of the segment.
Installation of corner support posts does not take much time, but it must be done with the highest quality possible, since it is the corner posts that will take the load of the bowl itself, as well as water and the weight of a person
Using connecting elements, the upper belt of the frame is assembled. The design will completely repeat the assembly of the lower support. The cut profiles are laid on corner posts and secured by welding or self-tapping screws.
Beautiful stand in the bathroom for children
Every family with children sooner or later faces the same problem: How to teach a child to use the toilet after using the potty? This period occurs at the age of 3-5 years, and sometimes a little earlier. To begin with, as a rule, you purchase a special children's circle, which is attached to the toilet. But the child is not able to reach it? In this case, smart parents usually leave a small chair in the bathroom. We bring to your attention an alternative in the form of a stand, with the help of which a child can easily reach the toilet. Making it will not take you much time.
Necessary materials • Boards (pallets are possible) • Saw • Jointer • Wood glue • Screwdriver • Self-tapping screws • Electric plane • Wide board (1 piece) • Jigsaw • Varnish
Select boards of the same size.
It is necessary to use an electric planer to make the surface of the boards very smooth so that the child does not get hurt. This will make them the same thickness.
To join the seams, the boards should be processed with a jointer, especially if pallets are used.
Then you need to coat the side parts of the boards with special wood glue and connect them into one large surface. Divide the remaining boards in half and glue them together. Their length should correspond to the width of the surface. These will be the legs for the stand. Connect the entire structure using a screwdriver and self-tapping screws.
Welded frame
Another option for installing a bathtub on a frame is to make a welded structure. For this purpose, a professional pipe is used - a metal profile of rectangular cross-section. This design is suitable for a bathtub made of any material: acrylic, steel or cast iron and is most often used in cases where it is necessary to create a durable frame with the possibility of further installation of additional equipment, for example, hanging a glass shower screen.
Profile pipe is a suitable material for the manufacture of reinforced frame structures.
Let's consider the main stages and nuances of creating a frame from a metal profile using a welded method:
- All dimensions (length and width of the future frame) are measured and a drawing is drawn up.
- The professional pipe is cut into pieces of the required size.
- The base of the frame is welded, which consists of three support profiles on which two guides are located; the bottom of the bathtub will rest on them.
Support base for the bathtub. - The next step is to install the adjustable legs.
To do this, small sections of the profile are welded onto the support legs. A thick washer is welded to the lower end of these legs, and a nut corresponding to the diameter of the screw is attached to it. After assembling the entire structure, the frame is easily adjusted in height and horizontally. Organization of screw legs for a homemade bathtub stand. - Next, vertical posts are welded to the supporting profiles, on which horizontal crossbars are in turn installed, serving as supports for the lower parts of the bathtub edge.
- The front racks are also welded for further cladding of the front part of the bath (mounting the screen).
Ready welded frame. - The finished frame is brought into the bathroom, leveled, and then a bathtub is installed on it.
After connecting and checking the functionality of the drain-overflow system, the frame is covered with plasterboard or other suitable moisture-resistant material. Covered bathtub installed on a welded frame.
Where to buy?
A large assortment of different stands is presented in various online stores, but often such products are made manually to order or purchased in regular stores with the corresponding goods. Prices for these types of products may vary. Inexpensive options from China can cost about 300-400 rubles, while products from a domestic manufacturer can cost about 1 thousand rubles.
Stands with special locks and massage rollers may be a little more expensive.
This information should be clarified with consultants of the brand where you want to make a purchase.
The most profitable purchases are ready-made kits , which include not only a stand for the toilet, but also a special cover for it.
When choosing a toilet seat cover or a special stand, it is best to try such products by touch to be sure of the quality. Where possible, products should be tested, especially if purchased for children.
Installing a bathtub on bricks
No factory frame? No problem! We can install an acrylic bathtub on bricks. This option is even more reliable compared to the method of installing a bathtub on a factory-made frame.
The support can be solid or columnar.
Installing a bathtub on a solid brick base
Example of installing an acrylic bathtub on a brick
First step. We temporarily install the bathtub in the place of its future installation and project a drain hole onto the base. This will give us the opportunity to leave a gap in the substrate to connect the drain.
Second step. We lay out the bricks over the entire supporting part of the container. We select the height so that the sides of the bath rise above the floor by no more than 600 mm. At the same time, we take into account that we will still have a 2-3 cm pillow made of polyurethane foam.
The bricks are laid on traditional cement mortar.
Third step. We assemble a frame made of sheet plywood around the perimeter of the brickwork. The height of such sheets should exceed the masonry by the thickness of the foam substrate. Don't forget to leave the drain hole unfilled.
Fourth step. We evenly foam the surface of the substrate with polyurethane foam, without going beyond the boundaries of the frame. We immediately apply pre-prepared sheet plywood onto the foam. We use moisture-resistant sheets 10 mm thick.
Foaming the bottom Installing a bathtub on a brick
Fifth step. We tightly plug the drain of the acrylic bathtub. At the same stage, we prepare about a liter of water and wooden supports to regulate the level of installation of the container.
Sixth step. We pour the previously prepared water into the container and place the bath on the substrate according to the building level.
Seventh step. While the polyurethane foam has not hardened, we adjust the evenness of the installation of the bathtub using supports. As a result, the water in the container should be evenly distributed around the drain, and the level should show “0”.
Eighth step. Having aligned the bathtub, pour water into it to about half the volume. Under the weight of water, the foam will not be able to lift the container, and the bath itself will take on the required slope.
Ninth step. Let the foam dry and remove the bath. If the edges of the container must be recessed into the wall, first outline the outline of the edge on the surface, and then make a recess in the wall for the edge of the bath. A hammer drill will help us with this. If a groove is not provided (this is not recommended if the walls are made of blocks, plasterboard or other lightweight material), at the level of the lower cut we simply fix a beam impregnated with an antiseptic, or a steel corner. We will additionally strengthen the supporting bar at the end with stops.
Tenth step. We return our container to its place and connect it to the sewer. We fill the gaps between the container and the bricks with foam. We install a decorative screen and baseboards.
Example of a bathtub installed on bricks with mosaic finishing
Ladder for towels in the bathroom made of wooden slats and plastic pipes
Many people believe that they themselves must improve the world around them. There is some truth in this, if you remember that accuracy is needed in everything. By following simple tips, you will indeed get very good results.
It is difficult to improve the space in the bathroom. The difficulties arise from the fact that a person wants to create something useful for a long time. A good choice is plastic. You can use it to create very beautiful things that will not get wet for a long time.
Stairs to the bathroom
Towels need to be hung, then they will dry quickly. You can easily give them the desired state. Many people find very non-standard solutions, and even make heated towel rails and heaters themselves. but here is a simpler option.
Plastic bottles are made in factories. They are quite hygienic. For our stairs you will need:
- 8 identical plastic bottles.
- Screwdriver.
- Nuts.
- Self-tapping screws.
The essence of the craft is simple. Using scissors, cut notches at the ends. They are attached to one another using self-tapping screws. Each side is made from three bottles. Remember that they are the same width. In order for one to attach to the other, you will need to cut them to the part where the expansion or contraction begins. The type of “beams”, in the end, should be standard.
No need to take big screws! They will need to be secured on one side with nuts.
We do not recommend using tape. It will be unreliable and ugly. Although, if you have learned how to cut it beautifully, you can take a risk. It is important to understand: towels will hang on this product, and they can be heavy. Will the tape withstand such a load?
We also need to remind you about the horizontal “beams”. They are attached to the vertical ones. You will need to carefully make the holes. Many people make horizontal “beams” longer, but this option is quite complicated. Think about whether it suits you, or whether the standard option is better. The difficulty is that the bottles will hold worse horizontally; you will have to think better about their grip.
Find a solid base and attach the ladder. Many people leave the “portable” option, because this is a means for storing towels, and they must be dried according to the rules. It is better to make a ladder that will serve specifically for hanging. Many are completely limited to one “vertical” beam to make it more convenient to hang towels on the side.
Ladder or shelf
Is it possible to use such a support permanently? It's your decision. Find several options and analyze them. It is important to understand: the appearance of the bottle product is very unusual. You will need to understand whether the product will be appropriate in the bathroom. perhaps it is better to choose something easier to implement; this is also your option, which you will have to endure for quite a long time.
Why shouldn't you use glue? It can be used. but then you shouldn’t be surprised if white marks remain on the plastic at the closure points. In fact, glue will do, but the bathroom is a room with high humidity, and this also matters.