What will you need for the job?
The photo of napkin rings shows that there is no need to look for special devices or tools. They are simple in design, but original and attractive in shape. In addition, the materials for production are available and are not at all expensive.
The whole technology of work comes down to choosing a base in the shape of a ring, followed by finishing with a beautiful material and decorating with interesting elements.
For the base of the ring you can use:
- wide format elastic band;
- a piece of wire;
- a piece of fabric or felt;
- cardboard tubes from paper towels, foil, parchment;
- rings made of metal, plastic, wood;
- rings for fixing curtains;
- caps from thermal rollers;
- plastic cups, etc.
To decorate the ring, a wide variety of materials are used that are at hand. This can be regular fabric, burlap or a piece of fur.
A stylish look is given by knitting threads or floss, twine, braid. There are also more budget options, such as paper. And a special chic is added with beads and tinsel.
You can decorate the base:
- buttons of different colors and sizes;
- butterflies and other paper figures;
- artificial or fresh flowers;
- braid, tassels, bows;
- sequins;
- rhinestones obtained from diamond-type mosaics;
- tree branches, etc.
Well, from the tools you need to prepare a pencil with a ruler. You will also need scissors and glue to attach the parts.
Graceful holiday rings
Beautiful napkin rings can be made from beads and seed beads. They look solemn and elegant. Such decorations will not leave anyone indifferent. The rings will look very beautiful at a candlelit dinner. The glare of the lights will create a noble shine of beads and beads.
A great idea would be to decorate candles and glasses with the same rings. In a duet, the jewelry will look even more impressive.
Let's make delicate and cute rings.
For production we will use beads and a thin satin ribbon.
We string six beads onto a wire and arrange them so that they are in the center.
We string seven more beads on one end, and one on the other.
Now you need to thread the tip with one bead through six beads located in the center.
We begin to pull both ends and tighten the beads into a ring.
Using the same principle, string the beads and tighten the ends until you get a bead strip of the required length.
Now you need to form a ring. We string one bead onto the ends and thread one end through the beads at the beginning.
We twist the ends tightly and cut them off.
We bend the tail into a bead so that it is not visible.
We pass a ribbon through the transverse beads so that it passes under one low and over two lows.
At the end we tie the ribbon and make a neat bow.
Make a knot on the thread and thread the needle through the center of the bow from the inside out. Bring the needle and thread up. We string the bead and return it from the back. We fasten the bow on the wrong side. And we have an adorable napkin ring.
Using cores and paper
When the question arises of what you can make a napkin ring from, the simplest option is to use a cardboard tube and paper.
To do this, a cardboard ring should be covered with beautiful colored paper, packaging sheets for decorating gifts, pieces of wallpaper, and foil.
The manipulation procedure is simple:
- Take a cardboard roll and mark small areas with a width of 40 mm on its surface;
- Cut the sleeve along the marked lines, obtaining 4 segments;
- Make blanks from finishing material. In this case, the width of the paper strips should be approximately 2 times larger than the cardboard base;
- Place the ring in the center of the strip of paper and glue it.
- Slowly fold the paper edges, gluing the ring along the inner surface.
Napkins with menu
When you're setting a large table and plan to serve a lot of dishes, display a list of all the treats to your guests with these DIY rings. This simple project can be made by anyone at any skill level by printing it on a printer and attaching it to the back. This option really makes the table stand out and will help everyone enjoy their meal once they know what they are going to eat.
Pasting with burlap
Having made blanks from cardboard, they can be finished with other materials, such as fabric. The burlap finish will look especially elegant. It is not necessary to use cardboard as a base.
Thermal runner lids would look great instead. Having covered the base with burlap, you can decorate the top with lace.
Do rings have any special purpose?
If you believe historical data, napkin rings were first used in the Middle Ages in the houses of noble feudal lords and kings at magnificent festivities. Each invitee was offered only one napkin. Of course, there were no monograms or monograms of a noble person on it, so they began to use rings so as not to confuse their personal napkin with others. So this attribute for feasts has reached our modern society.
Now traditions, morals and customs have changed, but etiquette on high holidays requires each guest to have a napkin “marked” with a ring.
Using twine
Ideas on how to make a ring are very different. It all depends on the imagination of the master. For example, cardboard blanks-sleeves are wrapped with twine.
To do this, its end is glued to the inside of the ring. Then the twine is tightly wound onto the base with the second end firmly secured with glue. You can also decorate with the most unusual details.
Historical excursion into the history of napkins
It is known for certain that the tradition of using table napkins arose many centuries ago. True, in ancient times table etiquette
differed in many ways from the modern one. The ancestors of textile napkins bore little resemblance to the compact and beautiful specimens common today.
The main differences concerned the quality of the fabric. In ancient times, napkins were made from homespun cloth and were used exclusively for utilitarian purposes. In those days they were practically not decorated.
The napkins were impressive in size and looked more like a tablecloth. They were not individual, but general. During the feast, guests and hosts wiped their hands with a common napkin served with the meal.
Only in the 17th century, when forks appeared in everyday life, huge napkins began to fade into the background, giving way to elegant models made of thin fabric, decorated with lace and embroidery.
Over time, a set of rules even appeared in society, prescribing the correct use of napkins. Many provisions have been forgotten, but the tradition of decorating a feast with elegant textile accessories and napkin clips is still alive today.
Use of wire and beads
After studying the instructions on how to properly make napkin rings, you can offer another option for easily making a stylish accessory.
This will require wire. Beads of bright colors are carefully strung on it. The ends of the wire ring should be carefully secured by twisting with pliers.
Beads in the design of rings
A very simple idea for decorating napkin rings. Here it is enough to have at hand an ordinary wire on which multi-colored beads are strung.
Both ends of the wire are twisted with pliers. The excess is bitten off with nippers.
Knitted designs
Knitted rings look no less original. You should take a napkin and decorate it with a strip of knitted lace. Regular lace fabric will also work. A fastener is used for fastening, but often they can be done without it, since the solid ring easily stretches.
If you want to create a special decoration, you can make a ring using crochet in the form of an openwork napkin. The basis is taken from a cut-off plastic cup.
Cotton threads are tied around its perimeter, and then a half ring is knitted. To better preserve the shape of the product, it is advisable to starch it in a solution of high concentration.
Bead rings
This is a Christmas master class, but again the idea is universal.
Difficulty: 1
Materials: wooden beads, wire, ribbon.
And again, we suggest trying different options: for example, stringing not ordinary beads, but tied or metal ones. If you take beads with letters, you will get fun personalized rings.
Features of accessory decoration
To decorate a ring under napkins, a variety of buttons, sequins, paper butterflies, felt flowers, knitted decorations, bargello embroidery, etc. are suitable.
If you want to make a bright decoration with rhinestones, you will need to cover the cardboard ring with double-sided tape. Then pour the rhinestones onto a wide, shallow plate or just a flat base. The ring with tape is rolled over the scattered rhinestones, which firmly adhere to the base.
Wire or wire clamps
No matter what your dining room decor style is or your event hall decor, wire rings will fit seamlessly into any table decor. You can make a set in gold, copper or silver by purchasing wire from a hardware store and wrapping a loop to fit the napkin. If there is no wire or wire of the desired color, it can be spray painted.
New Year's decoration
A master class on how to make a napkin ring will help you do everything correctly and clearly, showing your individuality and decorating the table for any celebration.
For example, New Year's decorations are made using spruce branches, toy decor, and felt figures. A themed ring in the shape of Santa Claus's fur coat looks interesting.
To do this, you need to glue artificial fur to the cardboard blank. This is done from the inside of the base along its edges so that the edges of the fur extend beyond its boundaries.
To decorate the outer surface of the ring, a narrow red braid is attached to it. After this, the edges of the swing should be folded outward and fixed with adhesive. And the functional decoration for the holiday table is ready.
Personalized napkin rings
An option suitable for any occasion. For example, on Thanksgiving Day.
- To make them, you need to choose a suitable dense frame, which is decorated with a satin ribbon, colored paper with ornaments and sparkling decorations.
- A name plate is attached to the front side. This idea is a great alternative to regular place cards.
It will be easier for guests to find their place at the festive table.
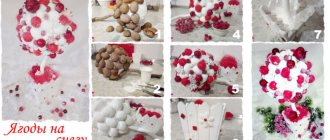
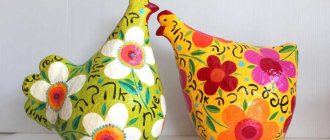
Photo of napkin rings
https://www.youtube.com/watch?v=-xl3hzMEn2I
Ribbons, lace, fabric, braid
The most classic and simplest option. The cardboard blank from the ring is wrapped with silk ribbon or braid, placing the turns tightly together and securing the edges with glue. Or they cover the cylinder with fabric (gift paper) on both sides. Light braid and lace look good on a dark base. You can’t do without rhinestones, beads and bows here either.
Knitted napkin holders are an idea for craft lovers. Of course, it requires patience, time, accuracy, and a certain crochet skill.
Decor options
The base material is actually not that important. Wooden, plastic, cardboard and paper napkin rings can be decorated equally beautifully. Each special occasion has its own decorations. Use everything your imagination tells you. If your creative mind isn't working well, use the list below. To decorate rings use the following:
- satin ribbons and elements made from them (bows, flowers);
- threads, braid, laces, twine (for example, for a marine theme);
- decorative paper and details made from it (flowers, butterflies, dragonflies, figurines);
- lace;
- frill;
- beads;
- beads;
- buttons;
- shells and pebbles;
- sticks;
- bumps.
In a word, everything that seems beautiful to you and suitable in style and theme can be used as decor.
Decorative cone bags
Magic signs for places at the table - paper cones with flowers. Filled with fragrant roses, they are an amazing gift for the dear guests of this dining table. Materials:
- Gift paper
- Red and white lace or green satin ribbon
- Fabric ribbon with decorations
- Bullseye buttons or other fancy buttons
- Rose flowers and buds, green leaves
Cut out a 15x20 cm rectangle from gift paper and roll it into a cone, which is secured with a strip of glue. Now pull the lace through the buttons and wrap it around the cone several times. In addition, it is appropriate to wear a shield with a name or a loving greeting on it. Fill the cone with roses and green leaves, and now your hands have created a simply enchanting decoration.
DIY napkin holders made of cardboard
Bright with openwork trim
Take a double-sided piece of cardboard with a beautiful, bright design. Cut out a rectangle measuring 10 x 3 cm and 2 semicircles.
Glue all the parts together using a heat gun (as shown in the photo).
Decorate the finished product with elements cut from white openwork braid.
This napkin holder is suitable for napkins folded in half.
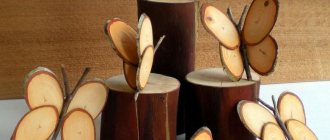
Butterfly shaped
From colored double-sided cardboard, cut out 2 butterfly silhouettes and a strip measuring 2 x 18 cm. Bend it as shown in the photo.
Glue the strip onto one of the butterflies using a heat gun.
And then apply hot glue to the edge of the strip and secure the second butterfly.
The result is such a narrow napkin holder.
It is better to place napkins rolled into tubes in it.
Metal option
Take the cardboard cylinder that always remains from the paper towel roll.
Cut it into rings 1 cm wide. You should get 8 pieces.
Leave four blanks in their original shape, and form stars from the rest. Insert the stars into the rings and secure them with PVA glue. Cut a piece of corrugated cardboard measuring 5 x 3 cm.
Glue 2 rings on it on both sides.
First paint the craft black, and then apply a little gold paint to the surface. Now the cardboard elements appear to be metal.
White napkins look very beautiful in such a stand.
Bright tubes
Cut 6 squares measuring 10 x 10 cm from double-sided cardboard with a bright print.
Glue them into tubes, wrapping them around a cardboard cylinder and securing the corners with superglue.
Then glue all the tubes together in a circle and cut off the lower corners. Cut a circle with a diameter of 8 cm from cardboard of the same shade.
Glue the tubes onto it so that the sharp corners are on top. Decorate the craft with a satin ribbon and miniature flowers.
In this stand there is a place for each napkin.
DIY napkin stand made from paper sticks
Prepare paper sticks. They are easy to roll from the pages of an old magazine, wrapping them around a thin, long object. You will also need a piece of thick cardboard measuring 4.5 x 12 cm.
Cover the rectangle with white paper on all sides. Bend two paper sticks in half.
Glue them to the sides of the white piece using PVA glue. Also cut two strips measuring 11 cm, 9 cm, 6 cm and 4 cm.
Glue them one at a time in descending order of length onto the previously formed side walls.
Do the same manipulations with the second batch of paper strips.
Now all that remains is to paint the craft blue. Use acrylic pearlescent paint for this.
After drying, the napkin holder is ready for use.
As you can see, it will not be difficult to make original napkin stands from the most popular material for needlework - cardboard.
Secrets of success and choice of materials
Before folding napkins for table setting, you should select the right materials. When choosing paper table aids, you will need to take into account shade palettes. For example, rich and bright colors are suitable for fun events. The solemnity of the event is emphasized by a snow-white tablecloth and a similar tone of the elements.
When choosing paper table aids, you will need to take into account shade palettes.
If the housewife prefers cloth napkins, it is recommended to choose one with a dense texture - cotton, linen, viscose. Such options hold their given shape well, do not wrinkle much, and therefore look very harmonious and solid.
If the housewife prefers cloth napkins, it is recommended to choose one with a dense texture - cotton, linen, viscose.
It is better to start your journey in origami with simpler variations. Having thoroughly studied the patterns and manufacturing methods, you can safely move on to three-dimensional complex shapes. The success of the event depends on the organization in advance. We recommend trying out the napkin folding technique in advance, rather than on the day your guests arrive. This way you can slowly realize your creative ideas, correct mistakes or make the required number of accessories for each participant in the feast.
We reveal several secrets to achieve spectacular results:
- Don't be afraid to experiment with shades of tablecloths and table accessories;
- Choose the right materials that perfectly hold the given shape;
- Start small and gradually increase the load and complexity;
- Take plenty of time to arrange fabric and paper decorations for serving;
- Give preference to a unique palette of shades, taking into account the holiday and the concept of the organization.
By listening to the recommendations, you will get a stylish decor that is guaranteed to receive positive feedback from event participants.
Give preference to a unique palette of shades, taking into account the holiday and the concept of the organization.
Homemade elements for table setting will become a wonderful decoration. Using the proposed methods, every housewife will give the feast an aesthetic appearance. The ease of manufacture (rolling, unfolding) and the availability of materials make it possible to involve assistants, for example, children, in the procedure. A beautiful tablecloth and an unusual presentation of napkins will make the home atmosphere luxurious and elegant.