Home Information Blog Cross stitch for beginners or how to learn to cross stitch beautifully
Embroidery is one of the most common and favorite activities of needlewomen of all ages. Among the variety of types of embroidery, cross stitch is the most attractive and has not lost its popularity since its inception. This was partly due to the wide possibilities of this technique - they embroider cross-stitch patterns on clothes, tablecloths, pillows, napkins and other accessories and decorative items, as well as create paintings and panels, while embroidery provides almost endless possibilities for realizing a wide variety of ideas - from simple pictures to world classic paintings.
From the lesson you will learn:
- Types of cross
- Cross stitch techniques
- Securing the thread
- Types of floss
- Embroidery needles
- About the canvas and its choice
- Hoops and their types
- How to choose a ready-made cross stitch kit
- Preparation of the workplace
- Cross stitch process
- Registration of the finished work
The choice of canvas, its types and sizes
The basis of any embroidery is the material on which the needlewoman applies stitches. These can be jeans, silk, cotton fabric, burlap, synthetic fibers and plastic. But there are special materials with a special weave of threads, which forms even squares with convenient holes for stitching - canvas.
Canvas is the fabric on which embroidery is perhaps the main material in the embroidery process.
Canvases vary in composition, color and size of cells, and are divided into 2 types based on weaves: “blockweave” - block and “evenweave” - uniform. Block canvas has a clearly defined square, while the uniform type is a continuous canvas without division into squares.
Block canvas
The most famous block canvas is Aida. The embroidery on Aida turns out smooth without much effort. It is quite rigid, which allows you to work without a hoop, and is available in a wide range of colors and different sizes. The canvas number, or count, indicates the number of squares per inch. This means that the smaller the count, the larger the cross will be.
If you recalculate to the usual centimeter, the numbering will look like this:
- Aida 8 - 31 cells in 10 cm;
- Aida 10 – 39 cells per 10 cm;
- Aida 11 - 43 cells in 10 cm;
- Aida 14 - 55 cells in 10 cm;
- Aida 16 - 63 cells in 10 cm;
- Aida 18 - 70 cells per 10 cm;
- Aida 20 - 79 cells in 10 cm.
Aida 8-11 is well suited for cross stitch for beginning needlewomen and children. Its cells are large and it will be easy to make a stitch in them. It is embroidered with 2 threads, but you can use 3 or 4 threads if the design requires it. But with Aida 16-18, using more than 2 threads can become difficult. The cells are small, and usually more experienced craftsmen embroider on it.
On Aida 20 they work with one thread. The cross stitch comes out light, suitable for embroidering a portrait, and if you use 2 threads, then a landscape turns out well.
When buying Aida canvas, you should pay attention not only to the color and size, but also to know the manufacturer:
- Belarusian Aida is softer, but after washing it may lose its shape.
- Hungarian is a little tougher.
- German (Zweigart) does not lose its shape after contact with water.
A worthy replacement for Aida is Gamma canvas. It has the same dimensions and quality, but at a much lower cost. Another block canvas is Hardanger. Its count is 22, which corresponds to 87 squares in 10 cm. Embroidering on this canvas is difficult and painstaking, but the picture will turn out just like it was painted.
These canvases are made of 100% cotton, although they are found with synthetic fibers, metallized, lurex or 100% wool.
Uniform canvases
Uniform canvases are available in 100% cotton, 100% linen, cotton-linen blend, cotton-rayon blend, and linen-viscose blend.
It is more difficult to embroider on such material than on Aida, but craftswomen often use it when they need to do work with a large amount of empty, unstitched background or use techniques that cannot be implemented on block canvas. The color range is also presented quite widely.
Of the natural fibers, the most durable is flax, but it is the most expensive. Mixed linen fabrics are much cheaper, although they are not inferior in quality. Here the embroiderer needs to decide what best suits the idea.
For example, napkins and tablecloths are usually embroidered on linen, and shirts and dresses can be decorated on mixed linen. Uniform 100% cotton and cotton blend canvases are suitable for embroidering pincushions, toys , handbags and pillows.
Stramin
You can learn how to cross stitch for beginners on Stramin canvas. It is distinguished by large cells on which it is easy to understand how to apply even stitches.
Stramin is very rigid and its mesh structure is suitable for creating small rugs, tapestries and embroidery on sofa cushions. Instead of stramine, you can use construction mesh.
Plastic canvas
Plastic and vinyl canvas are similar to Stramin, but much stiffer. Needlewomen use these canvases where crafts need to keep their shape.
For example, in the manufacture of magnets, Christmas tree decorations, cards, book covers and decorations.
Canvases that are removed
There are water-soluble canvases and overlays. These canvases are used where the base for embroidery needs to be removed.
Relevant for applying designs to clothes, oilcloth fabrics and eco-leather.
What you need for needlework
Any work requires the selection of suitable equipment, cross stitch is no exception.
It is recommended to take the simple route by purchasing a ready-made kit containing:
- embroidery pattern indicating thread colors;
- threads distributed by color, each of which is assigned a number;
- canvas of the required size.
There are extended sets for beginners, which add hoops, special needles, and sometimes scissors. Buying these items each time means paying more for them. It is better to purchase separately easy-to-use hoops and scissors, as well as a set of needles.
The most experienced embroiderers manage to take a pattern from the Internet, buy threads and canvas with the required hole spacing to match it, in order to complete the work without typing. It's hard to say which is cheaper: buying threads and canvas separately or purchasing a ready-made set. Probably, such a step is justified when there is no cross stitch kit with the desired picture on sale.
Threads
In a cross stitch kit you can often find not only colored threads, but also melange threads - with color transitions, shimmering or “metallic”. The most commonly used threads are floss. Some embroiderers like to use Iris balls, which make the crosses more voluminous and shiny. A play of color can result when some of the crosses are embroidered symmetrically to the rest. “Iris” is only suitable for designs with large crosses. Floss can be layered into the required number of threads. Large crosses are embroidered with three threads, regular crosses with two threads, small crosses with one thread.
Melange threads help out if you need a very smooth transition, for which you cannot select neighboring colors from the standard thread palette. To create effects, threads with lurex (“metallic”), fluorescent and glow-in-the-dark threads are used.
Canvas
Canvas can be included in the set or sold separately. When purchasing it, it is important to look at the pitch between the holes. The Aida canvas has numbers indicating the pitch of the holes for the needle, that is, the cells. The more threads in the canvas there are per inch (this is the number that gives the product number), the more cells are produced per square decimeter. This brand of canvas is most often found in sets.
There is a designer canvas where the drawing is directly applied. The colors of the embroidered pattern with this outline are deeper.
For children's cross stitch, they often use plastic canvas, where you can work without using a hoop, since it holds its straight shape well and does not crumble or stretch.
If you need to embroider something on a smooth fabric or knitted fabric, then it is good to choose an overlay canvas that can be removed after embroidery. Among the new technologies is water-soluble canvas: all you need to do is wash an embroidered product, and you won’t have to pull out the threads one by one.
Hoop
It is impossible to cross-stitch well and evenly without a well-chosen hoop. If the work is more reminiscent of a carpet or bedspread than a miniature, the hoop must be large. If you do embroidery all day, it is better to choose a chair hoop with a tripod or a sofa machine, which frees up both hands.
If the cross is small, then you will have to take an addition to the hoop in the form of a large magnifying glass on a tripod. This device is good for use by needlewomen with poor eyesight.
For miniature projects, small plastic or wooden hoops will do.
For convenience, they are equipped with a screw to make the outer ring easier to move apart depending on the thickness of the canvas or fabric on which the embroidery is being done. It is better to have hoops of different diameters in reserve, since you can cross-stitch a pillowcase on a pillow, bag, glasses case or wallet.
Needles, scissors
Embroidery needles have a large eye and a slightly blunt tip, easily recognizable by its characteristic curve, unlike a regular sewing needle. This point is made so that the embroiderer does not get caught in the thread of the canvas and does not stitch through it. With such a needle, it is easier to touch to find a hole in the canvas, which is why the crosses turn out to be perfectly even and the embroidery beautiful.
A wide eyelet is necessary for quick threading. This is especially important when using floss with several threads: threading them into a narrow eyelet is very problematic.
There are special scissors for cross stitch, and these are not only the now popular “heron” scissors, but also ordinary curved scissors with a very sharp angle at the tips. It is convenient to cut with such a pair, placing the blades parallel to the outline. If you don’t have such scissors, you can use manicure scissors.
Interesting fact:
heron scissors replicate the appearance of an obstetric umbilical cord clamp. This instrument could not have sharp blades, although it is quite possible that there were specific obstetric scissors with which the umbilical cord, pinched with two clamps, was cut.
The second scissors that an embroiderer cannot do without are tailor’s scissors. They are convenient for cutting the canvas from a roll or cutting strips of fabric that are used to deliver the canvas if it is too small for the hoop.
For metallic threads, you will need a separate pair of scissors, adapted for greater load. A thread containing metallized fibers is similar to wire, so over time it can damage such a precise instrument as hook or curved scissors. For rigid threads, you can use wire cutters or metal scissors, if the latter are not very bulky.
How to choose the right thread
There are a lot of threads, as well as bases for embroidery. They differ in manufacturers, compositions, length, quality and price.
For cross stitch, 3 types of threads are usually used:
- wool;
- silk;
- floss.
Wool
Wool threads are inexpensive, but the color palette is limited, and there are practically no transitional shades. The embroidery from them is bright and rich, suitable for a child's room.
The disadvantage is that wool is fragile, quickly frays and breaks, even if you work with a short thread.
Silk
For a novice embroiderer, some nuances can make it difficult to work - silk threads slip very much, and this causes the stitches to lie unevenly, so only an experienced embroiderer can work with them correctly.
They need to be unpacked immediately before embroidery, as silk threads quickly become greasy and lose their shine. It is better to take them with clean hands and very carefully.
Floss
Ideal threads for both experienced craftswomen and beginner embroiderers. They differ in composition, manufacturers, colors and prices. The thickness of the thread is the same for all manufacturers.
Every needlewoman needs to know the main types of floss in order to choose the right one for her work:
- Cotton floss takes first place. These threads are made from 100% cotton. They are strong, resistant to chemical influences and retain their color saturation for a long time.
These threads are twisted into a skein (skein), and usually the length of the skein is 8 m, but some manufacturers have 10 m. The skein consists of 6 threads that can be divided among themselves. This allows you to adjust the thickness of the embroidered cross in the canvas.
- Linen floss , unlike cotton, has a natural shine and silkiness. Otherwise, these 2 threads are very similar.
- Metallized threads are produced with the addition of polyester. In embroidered paintings, such threads can be used to realistically depict the shine of precious metals and stones.
- Melange is a thread, one color of which smoothly transitions into another. With their help you can depict shadows or play with light. But for beginners, it’s better not to try this technique, since each cross needs to be done separately.
- Glowing threads are gaining popularity. Those impregnated with phosphorus allow the painting to glow in the dark, while fluorescent ones are visible in ultraviolet light.
There are a lot of thread manufacturers, but we should highlight several well-known companies that vouch for quality for many years.
Among the Russian manufacturers it is worth noting:
- Gamma company. Threads are made from 100% Egyptian cotton. The color range is about 600 colors and their shades.
Embroidery floss threads, manufacturer Gamma
The advantage over similar Western manufacturers is the price, which is significantly lower, although the quality of the material is almost the same. When embroidering, such threads do not twist and lie flat on the canvas, but they are a little harsh to the touch and sometimes leave lint when embroidering.
- PNK them. Kirov in St. Petersburg. Color range over 550 shades. Threads made from 100% Egyptian cotton are soft, strong, and pleasant to work with.
Leading foreign manufacturers:
- DMC company from France , the oldest floss production company. Standard threads are made from 100% double mercerized cotton. This allows the threads to shine beautifully without stretching or fading. At the same time, they are not subject to shedding, can withstand high temperatures after washing, maintaining their original color for many years.
When working with them there are no knots, they do not twist, do not fray, do not tear, remaining soft and pleasant to the touch. Today the palette is about 500 colors, the standard length of the skein is 8 m.
There is also a line of metallic and linen floss. One drawback to working with DMC threads is the significant price. One skein costs more than 40 rubles, and when embroidering an average picture with 80 colors, the cost of threads will be high.
- Anchor. Coats Crafts, the English company that owns the Anchor brand, has been producing thread for 200 years. They are not inferior in quality to DMC threads, but this is only if they are produced in the UK or Germany.
If the packaging bears markings from countries such as Pakistan and India, then the quality may differ, but not significantly. In terms of price, they are almost 2 times higher than DMC, which makes them even more attractive, especially for beginners in cross stitch.
- The German company Madeira is the oldest manufacturer of decorative floss. The company has been engaged in this area since the 50s of the 20th century. and firmly occupies a leading position in the market. In addition to 100% cotton floss, it produces metallized, silk and viscose threads.
They do not fade, do not fade, can withstand washing temperatures up to 95 degrees, have a uniform weave, are soft and lie evenly in the stitch. Another feature is the skein, which is 10 m long. The quality of the threads is excellent, and the price is reasonable, so many ready-made sets from different companies are equipped with exactly these threads.
- Belka floss of Russian-Chinese production claims to be an analogue of DMC in Russia. The same color does not differ in each batch, unlike Gamma and PNK them. Kirov. The threads are pleasant to work with, do not twist and shine. The price is 2 times less than DMC floss.
Embroidery patterns for beginners
You should not immediately take on cross-stitching a huge picture. A small embroidered miniature is done quickly and gives a reason to be proud of your work. Even for beginners, it is now quite possible to choose an effective picture for embroidery.
Choosing embroidery needles
When working with the “wrong” needle, you can not only ruin the thread or make too large a hole in the canvas, but also get injured.
To avoid mistakes, you need to know the types of needles and their purpose:
- Tapestries. This needle has a large eye and a blunt tip. The floss in the eyelet slides freely, which reduces the risk of chafing and allows you to thread several threads at once. The needles are numbered from No. 16 to No. 28.
- Embroidery These needles have a wide eye and a sharp tip. They are approximately medium length. They are used in embroidery using various techniques, especially suitable for satin stitch techniques. The numbering of these needles is No. 16-26.
- Darning. These needles are of medium length, with a small eye and a sharp tip. Used in darning works.
- Sewing. Needles with a small eye of medium length. Used in hemming clothes and overcasting.
It is best to understand how to cross stitch for beginners using a tapestry needle, since splitting of the canvas is avoided. The higher the needle number, the thinner and shorter it is. Thin needles are suitable for canvas with a hard texture; thicker needles are used for “loose” material.
To select a needle, see the following table:
| Canvas count | Needle numbering | Thread quantity |
| Aida 6 | 19 | 2 |
| Aida 8 | 20-22 | 2-3 |
| Aida 11 | 22-24 | 3 |
| Aida 14 | 22-26 | 2 |
| Aida 16 | 24-26 | 2 |
| Aida 18 | 26 | 1-2 |
| Aida 20 | 24-26 | 1-2 |
| Hardanger 22 | 26-28 | 1 |
Needles from different manufacturers may differ in length and appearance, but the number indicating the diameter is the same for all.
How to calculate the canvas size?
In ready-made sets, everything is simple - a precisely selected diagram is attached to a canvas with a given number of cells. But even when using your own diagrams, calculating the size of the canvas is easy.
Samples of colored canvas
Since each diagram indicates the number of crosses in length and width, we only have to determine how many of them will fit on a fabric of a certain size. Canvas No. 18 is classic, it is used by most embroiderers, and it is this that we will use as an example.
Embroider a row of crosses so that their length is 1 cm. Count their number. You will get the number 7. Let’s say that the selected pattern contains 240x280 crosses. This means that the horizontal size of the canvas should be (240: 7 = 34.3 cm), and vertical (280: 7 = 40.0 cm).
Do you want the finished embroidery to be larger or smaller in size? In this case, change the canvas by choosing its number.
Selection of canvas
If you have vision problems, purchase a special magnifying glass - it is designed in such a way that both hands remain free. There are also lamps for embroidery - they are attached directly to the hoop.
Embroidery pattern
The basis of counted cross stitch is a symbolic diagram designed to guide and facilitate the work of the embroiderer. First of all, it should be readable and convenient. If the intended picture is small in size, then the diagram should occupy the optimal space on the sheet, and not stretch over 3 pages.
Black and white schemes
The symbols of such schemes are painted in black on a white background. The pattern is lined with 10x10 squares for the convenience of the embroiderer. Each symbol indicates a specific color of floss with the name of the manufacturer. For example, the numbers of the Gamma or DMC color palette.
The diagram is printed on an A4 sheet, and if the diagram is more than 1 sheet, then the last row, 3 cells wide, duplicates the next sheet of the diagram. This is done so that the embroiderer does not get confused when moving from one sheet of the pattern to another.
Color schemes
The symbols are painted in black onto a colored background.
Sometimes, if the embroidery is small and has only a few colors, there may be no symbols, but only different colored cells. The color scheme shows the design well, and its background is as close as possible to the colors of the floss.
Color scheme on canvas
How to cross stitch for beginners is most clearly shown in the color diagram, which is immediately imprinted on the canvas.
This greatly facilitates the work of a beginning embroiderer, but this pattern is only available in ready-made sets, which are usually more expensive than sets with an empty outline. After washing, the pattern on the canvas disappears.
Each scheme is accompanied by a key with which it can be decrypted. For example, what colors do certain symbols belong to. The key also indicates the required number of threads and the number of crosses. Based on these data, you can independently select the floss to match the pattern you like.
Ready-made diagrams with keys can be purchased in specialized stores, viewed on the Internet, or borrowed from friends.
If you want to implement a personal idea, for example, an image of a loved one, then there are special computer programs that synchronize the image with the symbolic circuit and calculate the number of threads needed in accordance with the palette of certain manufacturers.
Special threads
To create cross-stitch or satin stitch paintings, special cotton threads - floss - are used. The color range of floss is more than 500, and each skein (8 m) or skein (6 pcs) of these 500 has its own color number.
For convenience in choosing a shade, you should have a floss color chart on hand.
In addition to cotton floss, this type of work uses wool with acrylic, synthetics, and satin. Each species has its own color card.
For their quality, floss and other embroidery threads are rightfully in demand from Madeira, DMC, PNK Kirov, and Gamma.
To work with woolen threads, select a material with a wide cage pitch - when pulling the woolen thread, it frays (wears out) and can break at the most inopportune moment. But items embroidered with this thread are voluminous, soft and homely.
If for floss the length is 50 cm, then the length of woolen floss is no longer than 40.
You can make your own palette card, where not only the color numbers will be indicated, but you can also see the color of the future painting.
Additional materials
You can acquire additional tools that can make the job much easier.
Hoop or machine
Embroidery hoops and machines are devices on which the canvas is secured in tension. They will be needed if the canvas is soft, does not hold its shape, or you need to free your hands for greater convenience.
The hoop is more mobile than the machine. They do not depend on the supports and legs that machines have. They don't take up much space and are easy to use. There are round, square, rectangular, oval. Made from wood, plastic and metal.
Types of hoops:
- Round hoops range from 10 to 40 cm in diameter. Mostly on store shelves they are made of plastic. Such hoops are light and inexpensive, but brittle. The main thing when purchasing is to check that they are smooth, without burrs or sharp seams, since any irregularities can deform the canvas when stretched or even tear if the base material is thin.
- They are found in metal , but they can leave gray stripes on the canvas, and therefore experienced embroiderers do not recommend using them.
- The best hoops are considered to be wooden , well polished, smooth, with a clip or screw mechanism. They are suitable for all types of fabrics.
- Frame hoop. They are also called tapestry for their ability to perform large works. They are made round and square only from wood and have different types of fasteners: clips, fastening with Velcro, pins or sewn on canvas. Uneven tension is eliminated, so the fabric is not deformed and the embroidery stitches are even.
As for the machines, they are similar to frame hoops, only on adjustable legs, they can be divided into:
- Tabletop. Install on the table or attach it with clamps to the table surface.
- Sofas. This machine has side holders, between which it is convenient for the embroiderer to sit. The frame height and tilt can be adjusted.
- Floor-standing. Convenient for use in large jobs, but takes up quite a lot of space.
The choice of models of embroidery machines is quite large; the embroiderer only needs to decide which one suits her best.
Additional materials
Other tools that may be useful in embroidery:
- When embroidering eco leather or thick layers of jeans, it is better to arm yourself with a sewing thimble. They are made entirely of metal, metal with plastic, or entirely of plastic.
The latter, even if they are made of very hard material, will become unusable over time, since holes form in the plastic with constant contact with a sharp needle. The metal sewing thimble, which is available not only in the classic form, but also in the shape of a ring, remains a favorite in terms of durability.
- A magnifying glass makes embroidery easier, especially if the canvas is 18-count or higher. Magnifying glasses come in small and large sizes, with or without legs. You can buy them in specialized stores or in departments with soldering equipment. Cost from 500 rub. without support, and from 1500 on a leg or with fastenings.
- A special washable marker with which you can mark a 10x10 square outline without getting lost when embroidering. The main thing is not to wet the canvas until the work is finished.
- a thread cutter-ripper from well-known companies, since the tool must be sharp. This one costs from 200 to 400 rubles. Or you can use regular nail scissors.
Materials and tools
For work, it is recommended to buy high-quality tools and materials. You should first study the types of needles, hoops, canvas, threads, etc.
Embroidery needles
A special needle is used for embroidery - a tapestry needle - its eye is oblong and large, and the tip is rounded.
Needles have their own numbers, which you should pay attention to when choosing. If a uniform weave fabric is used, the needle size is matched to the brand. Correspondence of the needle number to its diameter
| Needle no. | Diameter, mm | Needle no. | Diameter, mm |
| 13 | 2,34 | 20 | 1,09 |
| 14 | 2,03 | 21 | 1,02 |
| 15 | 1,83 | 22 | 0,94 |
| 16 | 1,63 | 23 | 0,86 |
| 17 | 1,42 | 24 | 0,76 |
| 18 | 1,27 | 25 | 0,69 |
| 19 | 1,17 | 26 | 0,61 |
Editorial Voice
Matryona
Fan of embroidery and sewing
Ask a Question
You can also use double-ended needles with an eye in the middle . With their help, you embroider with both hands at the same time, which speeds up the work.
Hoops and frames
It will not be possible to create a picture without a hoop or frame, since without the tension of the base fabric it is inconvenient to embroider on it.
The hoop is a mobile tool. They are small and light, convenient to take with you on a trip. Made from wood or plastic. They may have a metal inner rim or a rubber outer rim. They are round or square in shape. The base is fixed between the outer and inner rim, and the hoop is moved along it during operation.
An embroidery frame is most often used with a stand - this design is called a loom. The base is fixed at the top and bottom along the edges. The device allows you to free both hands for work, but the machine is not mobile; it will need to be assigned a permanent place at home. The frame is not convenient for small embroideries. There are sofa, table and floor machines.
Floss
It is recommended to cross stitch with floss threads , which are intended specifically for needlework. The skein contains 6 threads that can be used separately. The yarn is processed by hand or on a machine. The most common are cotton threads. You can also find:
- woolen;
- linen;
- silk;
- acrylic;
- with fluorescent pigment;
- melange.
Most often, European-made cotton floss is chosen, for example, DMC or Madeira . The yarn does not fade when washed and does not fade.
You should not buy products from dubious companies, as their quality may be very low and all work will be ruined because of this.
Scissors
Embroidery scissors should have very sharp tips that will cut the thread perfectly. It is also convenient to use scissors with slightly curved tips . They may be required to remove an erroneous cross. It is much more difficult to do such work with a tool with straight blades, since the likelihood of damaging the base fabric significantly increases. If this happens, it will be necessary to carry out complex work to restore the damaged fabric, but it will not be possible to completely hide the damage - some defect will always be noticeable on the embroidery.
Thimble
is not necessary
when embroidering , since the work does not require significant pressure on the needle, which requires finger protection. At the same time, a special stitching thimble is useful. The tool looks like a ring with a needle sticking out vertically from it. It is necessary to ensure perfectly even placement of threads when embroidering. The needle of the stitcher is placed under the stitch being made and removed when the thread is in place.
Additional accessories
Craft stores carry embroidery magnifying glasses and fabric markers. Magnifying glasses are used if the work is carried out on a very small base fabric or when a needlewoman with poor eyesight works without glasses.
marker is used to mark the base into 10 by 10 hole squares. This will make it easier to navigate and match the pattern and fabric. Markers for embroidery choose water-washable ones. They remain in use for as long as required - they do not wear off, do not fade and completely disappear when soaked in cold water. The main thing is to prevent such markings from heating up.
Editorial Voice
Matryona
Fan of embroidery and sewing
Ask a Question
There are markers that disappear in the light, but they are not convenient for embroidery, since a few hours after marking there will be nothing left on the base.
Ready-made sets
If the embroiderer does not want to assemble everything for embroidery herself, then it is worth paying attention to ready-made kits.
How to cross stitch for beginners - diagram and detailed instructions, as well as the necessary materials and tools - all this can be found in a ready-made embroidery kit
To choose the right first set, you should follow simple rules:
- Don't start with the big picture right away. The smaller and simpler the drawing, the faster you can see the result, and thereby motivate yourself to do more complex work.
- Find a comfortable place and good lighting. It is better to direct the light so that the shadow from the working hand does not block the embroidery area.
- Read the key to the diagram carefully. If you understand and understand the meaning of drawing symbols, subsequent diagrams will be easy.
- If something goes wrong in your work, you can unravel a few stitches and go back. Manufacturers of sets usually put extra threads, especially for small pictures.
- It is not necessary to ensure that the wrong side is perfect. The main thing is to learn how to make confident and even crosses.
Reading schematics
Usually, the kit comes with detailed instructions, which describe in detail the operating procedure and decipher the symbols. Since the symbols on diagrams from different manufacturers may not be the same, you will need to carefully study the specific drawing and its symbols.
Cross knitting pattern
Each square on the diagram is painted with its own color. The center from which work begins is marked with an arrow. The numbers most often mean thickness, that is, the number of threads. Mixed colors (blends) on crosses are indicated by two numbers, for example, 318+416.
The number of threads added is also indicated, for example, 1 and 2 mean that you should embroider in two, 3 - in one thread. If, in addition to the classic cross, other types of stitches are used, their designation is deciphered.
Cross stitch methods
The following techniques are shown for beginners on how to cross-stitch, having mastered them, craftswomen can easily make any designs:
- Traditional. A method in which crosses are stitched one after another individually.
To do this, you need to make a stitch from the upper right corner of the cell to the lower left, and on top put a stitch from the upper left to the lower right corner. Then the next cross. Usually one color is embroidered first, then the other.
- Danish or rows of crosses. Here several stitches are made in one direction, and then the second halves are closed on top.
- Even rows. If the pattern requires even rows without changing to a new one, then you can embroider the required number of stitches from left to right, and then finish the crosses from right to left.
- Reducing and increasing rows. For the first time, it is better to start with the longest row, moving diagonal stitches from left to right. The latter must be closed with a full cross, and the needle must be positioned point down.
Then turn the needle point up and perform the second row of the pattern from right to left. The last cross closes completely, the needle point looks down again. The 3rd row is made, at the end it is completely covered with crosses - the needle looks up again.
How to cross stitch according to the pattern
There are no strict recommendations for working with the pattern, but it is better to start from one of the edges of the embroidery. You can move, filling an area of the same color with crosses, from bottom to top or top to bottom, but more often the direction is chosen from left to right, as we read and write. If a color is repeated frequently in cross stitch, it is good to immediately fill several zones with it, then thread another thread and proceed to the next shade. If the transition between areas of the same color is too large, you should not pull the thread from the wrong side: it is better to cut it, fasten it and start in a new place with fastening.
If it is difficult not to miss the beginning of a new “island”, it is better to take a thread (or several different threads, depending on the pattern) of an adjacent shade, embroider the intermediate section, and then start working in the same color.
Erroneously embroidered rows will have to be flogged: it is not worth embroidering one color over another, as this will spoil the texture of the product. And a visible contrasting shade will look bad. In order not to make mistakes, study the instructions for cross stitch in detail, look at the diagram, understand where which shade is used.
Types of crosses
Beginning craftswomen will benefit from the ability to embroider with different crosses, because in some works several types of them are used at once.
The basic crosses and the technique for their execution look like this:
- Double-sided cross. Make diagonal stitches through 1 square. From the wrong side you will get half-crosses in those places where they were missed from the front side. Then go back, finishing the crosses you started. The result was full crosses on the back and front sides. After this, repeat the procedure with the missing cells.
- Wicker Slavic cross. A diagonal stitch is made 2 squares of canvas in length, then covered with a traditional stitch. The next stitch is made from the point below, then also extends 2 squares. Closes with a diagonal half-cross in one square.
- Double-sided Italian cross. It is necessary so that the outline is not visible between the crosses. The stitch starts from the bottom left corner of the canvas square to the top right. The needle should then return to the starting point at the bottom left, the next stitch being made to the right horizontally.
Then again return to the exit point of the first stitch, then a vertical stitch is made upward. In the next stage, a full cross is closed from the lower right corner to the upper left.
- Bulgarian cross. Looks like a star or a snowflake. Thanks to the convexity of this cross, the embroidery is more rich and contrasting. Usually, at least 4 squares of canvas are used to embroider this cross.
The point is to put 1 horizontal and 1 vertical on top of a regular single cross. First you need to embroider a traditional cross, then the needle passes through the middle of the distance between the lower left corner and the middle of the cross - a horizontal stitch is made to the “wall” of the canvas square. Then, from the center of the top left and right corners, a stitch is made vertically to the center of the bottom corners.
Types of stitches
Despite the fact that all the crosses on the finished product seem exactly the same, there are several varieties:
a complete classic cross, occupying exactly one cell and consisting of two stitches crossing each other
Classic cross
fractional or incomplete, the thread closes not the entire cross, but part of it; this type includes a half-cross (1/2) - the cell is filled with only one inclined stitch; quarter (1/4) – half an inclined stitch; three quarters (3/4) with filling the cell with one inclined stitch plus the half of the second stitch adjacent to it; Moreover, the directions of full or incomplete inclined stitches and their colors must be indicated on the diagram;
Fractional stitches
oblique tapestry (petite point) a series of incomplete oblique stitches running from right to left, similar to a half-cross, but the thread from the wrong side is not perpendicular to the stitches, but runs diagonally
Making a tapestry seam
complex (double) cross, often called Bulgarian, in fact, it consists of two crosses, the second is located at an angle of 45° relative to the first
Bulgarian cross
French knot is used to embroider the center of flowers, creating wool or curly hair; the thread wraps the needle counterclockwise twice; the coils are moved to the tip of the needle; then it must be pulled through the knot
Performing a French knot
Stem stitch is used for delicate designs or flower stems; consists of strongly inclined bias stitches adjacent to each other
The order of the stem seam
stitches “forward needle” and “back needle” refer to finishing stitches, the first type of stitches consists of a number of stitches and skips; in the “backstitch” seam (backstitch), the gaps are closed by returning the needle; in appearance it is similar to a machine seam
Seam "forward needle"
Finishing stitch “back to needle”
To make the embroidery look voluminous, crosses are always made in 2 or 4 threads.
Step-by-step training in cross stitch
When the choice of canvas, threads, patterns and other tools is left behind, you should learn how to use these materials correctly.
How to calculate canvas size and thread consumption
A calculator for calculating canvas size and thread consumption can be found on the Internet. You need to enter the requested values in it, and the program will provide accurate data. But if it is not possible to use the World Wide Web, there are simple calculations.
Quantity of canvas = number of crosses in width (calculated similarly in height) / count value * 10. The result will be in centimeters.
For example, you need to calculate the consumption of Aida 16 canvas for embroidery consisting of 250 crosses in width and 150 crosses in height:
- Width: 250/63*10=39.68, that is 40 cm.
- Length: 150/63*10=23.80, rounded to 24 cm.
- The canvas needs to be taken with a reserve so that there is room for the frame or hoop.
Calculating threads is a little more complicated:
- For convenience, you can take a thread 1 m long and fold it in half. This results in a working double addition of 0.5 m.
- On Aida 14 canvas, you can embroider approximately 47 crosses with this thread, but it is worth rounding up to 50 for reserve, since beginning embroiderers do not always make even stitches.
- Now you need to see how many crosses you need to embroider in any color. Presumably, the green ones will need to make 118 crosses. The calculation will be as follows: 118 (number of crosses) * 100 (length of thread in cm) / 50 (crosses from 100 cm of thread) = 236 cm.
- Now you need to calculate how much to cut from 8 m of skein to get 236 cm of single thread. The following formula is used here: 236 * 8 (8 m of thread in a skein) / 4800 (8 m (800 cm) * by 6 (addition of threads in a skein)) = 0.3933, that is, 0.40 m needs to be cut from the skein.
The calculation must be done for each color. If the diagram does not include information about the number of crosses by color, then you will have to count manually. The rule also works here - take threads with a reserve.
Canvas marking
To make it easier to embroider according to the pattern, you can make markings on the canvas. Usually these are 10x10 crosses, which corresponds to the standard layout.
There are several markup methods:
- Using threads. When applying markings, you can use ordinary threads of a contrasting color, or use a special monofilament, which has a smooth texture compared to the usual one, so you can embroider on top of it and can easily be pulled out of the fabric after work.
Marking the canvas with threads
- Marker or pencil. Special markers and pencils for outline are not difficult to find and they are much simpler and more effective than thread markings. Just don’t wash them off with hot water or use them on colored canvas. And also store in a damp place, otherwise the markings may disappear.
Marking the canvas with a marker
- Ready canvas with markings. Such canvases are sold in specialized stores or on websites. The rules are the same as for pencils and markers: do not wash in hot water, do not dry on radiators or with an iron, otherwise the markings will remain forever.
To apply the markings yourself, you should start from the center of the canvas. To do this, you need to fold the material in the center, and then again and find the midpoint. Draw horizontal and vertical lines from it and, based on them, continue marking.
Reading schematics
To begin with, you should carefully consider the symbols and how many folds of thread will be used in the embroidery. The key also contains information about color mixing and color numbers on the floss organizer.
If there is no organizer in the set and the threads are included in skeins, or the embroiderer made a set for herself, then for convenience you can make this organizer yourself, or buy a ready-made one. In any case, the threads must be sorted by color and labeled with symbols on the diagram (or numbers in accordance with the diagram).
Reading embroidery patterns is studying the description of the embroidery process (what colors, what type of cross stitch, in what sequence, etc.)
It is also worth paying attention to what types of crosses the work is being done. This is also contained in the key. Only after a detailed analysis of the information in the diagram can you begin to work.
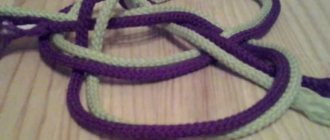
Securing threads in fabric
There are several ways to secure the thread at the beginning of work. To do this, fold the thread in half and thread both ends into the eyelet. On one side you get 2 threads, on the other there is a loop.
Now with this thread you can make the following fastenings:
- On the front side of the canvas. Thread the needle in the upper right corner and leave a loop. Bring the needle to the lower left corner and thread it through the loop. Tighten.
- On the wrong side of the canvas. Same as the front side, just start from the back.
- No knot. The needle is inserted from the inside to the front side. It stretches out, leaving a small tail. Then this tail is gradually closed with a row of crosses. The excess tail of the thread is cut off.
Loop method, option 1
Loop method, option 2 Microstitch at the beginning of embroidery, option 1
Microstitch at the beginning of embroidery, option 2 Fastening under stitches at the beginning of embroidery
Fastening the thread at the beginning of embroidery under previously made stitches Fastening under stitches at the end of embroidery Fastening with a microstitch at the end of embroidery
At the end of the work, the thread is secured in the following ways:
- From the front side, pull the thread under the finished crosses and cut.
- From the wrong side, also stretch the thread under several crosses and cut it as short as possible.
- Or fasten from the wrong side under vertical stitches, leading the thread upward and, as it were, overlapping each stitch. The result will be an almost perfect reverse side, since the thread is hidden vertically under the vertical stitches.
Shutdown
The product should only be washed by hand in warm water with the addition of mild detergents for colored fabrics.
If suddenly the threads begin to fade, then you need to quickly transfer the embroidery to cold water and change it until the stains disappear. Then the embroidery is hung out to dry without pressing. Afterwards, it is ironed from the wrong side through a damp cloth so that the embroidery itself remains convex.
Once the embroidered picture is in order, you can take it to a framing workshop or insert it into the frame yourself.
Memo for Beginners
Of course, knowledge of all the intricacies of the work comes only with experience.
It is advisable to start work from the center of the canvas
But there are several rules that even a novice embroiderer should know:
- Try to create perfectly even, parallel stitches from the very first day of training. The seams should look neat on both the front and back sides. There should be crosses on the side of the face, and straight vertical lines on the back.
- All stitches should go in the same direction.
- Work begins with the largest colored area.
- Do not cut the thread longer than 65-70 cm. Otherwise, it will constantly get tangled and you will have to break it. It is more convenient to measure on your hand - it should go from the beginning of the palm to the elbow. When metal threads are made even shorter, they become even more tangled.
- For beginners, it is more convenient to use canvas No. 14, the cells of which are clearly visible. The optimal canvas size at first is 20-25 cm.
- The canvas must first be washed and steamed with an iron - perhaps the fabric will shrink. Its edges are treated with glue.
- When purchasing threads from an unknown, unverified company, be sure to lather a small piece first - if it has faded, you should not use them.
- Don’t forget to outline embroideries, especially complex ones, with a fine outline. In this case, the likelihood of error will be significantly reduced.
- Always start work from the center of the canvas, folding the canvas twice (horizontally and vertically) in half. In this case, even if there is an error in the calculations, the finished work will be located exactly in the center of the canvas. Excess fabric can be trimmed.
- If you need to skip several cells, you need to pull the needle out from the wrong side and stretch it to the desired cell.
- Whatever type of stitches is used, the top ones are always placed in one direction.
- For large projects, gradually fold them inward and baste them to prevent fraying of the edges of the fabric.
- During long-term work, sebum and dust remain on the fabric, so the products should be washed after finishing work. It is better to do this with a colorless shampoo with the addition of a small amount of vinegar. Plus, water will help to completely straighten the fabric and threads and eliminate bends and deformations.
- Steam the work from the reverse side using a sufficient amount of steam. In order not to smooth out the crosses, but, on the contrary, to make them more voluminous, this should be done on a soft terry towel.
If you want to create a design on some other fabric, use an overlay canvas, in which the threads are pulled out after embroidering. Convenient and soluble canvas, which can be removed by immersing in water.
Simple ornaments
Patterns and ornaments are good because you don’t need to think about the realism of the future picture, as, for example, when embroidering flowers or animals. The ornaments are simple to embroider, but at the same time they are effective and will never go out of fashion.
On the Internet you can find diagrams of ornaments and patterns for every taste and theme, or you can implement the idea yourself. To do this, the rough drawing is divided into small squares in accordance with the outline and filled with the necessary colors. This will be the pattern for embroidery. Or transfer the drawing to canvas if the drawing is commensurate with the future embroidery.
Embroidery without using canvas
Embroidery can make your wardrobe stand out from the rest.
Once upon a time, craftswomen actually embroidered on ordinary fabrics (linen, cotton) without using canvas. However, for beginners it is better to use a special canvas - canvas. After all, it is problematic to accurately count the required number of threads to create an even cross on ordinary fabric. If the first works turn out sloppy, interest in further embroidery will disappear.
Embroidery on a blouse
When creating patterns on finished products - sheets, towels, tablecloths, clothes - it is better to use soluble or applied canvas, the threads of which are removed. In the future, as you master the process, you will be able to use ordinary fabric for work.
How to transfer a pattern to fabric
There are at least 4 ways to transfer a pattern onto fabric to make the embroiderer’s task much easier:
- Copy paper. Copy paper is applied to the canvas, and the outline of the design is drawn on top.
If the fabric is dark, then the design on the reverse side is rubbed with soap and outlined without carbon paper.
- Powder. The design is fixed on the material and carefully knocked out along the contour with a needle. Then sprinkle with baby powder or powder. Next, trace the outline with a marker or pencil until the powder falls off. For stable powder, a solution is prepared from blue and kerosene, and then a cotton swab dipped in it is applied over the contour with holes.
- Tracing paper and threads. Again, attach the design to the fabric and stitch along the contour with threads. The paper is removed and the embroidery is placed over the thread design.
- Glass. Typically this method is used for very thin fabric backings. The drawing is placed on the glass, and an outline is placed on top. The glass is illuminated from below, due to which the diagram will be clearly visible, and all that remains is to trace it on the fabric.
Transferring a design to fabric using an iron Printing a design on fabric on a printer
Embroidery Techniques
There are only two such methods. The first of them, called traditional, involves embroidering each cross in order - that is, both cross stitches are made in it at once. With the Danish method, you first make one row of slanted stitches without using cross stitches. Then you go back and start filling in the same row with the second stitches.
Sequence of embroidery
Most embroiderers use both methods. The traditional one is used if you need to make single crosses. The Danish method is used when filling large areas with one color.
Embroidery on canvas with a finished pattern
The advantages of such embroidery are simplicity. There is no need to constantly check the diagram and use the “counting cross” technique. In addition, the colors in the sets with colored canvas are perfectly matched, and this saves time and nerves for the beginning embroiderer. Such sets are relatively inexpensive, especially simple ones with a small pattern.
It doesn’t matter where and how to start cross-stitching, the main thing for the craftswoman is to enjoy the process itself. Holding a real masterpiece of art in your hands, even if it is small in size, you can enjoy the work done.
Author: Olesya Levchenko
Article design: Natalie Podolskaya
What is cross stitch
Cross stitch is a pattern on fabric created by special stitches called crosses.
Each cross stitch consists of 2 crossing stitches. This technique can be performed with threads from various fibers. Half-cross and Bulgarian cross techniques can also be used - depending on the design, its style and complexity. Cross is the most common type of embroidery. There is a wide range of kits on sale that contain the materials and instructions necessary for the work. You can also buy separate diagrams or canvas with a pre-printed design.
It is not recommended to master cross stitch immediately from complex paintings. First, you should practice making the stitches themselves so that when embroidering the pattern they are the same.
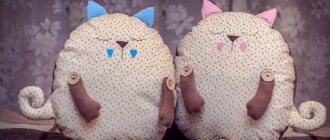
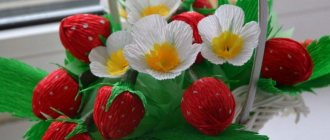
Embroidery examples (photo)
Most needlewomen strive to decorate clothes, decorative pillows, tablecloths and other items with the help of flowers. The rose is a winning option, since the magnificence of such a gift of nature does not allow anyone to remain indifferent.
Before you start embroidering a rose, you need to determine in what color scheme this amazing flower will look best. Bright red shades are best used when embroidering clothes. Blue and light blue roses will also look original. White roses will be appropriate in a calm interior.
The quality of the finished embroidery depends not only on the skill level of the needlewoman, but also on what threads are used during embroidery. Silk threads have an amazing shine and add additional charm to embroidery.
Embroidery in rows or by color
In one embroidery you can work with several colors at once: this will require more than one needle.
- First option: when one row of one color ends, the needle of another color is used. This embroidery method is not used often, but it significantly speeds up the work.
- Another option is to fill the canvas with one color first, then move on to another. This takes longer because you have to move the hoop every time.
- The third option combines both: select a small area and secure it with a hoop. First embroider one color on it, then, without changing the position, finish the area with a different color.
How to learn cross stitch for beginners step by step: preparatory stage
An embroidery project requires additional preparation before its implementation. It is very important to follow all preparation rules, since their quality will affect the subsequent work process. You need to take care of the quality of fabric and threads, choose the right needles and even scissors.
It should be taken into account that it is better to wash embroidery fabric before starting work, since after washing the base may “shrink”.
It is also necessary to take into account that the edges of the fabric may fray and become frayed during work. They should be pre-treated with threads or glue. The best type of fabric for embroidery is canvas.
Before buying an embroidery kit, you should carefully check the quality of threads, patterns and other materials for work.
Related article: Technology for making a table from boards with your own hands
How to prepare step by step:
- Scheme;
- Textile;
- Threads;
- Preparation of additional materials.
All materials must be of high quality. The final result will depend on this. It is best to embroider using a hoop. They will help to properly stretch the fabric, which will allow you to make stitches easily and accurately.
How to work with canvas (fabric)
All fabrics, including canvas, linen, cotton, and so on, have longitudinal and transverse threads, as well as an edge. If you do not want the design to be skewed, you need to cut the embroidery along the fractional lines, no matter whether you are embroidering a vertical or horizontal pattern. This is done so that after washing your embroidery does not become deformed and in order to facilitate the design of the work. If you subsequently align the embroidery and stretch it onto the backing, this process will be quick and clear. If the fabric has no edge, then you can find the edge by pulling the fabric horizontally and vertically. The lobe thread does not stretch!
Thread selection
The beauty and quality of the work done depends on the threads. They should be durable, bright, and not lose color after washing.
Choose bright and rich colors.
Most often embroidered with the following threads:
- Wool . The strongest thread of all presented. Wool provides a long life to the pattern. Used on thick durable fabrics such as starmin, and plastic canvas to maintain the shape of the intended figure.
- Floss. Threads for paintings and small embroideries. They are soft and have a rich color palette. Large selection among manufacturers. The higher quality the floss thread, the more expensive it is. One thread contains on average 8 thin threads, which can be easily divided into the required amount. All sets with pattern, outline and threads come with floss. The color may “float” if the thread is of poor quality.
- Silk. Silk threads can also be referred to as floss. Their difference is in their characteristic shine, which adds brightness to the picture and accentuates the details. It is used in any embroidery: from small paintings to tapestries and pillows.
The quality of the final work depends on the chosen thread.
Cross-stitch picture frame made from improvised materials
In order not to spend extra money on frames for cross-stitched paintings, you can make them yourself from available materials. Regular cardboard or ceiling plinth are suitable for this. The plinth can be coated with paints and varnish on top, making it look like wood.
Old wooden baseboards can also serve as frames; they can be painted in any desired shade. Another idea would be to use a wooden hoop with wide and thick edges.
Note! If you have old, unwanted paintings in your home, you can take them apart and use the frame for a new painting.
Cross-stitch paintings fit organically into the interior of the house
Embroidery on clothes
You can also cross stitch on clothes. Agree, a jumper and a denim jacket with a pattern embroidered on them look very original and exclusive. Surely no one else will have such a thing. Many novice needlewomen are wondering how to embroider a cross-stitch design on clothes so as not to spoil the item, and the crosses lie flat. Specialized water-soluble canvas is sold in specialized stores. Before starting work, it is glued to the fabric, and when the embroidery is ready, you simply wash the item and the canvas dissolves.
It is recommended to use just such a canvas for embroidery on clothes, especially for those who are just starting to engage in this type of needlework. Today you can find many ready-made kits for embroidery on clothes: all kinds of butterflies, flowers or funny pictures that can be used to decorate children's things.
How to make a diagram from a photo
Creating a diagram from a photo in Photoshop
There are a lot of ready-made free schemes on the Internet. But one day you will want to create your own original work. After all, making circuits yourself is an exciting job in itself. There are three main ways to compile them from photos.
They are made using:
- Special programs: you can download any of them on the Internet, for example, the free EmbroBox; its advantage is the ability to select shades of threads, determine their length, and also calculate the size of the future painting; after completing the diagram, you will know exactly how much material you will need;
- Photoshop: if you know this program, creating even a complex diagram will not be difficult for you; To do this, just reduce the resolution of the photo (using the Menu – Save for Web), and then, if necessary, adjust the colors in certain areas;
- Graph paper and pencils of the desired color
The last method is more labor-intensive, but no less interesting. You will need to enlarge or reduce the photo to the desired size (this can be done at any photo shop), and then apply translucent graph paper to it.
At first, it is better to choose pictures with a minimum amount of details, colors and shades. If the drawing is not clearly visible, it can be applied to the window glass. To get a sketch, you need to paint each of the areas with a different color. In order for their contours to be clearly visible, they are additionally outlined with a simple pencil.
Selection of materials
The choice of materials must be approached seriously, since the tools for work will last more than one embroidery. They must be of high quality, and in the case of needles, hoops and scissors, they are selected in different shapes and sizes.
Basically all tools are reusable.
Embroidery needles
First of all, it is determined on what fabric the design will be embroidered. This is what you need to take into account when choosing a needle:
- if it is a hard canvas with large holes or wool, then a thick, long needle is ideal;
- For delicate thin fabrics that are easy to damage, and soft canvas with small squares, thin needles are selected.
Embroidery pros recommend tapestry needles. Their feature is a thick ear and a blunt end. The thread will not fray, and the needle will not disturb the structure of the fabric.
It is better to hold the needle in your hand and see if it is comfortable to work with. This is a tool that will serve for a long time.
You can also buy a pincushion for storing needles. A common problem: when the thread runs out and is cut, the needle is put aside. Then finding it takes a lot of time.
Hoops or frames
The embroidery base is stretched onto a hoop and secured tightly for easy operation. Hoops come in different materials, shapes and sizes. To work on a small area, you can use a palm-sized frame, and vice versa.
Note : wooden hoops are the most popular among experienced needlewomen. But you definitely need to touch them for splinters or roughness. They can catch threads and ruin the fabric. In this case, plastic ones are better, but they are stiffer and tighten the already made stitches more strongly.
Thimble
A thimble is optional, but recommended.
- Firstly, while embroidering, your fingers may sweat from the strong pressure of the needle. As a result, it is very difficult to insert it between thick stitches or into rough fabric. It's easier to push through an unruly needle with a thimble.
- Secondly, the thimble protects the finger from being pricked.
For comfortable work, the object must sit firmly, but without pain, on the middle finger. Only after trying it on can you buy it.
Scissors
To work, you need special scissors that delicately cut threads and fabric. Here you can choose based on size. Large and medium scissors are convenient for cutting fabric, and small ones are sharper than large ones and are better at cutting threads.