Instructions for making flowers from paper:
To make such flowers, we will need:
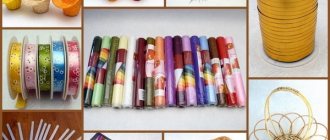
Tools and materials:
- Double-sided colored paper (possibly with patterns) or pages from newspapers, magazines, books
- Scissors
- Glue
1. First, take scissors and cut out a square from colored paper (the larger the square, the larger the flower will be).
We twist the square so that we get a rhombus. 2. Fold the diamond in half diagonally. We have a triangle.
3. Once again, fold the two corners of the triangle into the middle to form new corners, as in the photo below. We have a rhombus again.
4. Now let's start creating the core. Thanks to the core, our paper flower will look more natural. To do this, carefully straighten the two side corners. The bend line should be exactly in the middle on them.
5. We bend the side corners of the triangles (F and G) inward so that they do not extend beyond the boundaries of the sheet.
6. Next we need to fold the two side triangles in half. The corners remain inside. After this, apply glue to the sides, as shown in the picture, and glue the petal.
7. We have one petal with a core.
8. To make one flower, we need five such petals. We already have one, we need to make four more of these petals. To do this, repeat the previous steps four times.
9. We got 5 petals. Now, to make a flower out of them, spread glue on the sides of the five petals and glue the petals together.
To make paper flowers more vibrant and original, you can use colored paper with patterns.
If you want to give a vintage look to your paper flowers, you can make flowers from newsprint or from book pages.
By showing your imagination, these paper flowers can be used to decorate almost any holiday or gift!
How to Use White Paper Flowers as Holiday Decor
Artificial flower bouquets or garlands are a popular decorative element in our time, becoming increasingly popular among designers every day. If earlier it was customary to make paper roses or carnations during labor lessons at school and present them as a gift to mother or grandmother on March 8, today they are used more widely and variedly. They are used to create a romantic photo zone, decorate a room for a birthday, or decorate a room for an event dedicated to a holiday or celebration. Thanks to paper flower arrangements, you can give your space an elegant look, create an atmosphere of lightness, airiness and bright joy.
White flowers made of corrugated paper are especially popular as wedding decor:
- buds collected in garlands decorate the walls and ceiling in the banquet hall;
- an elegant arch is made from flower arrangements for a wedding ceremony;
- artificial roses or lilies decorate the festive table, chairs, napkin holders, plates and cutlery;
- giant white peonies decorate the place for a wedding photo shoot;
- A bridal bouquet is created from snow-white paper buds, which, unlike a live flower arrangement, will not fade until the end of the ceremony and will look perfect in photographs;
- small corrugated paper flowers are used to create the groom's boutonniere.
The advantage of artificial flower decoration over living plants is its durability, the possibility of repeated use, ideal shapes and proportions of buds, which are rarely found in nature. Paper flowers go well with ribbons, lace, rhinestones, artificial birds and butterflies, lanterns, and balloons. You only need to spend money on consumables once, as well as find the time and effort to make a rose or carnation, and then have at your disposal a wonderful set of white artificial flowers to decorate the hall for any holiday.
Paper flowers - Rose
Let's make such a wonderful paper rose together. For this we need:
Tools and materials:
- Scissors
- Ruler
- Threads
- Scotch tape (preferably colored or double-sided)
- A piece of wire
- Stretch Crepe Paper
- Ball or candy
Step-by-step instruction:
1. First we need to prepare the preparations. To do this, you need to choose the color for our rose and cut crepe paper of the desired shade measuring 7 x 5.5 cm - these will be our petals. The more preparations we prepare, the more magnificent the rose will look.
2. Now we need to stretch our blanks across. This is necessary in order to give them a bend and shape.
3. Next, we make a blank using green paper (look at the picture). This trick will make our rose look more realistic.
4. At this stage you need to connect the stem of the rose with its petals. Carefully wrap the petal blanks around the ball or candy and attach them to the stem with a thread.
5. Now you need to make the wire more similar to the stem. To do this, take green paper and wrap it around the wire. After this, we attach the green leaf blanks to colored or double-sided tape.
That's all! The paper rose is ready. If you want to make a whole bouquet of such roses, then repeat all the steps as many times as necessary.
To make the bouquet look more fun, you can use paper of different colors.
How to make tropical paper orchids
Tropical orchids are quite expensive, but you can make them from paper if you love these flowers but don't want to spend your money.
A beautiful orchid will serve as a wonderful decoration
Tools you will need:
- orchid template;
- desktop printer;
- scissors;
- glue;
- paper.
STEP 1
Print and cut out all the orchid petals shown in the template in the color of your choice.
Then print, cut out the center of the orchid onto a second colored paper, and the leaf template onto green paper. Cut out two sets of petals, one center, two leaves for each flower.
All details from the template are ready
STEP 2
Use the edge of a pair of scissors to curl each petal and center section. Fold the leaves in half. Fold each petal in the opposite direction to form a bowl shape. Fold both sides over the leaves.
Use scissors to give future petals a curve
STEP 3
Attach each layer using hot glue. The largest of the three petal shapes is located on the bottom with the petals folded up, followed by a two-piece petal in the center and a central part on top of the two layers of petals.
Glue the parts with liquid nails
STEP 4
Attach the leaves by turning the flower over and placing two leaves at the back.
STEP 5
To make a hair clip, bracelet or gift wrap, glue the fastener to the back of the flower.
Attach the clip to the flower
STEP 6
Attach the barrel. For a stemmed orchid, bend the end of the wire at an angle. Cut out a small leaf shape by cutting one-third down the center and insert a corner of the wire into that fold. Glue the petal and wire to the back of the orchid.
Attach the wire and petals to the flower
STEP 7
You can use ready-made orchids not only for decoration, but also to make a gift, a bouquet, or wear them on a sweater or in your hair.
STEP 8
These orchids can be a great alternative to a wedding bouquet or decoration.
This product is perfect for special occasions.
DIY paper orchid
Such wonderful orchids can be used for decoration or you can make a branch and put it in a vase.
Tools and materials:
- Scissors
- Color printer
- Glue
- Paper
- Clothespin (if we want to decorate gift wrapping)
Paper orchid templates
Download and print these templates on a color printer
Step-by-step instruction:
Handmade vase
Although the process of recycling paper waste can be quite complex, the end result is a beautiful material that makes first-class cards. Items can be made from such paper. You can make this vase from any paper of your choice.
Step by step guide
- You will need 12 sheets of 25 × 25 cm. At the end it is important to assemble the elements correctly. Always use three elements to combine.
- When you have formed a ball with 12 pieces of figures, take out one block in one place.
- The released two tabs are folded and glued. Repeat the same procedure on the bottom side.
- If you do not provide a stable base at the bottom, the vase may tip over, so a bottom hole is also necessary.
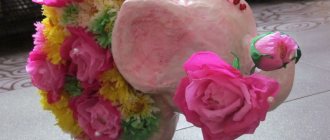
Sweet bouquet of paper flowers
Such a bouquet of flowers with a sweet surprise inside will be a unique gift for a loved one!
Let's start making it.
To make such a bouquet of flowers from paper, you need to prepare the following tools and materials:
- Corrugated paper
- Wide tape
- Narrow ribbon (0.5 cm)
- Wire
- Green type tape
- Scissors
- Wire cutters
- Wooden skewers
- Wrapping paper or mesh for a bouquet
- Sprigs of greenery
- Bow for decoration
Well, and, of course, chocolates
Step-by-step instruction:
1. First you need to take wire cutters and cut the wire for the stems into 10 cm pieces. In our case, you need 7 pieces of wire.
2. Take scissors and cut a thin ribbon (0.5 cm wide) into pieces about 25 - 28 cm long.
3. From corrugated paper we make seven blanks in the form of rectangles, measuring 18x12 cm.
4. Then cut out small rectangles in the bottom corner of a sheet of paper, measuring 9cm x 5cm. These will be our future flower buds.
5. Place the smaller piece on top of the larger one and place the candy on the smaller piece.
6. We twist our blank together with the candy into a tube, forming a bud.
7. We take the wire and place one end of it in the middle of the bud. We wrap the bottom of the bud blank around the top of the wire, forming the stem of the flower.
8. Now you need to wrap the tape around the top of the wire to secure the stem and bud well.
9. We take the previously cut ribbon and tie it around the bud with the candy.
10. Now we need to fluff the flower and give it a wavy look. To do this, gradually turn away the edges of the paper at the top of the bud, pulling it a little so that the paper stretches and bends like a petal.
11. We carry out all the above steps with all the buds.
12. We take a wooden skewer and, using tape, attach three flowers and decorative greenery to it. Then we add other flowers and continue wrapping the stem with tape.
As a result, we should get a bouquet like this:
You can stop here, or you can continue and beautifully package the composition.
13. We take the packaging, which should be longer than the stems of the bouquet, place the bouquet diagonally and wrap the flowers in the packaging.
14. We tie the bouquet with a ribbon and decorate it with a bow.
The bouquet of flowers is ready!
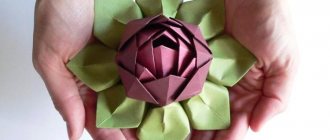
Origami "Lily"
Mark the diagonals of the square of paper and form it into a multi-layered rhombus with the “book” facing up. Expand the side corner as in the diagram and do the same for each side. Turn the bud blank over with the flat side up and bend the top corner down along the triangle to form the base.
Bend the thin, long “legs” upward - these will be the petals of a paper flower around the middle. Fold the sides at the bottom to make them thinner and sleeker, and then fold the top down. Gently straighten the bud by hand or help yourself with something thin, like a pencil or a Japanese stick.
Photo: neposed.net
Paper flowers with rounded edges
Quiet paper usually comes in large sheets, in a stack of 8-10 layers. This is exactly how many layers we need for the flower.
1. Take a stack of eight sheets and cut out a rectangle of any size. The diameter of the flower will be equal to the width of the leaf.
2. The next step is to fold our rectangular sheets into an accordion. The height of the fold was about 2 centimeters, but you can also experiment with this parameter.
We fold the sheets into an accordion until the very end, turning the sheet over after each movement.
This is how it should turn out.
3. Cut a piece of rope, ribbon, fishing line or thread
4. We tie our accordion in the middle. It should look like this.
5. Use scissors to round the edge to form a rounded petal.
It is difficult to cut through all layers at the same time, so try to cut in several steps.
6. On the other side we do the same.
This is how it happened:
7. If you buy ready-made pom-pom flowers from tishu, then you will be given exactly such a blank, which now you need to open, forming the flower as follows: starting from the top, lift all layers of paper to the middle.
At the same time, rotate the flower, grabbing the paper in turn from one side to the other.
After a while, you will have a stunning paper flower in your hands!
You can also watch all the steps in this video:
It was a flower with round petals. Go ahead!
Flower garlands
Get into a playful mood with these easy-to-make 3D paper flowers.
Party flower decoration
You will need:
- glue gun;
- scissors;
- glue stick;
- decorative tape;
- colored paper.
STEP 1
Select colors
Choose coordinating colors to create a balanced color scheme. For a monochromatic approach, consider layered shades and shades of one color. For a more multi-colored effect, mix together shades that have contrast.
For a more feminine look, stick to muted colors and pastels mixed with neutrals such as taupe, brown or soft gray.
STEP 2
Fold in half
Use square sheets as rosebuds are perfectly round. Rectangular papers should be trimmed to a square shape. The first step in this process is to fold each sheet of square paper in half.
Fold square sheets in half
STEP 3
Fold into quarters
Once everything has been folded evenly in half, fold it into quarters again.
Fold evenly into quarters
STEP 4
Turn a square into a circle
After folding the quarter, use scissors to round the edge.
Round the edges
STEP 5
Expand the circle
Expand to open the form. If you've managed to create a perfect sphere, it's time to move on to the next step; however, if the result is oblong or oval, it is better to repeat the previous step until you create a perfect circle.
The circle must be perfect
STEP 6
Cut out circles in a spiral
Starting at the outer edge and working your way towards the center, cut out solid circles in a spiral.
Cut out circles in a spiral
STEP 7
Form the central part of the flower
As you reach the end of the circle when cutting the spirals, leave an oval tab at the end, about 2cm in diameter. This is the part of each paper bud that will hold the spirals together with glue.
Leave an oval tongue at the end of the spiral
STEP 8
Coil the spiral
Starting at the end of the spiral opposite the oval tab, wrap tightly until the shape of a rosebud begins to form.
Coil the spiral
STEP 9
Fluff the ends
While the inside of the rosebud should be pressed tightly, the outside part can sit more loosely.
Pressing the inner part
STEP 10
Form the base
Fold the spiral so that the inner circle lies at the bottom of the bud.
Form the base
STEP 11
Glue the base
Pull the ends of the tape down and add a bead of hot glue.
Glue the base
STEP 12
Leave until dry
Press each layer of the rosebud firmly until the glue dries.
Wait until the product dries
STEP 13
Alternative colors and designs
After all the buds are made, be sure to mix, alternating colors.
Make flowers in other colors and sizes
STEP 14
Place flowers on ribbon
When all the buds are built in the desired sequence, stretch the tape and cut it into 2-meter strips.
Create a composition from ready-made flowers
STEP 15
Attach the rosebuds directly to the ribbon using a hot gun.
Attach the blanks to the tape
Paper flower with pointed petals
1. We repeat all the same steps until the petal formation stage.
2. At the stage of petal formation, we do not round the edge, but make it sharp.
3. We make sharp edges on both sides.
4. Now open the flower and see what happens.
This is what a miracle turns out to be like in the end!
Recommendations for step-by-step execution of a cascade configuration bouquet
- This bouquet should be small in size.
- Choose soft toys of different sizes (but so that there is no strong contrast) and color. It’s great if these toys are made with your own hands. The created bouquet will acquire an original, unique look.
- You will need a porta bouquet with a not very thick wire stem, which should be wrapped very tightly with a decorative element (ribbon, lace, corrugated paper), as well as skewers.
- Multi-colored narrow satin ribbons are attached to soft toys, with the help of which they are tied to the main stem. Small round balloons can be added.
By analogy, you can prepare a bouquet from various sweet ingredients.
Paper flowers. Chrysanthemum
The next version of paper flowers that we will learn to make resembles a chrysanthemum.
1. We take the workpiece, but now we do not round or sharpen the edge, but cut it into thin strips.
2. We do the same on the other side.
3. Opening the flower.
As a result, we got such a flower.
Very cool!
Origami "Iris"
Cut out a hexagon from colored thick paper and mark it along all diagonals, as in the diagram. Fold it into a quadrangular petal and bend its corners inward. Separately form each petal, straightening the triangles and turning over the workpiece. Turn it 90 degrees down, place the bud vertically, straighten it and turn the three remaining petals in the same way.
Photo: vilashes.ru
Photo: vilashes.ru
Flowers made of paper (paper towels)
Let's now look at how to make these paper flowers using paper towels. 1. Tear several rectangles from the paper towels.
In our version, the paper towels came with perforations. It needs to be cut off.
2. Now divide each sheet into several layers, depending on how many layers it consists of. They are usually two-layer or three-layer.
Thus, we obtain a fairly thin and durable paper suitable for making flowers.
3. Take 8 thin pieces of paper and stack them on top of each other.
4. We fold the sheets into an accordion, bend them in the middle and tie them.
5. We make sharp edges on both sides.
6. Opening the flower.
As a result, we get such a beautiful flower from paper towels in a couple of minutes!
Volumetric geometric shapes
Despite the external intricacy and apparent complexity, anyone can make geometric crafts.
To create a geometric figure you will need paper, a pencil, templates for three-dimensional paper crafts, scissors and glue. Following the diagrams, assembling the craft will not be difficult.
Schemes on how to make three-dimensional paper crafts contain a step-by-step description of the process of assembling a geometric figure. Still, it’s worth starting with a simple craft, especially if children are involved in the creative process.
One of the simplest geometric crafts is a cube. Using his example, you can understand the principle of assembling geometric volumetric crafts. You can draw the cube template yourself.
On a piece of paper you need to draw a chain of 4 squares, one side of 1 square is the side of the second and so on. Draw 1 more square on the sides of the second square. Now you should add strips on the sides of all free sides, along which the sides will be fixed with glue.
The template must be cut out along with the allowances. You need to bend the template along each line. Bending should be done by bending the template in one direction. All folds should be ironed well with a pencil. Now all that remains is to fold the cube and glue it along the allowances with glue. A simple geometric craft is ready.
Paper flowers (we use napkins)
Now let's look at creating flowers from paper napkins.
In our version, we took a multi-colored napkin. Let's make the lower layers of the flower yellow and the middle white.
1. As with paper towels, we also divide the napkins into layers.
2. Stack the yellow layers of napkins and cut out a rectangle of the desired size.
3. After this, we stack the white layers of the napkin and cut out a rectangle slightly smaller than the yellow rectangle.
4. After this, we place the yellow layers with the colored side up, and place the white center just below the main petals.
5. We fold the layers into an accordion.
6. Open the accordion and carefully separate the yellow layers from the white ones.
7. Fold the layers back into an accordion. As a result, we get two packs of white and yellow accordions.
8. Take a white accordion and cut its edges into thin strips.
9. Take a yellow accordion and make rounded edges.
10. Open both accordions and combine them in this way: put the white one on the yellow accordion and assemble it back into the accordion.
11. Bend it in the middle and tie it.
12. Layer by layer we open the flower.
This is such a wonderful flower! Agree, napkins make no less original flowers!
Finally, one more master class:
Bouquet in the form of a cascade
This composition is vertical, assembled from top to bottom, and has the shape of a regular triangle, the apex of which is at the bottom of the product. Cascade-drop and waterfall are types of arrangement of flowers in such a bouquet. To arrange flowers in a specific way, techniques such as:
- Using live stems.
- Prefabricated technique - combining natural stems (over 70%) and artificial branches (taping technique).
- Placing flowers on a special device - a porta bouquet.
- English montage - fresh flowers are carefully covered with wire stems.
- Frame type, which is based on birch branches, rattan palm, and wire.
You have been invited to a little princess’s birthday, a gift has been purchased, but something is clearly missing. Try to create an original plush surprise in the form of a cascade. There is nothing complicated, especially since the presented instructions on how to make a bouquet of soft toys will be an excellent help.
Bouquet with frame base
Making such a composition requires a rather complex execution technique. This product is a composition of different models and configurations. You will need quite a few different natural and artificial ingredients. There are many options for such compositions, but the more popular types are “fan”, “handbag”, “muff”.
In the gift industry for men, bouquets of this type are most often found. A unique men's composition, made with your own hands, will be a unique gift for your loved one.
Video lesson:
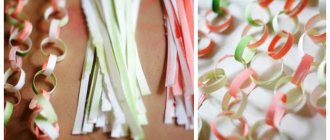
Paper daisies
The procedure for making paper daisies:
- we wrap a strip of green paper around a toothpick to form a stem;
- on a strip of yellow paper folded in four, make small cuts on both sides;
- fold a strip of white paper and a cut strip of yellow paper like an accordion;
- We tie the middle of the accordion with thread;
- round the ends of the petals;
- glue the accordion onto the stem and straighten the petals, which form a two-tier structure with a yellow insert in the middle.
The origami paper flower is ready. By making several of these flowers, you will get a wonderful bouquet of bright and beautiful daisies.
Purpose of crafts flowers
Skilled craftswomen create real masterpieces of applied art in the form of flowers from improvised, sometimes waste materials. But how beautiful and elegant they look in a home interior, or in the decoration of wardrobe items.
The created flowers have different purposes:
- decoration of hairpins, headbands, bobby pins;
- brooches for decorating dresses, hats;
- bouquets of flowers for decorative vases;
- appliques for T-shirts, blouses;
- interior decoration during special events;
- wall panel.
This is only a small fraction of the areas of application of crafts in the form of flowers.
Flowers by children's hands
Crafting flowers with children's hands is a great idea for family leisure time. Parents should teach their child the skills of working with scissors and a needle. Teach your child to glue parts rightly and assemble them into a single composition.
Receiving a gift from your child, which he created for you with his own hands, thinking how he will make you happy, is worth a lot.
The “indoor flowers in a pot” craft will perfectly refresh the interior of a child’s room and fill it with spring mood. There is no shame in taking such a craft to an exhibition in a kindergarten or school.
Flowers made by children from crepe paper are a win-win gift option for a mother, grandmother, or teacher. Working with such paper is easy and simple, and the result will delight both adults and children.
Video lesson:
Lush rose
This is a very simple way to make beautiful flowers from colored paper. Roses can be any color, even if they are not found in nature. To make a rose, you need to take four paper squares and fold them diagonally three times. Make a semicircular cut in the resulting triangle and cut off the tip of the sharp top.
Unfold the leaves that make eight-petalled rosettes. In the first rosette one petal is cut out, in the second - two, in the third - three and in the fourth half of the petals are cut off. Next, the edges of the cutouts are connected and glued together, forming three-dimensional structures. Cut out petals will also be used.
What about the bouquet?
Don't panic! If we have determined the required number of colors, then we repeat all the same movements the required number of times. Then we carefully collect all the flowers into a bouquet and secure the flower stems several times with a rope or thick thread.
- Wood as a material.
- Christmas tree decorations and toys for the Christmas tree for the New Year
- Coat. What types are there?
Upon completion of fixation, we wrap our beautiful and delicious bouquet in wrapping paper. For beauty, you can tie a ribbon and tie it in a bow.
Master Class
To learn how to make flowers with your own hands, you need to go to a creative website and open a master class on creating crafts flowers.
How many ideas for creating flower arrangements can be found on them. Having chosen a composition that particularly appeals to you, you should carefully read the description.
Then watch a video on how to create a craft, find out from it what, in what quantity you will need for the work, what tools, and then begin the creative process.
The creative work of creating floral arrangements is incredibly captivating for people who are accustomed to making crafts with their own hands. Seeing how you create beauty with your own hands increases self-esteem and acquires skills in working with materials. And how much joy your gifts, in which a piece of your soul is invested, will bring to your loved ones!