Isothread is an unusual type of embroidery, the distinctive feature of which is the surface on which the threads are embroidered. Instead of classical canvas, this art uses thick cardboard or paper.
Using thread graphics, they create beautiful panels and paintings, make bookmarks, decorate boxes and brooches, as well as elements of clothing and interior decor.
The history of the appearance of isothread, and how this activity is useful
Isothread is an applied art in which an image is created on a dense, solid base using threads. Therefore, Isothread has other names, such as: thread design, thread graphics or thread graphics.
The art of string art supposedly appeared in the 16th century in England. To create patterns on fabric, English weavers came up with the following method: they pulled threads in all possible ways onto nails driven into boards. Thus, unusual elegant products were obtained that decorated English houses. It is believed that this is how the art of String Art was born - creating paintings and images using threads and nails.
After some years, this art was improved: instead of planks, paintings began to be made on a different dense surface (mostly cardboard) with a dot pattern previously applied to it in a certain order.
Creating a thread pattern gives its author manual dexterity and perseverance, and also promotes mental and aesthetic development.
First, you need to come up with the drawing itself or find an image, and then analyze the structure and techniques for executing the elements of the image, and then select the optimal color scheme for the base and the threads themselves.
Compiling a pattern from such geometric elements as an arc, circle or angle forms abstract and creative thinking, this is especially useful for children, because all this broadens the horizons of a young thread creator.
Isothread is a type of embroidery
Drawing a parallel between Isothread and classical embroidery, it becomes obvious that Isothread is a unique type of embroidery, but only on cardboard or paper. This is explained by the fact that a simple “thread step” or also called a chord in Isothread is the same straight stitch in embroidery.
Note that Isothread is not only an intricacy of multi-colored threads. String graphics have their own basic techniques (this will be discussed below). It is these special techniques that are also used in embroidery on fabric.
With their help you can embroider amazing works:
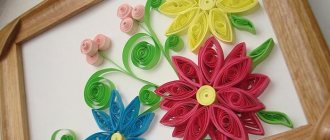
Flowers are embroidered using Isothread techniques
Chamomile field in the form of a pattern
Three basic Isothread techniques are used here: circle, arc and angle
An apple with a quatrefoil inside combines cross stitch and Isothread elements
Decorating the box with embroidery
Fabulous! The circle and angle elements were used again
The corner element forms an embroidered square
Filling the arc
When embroidering floral patterns or other rounded shapes, it may be necessary to fill the arc. The filling of an arc is a derivative of the filling of a circle and largely obeys the same rules. You can draw an arc either by hand, using a compass to draw curls, or using a pattern.
You will have to place the dots “by eye” or also using a compass, so before piercing it is better to apply pencil marks. To make the task easier, you can download templates with numbers and print them. When making stitches, you need to move in one direction.
A spiral is also embroidered using a similar principle.
Having studied the basic techniques, you can move on to more serious work and begin to embroider first light paintings, and then complex compositions.
Materials and tools
Embroidery base
In order to start embroidering using the Isothread technique, you first need to think about the basis on which the thread image will be created. thick cardboard is most often used .
It is better not to use thin material, since it can become deformed during operation; in addition, the loose base absorbs moisture from the fingers
It is more convenient to work with thick cardboard, because when tightening the threads, it does not wrinkle or tear, i.e., there are no gaps between the holes made.
It is better to take cardboard for children's creativity, since it is dense, but not too thick. One side of this cardboard is colored, and the other is gray or white.
Photo from the site youla.ru
In thread graphics, thick wallpaper , both plain and with a pattern or embossing. If the wallpaper is not thick enough, you can stick it on cardboard.
is perfect for work - it is an excellent textured material.
If it is thin, it can again be compacted with cardboard.
watercolor paper as a base its peculiarity lies in its interesting texture.
Photo from doodleandsketch.com
The background color of the base depends on the artist’s intention and composition. You can color it yourself
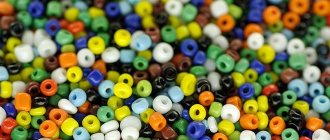
Embroidery threads
Suitable
In threadography you can use different threads.
Thin bobbin threads will help create a sophisticated composition.
But most often they use floss threads , since it is most common to embroider with them. When choosing threads, you need to pay attention to their uniform thickness and overall quality. It is very important that when embroidering they do not become shaggy, as this spoils the appearance of the work.
Iris is also often chosen. Twisted and shiny threads are considered an ideal option for Isothread.
NOT suitable
Woolen threads are not suitable for working in the Isothread style, since they are fleecy in themselves and are often not very bright.
However, there is an opinion that a design embroidered with wool on watercolor or velvet paper is a very good choice.
Bouclé and mohair are completely unsuitable for working with the Isothread technique.
Silk cords or chenille (sometimes called chenille) have a twisted texture, so they are also not intended for Isothread.
Other materials
Scotch tape is useful for securing the ends of the threads on the wrong side of the work. An alternative option is PVA glue .
a needle to make holes on the cardboard. If you make holes on thick paper, then a needle ( tailor's pin ) will do just fine.
For thick cardboard, it is better to use an awl .
Remember to choose the optimal diameter of the awl or needle so that too large holes do not spoil the appearance of the work.
A backing for the work will also come in handy so as not to spoil the surface when making holes in the cardboard. Old linoleum, thin polystyrene or foam rubber are perfect for this.
Auxiliary tools are also needed:
- a well-sharpened pencil for drawing the diagram onto the base
- ruler for drawing geometric shapes
- compass for drawing a circle
- thimble to protect fingers from possible needle pricks
- sharp scissors
- paper clips can be useful when securing the diagram to the base (regular paper clips will do, however, they can move during operation, unlike clips)
Basic Techniques
Paintings created in the isothread style combine several techniques. This makes it possible to obtain complex weaves that form particularly interesting patterns.
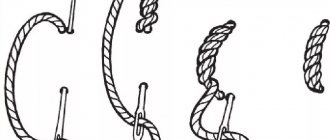
- Corner . This technique is used to fill the corners of the picture. The angle can be any - acute, right or obtuse. Its sides are divided into equal parts and holes are made along the marks. There should not be a hole directly at the top of the corner. In order not to get confused in the order of actions, first you should choose diagrams on which numbers indicate in what order to pull the thread through which hole.
- Circle . The circle is drawn with a compass or traced with a stencil. Next, 12 marks are made on it for the holes so that they look like a clock. In what sequence to pull the thread through these holes depends on the chosen pattern. Experienced needlewomen create their own intricate patterns, inventing new sequences for pulling threads.
- Fan . Usually used when embroidering flowers. With this technique, the holes on one arc are connected by a thread to those on another, located below or above the first and having a shorter length.
- Arc . May have different shapes. Holes for the thread are made at equal distances. Any method of threading is at the discretion of the needlewoman or as indicated in a specific diagram.
Often, experienced craftswomen use their own techniques of graphic threads, finding unusual ways to thread them and obtaining unique weaves.
Tips for beginners
Preparing for embroidery
For beginners, it is better to take ready-made patterns with points numbered in accordance with the sequence of the thread.
Before you start embroidering with threads, you need to:
- Decide what you want to depict and choose the appropriate diagram.
- Select the base and threads of the desired colors.
- Pin the image diagram to the base with a clamp, and then place the base on the backing.
- Use a needle or awl to make holes in accordance with the diagram.
It is better not to make punctures while hanging; you can tear the cardboard or paper.
When all the holes are ready, you can remove the pattern from the base and start embroidering on cardboard with threads.
Olga Voronova’s detailed story you will learn the basics of embroidery using the Isothread technique:
How to secure the thread
At the beginning of work, the thread must be secured on the wrong side; to do this, we make a knot, or simply secure the end of the thread with tape. At the end of the work we also fasten the thread.
Favorite Lesson channel demonstrates how to fasten a thread from the inside out in his master class :
Thread tension
To prevent the threads from getting tangled when working, it is better not to make the working thread too long. If the thread still gets tangled, then you need to pull it back and untangle it.
When pulling the thread, you need to tighten the stitches well, but do not overdo it, otherwise you can deform or even tear the cardboard. On the contrary, loose threads can lead to unclear and sloppy embroidered images.
In the video tutorial you can see how the thread is pulled when embroidering:
How to change thread color
To lengthen the thread or change its color, you need to fasten the old thread from the wrong side, and then start embroidering on cardboard with a new thread from the wrong side to the front. You can also tie a new thread to the old one from the wrong side.
At the end of the work, the wrong side is sealed with white paper using PVA glue. Instead of paper, you can use white cardboard, which can be larger in size than the work itself, so it will act as a passe-partout.
Helpful information
Beginners will be interested in some tips and subtleties of the iso-thread technique . Let's look at them in more detail.
— For the base it is better to use thick paper or smooth cardboard; works on velvet cardboard are less common.
— To draw a drawing, you need a simple pencil, preferably hard and well sharpened, so that the line of motifs is thin.
— You will also need a ruler for drawing lines and angles, and a compass for forming circles of different diameters.
— It is better to use a short but sharp awl They need to pierce the cardboard from the front side to make the work look neater.
— a needle with a large eye so that the thread can pass through easily.
— thread , but floss and iris are considered the best for this technique. Works made with woolen thread look great on velvet paper.
— Holes should be pierced on the backing so as not to damage the table covering. It is recommended to use a piece of cardboard from a packaging box or thick foam.
— To secure the thread from the wrong side, you can use narrow tape or PVA glue.
— To prevent the thread from getting tangled while working, cut off a piece that is not too long.
The isothread technique is used to make postcards, panels, paintings, notebook covers, and bookmarks.
— At the initial stages, it is important to monitor the density of the embroidery. If you pull too hard on the coil, you may tear the cardboard. A weak thread clamp will sag and look sloppy on the finished work.
— Beginners are recommended to initially take ready-made graphic patterns with dots for embroidery.
— To hide flaws on the reverse side, the work must be glued to cardboard or placed in a frame without glass.
Description of the main elements
The main elements in isothread, as noted earlier, are: circle and angle . That is why a compass and a ruler are useful for work.
Circle
Usually the circle is divided into an even (!) number of equal parts; it is better to start with 12-14 holes. Note that the embroidered circle looks more attractive if the distance between the holes is very small.
The circle can be made with threads in various ways: with continuous stitches along the contour, filled with threads through one center point.
The starting point for starting embroidery can be any hole.
Embroidery on cardboard using similar methods is clearly shown in the video lessons of the Favorite Lesson :
Filling a circle along the contour with oblique stitches, which seem to be layered on top of each other, is shown in this master class:
There are different ways to fill a circle, watch the video tutorial:
Schemes for filling a circle in different ways with numbering:
A variety of elegant intricacies of thread in a circle:
Having mastered the technique of filling a circle, you can move on to an additional element - an arc.
These elements will definitely come in handy when creating floral panels using thread graphics.
Corner
Using a ruler, a drawing of the angle is made. Its sides are divided into an equal number of parts on one side and on the other. No puncture is made at the top of the corner. The first stitch is made by threading the needle and thread from the wrong side, and then everything is done according to the pattern.
The process is presented more clearly in the video tutorials of the Money Channel :
By connecting several corners, you can get a triangle or a square.
How to make a square and other shapes using isothread technique:
Secrets for Beginners
Beginners in the process of work may encounter some nuances, ignorance of which can be puzzling or disappointing.
If the thread runs out during work, its end should be secured with tape on the reverse side. Then you need to bring the needle with a new thread from the inside out to the face into the next hole, attach it to the back with tape and continue working. To make the reverse side of the finished painting look neat, it should be glued to a sheet of cardboard or felt.
Embroidery using the same pattern can be filled in different ways. The choice of option depends on spatial imagination, taste and skill level. Beginners are recommended to embroider strictly according to the drawing. More experienced needlewomen can deviate from the proposed option, experiment and fantasize.
You should not embroider with too long a thread so that it does not get tangled. The length of thread required to fill the element can be approximately calculated from the drawing, adding 2-3 cm for fastening on both sides.
When embroidering with isothread, be sure to control the thread tension
During the embroidery process, it is necessary to constantly monitor the thread tension. If the tension is insufficient, the thread will sag. The image will look sloppy and blurry, or even lose its shape. If the thread is too tight, it will cut into the cardboard and tear it.
To avoid mistakes and accidentally missing holes, you can stick a template with numbered dots on the back of the base.
The isothread technique is easy to learn and accessible to people of any age, suitable for educational activities with children. Even absolute beginners will be able to quickly master it. Having embroidered several pictures using ready-made numbered patterns, you can then improve your acquired skills by creating unique original works.
Author: Veronika Reutova
Embroidery patterns using the Isothread technique
We have collected patterns with numbers for beginners to embroider using the Isothread technique. The archive contains diagrams of various themes, including Easter and New Year's, as well as many beautiful frames and borders for decorating postcards:
Patterns for embroidering postcards using the Isothread technique can be downloaded quickly and for free!
The second archive contains diagrams for more experienced craftsmen.
Patterns for embroidering postcards using the Isothread technique can be downloaded quickly and for free!
Ways to fill a picture with threads
The depicted picture can be created from individual geometric elements: from a circle - a sun, from triangles - a pyramid, from triangles and circles - palm leaves. In this case, the body of the image is filled.
The filling density of the pattern depends on the composition being created.
The drawing will be more expressive if its outline is stitched with threads:
If the outline differs in color from the image, this will give the panel even greater expressiveness:
The body of the image does not have to be filled with threads from the inside. You can simply “outline” the outline of the image with a thread of one color, i.e., create a monochrome image:
Also, the body of the drawing can be supplemented and colored with colored pencils:
Competent color transitions of the pattern look very colorful (we described how to change thread colors above):
Multi-layering in isothread will help create complex thread transitions
For example, to embroider the eyes of an owl, we first make a circle of blue threads (owl’s pupils), then using the same points on top, layering on blue threads, we make a circle of white color (owl’s eyelid) with a different angle of the thread, i.e. with a smaller radius. Layering with threads can also occur when filling a corner.
In the video tutorial from the Shirokin Creative Family , you can see how easy it is to create a three-dimensional panel using the nitcography technique:
The design can be embroidered using one thread...
...or in two threads:
If you master all these secrets and techniques, you can create your own compositions without using ready-made patterns!
Isothread for children (the simplest options)
The art of embroidery on cardboard can help instill in a child such qualities as perseverance, patience and abstract thinking.
However, during this exciting activity, do not forget about the safety rules with sharp objects!
For children, it is better to take floss threads, since they do not irritate children's skin, and the bright colors will please the eye. If you don’t have floss on hand, “Iris” can be an alternative.
To begin with, in order not to confuse the child, it is better to do something simple using the Isothread technique, for example, a vase according to the master class of the Favorite Lesson channel:
Next, you can “draw with threads” a dancing goose:
Or a cute puppy. Here one element is layered on top of another using threads of different colors:
The colorful rooster will help you learn how to combine different colors and fill the corner and circle with threads:
This butterfly with flowers will help you practice creating fine lines in an image using the main arc-shaped element:
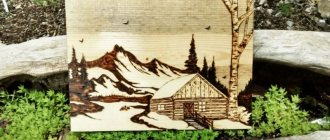
Creating a hut on chicken legs will definitely captivate your child!
Where to begin
Isothread for beginners is a set for creativity, consisting of thin cardboard, floss threads, an awl, stationery tape or a roll of adhesive tape for securing the threads. You can also use album sheets, whatman paper, and watercolor paper as a basis for needlework. It is important that the material on which the image will be embroidered with threads is strong enough.
The basis of any skill is the study of its techniques, so in order to understand how to make iso-thread, you need to study its technique.
The entire arsenal of fine arts in isothread, which allows you to effectively create both images of individual objects and large paintings, is based on two key techniques:
- circle filling;
- corner filling.
Having studied these techniques and their features, you can easily depict any elements derived from them that need to be conveyed using stitches, for example, oval, rhombus, triangle, square, arc, spiral, etc. You can embroider either from your own sketches or from diagrams, which are sufficient on the Internet and in printed publications for creativity. The most suitable designs for embroidery on cardboard for beginners are stylized images consisting of simple geometric shapes.
For beginning needlewomen, it is better to print embroidery patterns on paper using a printer or draw them yourself based on a sample, putting down numbers indicating the sequence of stitches.
In the first diagrams, to avoid mistakes, you can use arrows to indicate the direction of the stitches.
Having understood the principle of interlacing threads, after a very short time you can begin to create masterpieces, using not other people’s, but your own as patterns.
Small tricks
Basic rules with which you can check the correct execution of any pattern:
- on the front side the stitches can be long or short;
- on the front side the stitches can cross each other and start from one point;
- on the wrong side, the stitches do not cross, but can start from one point;
- The stitches on the back side are always shorter than on the front side.
After the diagram has been printed or drawn, the marked points need to be pierced with an awl. For convenience, you can place corrugated cardboard, foam plastic or a towel folded several times under the sheet.
There is no knot at the end of the thread; it is secured with tape or adhesive tape.
Postcards using Isothread technique
Postcards and metrics
Isothread will help you create an original and unique card for any celebration! Very often, thread printing is used to decorate the outline of a postcard, creating a kind of thread lace.
A delicate volumetric metric for the birth of a child can be supplemented with paper decor glued to double-sided tape:
You can combine isothread with applique:
Pearls will add noble charm and solemnity to a wedding card:
Threads in combination with rhinestones, foil and ribbons are another option for decorating a postcard:
There are a great variety of patterns for edging postcards!
You can play with a finished postcard or printed image in this way:
Isothread will help to depict the most sophisticated design
You are limited only by your imagination... and the color of thread you have at hand)
Try decorating cards with beads, rhinestones, beads, ribbons, and lace. They will turn out incredibly interesting!
Photo from the site omelitsa.livejournal.com
New Year cards
Frosty straight stitches of thread printing will help you “draw” a fluffy snowflake:
Lace designs will convey the New Year's mood:
It’s easy to depict a good snowman with golden and silver threads:
The New Year tree can be embroidered in one color...
...or different, because the New Year can be bright!
Christmas motifs are so beautiful!
Themes in embroidery on cardboard
Isothread in flowers and bouquets
Thin and delicate curves of flowers can be conveyed using embroidery on cardboard. Works made with thin threads look very elegant; iridescent threads give such works a special shine:
It’s better to start with simple jobs where you can work out the basic elements:
For example, filling the body of the picture:
Flower of wealth - sunflower looks great on a black background:
For a dark background, it is better to choose bright threads:
The flower will look even brighter if the outline of its flowers and leaves is treated with a darker thread color:
In this thread still life, white threads are layered on darker ones in the petals of daisies, thereby forming a contrasting outline:
Using isothread, you can depict a variety of flowers: chamomile, mimosa, cornflower, etc.
Bouquet of wild flowers
Flowers in vases
The background of the picture can also be filled with thread graphics. Bright colors can be conveyed using small, painstaking stitches. It turns out a kind of thread surface.
Irises in blue tones
Dandelions in impressionist style
Animalism
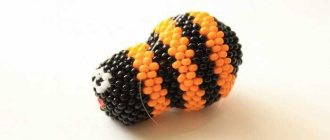
The popularity of depicting animals in one's works comes from ancient times. This direction has not been avoided by isoting. It is especially popular in children's rooms. For example, a ladybug in flowers, which is both a talisman and a talisman of good luck.
The butterfly is very popular in panels and paintings. At the same time, its beauty can be conveyed by a thread of one color:
Images of birds will add lightness to the interior.
A peacock against a dark background looks impressive
And on a light background - elegant
Birds of paradise in soft lilac-pink tones
The king of beasts always looks royal
The interweaving of threads on cardboard can even convey the energy of a galloping horse.
Bird Sirin from Slavic mythology
Abstraction
Regular geometric shapes are reflected in abstract paintings using the Isothread technique.
Vivid dynamics of acid lines - solid and dotted:
The peculiarity of abstractionism is that each person’s imagination perceives such pictures in its own way: a four-leaf clover, for others – a mysterious flower...
A tree with a human face or a stormy sea?
Every time, looking at the same picture, the imagination draws different images.
Isothread without a needle
You can create compositions using the isothread technique without a needle. For example, make a valentine with your own hands.
To do this, you need to cut out a heart from cardboard with curly scissors and make slits along its contour. Next, in a certain order, wind the threads that fit into these slots.
The process of making such a valentine is demonstrated by Vlad Mekhantsev :
You can intertwine the threads on a valentine in different ways: along the contour in a variety of ways, through the center of the heart. Rhinestones, sequins, and beads will complement this Valentine’s card:
In such products, red and white colors look most impressive:
Photo from needlewoman.org
Basics of isothread technique for beginners - unusual embroidery as a fashionable hobby
Everything new is well-forgotten old - the well-known proverb is confirmed by the isothread technique that has returned from the past. Unusual embroidery is again at the peak of popularity today.
Isothread, or thread graphics, is an embroidery technique on a solid base. The peculiarity of the direction is the unusual weaves and patterns that are obtained by pulling threads in a certain sequence. This needlework is fascinating and allows you to feel not only an embroiderer, but also a weaver, because the process is somewhat reminiscent of working on a mini-loom.
- A little history - where did this unusual handicraft come from?
- Isothread as a new exciting hobby
- What you need to get started
- Basic techniques and their use
- Reception "Circle"
- Reception "Angle"
- Reception "Fan"
- Additional tricks
- Little secrets for beginners
- Step-by-step master classes
A little history - where did this unusual handicraft come from?
It is believed that the isothread technique originated in England. As a base, English weavers used wooden planks into which nails were driven, and then threads were pulled onto them in the required order. The resulting panels were used to decorate houses.
Each direction of needlework is at first at the peak of popularity, but after a while it declines. The same thing happened with isothread, but the end of the 19th century saw the heyday of thread graphics. Bookstores sold many publications on this handicraft.
In the 21st century, the world again remembered isothin. Of course, over time, the board with nails was replaced by the well-known cardboard, but the essence remained unchanged.
Isothread as a new exciting hobby
Of course, they start to explore new directions small. For beginners, isothing will not be a very complicated technique. Once you master the basic techniques, you will be able to compose your own compositions. There is huge scope for imagination. Simple elements (circle, square, heart, corner, arc and others) make interesting pictures.
The fashionable hobby of string graphics will help develop taste and cultivate perseverance and patience. Over time, your hands will become more dexterous, and your movements will become more confident and accurate. The creative process captivates and relaxes, problems and anxieties dissolve in the resulting patterns.
One job takes quite a lot of time, but it’s interesting to come up with an idea and plan, transfer your thoughts to paper and draw a diagram, and then stretch the threads and watch how the plot picture turns out.
What you need to get started
To embroider using the isothread technique, you must prepare materials and tools :
- basis (background);
- threads (bobbin, floss, iris and others);
- a needle;
- scissors;
- ruler;
- compass;
Optional:
- substrate (thin foam, leather and others);
- glue or tape;
- pin or awl.
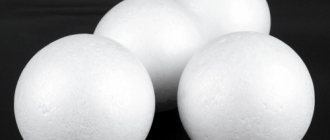
The basis for work is most often cardboard or disk. If we talk about the first one, it is better to take a regular color one, which is sold in every stationery store. It's thick enough to keep the holes neat, but not thick either.
Thin paper will tear in some places and wrinkle. It looks luxurious on velvet cardboard, but it is not dense enough, so it is better to additionally use ordinary cardboard. A more complex surface is fabric.
The threads can be completely different depending on the concept of the future image. For training, bobbin threads are good, but the most popular are floss and iris. They have a rich range of colors. They are bright and juicy. Woolen threads usually look rough, but sometimes they are used if the idea requires it.
The main details of a composition using the isothread technique are circles, corners, squares, and so on, so you need a ruler and a compass.
Before you start embroidering, you need to make holes in the base so as not to hurt yourself or scratch the table. To do this, place thin foam plastic , leather, a towel or other materials under the work. You can also pierce a canopy, but there is always a risk of denting and damaging the base.
To better secure the thread after finishing the embroidery or in case of a break, it is glued with tape or glue from the wrong side.
to pierce holes in the base not with a thin needle, which is uncomfortable and sometimes painful to hold in your hands, but with an awl (for dense material) or a pin.
Basic techniques and their use
There are only two main techniques in isothread embroidery. One of them is circle filling , and the second is corner filling . Additional techniques are used to obtain original effects.
Reception "Circle"
A circle is drawn using a compass. For training, it is better to choose a small radius (from 0.5 cm to 3 cm). By eye, the circle is divided into equal parts, and punctures are made at the resulting points. It is especially important that the number of punctures is even. A picture in which the distance between adjacent points is small looks very nice, but it is better to start with 12-14 holes.
Using a needle and thread, the pattern is stitched according to the diagram. The thread is threaded through the first puncture from the wrong side. A necessary condition is that the selected distance between two connected points (chord) is not equal to the diameter of the circle.
This method is used as the basis for embroidering a square, heart and any closed shape.
Reception "Angle"
Using a ruler, draw an angle. Its sides are divided into parts. The sides themselves do not have to be equal, but the number of holes must match. The number zero is placed above the top of the angle, but no puncture is made on it. The thread is threaded through the first puncture from the reverse side, and then the corner is embroidered according to the pattern. A segment unequal to the side of the corner is selected, and the thread is threaded each time through a certain number of holes.
Reception "Fan"
A flower petal, an entire bud, or a leaf can become a fan. The fan has a kind of base - a segment of some length, and also has an arc located above the base. The required number of points located at equal distances from each other are marked on the arc, and punctures are made on them and on the ends of the base.
Embroidery begins with the first puncture in the arc (the needle and thread are threaded from the wrong side of the work), then the thread passes through the first end of the base and enters the other end from the reverse side. From there, the thread is again inserted into the first hole on the arc and passes from the inside into the second. Then everything is repeated.
Additional tricks
"Arc" . The circle method is used as a basis. You need to connect the holes through a distance of less than half an arc. The smaller this distance, the thinner the arc. If you take the average value, you will get a neat figure.
A similar principle exists for spiral embroidery, but for it the distance between the points is better to take from 3 to 5 spaces. It is embroidered in one direction.
"Droplet" . The circle method is used as a basis. A droplet is approximately half an oval, which will have two sharp ends. They begin to embroider from one of them, and finish in the other. The distance between the punctures should ideally be exactly tangent to the droplet, or rather to its lower part.
Little secrets for beginners
With practice comes experience, but it wouldn’t hurt to take advantage of the experience of experienced needlewomen:
- When you embroider a circle, you get a star on the front side, and a circle on the back.
- When you embroider a corner, on the wrong side you get exactly the same, but done with a stroke.
- The larger the chord you choose to fill the circle, the more filled it will end up. The image in which the circle is stitched twice looks interesting. Once with a larger chord, another with a smaller one.
- It is better to cover the finished work on the reverse side with white or other suitable paper of larger size. Then it will take on a neat and finished look, and it will also form a frame.
Step-by-step master classes
Isothread is one of the most unusual types of embroidery, which creative types simply cannot ignore! After several trainings on simple elements, you will be able to embroider ready-made patterns and come up with your own compositions.
Postcard with Smesharik hedgehog
Panel with a rose
Embroidery using the isothread technique is perfectly embodied in entire panels; it can be done on the covers of postcards, or create paintings and panels that will become part of the interior of the bedroom and living room.
Thread graphics please the eye with their unusual weaves and have a calming effect on a person. You can relax and watch how an ordinary thread turns into an elegant pattern.
Author: Olesya Tartachakova, especially for the online magazine “Women’s Hobbies”.
Application of isothread
With the help of Isothread, you can create not only incredible panels and paintings, but also use the elementary techniques of this art in creating costume jewelry and decorating the interior of your home and shop windows.
In its video tutorial, the Hand-made clearly shows how to make a unique pair of earrings with your own hands from wire, beads and threads:
Guidecentral Ruskij also shows in detail the creation of earrings, the second pair of which will not be found anywhere!
The peculiarity of works made using the technique of thread graphics lies in their uniqueness and individuality. Few people will be able to make an absolutely identical thing using this technique, because it combines all kinds of working techniques, various colors and types of threads and, of course, the imagination of the artist himself.
Above we have given many striking examples of panels and paintings that can be used to decorate almost any corner of the house: children's room, kitchen, bedroom and living room.
But Isothread is not limited to creating paintings alone. Using her techniques, you can brightly and at the same time unusually decorate a passage in a corridor or a doorway...
...to become an artist-creator of designer furniture...
... to defuse the atmosphere in the room with a creative painting...
...decorate clothes with unusual embroidery using the Isothread technique:
Photo from lisitsynblog.blogspot.com
Hard brick framed by soft threads - why not?!