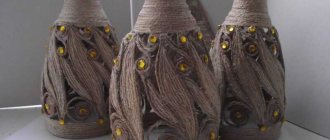
Many people like to decorate their apartment with decor from the “hand-mei” series. The most accessible technique for creating it is decoupage. Creative ideas for your home are presented in this article. Various examples of decorating household items and furniture are considered, photos are published that demonstrate the results of painstaking work. By studying them, everyone will be able to repeat the proposed experiment.
Decoupage - a simple technique for decorating objects Source vseme.ru
Application of decoupage technique
Most often, this decoration option is used to create unusual things designed to charmingly decorate rooms in rural styles: Provence or country. Pretty items are also suitable for creating a feeling of coziness in a rather rough loft.
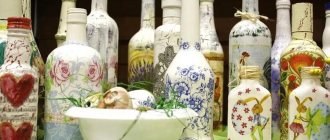
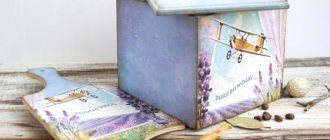
The technique is used to create completely unusual gifts from absolutely familiar objects: boxes, bread bins, cutting boards, wine bottles, New Year's glass balls. Decoupage will also give old furniture a second life, turning it into a real work of art.
Which technique should you choose?
Depending on your desire to decorate this or that item, you should choose what you need for decoupage in order to give it a new decorative design. Among your favorite motifs may be decorations of plastic bottles using strands, stones and other elements glued with silicone glue from a gun. To decorate furniture or an interior door you will need patterns cut from wallpaper, acrylic paints, PVA glue and varnish. Working on glass requires special knowledge of how to make decoupage on a capricious surface.
What is decoupage?
The beautiful word comes from the French language, where it is used as a verb to cut.
Currently, this concept refers to decorating a surface by gluing decoupage pictures.
Decoupage for beginners is accessible to anyone, regardless of age and preferences.
What do you need to know before you start creative work?
When starting to do decoupage with your own hands at home, you should be patient, as thin paper can easily tear during the gluing process. The surfaces of any objects must be pre-prepared, sanded and cleaned of old layers of paint and varnish. This especially applies to working with antique furniture, the surface of which must be completely treated with sanding paper. A big inconvenience when varnishing decoupage crafts is the unpleasant smell that can remain in the room for several days. If it is not possible to use a special workshop for home creativity, then this operation must be performed on the balcony or on the street.
When preparing for work, you need to find out what you need for decoupage for beginners, choosing materials that are suitable in thickness and quality. Too thick types of paper and cardboard will not look as natural on wood or plastic as thin napkins or fabrics. It should be taken into account that glossy images from magazines can dissolve under the influence of the varnish coating, so you should first test the durability of the dyes on a prototype. In order not to remove an already pasted picture due to an unsuccessful color combination with other images, you should first prepare all the cut out elements, and then begin making products using the decoupage technique.
Materials
To start turning boring things into unusual objects, you will need to take care of the tools and materials that will help you create an amazing creation.
A novice needlewoman will need:
- basis for applying the image;
- paper napkins;
- glue;
- clear nail polish;
- paints;
- tassels.
All of this can be purchased at stores that specialize in selling craft supplies, or you can find most of the items on this list at home. For the first work, it is not at all necessary to purchase rather expensive professional materials.
Some advice from experienced craftsmen
Thick paint is harder to apply than liquid paint, so don’t be afraid to thin it. A couple of thin layers will be preferable to one thick application.
Slow drying in natural conditions will help the product retain its attractiveness longer.
You can't apply too much varnish.
Sandpaper will help correct most imperfections.
Following these simple rules and tips will help you achieve even quite complex decor, such as the technique of decoupage of bottles, glass jars or eggs.
A photo of the decoupage technique will help you see what has already been done by craftswomen and choose a suitable craft for beginning needlewomen.
The basis
Any relatively smooth and even surface can be used as a basis for design. However, for beginning craftswomen, it is better to take a plastic or glass horizontal or vertical surface. Curved things like Christmas tree decorations, bread boxes, round boxes, decoupage bottles for beginners are best left for later, when experience allows you to decorate such complex details with pictures.
Decoupage courses in Moscow - addresses where to go
Here are the most popular courses from decoupage artists in Moscow:
| Name | Metro station | Address, telephone | Price |
| Music Soul | New Cheryomushki | st. Garibaldi, 36, +7( | First lesson is free |
| Decor course | Kursk | Zemlyanoy Val, 7, | from RUB 19,200 (20 academic hours) |
| Workshop of Natalia Tarasova | Taganskaya | st. Vorontsovskaya, 6, b2 | 5000 rub (2 lessons of 3 hours) |
| Design and Creativity Club “Marianna” | Novoslobodskaya | Seleznevskaya st., building 11ac2 +7 | from 5000 rub. |
| Russian Academy of Crafts | VDNH | st. Kasatkina 3 +7 (499) 343-9721 | 5000-8000 rub. |
Napkins
To create stylish antique items, you can use special napkins, but a good option for saving the family budget would be to use ordinary multi-layer paper napkins. For decoration, you only need their upper part with a beautiful image.
Note!
Ideas for LD (a girl’s personal diary): step-by-step instructions for making it yourself, photo reviews of the best options
- Educational soft books made of felt: materials for making, detailed instructions + reviews of plots for books (100 photos)
- Original do-it-yourself valentines - design options, necessary materials, master class for DIY work
Often instead of napkins, newspaper and magazine clippings, postcards and other suitable images are used.
However, for the very first works it is better to buy napkins for decoupage. They have a special density that helps to glue the image evenly or, if necessary, quickly remove it. The paper of such napkins does not tear or deform when applied.
Crafts Technique Styles
The use of decoupage techniques for updating and decorating various products and pieces of furniture has been used for the first century, and during this time it has found expression in many styles, the most popular of which are the following:
— Provence
Originating in the southern French province, the style is distinguished by life-affirming motifs. In the subjects of the drawings you can find fields of sunflowers, vines with the theme of winemaking, pastures with animals, rural landscapes, mills and seashores. In decoupage products, you can use techniques of aged wood, bleached base and painting with natural colors.
— Victorian style
Art created in Europe during the long reign of Queen Victoria is characterized by its use of classical motifs in a restrained manner. It is characterized by the active inclusion of striped and checkered patterns in Gothic frames, using ruby, green, gold and burgundy tones.
— Vintage
The monochrome or black and white vintage style also originated in France and fits perfectly into any interior design. The works are distinguished by their sophistication and brevity, often using various types of labels, stamps or written fragments. Among the shades that contrast with the main dark color are milky, gray and ivory.
— Shabby chic
This unusual style is characterized by delicate pastel shades such as pink, ivory, light blue or turquoise. Among the ornamental motifs, angels, flower patterns, birds and fancy animals are most often used.
— Simplicity
Democratic urbanism is at the heart of this decor trend. For it, clippings from old newspapers and magazines, with their thin paper, are widely used. Deliberate carelessness in composing compositions and tearing off the edges of decoupage designs is a distinctive feature of the style.
— Khokhloma
The national style of Russian painting is widely used for decorating clothing and accessories with bright colors or scenes taken from the best examples of colorful household items.
— Gzhel
The reflection of ethnic motifs when doing decoupage work with your own hands is expressed in the use of traditional decor in decorating household items. By decorating various dishes according to the designs of masters of folk crafts, you can study the culture of the country. Trays, teapots and plates in the traditional Gzhel style painted with floral scenes and ornaments will decorate the interior of any home, and will cost much less than the original products.
— Country
The voluminous and homely rustic style is distinguished by romanticism, simple plots of drawings and richness of images. It is dominated by colors close to the natural environment, such as brown, sand, blue and green. At the same time, their shades must be chosen taking into account the existing interior design, so that the item decorated with decoupage fits organically into the decor.
Glue
Decoupage for beginners from napkins will require the use of glue. In principle, this is one of the main elements of creating an unusual thing.
At first, you can buy regular PVA of the middle price category and slightly dilute it with water for better saturation of the picture. In the future, it is better to purchase special glue.
Volumetric decoupage of plates with napkins and paints - master class for beginners, step-by-step video
Decoupage for beginners with napkins and paints can be voluminous, as in the master class from the video below. Unlike the technique with craquelures for plates, using this version of decoupage it is possible to create dishes, and not just decor on them. If desired, it can also be used for more complex items (furniture, cutting boards, bottles, boxes). True, such crafts made from paper are not as durable as those made from wood, so they are purely decorative. Learn more about what is needed for volumetric decoupage of plates with napkins and paints (list) and the technique itself in the step-by-step lesson below.
Varnish
Decoupage for beginners from napkins is completed by coating the surface with varnish, which will protect the applied pattern from the negative effects of the environment.
Note!
Do-it-yourself bead brooch: photos of the best options, step-by-step master class on how to create it yourself, weaving patterns
- Do-it-yourself felt toys - TOP-120 photos of toy ideas, do-it-yourself instructions for making them for beginners
How to make a lapbook with your own hands: a detailed master class on how to make it yourself, reviews of lapbook elements
The best option would be water-based acrylic varnish. It dries quickly and does not smell much. To begin with, you can use regular construction varnish.
Sometimes a varnish with a craquelure effect is selected, giving the decorated surface a delightfully antique look.
Decoupage from napkins on a plate with craquelure - step by step lesson for beginners with photos
Decoupage with craquelure is an original technique that novice craftsmen are often afraid to use; it is widely used in the design of decorative plates. It is with its help that beautiful “cracks” are created on the surface, imitating naturally aged dishes or utensils. But despite the apparent complexity, this technique is quite simple and is perfect even for beginners.
Necessary materials for decoupage from napkins with craquelure on a plate
- ceramic plate
- napkins
- PVA glue diluted with water
- brush and sponge
- scissors
- acrylic paints
- varnish craquelure
Step-by-step instructions for beginners on decoupage from napkins onto plates with craquelures
- A white or clear flat ceramic plate works best for this technique. Before decorating it with napkins, you need to apply a thin leveling layer of white acrylic paint.
- While the paint dries a little, you should prepare the decorative elements - cut out the desired designs and separate the top layer from the napkin.
- Then the paper elements should be laid out on a plate, forming a pattern. Next, go over the napkin with a brush with diluted PVA glue.
- When the glue dries, you can move on to the next step: applying yellow paint to the free edges of the plate. The most convenient way to do this is with a piece of dishwashing sponge.
- Now you need to apply a thin layer of brown paint, minimally affecting the pattern of the napkin. It is also advisable to decorate the edges of the plate with a thin layer of acrylic paint, for example red.
- When the paint dries, apply craquelure varnish. This must be done carefully, in a thin layer, without leaving smudges or drops. As the varnish dries, it will form beautiful cracks, which will be clearly visible against the background of yellow and brown paint. Ready!
Tools
The tools are:
- Sharp scissors, straight and curved.
- Stationery knife.
- Sandpaper for sanding the surface if something rough will be used as a base.
Note!
- Amigurumi for beginners - photos of the best toys, a master class on knitting items with your own hands step by step
DIY bear costume: step-by-step master class for DIY sewing. Costume design options for the New Year
- Bead weaving patterns for beginners - step-by-step instructions with photos and descriptions
A glass of water for washing your brushes will also come in handy.
Briefly about the main thing
Decoupage is a technique that allows you to transform the appearance of old and new things, create decor that fits perfectly into the style of the interior, making the atmosphere more homely and cozy.
You can decorate any objects; any designs on paper or fabric are suitable for this; you will need a simple set of tools for the job. It is always at hand in any apartment. The ideas presented in the article will help you evaluate existing opportunities and try to do something yourself. Decoupage - skillful products Source homepic.com.ua
Preparation
- The step-by-step instructions for beginners are quite simple. But the quality of the finished product is largely determined by the preparatory work.
- The wood is freed from knots and eyes, carefully sanded with sandpaper until a smooth surface is obtained.
- Glass, plastic and metal are degreased using alcohol or regular dishwashing detergent. Rust is carefully removed, damaged areas are lubricated with special compounds.
- The base prepared in this way is covered with any construction primer, ensuring better adhesion of the two materials.
- Painting the surface with white paint will help make the design more expressive and add additional depth.
While the primer and paint are drying (one by one, until completely dry), the drawings are prepared. To do this, suitable pictures are cut out from a napkin and freed from excess layers of paper.
Features of creating decor
The essence of the method of decorating household items and furniture is extremely simple. It has remained virtually unchanged since its creation. Using decoupage, modern craftsmen restore things that have lost their former attractiveness and use them to transform interiors.
Beautiful decor to transform your interior Source kitchenremont.ru
The technique is easy to perform, accessible to everyone, and fascinating. You can work with any subject. It can be made of wood, glass, plastic, ceramics. To work, you need paper or fabric designs, scissors, rollers, glue and a polyurethane-based protective varnish.
Tools needed for decoupage Source teamnail.ru
Decoration work is carried out in several stages:
- First, the surface is prepared, dust is removed from it, dirt is removed, and the surface is degreased with alcohol.
- Cracks and chips are pre-primed, then after the primer has dried, the base is leveled with sandpaper.
Stages of creating decoupage Source donplastgarant.ru
See also: Catalog of popular plots in the Moscow region for the construction of a country house
- The finished drawings are distributed over the workpiece and secured with PVC glue. It is applied not to the base, but on top of the attached workpiece.
- The pattern is carefully smoothed out, folds are leveled, and air bubbles are removed.
- After the glue has completely dried, several layers of protective varnish are applied over the object.
The final stage is the application of protective varnish Source sunmag.me
Mastering this technique is not difficult. Using it, you can create original decorative items. The most interesting ideas for decoupage will be presented in the photo below.
Beautiful clock for the bedroom or kitchen Source handmadebase.com
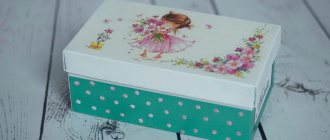
Artfully decorated box Source dotart.info Set for storing bulk products Source yandex.ru
Applying an image
There are several ways to fix a drawing on a base. But the simplest thing will be simply gluing a picture.
Decoupage for beginners step by step with photos will help you visually evaluate this method of decoration.
The whole process looks like this:
- A picture is applied to the prepared surface.
- The entire piece is carefully coated with glue, starting from the center of the image and gradually moving towards the edges of the picture (if the layer of paper does not allow the glue to penetrate to the base, then the picture is glued like a regular applique, carefully leveling out the folds and fixing all the ends).
- Leave the almost finished product to dry completely.
- Several layers of varnish are applied on top. Sometimes up to a hundred layers are used to achieve the result, but for simple homework you can limit yourself to 4-6 layers. Each of them must be dried.
Decoupage bottles in shabby chic style
You will need a simple glass bottle, degreasing alcohol, glass primer and white acrylic. Cover the dried acrylic layer of varnish, place a nice napkin on top and coat it with PVA. Choose a beautiful stencil, take a small trowel and spread the putty.
Apply the putty in an even layer through the stencil, let it dry and sand the top with sandpaper. If desired, use acrylic paints, wax for scuffs, lace, beads and any other decor, first covering each layer with varnish.
Correction of minor bugs
Even experienced craftswomen can make mistakes. But most of them can be corrected before varnishing. Slightly damp paper can be gently smoothed out with your fingers or a wet brush. Unevenness in the dried picture can be removed with soft sandpaper.
Inhomogeneity of the background or blurry image can be corrected with a brush with suitable paint. It will also help create a smooth transition between the picture and the base, and create unusual splashes.
A photo of decoupage will demonstrate the charm of works in this design style and will inspire you to create something similar.
A little history
This type of creativity first appeared in the Middle Ages, when practical German artisans began to decorate the furniture they produced in this way.
But the design style reached its first heyday in the 18th century, when Italian and French masters imitated expensive inlays made of wood or leather in this way.
Note!
DIY gifts for February 23rd - a large selection of ideas for creating unusual gifts for Defender of the Fatherland Day
What to give a 2-year-old boy - a list of the best options for an interesting and useful gift (120 photo ideas)
- Papier-mâché - TOP 120 photo reviews of original products. Detailed instructions for beginners on creating beautiful crafts
A little later, the technique became popular among poorer segments of the population. At the end of the 19th and beginning of the 20th centuries, the decoupage technique conquered all of Europe and moved to America, where it acquired the form of a craze.
The development of new technologies, an increase in production and consumption pushed handicrafts into the background, and for a long time it was in some oblivion. But now it is coming back into fashion.
TOP 50 photos of beautiful decoupage
Stages of working with decoupage step by step
The goal of all technology is to decorate a simple surface with a beautiful image. This process is based on a person’s creative vision, so there is no right way to work. Different surface materials can be used as a base, as well as various techniques and techniques. It is better to take the method that seems simpler and works best.
Experts who have been involved in decoupage for a long time recommend starting with gluing large fragments and parts. When this is achieved without flaws and shortcomings, it will be possible to move on to creating a product from smaller parts, and also master the techniques of volumetric decoupage. Below are the steps for working with large parts.
Preparation
The very first stage, before proceeding with the technique itself, is preparing the foundation. Ideally, there should be no irregularities, pits or humps on it; the surface should be smooth and even (only if this was not intended from the very beginning).
To achieve this effect, it is recommended to use putty material or sandpaper. After leveling work, it is necessary to cover the surface with primer and white paint.
How to work with a napkin
There are several options for working with the material. If the base is flat and smooth, then the napkin can be glued as a whole, but if there are any bends on it, then the napkin will have to be joined in fragments. You can use scissors or carefully tear it into pieces.
Bonding techniques
Those who are starting to work with decoupage for the first time prefer to use small parts for work. This is a good approach for beginners, but it is better to choose the simplest possible shape of the product - it is recommended to choose a surface without additional bends.
If you plan to work with small parts, then you can apply the glue either with a thin brush or with your fingers. After application, you can also level the napkin. The type of brush depends on the individual - you need to choose the option that will be most convenient to work with. Some people prefer to do most of the work with their fingers - this way they can feel all the imperfections of the material.
The glue is usually applied to the surface or to the napkin itself, and you can use one of the following methods:
- Glue can be applied to the entire area, and then connect the surfaces from the middle of the napkin. When smoothing, you need to move towards the edges of the product to remove excess air bubbles;
- You can apply glue only to the middle of the fragment, and then also smooth it to the edges of the surface.
Technology using glue and iron
There is another way to avoid wrinkles: smoothing the surface from bubbles. After priming, glue is applied to the base (PVA or a pencil will do). It must be applied evenly so that there are no glue tracks. You need to leave it for some time to dry (you can use a hairdryer).
After this, put a napkin and smooth it with your hand. They also place a piece of paper on top of it and, using an iron, begin to smooth the surface from the edges.
File and water method
This decoupage technique is perfect for beginners: it uses a file, glue and water. It is better to use it if you plan to decorate large fragments of the picture. You need to pour a little water into the middle of the film, and then place the design on it face down. It is carefully smoothed out and air bubbles are removed.
After this, carefully grasp the edges of the file and drain the remaining water. The drawing will not disappear from the film. Then you can start trying the design on the surface. A drawing is applied to the area and carefully smoothed out. The main thing is to do everything carefully and gradually - then you can avoid the appearance of wrinkles and bubbles.
After one edge has stuck, move on to working with PVA glue. It is diluted and applied to a napkin. Finally, a fresh layer of varnish is applied to the product.
Renewing wooden surfaces
Wood is a great material for decoupage. Even old surfaces look amazing after proper treatment. What can this technique be used on? Decorative boards and saw cuts, photo frames and tabletops, cabinet doors and shelves, trays and boxes are quite suitable.
Note!
Master class on decoupage: step-by-step do-it-yourself decoupage schemes. Master classes on creating products for beginners (130 photos)- Bouquet of candies: TOP-170 instructions for creating a bouquet of candies + DIY design ideas
Bouquet of Raffaello: the best instructions for creating a bouquet of Raffaello with your own hands + simple diagrams with photo reviews
Furniture decoration: the best options
Elements with decoupage in home or country furniture look especially aesthetically pleasing: handmade creations give the interior a special charm. Using this technique you can create the following items:
- The back or seat of a chair (stool). With the proper amount of varnish, it can be used for its intended purpose, or as a flower stand.
- A wardrobe or chest of drawers will require costs for materials and time to cover a large area, but the result will please everyone in the household. This will look especially good in a nursery.
- A dressing table in neutral tones can be decorated to match the tone of the bedroom using decoupage techniques.
- The desktop has long dreamed of getting rid of the pseudo-wooden oilcloth - you can give a new look to your workspace with the help of designs in napkins and fabrics. The updated workplace will please the eye every time you have to work on it.
- The dining table can also be decorated in the style of the tones of the kitchen or living room. It is better to choose light green and blue tones so as not to visually interrupt your appetite with bright spots.
- Decorative shelves with a themed pattern made from napkins can be filled with books, flowers or figurines.
- You can decorate not only the whole object, but also the corners of the furniture: table, kitchen cabinet, chair or door. This solution will not be an eyesore, but will add a special zest to the interior.
- The crib is one of the most suitable places for creativity. Decoupage will perfectly complement the walls of the crib and make the piece of furniture more ethnic and magical.
Decorating bottles: decor and benefits
The decorated bottle can be used for storing and serving alcoholic beverages. Or become an original touch in the interior of the kitchen, dining room, living room. Thanks to the variety of designs, it can fit into any style.
Decoupage of bottles with your own hands is not difficult to do, even if this is your first experience with this technique. For a debut, it is better to choose a flat and smooth bottle. In addition to the standard set of necessary materials, when working with glass, you will need glass cleaner or alcohol to degrease the surface.
One more nuance - it is better to carry out all manipulations with gloves, so as not to spoil the work with fingerprints.
How to decorate a table
The surface of the table, like any wooden surface, must be sanded and degreased. To make it as smooth as possible, one or more layers of primer are applied. Then comes the turn of decoration.
Decoupage with napkins is popular and affordable, and in addition to it, pages of music notebooks and books, pictures from comics and special decoupage sheets can be used as a drawing.
Most often, furniture is decorated in the style of:
- shabby chic;
- Provence;
- ethno.
There are tables in Victorian style and with classic flowers.
In some cases, only the tabletop is decorated, and the legs are simply painted. But it is possible to apply a design to the legs. In this case, it is better to choose patterns with small details.
Features of decoupage on wood
Wooden objects look most organic in the napkin technique: furniture, boards, decor, etc. Especially if the effect of “aging” of wood is added to everything else. Such items will truly decorate any home and add zest to it.
Many needlewomen like to revive old furniture: chests of drawers, bedside tables, tables, and also decorate undecorated kitchen cutting boards.
For fans of decoupage, craft stores sell special small wooden decorative elements, not yet painted or painted, just the base. These are boxes for storing small items, boxes, boards, tea houses, key holders and more.
Wood is a creative material on which beautiful napkins look very good.
Before gluing napkin designs, the surface must be well prepared: remove the old coating if necessary, sand and clean, degrease and paint.
They are most often painted white as a contrast to dark wood. Images are clearly visible on a white background, but it is not necessary to make the surface white.
The flight of imagination of fans and admirers of this decoration technique is limitless, and there are a great many options for napkins, and therefore other coloring is used - in all shades of blue, indigo, green, yellow, etc. The main thing is that the drawings do not get lost against this background.
Useful tips
To make decoupage decoration quickly and accurately, there are several small tricks when working with this decoration method. These tricks can also help avoid wrinkles on the product:
- All fragments of the pattern are pre-moistened with water using a spray bottle - with the help of moisture the napkin will stretch. If it has lost its shape, then you can carefully iron it, and then proceed to traditional decoupage methods. The entire further process is easier and faster.
- Fragments of the pattern can be moistened with varnish. The structure of the napkin will become more rigid, which means that wrinkles will be avoided. However, if this trick is used, then the glue can only be applied to the surface itself - the napkin will repel it.
- You can place a napkin on the surface and then start applying glue. More details about this method are in the video.
