The modern world offers our children a huge selection of beautiful, bright, interesting toys made in factory conditions. But how often do we pay attention to their quality, composition and safety?
There can be no question of uniqueness at all. It is believed that about 75% of the toys that end up on store shelves in our country are made in China, where their production is put on stream, and entire cities are engaged in it.
Knitted doll patterns
There are several ways to create knitted dolls:
- of 6 separately connected parts - head, torso, 2 parts each. legs and arms, which are then sewn into one piece;
- of 5 parts - a solidly knitted head and torso, as well as separately knitted parts of the arms and legs, which are subsequently sewn to the solidly knitted part;
- of 3 parts - a one-piece knitted part consisting of a head, torso and legs and separately knitted parts of the arms, which are then sewn on;
- from 1 piece - a doll figurine is knitted starting from the head or legs, with separately knitted limbs immediately tied into a common piece.
Below are knitting patterns for individual parts of the doll figurine
- Doll head
2. Torso and legs of the doll
3. Hands
4. Knitting pattern
Schemes and descriptions of crocheting amigurumi dolls
Making crocheted amigurumi toys is not difficult; diagrams and descriptions can be easily downloaded. And detailed video tutorials on crocheting amigurumi dolls can be easily found on the Katkarmela Handmade YouTube channel. Here you can watch a free MK video of making a bear, unicorn, elf, angel and other toys.
There are many interesting master classes for beginners and experienced craftswomen on the channels of Elena Belova, Nina Tarasova, Yulia Tkacheva, Svetlana Vysotskaya.
There are interesting groups dedicated to amigurumi knitting on the VKontakte social network - the Foxy group.
Yo-yo doll
The author of the idea of knitting cool yo-yo dolls is Marina Zakharova. The baby doll is about 16 cm high. As you knit, you need to fill the toy with synthetic padding or other suitable filling.
The model is simple to implement. Amigurumi is crocheted according to the following pattern:
- Separately knit two parts (legs).
- The knitted parts are connected together and the body continues to be knitted.
- Change the thread to light pink or beige and knit the head.
- Separately knit two parts of the handles and sew them to the body.
- They knit a hat and scarf and put on a baby doll.
- Sew on the eyes.
Additionally, the doll can be decorated with buttons, beads, bows as desired.
Pirozhenka
This is the author's model of Lyudmila Zhuravleva. Knitted from threads of three colors - beige (head and hands), colored (overalls) and white (hat, lace on the overalls).
Knitting stages:
- Two legs are knitted and joined together.
- Handles are knitted separately with threads of two colors (hands and sleeves), without covering the upper loops.
- They begin to knit the body as an extension of the legs.
- Before starting to knit the head, attach the already knitted hands, change the color of the thread, and knit the head.
Read
Crochet summer coat using fillet knitting technique
The last stage is knitting a hat and decorating the Pirozhenka doll.
Barbie
Knitting a Barbie doll requires experience. This is a rather difficult toy to make, since it is necessary to knit an anatomically correct body. A rigid frame is used to give shape. Another difficult point is the face. It is necessary to form a relief, embroider eyebrows, eyes, lips.
Barbie needs to attach her hair. They can be made from yarn or you can buy special hair for dolls in craft departments.
You can pair a Barbie with a boy doll. Clothes for these characters are knitted separately.
Stesha
Stesha is a designer doll by Tatyana Kostochenkova. Model height 27 cm with holofiber filling. Doll tresses were used to make the hair. The hat and shoes are not removable. The separately knitted vest can be removed.
Stesha's scheme.
Ballerina
There are many options for making amigurumi Ballerina (ballerina). There are relatively simple descriptions for beginners, and there are complex schemes that require great skill.
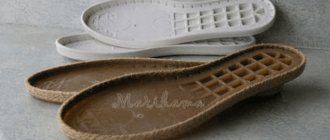
Martina
The author of the toy is Sandrine Campana. Schemes and descriptions of crocheted amigurumi dolls were published in foreign magazines. Martina's size is 28 cm, she is knitted from 100% cotton. The hat and clothes are removable, the shoes are not.
Original description with step-by-step photos: Martina doll
Alenka
Alenka is a character from the popular cartoon “Fairytale Patrol”. A free video tutorial on knitting a doll is available on YouTube.
Japanese
Traditional Japanese kokeshi or kokeshi dolls were made from wood, but are now made from a variety of materials, including crocheted ones. There are many patterns for knitting Japanese dolls, but mostly in foreign languages.
Knitted doll for beginners, step-by-step pattern from scratch
To knit a doll you will need:
- remnants of yarn of different shades, among which there must be flesh-colored threads, with a total amount of about 150 g;
- knitting needles - 2.5-3 mm - paired and sock;
- filler;
- darning needle;
- a pair of doll eyes.
Knitting density: 26 p × 36 r (10 × 10 cm).
Basic pattern: stockinette stitch, purl stitch.
Knitting pattern for individual parts
For the body
Cast on 40 stitches on the needles and knit 30 stitches. Ch. Sew the finished rectangle along the sides and bottom, and pull along the top edge. Fill the resulting bag with filler, tighten it along the upper edge, and make forming drawstrings to mark the navel and buttocks.
For the head
Cast on 50 stitches and knit. Ch. In every person. R. perform increases at intervals of 3 sts. Repeat the action in 2 more persons. R. Knit 10 rubles. no increases. Perform a contraction at intervals of 3 sts, knitting 3 and 4 sts together. Repeat the action in another 2 knits. R. Sew the finished piece along the sides, tighten with thread along the top and bottom edges.
Arms and legs
Knit the details using sock knitting needles. Ch., cast on 20 points, evenly distributing. Pull along the top and bottom edges. Fill fill. Shape the hands and feet by tightening the main parts of the legs and arms.
Assembly
Sew all the parts together. Create hair for the doll by tying individual strands of thread using a hook. Embroider a nose and mouth, attach ready-made eyes or embroider them. Make an outfit for the doll by sewing or knitting it separately.
A detailed master class on creating a doll with knitting needles is shown in the video.
Video with master class lessons
We offer master classes with a detailed description of knitting amigurumi dolls.
- How to cast on air loops and knit single crochets into the first loop, rows with double crochets, see this video. The main stages of knitting and filling the toy parts are shown.
- How to crochet amigurumi dolls - watch the master class with step-by-step instructions. To make a Toffee doll you will need 5 types of yarn of different colors and auxiliary materials.
- Our video tutorial will tell you how to attach hair to a finished doll without knots or sewing. Prepare long yarn and a hook and follow the detailed video instructions.
At first it is difficult to connect the parts of the doll with the same ones; this is a matter of experience. A lot depends on the threads. Take advantage of our master classes and get started. Be careful, and the result will not take long to arrive. Share your patterns and tips for knitting dolls and clothes for them for our readers. They will be useful to every needlewoman.
Crochet doll for beginners, pattern with detailed description from scratch
As a first attempt for novice needlewomen to crochet a doll, it is worth trying the option with a one-piece crocheted head and body. It is knitted as follows: knit a chain of 37 chains, close it into a ring; first 4 rubles – 37 st/bn; 5 r.: knit 39 st/bn in the following sequence: increase, 18 st/bn, increase, finish r. 17 st/bn; 6 r.: knit 41 st/bn in the following sequence: increase, 19 st/bn, increase, finish r. 18 st/bn; 7 p.: on p. previous. Row knit 41 st/bn; 8 r.: knit 43 st/bn in the following sequence: 20 st/bn, increase, finish r. 19 st/bn; 9-15 p.: on p. previous. Row knit 43 st/bn; 16 r.: knit 40 st/bn in the following sequence: 4 t/bn, decrease, 9 st/bn, decrease, finish r. 15 st/bn; 17 and 19 p.: on p. previous. row, respectively, knit 40 st/bn and 38 st/bn; 18 r.: knit 38 st/bn in the following sequence: 4 t/bn, decrease, 18 st/bn, decrease, finish r. 14 st/bn; 20 r.: knit 36 st/bn in the following sequence: 4 t/bn, decrease, 17 st/bn, decrease, finish r. 13 st/bn; 21 r.: knit 34 st/bn in the following sequence: increase, 4 st/bn, decrease, 16 st/bn, decrease, finish r. 12 st/bn; 22 r.: knit 32 st/bn in the following sequence: 4 t/bn, decrease, 15 st/bn, decrease, finish r. 11 st/bn; 23 rubles: on p. previous. Row knit 32 st/bn; 24 r.: knit 30 st/bn in the following sequence: 4 t/bn, decrease, 14 st/bn, decrease, finish r. 10 st/bn; 25 r.: knit 28 st/bn in the following sequence: 4 t/bn, decrease, 13 st/bn, decrease, finish r. 9 st/bn; RUB 26: same as previous. Row knit 28 st/bn; 27 r.: knit 26 st/bn in the following sequence: 4 t/bn, decrease, 12 st/bn, decrease, finish r. 8 st/bn; 28 r.: knit 24 st/bn in the following sequence: 4 t/bn, decrease, 11 st/bn, decrease, finish r. 7 st/bn; RUB 29: same as previous. Row knit 24 st/bn; 30 r.: knit 22 st/bn in the following sequence: 4 t/bn, decrease, 10 st/bn, decrease, finish r. 6 st/bn; 31 r.: knit 20 st/bn in the following sequence: 4 t/bn, decrease, 9 st/bn, decrease, finish r. 5 st/bn; 32 r.: knit 4 decreases every 3 st/bn = 18 st/bn; RUB 33: same as previous. Row knit 18 st/bn; 34 rubles: knit 4 increases every 3 st/bn = 20 st/bn; 35 rubles: knit 4 increases every 4 st/bn = 24 st/bn; RUB 36-41: same as previous. Row knit 24 st/bn; 42 rubles: knit 2 decreases every 10 st/bn = 22 st/bn; 43-44 rubles: on the previous paragraph. Row knit 22 st/bn; 45 r.: knit 2 decreases every 9 st/bn = 20 st/bn; 46 r.: knit 5 decreases every 2 st/bn = 15 st/bn; 47 r.: knit 5 decreases every 1 st/bn = 10 st/bn; RUR 48: knit 2 dc together, tighten the edge. To knit the feet, make an amigurami ring, into which you knit 6 dc. Next: 1 p.; 12 st/bn, making 6 increases on the previous step. R.; 2-4 r. knit 12 st/bn; 5 rows: for the heel, make 2 increases in a row, finish the row with 10 st/bn = 14 st/bn; 6-11 r.: knit 14 st/bn; 12 r.: knit 2 sc together, fill the parts with filler, tighten the edges. Knit legs from 35 r, 14 st/bn, made on a ring from a chain of 14 ch. For the arms, work 6 dc into an amigurami ring and continue by making 6 increases on the next row = 12 dc. Next, knit 2 rows. without changes, that is, 12 st/bn in each r. On the next row, work 1 puffy st (thumb) and 11 dc (rest of palm). All subsequent 23 r. knit 12 dc in each row. Assemble the doll according to the drawing.
Another option for knitting a doll with a one-piece head and body, shown in the master class
Clothes for dolls
To knit clothes for large dolls, you don't need to make patterns or take measurements. All you need to do is take a hook and yarn. If you know the Tunisian crochet technique, you can create beautiful openwork outfits for dolls.
Children's favorite can be dressed to suit every taste. We offer you instructions for a pattern of crocheted pants for a doll, photos of which are attached below.
We start knitting from the waist.
- We cast on 45 ch and a connecting loop around the circumference. We knit 44 sc in the round. We make sure that the loops do not decrease.
- We divide the connected loops in half and mark this place.
- Knit a contrasting thread into one loop and connect two opposite sides so that the outline looks like a figure eight. This is where the trousers are divided into two legs. We continue to knit, randomly changing the colors of the yarn: first one leg, then the second. We finish by securing the last loop.
- When knitting, be guided by the size of the doll for which you are knitting pants.
Clothes for Barbie dolls
Barbie doll is one of the favorite dolls among the abundance of other dolls. You can knit unusual, interesting dresses for Barbie using a crochet hook and thread. We offer a master class with step-by-step photos in which we will crochet an outfit for Barbie dolls.
- We knit sc, in the 1st row. We don’t make an addition.
- Next, after one row we add 5 sc.
- In the eleventh row, tie 12 sc and 5 dc into one base. Add 3 sc and 5 dc in one loop. Next - simple sc.
- The 12th column is embroidered in a special way. Embroider sc up to the 1st arch, and above the last, tie 2 columns together. Knit two more rows with decreasing stitches.
- Attach the yarn to the beginning of the product and knit a skirt, making a row of sc.
- In each subsequent row, add 2 tbsp to the 2nd loop.
- From the third to the eighth row we knit without increases.
- Sew fasteners.
- Fold and sew.
- The bottom of the dress is made of knitted “grass”, the length of which you can adjust yourself.
For such a doll, you can make a two-story house and -crochet rugs-, sofas and beds, chests for storing knitted items and many other products.
Doll hat
The child must understand what things can be combined. You can make a crocheted hat for a doll, and then crochet a shawl.
The cap consists of a rectangle along the circumference of the head. Cast on a rectangle from ch. Make a rise and knit a sc to the desired length, periodically trying it on the doll. Fold the finished strip and sew. You can sew on headbands or decorate with crocheted flowers.
Summer dress for a doll
We offer to crochet clothes for dolls with a detailed description of the stages of knitting. We will knit a summer sundress for a baby doll with a height of 12 cm. For work you will need a hook and yarn.
- We measure the circumference of the doll's chest and knit a chain from VP. Divide the number of loops into 6 parts.
- Dial 6 ch + 5 dc + 6 ch. Skip 6 sts and work 12 dc + 6 ch. Skip 6 sts again and work 6 dc.
- Cast on a sc in the next row, and knit 6 sts into a chain of 6 stitches.
- The next row consists of dn.
- Next we make 3 air loops. Next, two times 2 increases. 5 dc + 2 increases. In total, there should be 6 increases until the end of the row. We repeat the row in the same way.
- Next we knit a dc without any additions.
- Next 2 p. We do it like this: at the beginning we type 4 ch + 2 dc next to each other.
- Then - 3 ch and knit ss into the next loop. We continue until the end.
- The dress is ready.
Head of a knitted doll in detail
The principle of crocheting a doll head is always the same. It begins with the formation of an amigurami ring, knitted in the round, with an even distribution of increases and decreases. A detailed knitting pattern in rows is shown in the photo below.
The process of crocheting a doll's head is shown in detail in the master class.
Below is a pattern for knitting a doll's head with knitting needles
How to crochet amigurumi frame toys
It is much more difficult to make crocheted frame dolls - the diagrams and descriptions of these toys include strict adherence to dimensions and adjustment to the existing base.
Here is an example of a video master class on a knitted frame doll:
A rigid wire frame is created for the toy, thanks to which it holds its shape well and can sit and stand.
Amigurumi is a whole world. Learning how to make them is not as difficult as it might seem. The main thing is to start work in a good mood, then everything will definitely work out.
How to embroider eyes on a knitted doll
The doll's eyes can be embroidered either when the head is completely tied or when it is not yet finished. The advantage of embroidering on an unfinished head is that bartacks and protruding thread ends are easier to hide inside the knitting. For embroidery, you can use several shades of thread (floss, wool or silk) - the darkest for the pupil and contours, colored ones for the iris, white for whites and highlights.
Eyes can be embroidered in several ways. The easiest way to do this is with satin stitch.
- Outline the location of future eyes and their contours. It is more convenient to do this with a self-dissolving marker or mark with thread.
- Embroider the pupils using satin stitch, taking 2 tbsp.
- Embroider the iris around the pupils.
- Embroider whites and highlights.
- Using small stitches, embroider the upper and lower contours of the eyes and eyelid.
To make the eyes of a knitted doll look three-dimensional, you can use another stitch for embroidery - rococo, in combination with a bead instead of a pupil.
The sequence of embroidering eyes using this technique is shown in detail in the photo.
Hair for a knitted doll made of yarn, how to tie the hair of a knitted doll
There are several ways to make hair for a knitted doll:
- knit from fancy yarn - “grass”, “boucle”;
- knit with double thread using knitting needles, with a grooved pattern - garter stitch, English or French elastic;
- crochet a separate piece with an elongated loop pattern, and sew it to the top of the head like a wig;
- sew rows of threads cut into pieces onto a strip of fabric. Sew the finished part to the top of the head;
- attaching to the top of the head separate strands of threads cut and folded in half;
- crochet a wig;
- knit the backing in the form of a cap, and then embroider it with threads on top.
An interesting way of attaching hair without knots to the head of a knitted doll is demonstrated in the video below.
How to tie a mop of cute curls on the head of a knitted doll is shown in detail in the video.
Features of knitting amigurumi dolls
The doll itself, or rather its original amigurumi image, came to Russia from Japan. She is the national doll of this country. Amigurumi is very sweet and beautiful, her face expresses real emotions. Each toy can have its own character. The amigurumi doll is knitted in a special way in the round. The hook for such a product should be a size smaller than recommended for the selected yarn. Then the knitted fabric will be quite dense and the filler will not be visible through it.
Amigurumi doll
Crocheted dolls are very cute toys that bring good luck and prosperity. The main thing is that creating this toy brings joy to both the needlewoman and the child.
How to make a face for a knitted doll
When shaping the face of a larger crocheted doll, tightening may be required to give it volume and a certain facial expression. To do this, the location of the eyes and nose is marked with pins, and then a tightening is performed using a needle and matching thread.
If the doll is small or is quite happy with the option of a flat face, then you can do without a tightening. This means that after the doll’s eyes are embroidered, you can proceed to designing the nose, lips and eyebrows. Like the eyes, these details of the face can be embroidered by choosing the appropriate shade of thread. It is important to remember that depending on how the eyebrows and mouth are positioned, the doll’s facial expression depends. The process of embroidering lips and nose is shown in detail below in the photo and video.
What kind of dolls are crocheted?
You can crochet different dolls. If earlier it was mainly women for a teapot or something like a baby doll, now there is a great choice. Knowing how to crochet, you can make any beautiful and fashionable dolls.
- The likeness of Barbie, LOL, as well as copies of various cartoon characters are popular.
- You can knit simple but effective toys that will delight not only children, but also adults.
Knitted dolls are widely used for games, interior decoration, and collecting. It all depends on the skill of execution and personal preference.
Frame for a knitted doll
The presence of a frame gives a knitted doll the ability to hold its shape, as well as a certain pose, to be dynamic and flexible. It is inserted at the stage of assembling finished parts or during the process of knitting them. To create the frame you will need the following materials and tools:
- 3 pieces of copper or steel wire with a cross-section of 1.2 mm;
- electrical tape, masking tape or medical plaster on a cotton base;
- pliers.
Taking one of the pieces of wire, bend it in half, insert it into the lower part of the body. Pull the leg parts onto the ends of the wire. To prevent the wire from breaking through the parts, its ends are folded into a loop using pliers and wrapped with electrical tape or any other material. Fill the legs and lower body with filler to give them volume.
From the second piece of wire, securing it to the top of the first, twist the spine and a large frame loop for the head. Tie the body piece around the frame or, if it was knitted before, put it on the frame, fill it with filler and sew it to the bottom.
Pass the third piece of wire through the twisted wire-frame of the spine at the level of the shoulder line, secure it by twisting and wrapping it with electrical tape or other fixing material. Bend the ends of the wire - the arm frame - into a loop.
Stretch the arm parts onto the wire frame, fill them with filler, and sew them to the body and head. Give the workpiece the desired pose. Below are 2 master classes demonstrating how to make a frame for a knitted doll.
Features of knitting a frame doll
The basis of such a doll is a frame, which is made of wire or something similar to this material. Each frame element is first wrapped with filler material, and then “dressed” in a thread sheath. The peculiarity of a frame doll is that its legs and arms bend, which makes it more real and alive. Knitted interior dolls of this type serve as an excellent home decoration. They can also be used as a gift for any occasion.
Frame doll
Legs of a knitted doll
The doll's legs can be connected from top to bottom and bottom to top, and also connected to each other at the transition point to the body or separated by a jumper, that is, they can be brought together or spaced shoulder-width apart.
Following the pattern below, knit a pair of legs: 1 row: knit 6 tbsp into a ring. 2 p.: make increases in each paragraph of the previous one. R. = 12 tbsp. 3 rubles: make increases in the previous paragraph. R. with an interval of 1 p. = 18 st b/n. 4 rubles: make increases in the previous paragraph. R. with an interval of 2 p. = 24 tbsp. 5 r.: knit 24 tbsp behind the back walls of the previous stitch. r., without increases. 6-8 r: 24 tbsp. b/n.
9 rubles: make decreases on the previous step. R. with an interval of 6 p. = 20 tbsp. 10 rubles: make decreases on the previous step. R. with an interval of 9 p. = 18 tbsp. 11 rubles: make 1 decrease on the previous step. R. = 17 st. b/n. 12-18 r.: 17 tbsp. b/n.
19 rubles: make increases in the previous paragraph. R. with an interval of 3 p. = 20 tbsp. 20-25 rubles: 20 st. b/n. To obtain the effect of flattened legs, connect the finished parts in the upper part of 3 tbsp. b/n. To get the effect of spread legs, connect them with a chain of 2-4 stitches, and then proceed to knitting the body. How to tie legs shod in shoes is shown in a master class
Master class on tightening knitted dolls
Tightening is a technological technique that allows you to give natural volume and expressiveness to individual parts of a knitted toy. A tightening is used to shape the torso and face of the doll - forming the cheekbones, nose, eye sockets, etc., after the associated parts are assembled and filled with filler. To tighten small parts, bobbin threads are used to match the main knitting; in other cases, the knitting threads themselves are used.
To tighten your head under your eyes, you need to:
- use pins to mark a place for future eyes;
- insert the needle at the marked place;
- make a stitch after 2-3 stitches; tighten;
- repeat the same steps with the second eye.
How to tighten the doll’s body is shown in the video
Crochet Barbie doll, diagram with description
The height of the knitted Barbie is about 25 cm. To create it you will need:
- 50 g flesh-colored yarn;
- hook No. 1.8-2 mm;
- filler;
- stitching needle.
The doll is knitted in a spiral, that is, without a VP rise. Knitting a Barbie head begins with an amigurami ring, in which 6 st/bn are knitted. 2 r.: increase the number of sc/bn to 12, knitting 6 increases. 4 r.: increase the number of sc/bn to 18, knitting 6 increases. 6 r.: increase the number of sc/bn to 24, knitting 6 increases. In the 3rd, 5th and 7th rows, knit 12, 18 and 24 dc, respectively. 11 r: reduce the number of st/bn to 18, making 6 decreases. 13 rubles: reduce the number of st/bn to 12 by making 6 decreases. 15 rubles: reduce the number of st/bn to 6, making 6 decreases. In rows 12, 14 and 16, knit 18, 12 and 6 dc, respectively. Fill the head with filler and tighten the hole. Knit the body by knitting 6 dc into an amigurami ring. 2 r.: increase the number of sc/bn to 12, knitting 6 increases. 3-4 rubles: 12 st/bn. 5 r.: increase the number of sc/bn to 18, knitting 6 increases through each sc/bn. 6 r.: increase the number of st/bn to 24, knitting 6 increases every 2 st/bn. 7 r.: increase the number of st/bn to 30, knitting 6 increases every 3 st/bn. 8-9 rubles: 30 st/bn. 10 rubles: reduce the number of st/bn to 24, making 6 decreases every 3 st/bn. 11 rubles: reduce the number of st/bn to 18, making 6 decreases every 2 st/bn. 12-13 r.: 18 st/bn. 14 rubles: reduce the number of st/bn to 16, making 2 decreases every 7 st/bn. 15 rub. 16 st/bn. 16 r.: increase the number of st/bn to 18, knitting 2 increases every 7 st/bn. 17 r.: increase the number of st/bn to 20, knitting 2 increases every 8 st/bn. 18 rubles: 20 st/bn. 19 r.: increase the number of st/bn to 24, knitting 4 increases every 4 st/bn. 20-21 r.: 24 st/bn. 22 r.: increase the number of st/bn to 28, knitting 4 increases every 2 st/bn, finish the row by knitting 12 st/bn. 23 r.: increase the number of st/bn to 32, knitting 4 increases every 3 st/bn, finish the row by knitting 12 st/bn. 24-25 rubles: 32 st/bn. 26 r.: reduce the number of st/bn to 28, making 4 decreases every 3 st/bn, finish the row by knitting 12 st/bn. 27 r: 28 st/bn. 28 r.: reduce the number of st/bn to 24, making 4 decreases every 2 st/bn, finish the row by knitting 12 t/bn. 29 rubles: 24 st/bn. 30 rubles: reduce the number of st/bn to 18, performing 2 decreases in a row, 6 st/bn, 3 decreases in a row, finish the row by knitting 6 st/bn. 31 rubles: reduce the number of sc/bn to 14 by performing 1 decrease, 5 sc/bn, 2 decreases, 5 sc/bn. Fill the body part with filler, decorate the shoulders, sewing 2 dc on each side. On the remaining sts, knit 3 rows of 10 sts. Fill the neck with filler, Sew on the head. Bind the legs by doing 3 ch to begin with. R1: ch 1, 2 sc/bn, 3 sc/bn in the last stitch of the chain, turning the knitting, continue 2 sc/bn, 2 sc/bn in the first stitch of the chain 2-3 rows: 8 st/bn. 4 rubles: 2 increases every 3 st/bn = 10 st/bn. 5 rubles: 10 st/bn. 6 rubles: 2 increases every 4 st/bn = 12 st/bn. 7 rubles: 12 st/bn. Fill the foot with filler. 8 rubles: 6 decreases through each stitch = 6 st/bn. 9 p.: Pull st, and then dial on top 12 st/bn. 10 r.: knit 9 tbsp in the sequence - 3 tbsp, 2 decreases in a row, 3 tbsp, decrease. 11-14 rubles: 9 st/bn. 15 rubles: knit 10 st/bn in the sequence – 1 increase, 8 st/bn. 16 r.: knit 12 st/bn in the sequence - 2 increases in a row, 8 st/bn. 17 r.: knit 14 st/bn in the sequence - st/bn, 2 increases in a row, 9 st/bn. 18-20 r.: 14 st/bn. 21 r.: knit 12 tbsp in the sequence - 2 tbsp, 2 decreases in a row, 8 tbsp. 22 rubles: 12 st/bn. 23 r.: knit 14 st/bn in the sequence - 9 st/bn, 2 increases in a row, st/bn. 24 rubles: knit 13 st/bn in the sequence – 3 st/bn, 1 decrease,. 9 st/bn. 25 rubles: 13 st/bn. 26 r.: knit 14 st/bn in the sequence - 3 t/bn, 1 decrease, 4 t/bn, 2 increases in a row, 2 st/bn. 27 r.: knit 14 st/bn in the sequence - 2 t/bn, 2 decreases in a row, 2 st/bn, 1 increase, 3 t/bn, 1 increase, 1 st/bn. 28 r: knit 16 st/bn in the sequence - 2 st/bn, 2 increases in a row, 10 st/bn. 29 r.: knit 18 sc/bn in the sequence - 2 t/bn, 1 increase, 3 t/bn, 1 increase, 9 t/bn. 30-33 rubles: 18 st/bn. 34 r.: knit 19 st/bn in the sequence – 7 st/bn, 1 increase, 10 st/bn. 35-38 rubles: 19 st/bn. 39 r.: knit 20 st/bn in the sequence – 8 st/bn, 1 increase, 10 st/bn. 40-44 rubles: 20 st/bn. As you knit, fill the leg parts with filler. Tie your hands together by making an amigurami ring first. 1 -5 rubles: 6 st/bn. 6 r.: knit 8 tbsp in the sequence - 2 tbsp, 1 increase, 2 tbsp. 7-8 and 11-15 rubles: 8 st/bn. 9 r.: knit 8 tbsp in the sequence - 2 tbsp, 1 increase, 2 tbsp, 1 decrease, 1 tbsp. 10 r.: knit 8 tbsp in the sequence - 3 tbsp, 1 increase, 2 tbsp, 1 decrease. 16 r.: knit 9 st/bn in the sequence –1 increase, 7 st/bn. 17 r.: knit 9 tbsp in the sequence - 4 tbsp, 1 increase, 2 tbsp, 1 decrease. 18-22 rubles: 9 st/bn. 23 r.: knit 10 tbsp in the sequence - 6 tbsp, 1 increase, 2 tbsp. 24-30 rub.: 10 st./bn. As you knit the piece, fill it with filler. Sew the finished parts of the arms to the body. Embroider the face, sew on the hair.
In order for Barbie to change poses, a wire frame can be inserted inside the doll.
Crochet dolls, works of our readers
Crocheted ballerina doll. Master class from Ksenia
For a long time, the idea of knitting a neat little ballerina with miniature pointe shoes, a tiny tutu and always a big bun has been spinning in my head :)) At first the idea was figurative, not designed into specific figures. Then I started experimenting, bandaged the nth
Read completely
A couple of dolls in love. MK from Yulia Kononchuk
Dear needlework friends! I would like to wish everyone LOVE for a lifetime, and give a small gift - MK “Couple in Love”. I will be glad if this MK is useful to anyone, and I wish everyone easy loops and beautiful gifts for the holiday! Us
Read completely
Crocheted doll. Work by Tatyana Erofeeva
Good day, dear needlewomen and site readers! Recently, toys related to the description of the Yo-Yo doll have become very popular. I also didn’t stand aside and knitted just such a doll for my daughter. Design options
Read completely
Crochet amigurumi Yo-Yo dolls. Works by Marina Stoyakina
Hello! I would like to show you another version of my performance of the yo-yo baby - the simplest, in my opinion! According to the basic description, a doll is knitted, and the only removable decorations are a hat and a scarf. For a description of the Yo-Yo doll, see the link. At the same time, accessories
Read completely
Amigurumi baby Owl. Work by Marina Stoyakina
Hello everyone! Lately I’ve been very interested in creating interior toys and now I want to introduce you to this cute baby owl! The baby doll is crocheted from half-wool, crocheted No. 2, with movable handles on a thread fastening. Clothes - cap and dress
Read completely
Knitted doll
Original pattern and description in English https://stitch.hellooperator.net/free-patterns/amigurumi-doll/ To knit a doll you will need: Materials: I used cotton, which is suitable for crocheting with a 3mm hook. The body, dress and boots are crocheted with the same yarn in 3.5mm crochet (I don't have a description
Read completely
Crocheted doll Eva and her house
Dollhouse - the work of cher va21 from the Country of Mothers. Eve. Small doll (doll size 5 cm). The baby has her own house: The house has a bedroom, a wardrobe and a swing. For DESCRIPTIONS of the house, see the author’s group at the link That’s why the whole toy is called Dollhouse or house
Read more…
Crochet doll Marina from Alexandra Yankovskaya
INTRODUCTION The difficulty level of the master class is simple, i.e. Even a beginner knitter can easily handle it. To knit a toy according to this description, you need to know how to make: 1. Amigurumi ring (or magic, sliding, magic ring) 2. Columns without
Read more…
Crochet twig doll from Alexandra Yankovskaya
Bobblehead Twig The difficulty level of the master class is simple, i.e. Even a beginner knitter can easily handle it. To knit a toy according to this description, you need to know how to perform: a) adding/decreasing loops according to the circle rule b) amigurumi ring (or magic, sliding,
Read more…
Crochet Gerda doll. Vera's work
Gerda doll. Knitted according to Martina's doll's master class. Apparently the hook and threads are thinner than in the description. Our height is 25 instead of 38 cm. Hook 1.5, cotton thread. Author of the doll: Sandrine CAMPANA. The author has a doll about 38 cm, yarn 100%
Read more…
Crocheted Tilda doll, diagram with description
Tilda is a popular doll image created by Norwegian artist Tonne Finanger. If you have minimal crochet skills, you can make it yourself. To work you will need a hook, flesh-colored or white threads for knitting open parts of the body and colored threads for panties and blouses, filler.
Head and torso:
Knitting starts from the head. To do this, you need to make an amigura circle using flesh-colored threads. 1 r.: knit 5 st/bn. 2 rubles: 5 increases per previous item. row = 10 st/bn. 3 rubles: alternation - 1 st/bn, increase = 15 st/bn. 4 rubles: alternation – 2 st/bn, increase = 20 st/bn. 5-10 rubles: knit sc/bn on the previous item. row = 20 st/bn. 11 rubles: alternation – 2 st/bn, decrease = 15 st/bn. 12-14 rubles: knit sc/bn on the previous paragraph. row = 15 st/bn. 15 rubles: alternation – 1 st/bn, decrease = 10 st/bn. 16-19 rubles: knit sc/bn on the previous item. row = 10 st/bn. 20 rub. : alternation – 1 st/bn, increase = 15 st/bn. 21 rubles: alternation – 2 st/bn, increase = 20 st/bn. 22 rubles: alternation – 3 st/bn, increase = 25 st/bn. 23-24 rubles: alternation – 4 st/bn, decrease = 30/36 st/bn. 25 rubles: alternation – 5 st/bn, increase = 42 st/bn. 26-28 rubles: knit sc/bn on the previous item. row = 42 st/bn. After 26 p.m. change flesh-colored threads to colored ones. 29 rubles: 5 st/bn, decrease = 36 st/bn. 30 rubles: knit sc/bn on the previous item. row = 36 st/bn. 31 rubles: 4 st/bn, decrease = 30 st/bn. 32 rubles: knit sc/bn on previous stitch. row = 30 st/bn. 33 rubles: alternation – 3 st/bn, decrease = 24 st/bn. 34-38 rubles: knit sc/bn on the previous item. row = 24 st/bn. 39 rubles: alternation – 3 st/bn, increase = 30 st/bn. 40 rubles: alternation – 4 st/bn, increase = 36 st/bn. Fill the knitted part with filler and continue knitting without changing the thread. 41 rubles: alternation – 5 st/bn, increase = 42 st/bn. 42 rub. alternation – 6 st/bn, increase = 48 st/bn. 43 rubles: knit sc/bn on previous stitch. row = 48 st/bn. 44 rub. alternation – 7 st/bn, increase = 54 st/bn. 45-46 rubles: knit sc/bn on the previous item. row = 54 st/bn. 47 rubles: alternation – 8 st/bn, increase = 60 st/bn. 48-53 rubles: knit sc/bn on the previous item. row = 60 st/bn. 54 rubles: alternation – 9 st/bn, increase = 66 st/bn. 55-59 rubles: knit sc/bn on the previous item. row = 66 st/bn. 60 rubles: alternation – 10 st/bn, increase = 72 st/bn. 61-66 rubles: knit sc/bn on the previous item. row = 72 st/bn. 67 rubles: alternation – 11 st/bn, increase = 78 st/bn. 68-71 r.: knit sc/bn on the previous item. row = 78 st/bn. 72 rubles: alternation – 38 st/bn, increase = 80 st/bn. 73 r.: knit sc/bn on the previous item. row = 80 st/bn. Fill the knitted part with filler, connect its edges with a hook.
Legs:
The piece is knitted from bottom to top. To do this, you need to make an amigura circle using flesh-colored threads. 1 r.: knit 5 st/bn. 2 rubles: 5 increases per previous item. row = 10 st/bn. 3-15 rubles: knit sc/bn on the previous item. row = 10 st/bn. 16 rubles: alternation – 1 st/bn, increase = 15 st/bn. 17-27 rubles: knit sc/bn on the previous item. row = 15 st/bn. Having knitted 26 rubles, change the threads to colored ones. 28 rubles: knit st/bn behind the back. Art. on p. previous row = 15 st/bn. 29 rubles: alternation – 2 st/bn, increase = 20 st/bn. 30-41 rubles: knit sc/bn on the previous item. row = 20 st/bn. Fill the leg with filler, close the edges of the part, crocheting 10 dc. 42 r.: knit 10 st/bn for the back. st., turn the knitting and perform another 10 st/bn before the st. = 20 st/bn. 43-44 rubles: knit sc/bn on previous stitch. row = 20 st/bn. 45 rubles: alternation – 3 st/bn, increase = 25 st/bn. 46-50 r.: knit sc/bn on the previous item. row = 25 st/bn. 51 rubles: alternation – 4 st/bn, increase = 30 st/bn. 52-61 rubles: knit sc/bn on the previous item. row = 30 st/bn. 62 rubles: alternation – 5 st/bn, increase = 35 st/bn. 63-67 rubles: knit sc/bn on the previous item. row = 35 st/bn. 68 rub. alternation – 6 st/bn, increase = 40 st/bn. 69-73 r.: knit sc/bn on the previous item. row = 40 st/bn. Fill the knitted piece with filler, crochet its edges without tearing off the thread, and sew the leg to the body. Repeating from 1 to 73 r., tie the second leg, sew it to the body.
Hands:
The piece is knitted from bottom to top. To do this, you need to make an amigura circle using flesh-colored threads. 1 r.: knit 5 st/bn. 2 rubles: 5 increases per previous item. row = 10 st/bn. 3-14 rubles: knit sc/bn on previous item. row = 10 st/bn. 15 rubles: alternation – 4 st/bn, increase = 12 st/bn. 16-30 rubles: knit sc/bn on the previous item. row = 12 st/bn. 31 rubles: alternation – 5 st/bn, increase = 14 st/bn. 32-46 rubles: knit sc/bn on the previous item. row = 14 st/bn. After knitting 40 rubles, change the flesh threads to colored ones and fill the knitted part with filler. 47 rubles: 7 decreases per previous item. row = 7 st/bn. Fill the arm part to the top with filler, tighten the edges of the part with thread, and sew the arm to the body. Repeating from 1 to 47 r. tie the other arm, stuff it and sew it to the body.
You can see the process of knitting a Tilda doll in the video presented in 3 parts below. Head and torso
Arms and legs
Assembling the doll and tightening it
Knitting a baby doll
We will need:
Knitting needles No. 2;- The yarn is beige and multi-colored;
- Large needle;
- For eyes, one thing: half beads, eyes or buttons;
- Glue moment;
- Padding;
- Eyelashes (you can cut them yourself from PET);
Abbreviations in the text:
- Stockinette stitch - knit one row, purl the other row - k. ch
- Increasing loops - prb.
- Two loops together - dec.
- Facial loop - knit.
- Purl loop - purl.
- Buttonhole - p.
- Row - r.
Description
Work starts from the bottom edge of the shoes.
- We dial 20p.
- 1p - purl;
- 2−5r — persons. smooth surface;
- 6p - 2 persons. (increase, front) 16 times, 2 persons. p-36p.;
- 7−11r - from the inside out. we make parts l. gl.;
- 12r - 10 persons. (prb, lp.) 16 times, 10 knits-52p.;
- 13p - purl;
- 14−19r - l. gl.;
- 20r - 14 persons. (decrease) 12 times, 14 lp.-40 p.;
- 21p - purl;
- 22p - purl;
- 23p - purl;
- 24r - 33r l. Ch. (socks are a different color).;
- 34p - purl;
- 35−53r - Starting from the wrong side. We perform parts l. lie beige threads - legs;
- 54r - purl;
- 55−64r - Starting from the inside out. We perform parts l. Ch. thread of a different color - pants.;
- 65−79r — l. Ch. beige threads;
Stesha doll knitted description, details
Knitting pattern for the head
Using flesh-colored threads, make an amigurami ring and then knit 1 row: 6 st/bn. 2 rubles: 6 increases = 12 st/bn. 3 r.: knit rapport 6 times *1 st/bn, increase* = 18 st/bn. 4 r.: knit rapport 6 times *2 st/bn, increase* = 24 st/bn. 5 r.: knit rapport 6 times *3 st/bn, increase* = 30 st/bn. 6 r.: knit rapport 6 times *4 st/bn, increase* = 36 st/bn. 7 p.: knit rapport 6 times *5 st/bn, increase* = 42 st/bn. 8 p.: knit rapport 6 times *6 st/bn, increase* = 48 st/bn. 9 p.: knit rapport 6 times *7 st/bn, increase* = 54 st/bn. 10 rubles: knit rapport 6 times *8 st/bn, increase* = 60 st/bn. 11-20 p.: on p. previous. Row knit 60 st/bn. 21-27 r.: repeat the knitting sequence in the opposite direction from 10-3 r., performing instead of increases, decreases 28 r.: knit rapport 6 times *1 st/bn, decrease* = 12 st/bn. 29 rubles: make 6 decreases = 6 st/bn. Fill the head with filler, attach the eyes between the 17th and 18th rows, the distance between the eyes is 6 st/bn.
Body knitting pattern
Knitting begins from the feet, more precisely from the sole, and is carried out from the bottom up. Using colored threads, knit a chain of 10 chains. 1 r round.: 25 st/bn knit in the following sequence: 2 ch rise, 4 st/bn in the next st., 8 st/bn., 5 st/bn in the last stitch of the chain, 8 st/bn, s/ With. 2 r. circular: 35 st/bn knit in the following sequence: 2 ch/bn rise, 1 st/bn in the same st, 4 st/bn in the next st., 8 st/n., 5 st/bn in one st, 8 st /bn, s/s. 3 rubles circular: 45 st/bn knit in the following sequence: 2 ch/bn rise, 1 st/bn in the same st., repeat the report 4 times * st/bn + increase*, ., 8 st/n., repeat the report 5 times * st/bn + increase*, 8 st/bn, s/s. Change the thread and continue knitting the sole of the shoe. 4 r.: knit 46 st/bn, behind the back st. 5-7 r.: on the p. of the previous row, knit 46 st/bn. 8 r.: knit 42 st/bn in the following sequence: 24 st/bn, 4 decreases, 14 st/bn. Insert a pre-cut insole from cardboard. 10 r.: knit 36 st/bn in the following sequence: 21 st/bn, 6 decreases, 9 st/bn. 11 r.: knit 30 st/bn in the following sequence: 1 st/bn, 6 decreases, 6 st/bn. 12 r.: knit 24 st/bn in the following sequence: 15 st/bn, 6 decreases, 3 st/bn. 13 rubles: repeat the report 6 times *2 st/bn, decrease* = 18 st/bn. Change threads. 14-38 r.: knit 18 tbsp. Return to 5 p., and use white thread to tie the sole 46 p/st/bn., embroider the laces. Knit the top of the socks in the following sequence: 1st row: chain of 15 ch. 2 -30 r.: 1 ch, 15 mst/bn. Sew the finished part to the leg above the shoe, rolling it into a ring. Tie the other leg in the same way. 39 r.: connect both legs with a chain of 3 ch. Continue knitting the body. 40 rubles: knit 42 sc/bn in the following sequence: 18 sc/bn (first leg), 3 sc/bn (on the point of the connecting chain), 18 st/bn (second leg), 3 sc/bn (on the p. . connecting chain on the other side). 41 r.: knit rapport 6 times *6 st/bn, increase* = 48 st/bn. 42-44 rubles: on the previous paragraph. Row knit 48 st/bn. 45 rubles: knit rapport 6 times *7 st/bn, increase* = 54 st/bn. 46-48 rubles: on the previous paragraph. Row knit 54 st/bn. 49 rubles: knit rapport 6 times *7 st/bn, decrease* = 48 st/bn. 50 rubles: knit rapport 6 times *6 st/bn, decrease* = 42 st/bn. Change thread. RUB 51: same as previous. Row knit 42 st/bn. RUB 52: same as previous. row, knit 42 st/bn, inserting the hook behind the back st. RUR 53-55: same as previous. Row knit 42 st/bn. 56 rubles: knit rapport 6 times *decrease, 5 st/bn* = 36 st/bn. 57-61 r.: on the previous paragraph. Row knit 36 st/bn. 62 rubles: knit rapport 6 times *decrease, 4 st/bn* = 30 st/bn. RUR 63-65: same as previous. Row knit 30 st/bn. 66 rubles: knit rapport 6 times *decrease, 3 st/bn* = 24 st/bn. Change the colored thread to flesh yarn. RUB 67: same as previous. row, knit 24 st/bn, inserting the hook behind the back st. RUB 68: same as previous. Row knit 42 st/bn. 69 rubles: knit rapport 6 times *decrease, 2 st/bn* = 18 st/bn. Leave a long thread, with which you can then sew on the head and fill the part with filler. Return to RUR 52 and knit 2 rows of 42 st/bn on it. Sew buttons onto the front of the body.
Hand knitting pattern
Knitting is done from the bottom up, first with flesh-colored threads, and then with colored ones. Knit 6 dc into the amigurami ring. 1 row: on the stitch of the previous row, knit 12 tbsp, making 6 increases. 2 p.: repeat the report twice - 5 st/bn, increase = 14 st/bn. 3-9 r.: knit on the previous step. R. 14 st/bn. 10 rubles: repeat the report twice - 5 st/bn, decrease = 12 st/bn. 11-12 r. knit on the previous step. R. 12 st/bn., changing after 11 r. flesh threads to colored ones. 13 r.: knit 12 tbsp, inserting the hook behind the back wall. 14-34 rubles: knit on the previous step. R. 12 st/bn. Fill the part with filler and join the edges. Knit the cuffs. To do this, using a colored thread, insert the hook into point 13, knit 2 rows of 12 st/bn. For the thumb, use flesh thread to knit 3 circular rows of 6 dc, inserting the hook in the first row into the amigurami ring. Sew the finger to the palm of your hand. Tie the other hand in the same way.
Knitting pattern for a vest and bag
Knit a chain of 42 chains, the 2nd of which are lifting loops. 1 r.: knit 42 st/n in the following sequence: 2 increases every 6 st/n, 14 st/n, 2 increases every 6 st/n. 2 r.: turn the knitting and knit 2 ch rises and 46 st/n in the following sequence: 6 st/n, increase, 7 st/n, increase, 15 st/n, 2 increases every 7 st/n. 3 r.: turn knitting, knit 2 ch rises and 50 st/n in the following sequence: 7 st/n, increase, 8 st/n, increase, 16 st/n, 2 increases every 8 st/n. 4 r.: turn knitting, knit 2 ch rises and 54 st/n in the following sequence: 7 st/n, increase, 9 st/n, increase, 17 st/n, increase, 9 st/n, increase, 8 st/n /n. 5 r.: turn knitting, knit 2 ch rise and 58 st/n in the following sequence: 8 st/n, increase, 10 st/n, increase, 18 st/n, increase, 10 st/n, increase, 8 st /n. 6 r.: turn knitting, knit 2 ch rise and 58 st/n in the following sequence: 8 st/n, increase, 10 st/n, increase, 18 st/n, increase, 10 st/n, increase, 8 st /n. 7 r.: turn the knitting, knit 2 ch rises, then in the following sequence: 8 sts/n for the front, 18 sts for the back and 9 sts/n for the second shelf, skipping the st for the armhole = 36 sts/n. 8 r.: turn knitting, knit 2 ch rises, then 6 increases every 5 st/n = 42 st/n. 9 r.: turn knitting, knit 2 ch rises, then 6 increases every 6 st/n = 48 st/n. 10 r.: turn knitting, knit 2 ch rises, then 6 increases every 7 st/n = 54 st/n. 11 r.: turn knitting, knit 2 ch rises, then 6 increases every 8 st/n = 60 st/n. Tie the finished vest around the edge with 3 p. st/bn., in the last row on the left shelf, knit a buttonhole. Sew a button on the right shelf.
Knitting pattern for a hat
Knit a chain of 62 chains, the 2nd of which are lifting loops.
1 r.: knit with a st/n pattern on the loops of the chain = 60 st/n. 2-12 r.: repeat the rapport 15 times - 2 dc, knitted behind the front st., 2 dc, knitted behind the back st. Art. = 60 st/n. 13 r.: repeat the rapport 15 times - 2 st/n, knitted behind the front st., 2 st/n, knitted together behind the back st. Art. = 45 st/n. 14 r.: repeat the rapport 15 times - 2 st/n, knitted together behind the front st., 1 st/n, knitted behind the back st. Art. = 30 st/n. 15 r.: repeat the rapport 15 times - 1 st/n, knitted behind the front st., 1 st/n, knitted behind the back st. Art. = 15 st/n. Pull the hat along the edge and sew on a pom-pom made in advance. Attach hair to the doll by sewing on tresses or a wig from threads, and attach a hat. Sew the finished head piece to the body, then sew the arms to it.
Clothes and shoes for the doll
To knit an elegant dress for the Tilda doll, you need to take yarn of a beautiful color, for example, pink:
- Knit forty single crochets + eight chain stitches. In the 9th loop from the hook, knit 40 sc, then turn the product and knit another 40 sc.
- 1 chain stitch, 2 sc and increase - repeat 13 times, 1 sc, turn the product and knit 53 sc.
- 1 ch, 6 single crochets, 10 ch (skip 10 loops), 21 sts. bn, 10 ch (skip 10 loops), 6 sc, turn the product - 53 sc.
- 1 ch, 53 single crochets.
- 1 ch, 2 sbn and increase - 17 times, 72 sbn.
- 1 ch, 1 sc and increase - 34 rubles, 106 sc.
- 1 ch, 106 sc.
- 1 ch, 106 regular stitches.
- 8 ch, 106 regular stitches.
- From rows 10 to 29, knit 1 ch, 106 sc.
- In the 30th row, knit 1 ch, decrease, 105 sc.
- 1 ch, decrease, 104 sc.
The doll's dress is tied as follows:
- 3 ch, skip 2 loops, then “blind” loop for the entire row.
- 1 blind loop in the first arch, 3 ch, 2 sc together, 2 ch, 3 sc, 2 ch, 2 sc together, 1 sc.
The shoes are knitted according to the following pattern:
- Air loops.
- Half-column, tie a chain on both sides, knitting in rounded places, 2 half-columns.
- Half double crochet, 5 double crochets, half double crochet.
- Half columns.
- 9 half-columns, 3 columns in one loop.
- 5 ch.
Shoes for a doll