There was a need to put a threaded rivet in a hole on the side member of my car. Having seen unimaginable numbers cost of finished threaded riveters ≈ 2000 rubles
The only decision was made to assemble the device ourselves.
There are options for converting ordinary manual riveters into threaded ones, but I didn’t really like this option. Having summarized the experience of previously built similar devices, and supplemented the design with some rational suggestions from myself, I’m posting the result.
- The device is not suitable for everyday and professional use, but for one-time use it’s just right!
- Well, if we are all on an automotive site, I tried to use automotive components as much as possible
.
The principle of operation is to pull out the rivet with an internal screw while unscrewing the outer bolt relative to the thrust nut.
Full size
It turned out quite compact and cute
Full size
Components of a threaded riveter for 100 rubles
1 - working screw (5 rubles)
- replaceable screws, according to the diameter of the threaded rivet.
Acquired threads M5, M6 and M8, strength class 8.8. In the final form, the length of the working screw = 70mm. 2 - body (50 rubles)
(something like that. This is the main part of the riveter. Many people take ordinary bolts and drill a Ø8 hole through it. There is a simpler solution - a
KAMAZ 870022 M14 fuel bolt
.
Almost everything is already done in it, you just need to drill a hole in the head of the bolt 3 - thrust nut (20 rubles)
.
I didn’t use “raw” nuts from stores like Leroy; I picked up a normal hardened wheel nut PE AUTOMOTIVE 01710900A M14
from trucks.
4 - support bearing
. Necessary to prevent the screw from tightening the threaded rivet.
A penny bearing from the AliExpress site was ideal (search for thrust bearing). The outer diameter fits perfectly with the nut, the inner diameter with the M14 thread of the fuel bolt. Initially, I used support bearings for the apron of the struts, but with them the design was much larger. 5 — adapter (25 rubles)
.
Here, no matter how hard I tried, I wasn’t looking specifically for an automotive component, but I still couldn’t come up with a more elegant solution than using an adapter, internal-to-external thread, 1/2″x3/8″
. The outer diameter also coincided with the diameter of the bearing. To save the total length of the tool (about 10mm), I cut off the part with the external thread.
6 - washer
, is placed in accordance with the thread size of the working screw. It is necessary to center the working screw from the bottom in the body of the body so that the rivet can be pulled out without distortion.
Full size
Ø8 hole drilled in the head of the fuel bolt
Full size
Using three types of working screws (M5, M6 and M8) we achieve amazing functionality.
Full size
Threaded rivets purchased in reserve
Full size
Close-up of a threaded rivet. The zone of programmed deformation during installation with a riveter is clearly visible
Source: https://www.drive2.ru/c/488749412294591213/
Scope of application
During construction or repair work, a riveter can become an indispensable assistant. This tool is used to connect two or more parts only when the use of other available devices is impossible.
A riveter for threaded rivets fastens parts together in the most precise, reliable and aesthetically pleasing way. Most often, threaded rivets are used in construction when there is a need to make threads in thin panels or metal sheets.
Principle of operation
A riveter for threaded rivets is designed for connecting various metal elements, which is particularly reliable, highly resistant to mechanical stress and vibration. The essence of the operation of this device is to deform the edge of the threaded rivet so that it is pressed into the desired hole. The main working condition that the riveter for threaded rivets must ensure is keeping the internal thread of the rivet intact and undamaged.
In addition to joining metal elements, the riveter can be used to join building materials, such as plastic. In this case, a prerequisite is the use of a washer so that the applied pressure on the rivet is distributed evenly.
Threaded rivet - if you need to screw in a bolt
Threaded rivets differ from blind rivets by the presence of internal threads, which are suitable for fastening screws, screws and bolts. Threaded rivets are used when connecting parts with a high level of strength. Most often, it is metal, and the main areas where this type of fastener is applicable are related to mechanical engineering, production of building units, and construction. The installation of a threaded rivet is practically indistinguishable from the installation of a pull-out fastener - the product is inserted into a pre-prepared hole and clamped.
Among threaded fasteners, the following types of rivets are distinguished:
- A standard rivet consists of a movable sleeve and an internal thread, which, when the sleeve is compressed while screwing the rivet, remains motionless.
- A rivet with a hidden side is used for fastening parts to thin-walled structures made of plywood, plasterboard, steel or plastic, in which it is impossible to cut threads.
- A rivet with a reduced flange is used when connecting thin-sheet structures made of steel or plastic. Thanks to the reduced side, the rivet is mounted flush, while the fastening is held securely.
Tool Features
The riveter for threaded rivets, in addition to fastening various construction and automotive elements, makes it possible to use bolted fasteners. This fastening method can be used even for polished and painted parts. It is worth noting that both mechanical and manual riveters for threaded rivets make it possible to make the joint of parts aesthetically beautiful and attractive.
The condition that determines the reliability of fastening is the diameter of the rivet. The wider the diameter of the rivet used, the more stable and better the connection will be made. However, there is one unpleasant nuance: large fasteners are much more difficult to work with, and you may need a powerful professional tool to install them.
Kinds
Today, the construction tools market offers a wide range of riveters for threaded rivets. The main difference between them is the way the device acts on the rivet. Based on this, the following types of devices are distinguished:
- The manual riveter functions as a lever. That is, the force that a person applies is directed to the connecting element. Since the principle of operation of this device is quite simple, you can independently assemble a riveter for threaded rivets. The two-handed tool can be used for rivets with a diameter of up to 6.4 mm, the one-handed one – 5 mm.
- Pneumatic. It can rivet efficiently and quickly thanks to the power of compressed air. Its main disadvantage is the need to use additional equipment in the form of a compressor, so it is most often used in industry. Modern models of riveters of this type are compact, reliable and easy to use, which allows them to be used in construction and repair work of any scale.
- Pneumohydraulic. The operating principle of such devices is based on converting the working stroke of the piston into the translational movement of a threaded rod using a hydraulic system.
- Cordless riveters are the most popular models of this tool among consumers. They operate from an internal battery or from a power source, which allows continuous use of this device for a long time.
Another way to work with rivets is to purchase a special screwdriver attachment. Modern manufacturers of construction equipment produce various types of attachments that can easily replace both a conventional tool and a riveter for threaded blind rivets.
Features of working with the tool
To quickly learn how to handle a riveter and easily perform reliable connections of elements, it is enough to learn a simple procedure for working with it:
- The first step is to select rivets of the appropriate diameter. Most often, fasteners with a diameter of 2 to 4 mm are used. When working with large-diameter rivets, you will need a specialized tool, which is best suited to a pneumatic or pneumatic-hydraulic riveter.
- A hole is drilled in the working surface taking into account the outer diameter of the rivet. When using fasteners with a countersunk head, it is often necessary to first countersink the surface, which makes the rivet invisible.
- Before work, you should install a rod with a thread of the required diameter in the rivet gun and screw a threaded rivet onto it. It is important to ensure that the rivet is securely fastened, otherwise it may come loose during installation.
- It is necessary to insert the fastener into the hole until it stops, making sure that its head is tightly adjacent to the surface of the material.
- The riveter is positioned strictly at right angles to the surface and begins to exert force on the handle. During operation, the rod will begin to move inside the tool, providing the necessary pressure to deform the fastener.
- After installing the rivet, you should unscrew the threaded rod from the socket and make sure that the rivet is seated in the hole correctly. This can be judged if there are no distortions and gaps, as well as thread deformation.
How to remove a rivet
Sometimes there are situations when the fastener was installed incorrectly or in the wrong place and needs to be removed. This can be done in several ways.
In the first case, you will need a drill with a drill slightly larger in diameter than the internal thread size. When installing the rivet, you need to monitor the process and promptly change the drill to a larger one. When the problem is solved, the fastener will be divided into two halves - the head and the inner part.
You can also remove incorrectly installed fasteners by grinding off the head. A drill will also help in solving this problem, and when the head is destroyed, all that remains is to knock the rivet out of the seat.
Installation nuances
Before installing the fastener, special attention should be paid to choosing its length. To correctly calculate this rivet parameter, you need to add the thickness of the material and the diameter of the rivet. For example, if the cross-section of the fastener is 4 mm and the thickness of the material is 2 mm, then to make a reliable connection it is recommended to use a rivet with a diameter of 6 mm. After installation, it will “sit” securely in the seat and will allow you to screw a bolt in if necessary.
It is no coincidence that the riveter is very popular, because it has such advantages as ease of use and practicality. Although home craftsmen very rarely share their impressions of the practical use of this tool in everyday conditions. In many construction stores, a riveter is a rarity, not to mention fasteners for it, which many are forced to order online.
This tool has only recently become popular among the population. Most often it is used to perform reliable installation of license plates. It is also perfect for installing fences made of sheet materials, as well as mounting electricity metering devices on thin walls of panels. This installation method has surpassed in popularity even such a common type of fastening as welding, due to its reliability. And this is not surprising, since even under conditions of high loads, if the rivets begin to fail, it will not happen to all of them at the same time.
Work technology
Using a riveter for threaded rivets is quite simple, so you do not need any special skills. You just need to understand the general rules of its operation and you can safely start using this device. First you need to prepare the metal parts. The surface of the parts to be fastened must be smooth and fit tightly to each other. After the parts have been prepared for further work, it is necessary to make special marks, in place of which the corresponding holes will be drilled. Marks must be placed clearly and accurately so that the holes on the parts to be fastened coincide with each other.
Then, using a drill, holes are drilled and threaded rivets will be inserted into them. In this case, you need to take into account the diameter of the rivet and drill, otherwise it may not fit or, conversely, fall out of the hole made. Let's say, if you need to make a groove with a diameter of 4.8 mm, then, accordingly, the drill bit should be 5 mm. The sharpener attachment must completely fit the threaded rivet. To install the latter, its head is placed in the drilled hole in the part. On the reverse side it should protrude slightly, at least 2 mm.
The last step is to squeeze the levers of the tool. When working with a manual riveter, you need to apply quite a lot of force to make a reliable connection. If the rivet leg remains in place after squeezing the handle, then the procedure must be repeated again.
Types of rivets
The connection made using rivets is permanent. The appearance of this type of joint may vary. It depends on what kind of rivets were used in the process. The appearance is determined by the conditions in which a particular connection will be operated. Most often, the connection with rivets requires tightness so that water or cold air does not get inside the object or room. To achieve this result, rivets are often arranged in several rows. Their installation is carried out using hand or electric tools. Manual riveters make it possible to complete a limited amount of work within a certain time frame. With power tools, volumes and quality increase.
Note! There are various attachments available for drills and screwdrivers that allow you to quickly install a rivet.
The algorithm for creating a joint with rivets comes down to choosing a place for fastening, drilling a hole and fixing the equipment. With the use of such fastening material, there are practically no restrictions on which elements can be fixed to each other. In this case, the structure of the components remains without damage. The downside for many is the labor-intensive process, which involves the use of various tools. In some cases, additional sealing of the seams is required. In terms of time, it takes a longer period of time than welding or using self-tapping screws.
Rivets differ in the method of fixation and the tool that is needed for this. Initially, the fastening material was a small cylinder of metal. To fix parts with it, it was necessary to gain access to two sides of the part. The main tool was a hammer, which was used for riveting. The most common option at the moment is the use of tubular fasteners or blind rivets. Fixation with their help is carried out by a manual or automatic riveter, which pulls out a rod with a thickened tip. The latter flares one of the parts. This does not require access from the second side.
Another option that is widely used in manufacturing today is screw or threaded fasteners. In appearance, the clamps resemble a hollow tube with a thread. To process it you will need a special riveter. A rod is mounted into it, and it itself is placed inside the rivet. After squeezing the handle, the outer part of the riveter holds the latch inside, preventing it from moving. In this case, the rod is pulled out, which compresses the rivet, increasing its diameter and locking it tightly in the hole. This installation method can be divided into two workers without much difficulty. One of them drills holes and inserts rivets, and the second crimps them with a tool.
DIY riveter for threaded rivets
This tool is quite expensive, but at the same time necessary. In fact, you can easily make it yourself from scrap materials. For a homemade riveter you will need:
- steel bolt;
- screw;
- thrust ball bearing.
The diameter of the bolt must match the diameter of the rivet that is planned to be used to fasten the parts.
When all materials are prepared, you can begin assembling the tool. The nut is screwed onto the bolt, and then a thrust ball bearing is installed, which is necessary to distribute the pressure acting on the rivet (this will prevent the nut from jamming).
Installation process
The algorithm for installing a threaded element can hardly be called overwhelming, but it is important to know certain nuances. If possible, it is better to use a factory riveter
If desired, you can assemble it yourself; one option will be discussed below. The first step is to determine the type of metal on which the rivet will be installed. Next, you need to know what the diameter of the bolt or module that will be fixed thanks to this rivet is. According to the specified diameter, the appropriate rivet is selected. Its outer diameter is measured and a drill is selected that will be one tenth in diameter larger than the rivet. This is necessary so that the latter fits into place without much effort or obstacles.
Electric or cordless drill. The metal is drilled in the required location. After this, the fastening element is inserted into the seat. If it needs to be placed in a certain position, then it is better to hold it with your hands. For hexagonal holes, you can use special punches if we are talking about thin metal. If the thickness of the metal is greater than the length of the fastener, then the hole must be drilled a little deeper than the fastener, but there is no need to make a through penetration. After this, a rivet maker core is selected that fits the thread to the element being installed. The handles are brought together or the bolt is rotated so that part of the rivet is deformed and fixed in the hole.
You should not apply too much force, as you can tear off the thread, which will later be used to fix the required part. It is necessary to ensure that the rivet is installed in the required position. After this, you can fix the required product using a screw or bolt.
Operation of a homemade device
Such a tool will work as follows: the riveter is placed in the hole of the part, then, holding the nut with one key, the head of the threaded rivet is unscrewed with the other. If you use a lathe, you can make the most convenient model of a riveter, which will be based on the use of a bolt with threads of different diameters. In the head of the bolt of such a tool there is a hole into which a handle of the required size is mounted.
As in the previous model, a washer must be placed between the nut and the rivet to distribute the force evenly.
Required Parts
There are various descriptions of a homemade device made from various parts on the Internet. For example, you can assemble the tool yourself using the following materials:
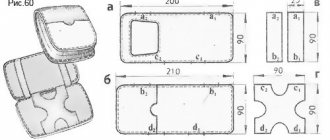
- Pieces of pipe from a 20x20 profile.
- A piece of tube 20x40.
- Hardened screws 5 cm long with threads for 8,6,5 and 4.
- One M10 bolt – 10 cm.
- M10 washer.
- Plastic plugs for pipes.
- Thrust bearing.
- Connecting nuts with thread 10.
- Plastic stopper.
You also need to make a case in which the mechanism will fit. For it you will need:
- Pieces of extruded foam.
- Galvanized pieces.
- "Piano" loop.
- Furniture fasteners.
- A piece of wire 4 mm thick.
Disadvantages of a homemade riveter
In terms of functionality, a homemade tool is absolutely no different from industrial ones. However, there is a significant drawback that a homemade riveter for threaded rivets has. Reviews from users who were able to build and test this device say that when working with the tool, the bolt can jam inside the threaded rivet. Most often, this problem occurs if a softer metal element was used instead of a steel bolt, or due to excessive force applied to the tool.
A homemade riveter is ideal for one-time use. But if you plan to work with this tool repeatedly, then it is still worth purchasing this device in a specialized store. It can significantly save your time and effort, as well as provide reliable and durable fastening of various types of parts.
Problems that may arise with the riveter
After the exhaust part is removed with the tool, it should fall out through the hole. However, after some time of constant use, you may encounter the fact that the exhaust part will get stuck inside the tool.
Moreover, it will be impossible to get it out of there either with pliers or with several direct blows. The reason lies in the sponges that compress the exhaust part.
If blocking occurs, most likely the jaws inside the tool are misaligned. You will have to completely disassemble the tool and install the jaws in the correct position. After this procedure, the functionality of the equipment will be completely restored.
Read also: How to measure a weld leg
In the video, a home craftsman clearly demonstrates how to quickly and easily fix the problem of “biting” the rivet part:
We all know what a great thing threaded rivets are.
In some cases there is no alternative to them. Until one certain time, I somehow managed without them. But one fine day a wonderful car came to me and needed window protection installed. Like this:
Then I started working on collective farms, and in the end I ended up with a device that was not very presentable in appearance, but very functional, and with its help I have installed more than a dozen rivets. The base is an M6 bolt, strength 8.8
This is what it looks like assembled, with the rivet installed
Main parts: M6 bolt. A piece of M12 bolt. More precisely, there was no bolt, no stud. A nut is welded on one side, turning it into a bolt. The stud is drilled through D=6.5mm. Then comes the nut from the UAZ stepladder. Strong. Next is the support bearing, the dimensions are not important. Next is a washer with a fitting from the brake pipe. It doesn't matter either. I installed what was there.
I think the principle of operation is clear. We drill a hole, under the M6 rivet it seems 9mm. We insert the device. Use one wrench to hold nut 1, and use the second wrench to unscrew nut 2.
As the effort increases, the riveting is completed. We twist everything back until it loosens, unscrew the M6 bolt, and install the next one.
A practical and easy-to-use semi-automatic manual riveter for working with blind rivets can be made with your own hands if desired. At the same time, most of the components for it can be easily found in a workshop or garage.
A distinctive feature of this design is that it does not have a power lever, as on factory models - here a screwdriver acts as a drive. An electric drill will also work.
Read also: Melting point of bronze in degrees
To make a homemade rivet gun, you will need a working bushing with collet jaws, a conical bushing and a spring, which can be borrowed from an old rivet gun. You will also need a head into which the rivet shank is inserted.