Using powder paint to restore a car's paintwork allows you to obtain a high-quality polymer coating, which, in addition to its excellent appearance, is also characterized by increased protective properties. This coating technology was developed back in the 50s. In most cases, unlike standard enamels, powder paint after application can be heat treated in a chamber, melting, and forms a reliable protective layer on the metal parts of the body.
Paint is applied using a special powder coating gun, which has its own characteristics and differences in comparison with the enamel spray guns that are already familiar to us.
Step-by-step instructions for making a laser level
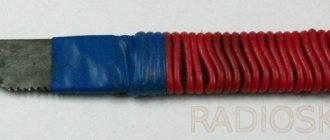
Let's improve the children's laser pointer. It is necessary to unscrew the part of the pointer that does not have inserts with a pattern. The hole needs to be sealed with cardboard and a small hole clearly made in the center, then put the cap back on. Now if you point the pointer at the surface, the laser dot will be clearer. A straight stick must be sharpened at one end and made in the form of a peg. You can also use a shovel handle or a tripod for support. A piece of plywood or a flat board must be firmly attached to the flat end of the stick.
It is very important that the plywood is as level as possible and attached at an exact 90 degree angle. A strip is attached to the surface of the board that matches the length of your bubble level. It should be located in the center of the plywood surface and supported by a screw (nail) so that it can be conveniently turned in different directions. You need to attach a laser pointer to the bubble level
This can be done using a clamp and secure it quite firmly to the side of the level. Now we will place a prepared piece of porous rubber under the pointer for shock absorption. This is necessary in order to easily adjust any angle of inclination along the longitudinal axis.
Having made all the necessary fastenings, your laser level is ready for use.
How to use a laser level
Once adjusted to your level, you will realize that it is very simple and convenient to use. First, you need to secure the structure to the surface using a pointed corner in a stick. After this, using a bubble level, we align the plane with the bar, so that the laser level we made ourselves shows an even horizontal position.
Now you need to turn on the laser pointer and point it at the surface you need. You will see a reflected laser point, make a mark at this place, now move the laser point further along the surface, check if the horizontal level is off on the bubble level, and place another point.
By connecting two points to each other, you will get an even horizontal line, after which you can start working. The easiest way to connect the dots is to use a metal profile for.
Another video guide
How to mount a laser level with your own hands, and is it even possible? Such a high-tech device for projecting vertical or horizontal surfaces when leveling them is manufactured using high-precision equipment. Professional models use special diode lamps that, using prismatic glass, convert the outgoing light into a thin beam.
This definition sounds somewhat scary. But there is no need to despair, because this applies to professional devices used on construction sites. But such models are not very suitable for home use. There are various options on sale for professional use, as well as for indoor renovation work.
You can purchase household models, but again, after using them once, you will put the device in a drawer, and it is not known when you will need it again. Therefore, we suggest considering the option of making a laser level yourself at home.
Making a spray gun for powder paint
Powder paint is used to cover a wide variety of surfaces. It is worth considering that such equipment is quite difficult to manufacture; a homemade sprayer is assembled as follows:
- First, the electrical module is assembled. It consists of a core with wound wire. The element is placed in a sealed plastic container with paraffin.
- The gun is assembled, which ensures spraying and supply of paint. A plastic tee is used as a base into which the core is inserted. The stability and strength of the element is ensured by treating the edges with glue. All electrical connections are routed through the bottom of the structure.
- The previously created gun and electrical module are connected to the paint tank. The flow of paint can be controlled using a rubber trigger.
- All wires are brought out and fixed on the power supply.
DIY powder spray gun
After this, you can begin directly testing the spray gun, for which its container is filled with powder paint.
Manufacturing technology
You can make such a level with your own hands from a laser pointer. It is enough to know the structure of a laser pointer and the structure of a conventional construction tool.
If you take into account the price of a water level and a regular pointer with a beam, it will be several times cheaper than a professional tool.
Step-by-step instruction
For a laser pointer you will need:
- Water level
- Laser pointer
- Fastenings
When choosing a water tool, you need to pay attention that the back side is smooth, otherwise the pointer will be inconvenient to attach. The laser pointer should also have a flat surface
They are connected using glue or tape
It is important to set the pointer as level as possible to the water level. After the joints have been glued, you need to use a ruler to measure the distance from the bottom of the water level to the very sight of the laser pointer
The resulting size will indicate the bottom of the mark from the direction of the laser beam.
Homemade level
Making a laser level with your own hands is not so easy. It will require not only the above materials, but also a device for installation. For example, it could be a stand made of wood or metal. It will not be possible to assemble such a tool from available materials. You need to correctly calculate the holder for the level.
The instructions for assembling such a level indicate the accuracy of its geography when used. If you go to hardware stores, you can find a round water level that ensures the evenness of both surfaces at once. If you assemble and install it on your pointer, you can easily use this device for home use.
Remember that a professional tool is built much better than a homemade one. And when creating and using homemade devices, you are more susceptible to construction errors. After all, if it is not possible to buy an expensive instrument, you can always borrow it from friends, neighbors, or rent it from special companies.
Types of spray guns
Before creating a paint sprayer with your own hands, you need to pay attention to their classification. The following types of such equipment are distinguished:
- Manual.
- Pneumatic.
- Airless.
- Combined.
- Electric.
Spray gun device
The manual version is characterized by the fact that the master has to perform certain actions to supply the substance. Pneumatic models are the most widely used, as they are characterized by an optimal combination of practicality and cost. In most cases, homemade versions are represented by a combination of a sprayer and a pump or compressor. Electric ones appeared on sale relatively recently; the features of the device allow you to adjust operating parameters with high precision. Combined ones are rarely made by hand, as they are characterized by a complex mechanism.
A spray gun for whitewashing should be included in a separate category. You can also make it yourself; when creating the design, you take into account the fact that the lime mortar may contain large impurities. It is worth considering that this version of the device cannot be used for spraying paint.
Automatic paint sprayer
Leveling from a laser pointer and bubble level
One of the available options for making such a tool at home is to upgrade a conventional bubble level. The idea is to attach a light pointer to the body of the level, which will expand the possibilities of using the instrument and allow you to place points on distant planes. If you additionally adapt a tripod with a rotating platform, the efficiency of its use will increase noticeably.
During production you will need:
- bubble level, medium size;
- laser pointer;
- rubber, hard foam rubber, polystyrene foam with dimensions 40/15/5 (length/width/height in mm);
- for fastening, worm clamps, nylon ties in the amount of 2–3 units.
The level should be taken with handles in the middle of the side edge, through which it is more convenient to attach the laser pointer with clamps or ties. The requirements for the indicator are simple - the light point at any distance must remain clear and not blur. To do this, rotate the cap on the laser side, under which the focusing lens is hidden. Depending on the direction of rotation, the outline of the point will change. The adjustment is carried out in such a way that deviations from the original shape of the light spot are minimal, regardless of the distance.
1 – laser pointer; 2 – rubber backing; 3– clamps, ties.
The device is attached to the top, where the insert with the bubble is located. First, lay the substrate, a prepared piece of rubber, foam rubber, or polystyrene foam. Then there is a light indicator, which is tightly secured with nylon ties and worm clamps.
The direction of the beam is set strictly parallel to the edge of the level. The adjustment is made by placing the instrument on any long, flat surface, this could be the top of a table installed against the wall. The height of the light beam from the base should be the same throughout.
If there are no holes suitable for attaching the handle, then in order to securely fasten the light indicator, drill them yourself in the most suitable place with a 3 mm drill. Further fastening steps are similar to those listed above.
To carry out marking in different planes, the tool is applied to a base that is set strictly horizontally or vertically. By rotating it around its axis, the marks are transferred to the walls, ceiling, and floor. Instead of a surface, it is allowed to use a tripod with a rotating element with a fixed flat board or metal plate.
Blow gun as the main working unit of a homemade device
A unit powered by compressed air is more convenient. Although it takes more time and effort to assemble it. The air comes from a hermetically sealed container. The function of the receiver is performed by a bottle or a can; it can be replaced by a canister. The operating principle is similar to the first device. In this device, the rod is replaced by the barrel of a blow gun. The air supply is opened and closed by a trigger. This spray can cover large surfaces.
- blow gun;
- the helium pen is disassembled into a core and a cap;
- capacity 0.5 l;
- to seal the container - a lid;
- a block of wood as the basis for the installation of all components;
- bottle (can be replaced with a canister). Designed to pump air masses;
- from the airless chamber - nipple;
- clamp and hose;
- compressor (the pump is used less often).
The spray gun is operational if the paint container is full and air is periodically pumped in. Having a compressor will eliminate the need to perform step 5.
The structure is assembled in the following sequence:
- The KM supply tube is being prepared. The spout is removed from the metal spout of the rod. To do this, it is processed with sandpaper. If you simply remove the metal spout, the paint will come out as a cloud with large particles.
- The letter “L” is cut out of a wooden block. The barrel of the blowing device and the rod will be attached to it. A hole the diameter of the barrel is drilled at the center point of the longer side. On the short side, in its center, there is a hole for the rod. From the outside, both tubes are threaded through both sides. They must converge inside the element. Their position is fixed.
- A hole for the rod is drilled in the cover of the reservoir for CM. It is lowered inside the container so that it does not rest against the bottom. Otherwise, the rod is shortened.
- The short side of the wooden structure is fixed to the lid of the container with glue.
- A gun is ready to apply CM, but the technology requires incoming compressed air.
- Air is pumped into a container hermetically sealed with a stopper. A canister or a bottle is used. A normal pump is used. Holes are drilled in the plug for the nipple and hose. The contact between the walls of the parts and the plug should be maximum. Therefore, the holes are 2 mm smaller than the diameter of these elements. A hose is lowered 10 cm into the container. The nipple is inserted so that the thread is outward. The parts are fixed with epoxy glue.
- The plug is screwed onto the reservoir for the fuel oil.
- The free end of the hose is put on the blow gun fitting.
- The pump is connected to the nipple. 4 atmospheres are pumped.
- The device is ready. You can start painting. Excessive pressure build-up leads to an explosion.
Advantages of a homemade tool
Despite the fact that such a tool cannot provide high accuracy, it is quite profitable to use it in everyday life. In any case, the marking will be more accurate, and the process itself is much simpler than when using a water level. It is for this reason that such equipment is in demand among household consumers. The positive characteristics of the tool include:
- long beam length;
- minimum error;
- high marking speed.
The use of the equipment is fully justified for walls, floors, ceilings and other supports of a similar type with any type of surface. Alternative applications include marking the following objects:
- personal plots;
- fence structure;
- facade finishing.
Ingenuity, accuracy and strict adherence to the instructions described above will help to significantly save money and time. Before spending money on expensive equipment, a thrifty person should think about whether it’s worth making the device yourself, saving money? Moreover, its quality and ease of use in everyday life corresponds to an expensive device.
Review of popular models
| Place | Name | Rating | price, rub. |
| 1 | Gletcher W-125 | 8/10 | 1 500 |
| 2 | Veber 01G | 8.6/10 | 5 000 |
| 3 | Dual-beam laser target designator IR/R | 9/10 | 14 000 |
| 4 | BH-LR01 | 8.9/10 | 1 500 |
| 5 | Combat (red) | 8/10 | 2 700 |
1st place – Gletcher W-125
This is a budget laser laser from the popular Gletcher brand, made of black plastic composite. The sight has a universal fastener for a Weaver rail; the power sources are 3 elements of the LR41 type. This device is turned on using a double-sided convenient lever. A regulator is installed on one part of the body, which allows you to adjust the sight horizontally.
An adjustment element for the vertical direction of the sight is also installed. For adjustments, the package includes a hex wrench. Use: hunting, sports and training shooting. Sighting equipment can be installed on any type of shotguns and pistols that contain the necessary rails.
2nd place – Veber 01G
This sight differs from others in that the laser beam is not red (as in many laser pointers), but green, with a wave size of 531 nm. This is better for the human eye; in addition, hunting animals are not afraid of it (since during fright a blinding effect often appears). The device is made of aluminum alloy, it is protected from moisture and is not subject to mechanical stress. Weight – 25 g, length – 150 mm.
The laser is adjustable relative to the barrel in two positions. The focus ring can also be used to change the size of the marker (range 9-810 mm). A CR123A battery is installed as power supply. There is a mount for the Picatinny rail. Use: sports and training shooting from military weapons or pneumatics. Manufacturer: Chinese brand Veber.
3rd place – dual-beam laser target designator IR/R
This device can work with 2 beams: visible red (660 nm), invisible IR (890 nm). A separate switch is installed to change the color of the beam. In the second case, you can see the light marker only if you are armed with a night vision device. At a distance of 60-70 meters, this marker has a diameter of 40 mm. The main power source is a CR123A or LR44 battery.
Total length – 65 mm, weight – 135 g. The device is equipped with fasteners that fit the Weaver bar. The power key has a remote design and is mounted on the stock of the weapon. Use of the device: hunting, sports and training shooting. Temperature range -25/+45 degrees. Can be installed on military weapons or pneumatics. Manufacturer: Belomo brand (made in Belarus).
4th place – BH-LR01
This is an under-barrel (red laser is used) sight, which has a universal mount for a Weaver rail, as well as a remote button, the beam power is 6 mW. Can be used for recreational or sport shooting. Area of use: air guns, airsoft, weight and size models. A fairly convenient laser target designator, which has a remote button on a flexible cord; it can be fixed on any part of the weapon.
Advantages of this laser center:
- increases time for fast and accurate shooting;
- makes it easier to target a moving target;
- reduces the time required to aim the sight.
5th place – Combat laser center (red)
This is a specially manufactured small laser designator, which is one of the most advanced today. Its main task is to increase the accuracy of a shot in any position of the pneumatic shooter’s body. This device will improve the efficiency of shooting itself. At an aiming distance of approximately 60-70 m, the pointer marker has a diameter of approximately 35x45 mm. It is also lightweight, reliable and does not require much maintenance. Such a sight can be used for precise aiming of a gun, both day and night, at a short distance.
How to do it?
As noted above, high-quality devices from famous brands will not be affordable for everyone. You can reduce costs by purchasing Chinese models, which are significantly inferior in quality and basic characteristics. But do not forget about the possibility of making the necessary structure with your own hands. A homemade tripod can be assembled in several ways, namely:
- equipped with fastening elements in the form of magnets;
- using so-called cross tripods;
- using belts to secure devices.
One of the simplest options, involving minimal costs, is to use a regular tripod for a camera or camera. If you have such a device, all that remains is to adapt it to install a laser level. An equally simple way would be to make your own tripod with a platform for a level from any materials. The main requirement will be the stability of the entire structure.
You can make a telescopic rod yourself and at relatively low cost. To do this, you will need two tubes, the diameters of which are selected so that one fits into the other. One of them should be twice as long as the other. The manufacturing process includes the following steps:
- cut the larger tube in half;
- We put a larger one on both ends of the smaller pipe to achieve a telescopic effect;
- holes are drilled in the tubes onto which nuts are welded;
- To fix the components, wings with appropriate threads are used.
The most budget option would be to build any stable stand. It could even be a shovel handle with a stand made of plywood or OSB board
It is important to set this structure strictly vertically, using a regular level or plumb line
Spray gun holder
In almost all cases, a special holder is required for the device to operate. If necessary, you can also make it yourself. To do this you will need:
- A small piece of plywood, which measures 25 by 25 cm. Using a jigsaw, a hole is formed in it that fits the diameter of the spray tank.
- The handle is inserted into the groove, after which the edges are cut to size.
- Special legs are created for the stand, which ensure the correct positioning of the hose.
Spray gun holder
Such a holder can additionally be equipped with an element for installing a filter funnel. It is created using aluminum wire, which can be secured with screws.
Preparing for work
Before using the laser level, it must be aligned vertically. There are two types of devices - with and without automatic position adjustment. If your unit does not have auto-tuning, it has bubble levels and adjustable feet. Tighten the legs so that the air bubbles are exactly in the center of the scale. After this, the level can be turned on.
This is what a laser level looks like
If the laser level is self-adjusting, it compensates for small deviations - about 4° - on its own. When the position is set, a sound signal sounds (in another version it stops beeping) or the green LED lights up, indicating readiness for work (before this the red light is on). If the normal position cannot be corrected by automatic correction, you will need to manually tighten the legs so that the angle of deviation is smaller.
Let's start making a tactical flashlight
In general, to do or not to do is up to the fighter. So what's the point? Piss in the toilet, and here's what you need.
To produce a tactical flashlight we will need:
- A whale light with or without an adjustable point width, but definitely not a lamp, not a diode, but a semiconductor one (if you’re in a tank, instead of a light bulb, there’s a small square that burns very brightly and also uses batteries much more economically). For some models, the beam hits 150 - 200 meters (200 - 800 rubles);
- Epoxy plasticine cold welding (70 - 150 rubles).
- Well, for final fixation you will need two clamps or a screw if we are attaching it to the body.
First of all, we zero the sight, unless it is zeroed, of course. After this, we make a pad out of plasticine and place it in the place where the flashlight comes into contact with the weapon. We stick a flashlight on this pad and constantly, until the plasticine hardens, keep the flashlight point on the crosshair of the sight, this is the most crucial moment, if you miss it, you will have to do it again. In my opinion, the optimal distance to the wall where we combine the flashlight point and the crosshair of the sight is 7-10 meters. When the plasticine has completely hardened (for different brands the time ranges from 5 to 20 minutes), we check it again and preferably leave it overnight so that the lantern does not touch anything. Clamps are needed because the plasticine will come off over time; in this design it has the role of a position stabilizer. By the way, in the morning you can tear it off yourself and use a file (how can you do without a file in Russia) to cut off all the excess, after which we attach the structure to the weapon and use a regular marker of the appropriate color to even out the color.
Ready tactical flashlight
How to check if a homemade level is working properly
Using a simple rope, the device is suspended from a support in the center of the room. The equipment is turned on, directed in the desired direction, and the required distance along the length of the beam projection is noted. After this, a special stick is installed to ensure ease of marking.
After such important events, you can begin to use the device and point it in any direction. If you leave the position of the stick unchanged, the same height of marks will be ensured. After marking the laser dots, they are connected with construction cord. Next, using a measuring meter, preferably a hard one, draw a marking line.
Device from a car camera
If you plan to paint a small area, for example, the body of a car, then you can build a spray gun from an old car camera. It will serve as a receiver, that is, a vessel for accumulating air.
This paint spraying device, in addition to the car camera, is assembled from:
- car pump;
- pressure gauge;
- a nipple from another old camera;
- two fittings.
The car camera taken to create a spray gun must be intact and free of holes. This is important because it will be under a lot of air pressure.
When making a spray gun from a car camera, you need to complete the following points:
We check if there are any punctures in the chamber by inflating it with a pump. If air escapes from the chamber in some place, the rubber part is repaired;
- We make a small hole in the receiver without punctures. It will become a place for attaching an additional nipple, from which a compressed air stream will emerge;
- We insert an additional fitting into the formed hole, carefully fixing it with adhesive. After this, the fitting can be connected to a household sprayer;
- We try to unscrew the nipple. If the air flies out slowly, then the work was done flawlessly;
- We screw the nipple to the original nipple on the camera. It is assigned the role of a valve that lowers the pressure if it is too high;
- Determine the air pressure in the chamber. An intermittent (excessive) behavior can be indicated by a pressure gauge.
Purpose and classification of devices
The principle of operation of the device is quite simple: you need to place the laser level on the surface of the floor or wall, start it and wait for the device to create vertical or horizontal marking lines, depending on the surface used.
But such a device in construction stores costs a lot, so it’s best to figure out how to create a tripod for a level with your own hands, especially since such a procedure does not require much labor.
In appearance, the alignment looks more like a compact device that can be installed on different surfaces. The most common mounting of the device is carried out using the following settings:
- tripod stand;
- magnetic mounts;
- bracket;
- special fastening belts.
In addition to the principle of fastening, construction devices differ from each other in the features of the projection of the laser beam onto the wall surface and its direction. Devices that are used to determine direction create a projection on the surface in the form of a point. The levels that delimit the plane include in their structure a special optics system that turns the beam into the plane itself. Today, experienced builders identify the following types of laser systems:
- A rotating device that can rotate around its axis, while forming clear outlines. This device has a durable body, well protected from external factors. This product is often used for various construction works: from pouring the floor to creating a ceiling.
- A positioning apparatus, which includes two radiation sources, helps to project the plane visible to the builder. This device is most often used to furnish a room.
- A self-leveling device is a level that includes a special pendulum that can emit about five rays. Such a device may also have a cross-type sight.
Safety precautions when making a spray gun
Almost all created structures are associated with high pressure, which is supplied from various devices. That is why it is recommended to carry out work on assembling the spray gun in ventilated, protected areas. During assembly, special attention is paid to the tightness of all connections, as well as their strength. The amount of supplied pressure is also controlled.
Safety precautions when working with a paint sprayer
Making a regular spray gun with your own hands is quite simple; the equipment created in many cases copes with the assigned tasks. The most difficulties arise when it is necessary to paint the surface with a powder composition.
Step-by-step instructions: how to make a laser pointer at home
Making a laser level yourself can be done in various ways. For example, with magnetic fasteners, with a ruler, using a cress - a tripod or straps.
And on this mechanism they install an unnecessary disk and attach laser pointers to it, but the fastening of the pointers must be cross-criss. This level option is ideal in cases where you need to hang a shelf or picture evenly, and the like.
If you suddenly need to quickly mark, but you don’t have a laser level at hand, you can do it yourself. For such purposes, there are step-by-step instructions for making a level without a tripod.
In order to make a similar level, which will have a very light structure, and its production is the simplest and has a self-leveling element, then you need to perform some steps.
Namely:
- Prepare a small container of water;
- We take a piece of polystyrene foam, but in the shape of a triangle, and attach it with an elastic band to the laser pointer;
- We set this container to the desired height and lower the foam with a fixed pointer into it and turn on the laser pointer.
After some time, the water will calm down and you can make marks by moving the pointer along the wall. The marks will be at the same level.
So, you’ve decided to make a homemade level with your own hands, watched all the relevant videos, found out what the structure of the finished unit is and how the homemade one works, and now you have a completed diagram in front of you.
Of course, it cannot be said that a homemade version is better than a store-bought electronic one, but it may well replace a wooden spirit level. Such a ruler will become a reliable assistant for cutting and if adjustment is needed, but for geography lessons this is generally an ideal option. It makes it easy to repair any surface yourself.
Homemade spray gun from a vacuum cleaner with a hose
If you need to paint some larger surfaces, then a manual sprayer will be ineffective, because it will take a lot of time. Here it would be better to make a device equipped with an auto-air supply mechanism. For such purposes, a vacuum cleaner or compressor is used, which is equipped with almost every refrigerator.
Such solutions are suitable for creating a homemade auto compressor, which will do an excellent job with water-based paint. But such a device is not suitable for powder processing.
If you use a vacuum cleaner, it would be best to take some kind of Soviet model. The reason is that the design of modern models does not provide for the presence of a pair of hoses, one of which works for “blowing” and the other for “blowing”.
- If the old vacuum cleaner is no longer needed, then sometimes changing the direction of air movement simply requires changing the direction of the terminals that connect the rotor and starter. After this, you need to perform some actions, after which the vacuum cleaner can be used for painting.
- First you need to prepare a bottle made of glass or plastic. The material is not that important. The main thing is that the volume of the container is no more than one and a half liters, and the size of the neck is at least 20-25 millimeters.
- Now you need to take a 20 cm bottle made of aluminum or copper with a 4 mm diameter. You need to bend it and attach the nozzle to the vacuum cleaner hose from the bottom. Instead of a compressor, you can use an aerosol can of good power. These, for example, are used in hairdressing salons. A nozzle made of brass should be mounted at the upper tip of the tube. You will also need to grind the end so that it has a cone shape. After this, it remains to install the upper edge of the tube into the plug-type connector.
- After this, you need to equip the resulting device with a holder so that it is comfortable to hold in your hands. To do this, you must first make a groove in the rod, and then screw the handle into it using bolts or screws.
- Now you will need to make a steel bracket with a hole that will correspond to the size of the nest in terms of dimensions and especially in width. The workpiece should be assembled taking into account the fact that the end of the suction tube should be located at the same level as the nozzle.
Before starting work, you should definitely check the functionality of the resulting paint spray gun based on a vacuum cleaner hose on some surface.
You can reduce or increase the pressure by adjusting the tightening of the tube. When a suitable pressure level has been established, you will need to fix the suction tube using foam into a groove that is glued to the lid of the paint container.
How to make a laser level with your own hands
Everyone knows that laser levels are very convenient and practical to use, but they cost a lot of money. Therefore, anyone who does not want to spend money on a factory copy of the device can try to assemble it themselves at minimal cost.
Moreover, we will try to give step-by-step instructions for assembling the device.
There are several ways to assemble a homemade laser level. The easiest way is, of course, using a regular laser pointer.
Second option
more complicated, but more advanced using a special laser module, which is freely available and costs literally several hundred rubles. Let's look at it in more detail.
First step
To make a laser level with our own hands, we need, and perhaps most importantly, the emitter itself with a cross, into which two small prisms are already built-in, responsible for projecting a horizontal and vertical line.
Second step
We need to find or create a mechanism similar to a pendulum. You can take the insides of an old joystick, as shown in the video below, or assemble it yourself from metal, plastic or wooden parts, the main thing is that all connections move freely relative to each other.
You can see the structure of the pendulum using a real laser plane builder in the photo:
Third step
Next, we install our module into the pendulum; to do this, we make a corresponding hole in the lower part of the pendulum with a diameter the same as the thickness of the module.
When our conditional compensator is assembled, we need to make weights that will help us in setting up a homemade laser level.
Fourth step
- We make two holes in the pendulum barrel, namely transverse and longitudinal, for the subsequent installation of threaded studs on both sides.
- You need to screw two or three nuts onto all four resulting ends, depending on the weight from which the pendulum will react to the overweight.
- Thus, we have a device in which we can shift the center of gravity, and, accordingly, the position of the laser lines.
Fifth step
We take a battery compartment from some old toy for 3 or 4 batteries, two will not be enough, so our homemade laser level will quickly run out, and more than four will be heavy.
It is advisable to make the compartment through a switch, it will be much more convenient. The switch can also be taken from an old unnecessary toy, fortunately this goodness is now in bulk.
Sixth step
Our entire self-assembled device needs to be installed in some kind of housing, here you can take, for example, a part of a plastic plumbing pipe with a diameter of 110 mm with a plug.
Screw the homemade compensator to the lid and insert it into the pipe, but first you need to cut apertures (windows) for laser beams.
Seventh step setup
When the entire assembly of the laser level with your own hands is completed, it needs to be configured. For precise adjustment, you can use a cheap water level, which we make two marks on the wall at a distance from each other, about 5-6 meters.
Using these two points we check the horizontal; if it passes evenly through these points, then no adjustment is required. When the laser line deviates from a given line, we use our nuts on studs, moving which will change the position of the laser plane.
The vertical line can be checked using a simple plumb line.
The advantages of such a homemade level
- – very low cost
- – projects visible laser lines onto walls rather than a dot
- – self-aligning mechanism
- – the ability to make very precise adjustments to the minimum error.
Disadvantages of a homemade laser level
- – takes a long time to install, since there are no magnets at the bottom
- – small ray scan
- - painstaking work
- – has an unfinished appearance
Where to buy a laser module
To purchase, you can use two well-known international online stores. There is nothing complicated about ordering, just follow the navigation instructions and you will have the emitter for mere pennies.
- 1. store
- 2. store
- Try it, assemble it yourself, if it doesn’t work out or you don’t have enough perseverance, you can always buy a finished product, at least from a selection of cheap laser levels.
- Recommended reviews and articles
Join our Telegram channel: @izmerilovka and the VKontakte Group, and you will be the first to know about the latest reviews of laser levels! We hope that our reviews will help you make your choice and save money.
Making a power supply
This process depends on what kind of weapon is supposed to be equipped with a laser target - with a shotgun it is easier than with a pistol. Therefore, first we will select the location for installing the power supply.
Most often it is possible to hide it in the butt by drilling a suitable hole for this.
“Tablets” take up less space, they can simply be secured with tape, not forgetting to make the correct electrical connection and soldering the wires: “plus” and “minus”. For fingers and mini-fingers, you can adapt some kind of housing (for example, a pencil case for brushes, cutting it off). The arrangement of metal contacts is similar to that found on any remote control.
This variation of the weapon is distinguished by good shooting characteristics, as well as the ability to operate in various conditions. Here we talk about the Matador air rifle and its modifications.
What is a holographic sight, its operating principle can be seen in the video at this link. Aiming mark and design features of the sight.
What do we do?
As for work on the ground, the choice of leveling method is clear - by eye, see below. But it is better to make a construction and repair level using a laser: its advantage, such as a manifold reduction in the labor intensity of marking work, cannot be missed.
3D laser level and laser level
There are generally 2 types of laser levels on sale: 3-coordinate (3D, pos. A in the figure) and laser levels, pos. B. A 3D level that draws lines, corners, crosses and even, under the control of an external computer, the contours of openings or finishing panels - a complex optical-mechanical design that is unlikely to be repeated by hand. But the main thing is that such devices are very flimsy. Not only an accidental shovel of earth or a dropped tool, but also ordinary construction dust in the room can permanently damage a 3D level. Therefore, devices of this class find rather limited use, and we will take up a laser level - it, homemade, can be fit into the given conditions in all respects.
What we have?
Making a laser level seems to be as easy as shelling pears: attach a laser pointer to a regular bubble level and you’re done. Place everything together on a flat stand, spin it and mark it on the wall. The production of such a “mini-level” usually takes no more than 10 minutes, see for example. video:
Video: homemade mini laser level
But in reality it turns out that the final accuracy of the markings is no good. And when using a “new, good” branded laser level, another circumstance emerges: during operation, it is often necessary to adjust the device. Which practically negates the reduction in labor costs. Let's try to figure out why this is and how to fix the matter. The laser level device is shown on the left in Fig. There its main Achilles heel is visible - the initial installation on a tubular bubble level. For accurate initial installation, the beam of the device must be aligned to the horizon along 2 mutually perpendicular planes. But on site, when placing the level on a random support (on the right in the figure), both adjustments turn out to be interdependent! I twisted the tripod leg horizontally in one direction - the beam “went” up or down along the perpendicular. As a result, it can be easier to mark the markings with your hands than to struggle with setting up the laser.
The laser level device and how to use it
Based on this, we will introduce 2 modifications to the design at once: installation of a leveling block on a 2-coordinate level (see below), and a lightweight portable support, independently adjustable to the vertical. On an exactly vertical support, and if you can immediately see where and how much the leveling unit has tilted, it can be quickly and simply set up in one step for the entire marking cycle at a given site.
Although the device of a homemade laser level with a laser pointer instead of a special head is simpler, the procedure for setting it up (see next figure) is no less labor-intensive, and the accuracy and stability are much worse than with manual marking. In this case, 2 more weak points are added to the design: the pointer head and the rotation unit. Where is the guarantee that the pointer beam “hits” exactly along its optical axis? In order to simply move the beam back and forth, their axiality (coaxiality) is not required, which is why laser pointers are cheap. And if the beam is beveled, then when marking by points, instead of straight horizontal lines and plumb lines, you will get tangentoid segments. Their deflection may not be noticeable by eye, but the marking error will exceed the permissible limits.
Device and methods for adjusting a homemade laser level
As for the rotation unit, custom-made parts for it will hardly cost less than the cost of a ready-made laser level. Amateurs with a rotation unit are as clever as they can be. It’s good if there are suitable ready-made parts for it in the storerooms (simply in the trash), as, for example, in the plot:
Video: rechargeable level from a laser module
But this is a single unique product. If there are no suitable components in the stash, craftsmen manage to make laser levels even from... sewer pipes, see video:
Video: laser level from a sewer pipe
We will try to get out of the situation even easier, but observing the conditions set above: accuracy, stability, simplicity.
Car powder painting technology
Before application, the metal surface of the part is thoroughly cleaned and degreased. When passing through channels in a powder painting sprayer, paint particles are electrified from an external source or receive a charge through friction. Then, due to the formation of an electric field, they fall and are fixed on the metal, which has the opposite charge. Those particles of powder material that are not fixed on the surface are taken into the spray painting chamber and can be reused for painting parts. Next, the processed body part is moved using special stands into a chamber for polymerization and drying. The result is a reliable layer of paintwork, which in terms of characteristics is significantly superior to simple enamels.
The polymerization process itself occurs by placing a stand with a fixed part in a special chamber, where the material is heated to the melting stage. After this, in the case of using thermosetting materials, a slow hardening process occurs, but if thermally plastic compositions are used, then the cooling process of the part is ensured.
Ultimately, a dense film is created on the treated surface, which not only decorates the part externally, but also protects it well from corrosion and is quite resistant to mechanical damage.
How the tool works
The essence of the operation of this equipment can be divided into three main steps:
- Paint is poured into the spray bottle and equipment is connected to electrify the material particles. They receive a charge when passing through the channels of the atomizer.
- The workpiece is grounded.
- Charged paint particles are applied to a metal surface.
What do we do?
As for work on the ground, the choice of leveling method is clear - by eye, see below. But it is better to make a construction and repair level using a laser: its advantage, such as a manifold reduction in the labor intensity of marking work, cannot be missed.
3D laser level and laser level
There are generally 2 types of laser levels on sale: 3-coordinate (3D, pos. A in the figure) and laser levels, pos. B. A 3D level that draws lines, corners, crosses and even, under the control of an external computer, the contours of openings or finishing panels - a complex optical-mechanical design that is unlikely to be repeated by hand. But the main thing is that such devices are very flimsy. Not only an accidental shovel of earth or a dropped tool, but also ordinary construction dust in the room can permanently damage a 3D level. Therefore, devices of this class find rather limited use, and we will take up a laser level - it, homemade, can be fit into the given conditions in all respects.
What we have?
Making a laser level seems to be as easy as shelling pears: attach a laser pointer to a regular bubble level and you’re done. Place everything together on a flat stand, spin it and mark it on the wall. The production of such a “mini-level” usually takes no more than 10 minutes, see for example. video:
Video: homemade mini laser level
The laser level device is shown on the left in Fig. There its main Achilles heel is visible - the initial installation on a tubular bubble level. For accurate initial installation, the beam of the device must be aligned to the horizon along 2 mutually perpendicular planes. But on site, when placing the level on a random support (on the right in the figure), both adjustments turn out to be interdependent! I twisted the tripod leg horizontally in one direction - the beam “went” up or down along the perpendicular. As a result, it can be easier to mark the markings with your hands than to struggle with setting up the laser.
The laser level device and how to use it
Based on this, we will introduce 2 modifications to the design at once: installation of a leveling block on a 2-coordinate level (see below), and a lightweight portable support, independently adjustable to the vertical. On an exactly vertical support, and if you can immediately see where and how much the leveling unit has tilted, it can be quickly and simply set up in one step for the entire marking cycle at a given site.
Although the device of a homemade laser level with a laser pointer instead of a special head is simpler, the procedure for setting it up (see next figure) is no less labor-intensive, and the accuracy and stability are much worse than with manual marking. In this case, 2 more weak points are added to the design: the pointer head and the rotation unit. Where is the guarantee that the pointer beam “hits” exactly along its optical axis? In order to simply move the beam back and forth, their axiality (coaxiality) is not required, which is why laser pointers are cheap. And if the beam is beveled, then when marking by points, instead of straight horizontal lines and plumb lines, you will get tangentoid segments. Their deflection may not be noticeable by eye, but the marking error will exceed the permissible limits.
Device and methods for adjusting a homemade laser level
As for the rotation unit, custom-made parts for it will hardly cost less than the cost of a ready-made laser level. Amateurs with a rotation unit are as clever as they can be. It’s good if there are suitable ready-made parts for it in the storerooms (simply in the trash), as, for example, in the plot:
Video: rechargeable level from a laser module
But this is a single unique product. If there are no suitable components in the stash, craftsmen manage to make laser levels even from... sewer pipes, see video:
Video: laser level from a sewer pipe
We will try to get out of the situation even easier, but observing the conditions set above: accuracy, stability, simplicity.
Tags: machine, beat, sconce, view, choice, switch, house, , capacity, sign, like, computer, design, circuit, crown, , magnet, point, setting, transfer, rule, principle, wire, start, , work, size, revise, repair, row, garden, homemade, light, LED, circuit, ten, type, current, triangle, , installation, facade, photo, electronic, effect
How to make it from a spray can?
Another option for creating a good and powerful spray gun is the simplest aerosol can. This solution is cheap and easy to implement. To bring this idea to life you will need to have:
- nipple or inner tube from a bicycle wheel;
- a plastic bottle that will have the required volume (it should not have defects);
- aerosol type can – special attention should be paid to the quality of the sprayer so that it works for a long time;
- hand pump for bicycle;
- hacksaw for metal.
Many components can be found in your garage, which makes it cheaper to create such a device.
The build process will look like this.
- The selected bicycle tire will require a nipple, which can only allow air to flow in one direction.
- You will need to make a hole in the bottle to fit the nipple. It will be a container for paint.
- We fix the nipple there on the inner wall. It should be taken into account that the connection must be leak-tight. The nipple will be responsible for supplying paint.
- The upper area of the can must be sawed off using a hacksaw. This must be done so that the resulting result perfectly matches the size of the cork.
- You will need to connect the spray can and the bottle using cold welding. This solution will provide the best possible fastening. This is due to the fact that quite high pressure will be exerted on the structure.
It should be added that this type of spray gun is designed for a pressure of no more than 3 atmospheres. Air injection is carried out by a bicycle pump, for the connection of which a nipple was installed. This version of the spray gun will do an excellent job of painting different surfaces with water-based paint or a lime-type solution.
Combining laser sights
Today, many people are trying to experiment with installing different sighting devices; red dot sights, laser designators, and optics are periodically installed and changed from one type of weapon to another. Constantly wasting ammunition on initial zeroing is quite expensive.
With collimator sight
The difference between this device is that you can see with both eyes an illuminated dot that appears on the target. After a little training, you can make shots much more accurately, unlike a conventional optical sight. In this case, there is an aiming lens with an extended focus, which houses the front sight. It is illuminated independently or illuminated by a rechargeable battery. On a clear and sunny day, the brightness should be increased, and at night - reduced. The marking dot, which does not cover the target, is quite convenient - even novice shooters will be able to achieve excellent results. This type of sighting device is perfect for air guns and small guns. With such a sight you can hunt at night and easily hit the animal.
An example is the ZOS HQ434 open collimator; it is often used with a laser target designator. The device is manufactured by the ZOS brand (China). The sight is inexpensive (about 4,500 rubles) and practical. The body is made of metal, there is a built-in bracket that fits the Weaver bar. Device weight – 115 g, total length – 82 mm. The aiming dot can be switched: it can be a thin or bold dot or a cross. You can adjust the brightness - in the range of 0-12. The lens has a rectangular shape 21x32. A CR123A battery is installed as a power source. Area of use: pneumatics, small items.
With optical sight
The main advantage of optics, in contrast to external sighting devices (front and rear sights), is magnification. That is, you can see the target approaching the person, and the chances of missing (even in the dark) are reduced. If you add a bright laser pointer marker to this device, it will be even easier to make the sight. Thus, certain manufacturing companies produce optics that are combined with a laser laser.
For example, POSP 4x24 optics with LCU-OM - a sight from a Tula company. The device has a 4x magnification, a total laser wavelength of 660 nm, and an illuminated marker diameter of 30 mm at a distance of 30 m.
Weight 62 g, power sources: AG-13, LR44 batteries. Can be installed on dovetail fasteners. The sight is equipped with an illuminated reticle and a parabolic distance measuring scale. Use: observation, hunting, sports and training shooting.
With Sniper flashlight
This type of equipment, which is attached under the barrel of a gun, combines a tactical flashlight and a laser laser. The sight is used simultaneously in both modes or separately, depending on the need. The light bulb in the flashlight is powerful, most often it is krypton - a power of 330 lumens or more. And the laser target designator has a power of 60 mW, which allows you to send a laser at an aiming distance of up to 700 m.
Installing a remote button simplifies the operation of the gun. Sight weight – 135 g, total length – 100 mm. Can be used for any type of pneumatic due to universal fasteners. Power source – CR123A battery. Manufacturer: Bailong (China).
The laser pointer is not a weapon sighting device by and large; it is an additional sight that has a limited sighting range of the bullet. Most often it is used in conjunction with a collimator or night vision device. The main advantages of this device are simplicity of design, low weight and size, and fast aiming speed.