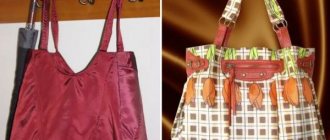
Bags are the favorite accessory of many women. They are not only comfortable to carry the necessary things, but also complement any look.
Many women want to create their own unique bag to stand out from the crowd. To do this, you can sew it yourself. After reading this article, you will learn the necessary information on how to sew a leather bag with your own hands.
Necessary materials for work
Sewing a bag is not an easy task, so you should acquire all the necessary “tools”, namely:
- leather (natural/artificial);
- skin needle;
- dratvoy;
- large scissors, glue;
- ruler or centimeter;
- with an awl and a solid base on the bottom.
How to make a pattern?
The pattern of a leather bag is the most important thing when creating a product. The first stage is to choose the size of the bag, namely its bottom, around which the remaining parts will be placed.
Then we cut out the bottom of a rectangular shape of the required size, and fix the panels on the sides (they must be symmetrical). You can choose the height of the bag as desired.
An important detail is the handles; they maintain the balance of the product. Don't forget about their appearance. The handles should look harmonious on the finished product. If the bag is small in size, then you do not need to sew too long and wide handles to it.
Don't forget about the seams. If you have not done needlework, then on the Internet you can watch a master class on sewing a leather bag, where everything is explained in detail and step by step: how much space to leave from the edges, the number of lines, etc.
The process of making bags for household needs (sacks)
A master class on sewing such a bag is not difficult. All stages of forming the base are quite simple. Even a novice seamstress can cope with the task. To make your work easier, you should prepare your workplace - arrange good lighting and remove unnecessary objects.
How to sew a grocery bag using an already prepared pattern:
- Use safety pins to connect all the seams of the resulting pattern. Can be sewn with a basting stitch.
- To make the product voluminous, you need to sew the lower corners, which will form the bottom, on the bias. To do this, separate equal triangles on each side. The figures need to be made identical.
- Sew all seams using a sewing machine using any seam. But it is better to use a zigzag seam. First, the edges of the cuts must be overlaid or folded when stitching.
- To hide the connection of the handle, which will be located exactly in the middle of the shoulder, it is recommended to sew a tube from fabric. It is enough to prepare a strip of fabric measuring 8 × 15 cm. Overcast the edges and join the edges together along the longer side.
- Before sewing, put a fabric tube on the top edge, and only then fix the parts on the sewing machine. Pull the tube over the seam. The part does not require fixation.
Handle sewing stage
The main string bag for household use is ready. The next stage will be decoration. You can sew a patch pocket on the base from the same fabric as the tube on the handle.
Ready product
You can make another model of string bag. To do this, you should use a simpler pattern. The sewing process will be much easier, since only the parts are sewn together on the sides. The best option would be a bag model:
Another option
Moreover, any model is quite compact and functional in terms of transportation.
For your information! Any design can be folded and carried in a handbag - it will not take up much space. Thanks to its baggy shape, the product is spacious and comfortable to use.
You might be interested in Sewing baby bedding for a crib
Quantity of material
Material calculations must be carried out taking into account the selected model. When counting material, you should not forget about all the small details (pockets, decorative elements).
For authenticity, lay out the pattern pieces on the fabric. On average, a small bag will require 1.7 meters of fabric.
Stage four: sewing the “body”
At this stage of work you need to do the following:
- wrap a rectangular piece around the base of the future cylinder bag;
- make sure that the size matches perfectly and mark the seam location with chalk;
- sew the sides of the piece, joining the material right sides together before sewing;
- Unscrew the sewn “cylinder” and try it on the base.
The work is almost complete, just a little remains - to connect the parts, make a lining and fasten the strap.
We sew handles
Before sewing handles, it is necessary to cut strips of leather of the required length and width, and also prepare a needle and thread.
Sew the straps inside out. At the same time, retreat from the edges a couple of centimeters, and at the end fasten the straps to the bag. For reliability, sew the seams several times.
- DIY tennis skirt: create a pleated skirt with your own hands
The latest running accessories
- How to dry clothes at home?
LiveInternetLiveInternet
Quote from Lydmilka_by
Read in full In your quotation book or community!
Bags without a sewing machine.
MK. Option 1: author https://www.livemaster.ru/topic/265041-sumka-iz-tol...niya-shvejnoj-mashinki?msec=59
Here is the pattern we will use:
Lay out the pattern on the right side of the leather. Seam allowances are not needed, so we place the pattern pieces closer together to save leather. The side can be made whole, but most often the length of the leather is not enough for this, so we make it in two parts and sew it in the center.
If you often use the same pattern, make it on cardboard or thick leather like mine. It’s better on leather because you can bend it and see how this or that part of the bag will look - for example, if you want to make changes to the model
Lay out the main parts of the pattern. We will also need a strap. You can cut it out right away or later. As you prefer
We trace the patterns, lightly scratching the lines with an awl. We don’t use a pen or pencil—they don’t always draw on the skin.
Don't forget the holes - mark each one with an awl.
We will need leather braid to sew the parts together. If there is no ready-made braid, then we cut it ourselves. We take a piece of leather from which we are sewing a bag (or a similar one that matches the texture and color).
Cut out a circle with a diameter of 3-4cm in the center. We make a cut in a spiral in the middle of this circle - 2-3cm long. The photo shows a tool for cutting braid. If you work with leather, you simply need such a tool, but if you don’t have it, then cut it with scissors.
We pass the notched tip between the blade of the tool and carefully move the knife, cutting the skin around the perimeter of the circle.
When we have cut a few centimeters, we tighten the braid and continue to cut it just as carefully. We pull the braid while holding the knife at an angle - so that the blade is not directed towards the center of the circle, but away from it, otherwise the braid will be cut off and you will have to start over. Try it a couple of times and get the hang of it, it's not difficult.
You hold the knife and pull the braid - the leather scrolls by itself and no effort is required.
The leather for cutting the braid must be tough, even if it is thin. You won't be able to cut soft leather - it will bend and be cut off. For soft ones, we use scissors (although with a knife the braid will be smoother).
The blade on the knife should be very sharp - this is the key to a smooth and beautiful braid.
Don't be afraid to pull on the tape. If it is torn, start over. It’s better if it breaks now than later when wearing the bag. If the braid breaks all the time and it is impossible to cut the braid to a normal length, then the leather is old or weak and is not suitable for the braid. Don't try to be careful and still cut to the required length. You won’t be able to stitch a bag with it, and even if you do, such a bag won’t last long because the braid will tear when worn. Your work will not be of high quality and you will earn a bad reputation for yourself (if, of course, this is important to you). It’s better to choose a different leather for the braid or buy a ready-made one.
From a circle of leather with a diameter of 20cm, you get about 8.5 meters of braid with a width of about 4mm. It’s very convenient and profitable, so I advise you to buy such a knife.
If the leather wrinkles easily and you see that it is too thin for a bag, then we make a lining.
The color of the lining can be any - even bright. Although, of course, there are colors that do not dance with each other. I use gray thin leather.
You can use a fabric lining if the fabric is thick and will seal the bag enough. But it seems to me that leather will work better since we are making a leather bag. We will glue the lining and the glue will come out on the fabric.
You can use artificial leather to save money.
We lay out the patterns on the wrong side of the lining and simply trace them with a ballpoint pen. We don’t cut out any details, but we cut off a piece of leather on which the detail with the “lid” of the bag is drawn. We will work with this section separately.
Apply glue to the back surface of the upper part of the pattern on black leather and on the lining.
We go a little beyond the boundaries of the pattern outlined with a pen. This is so that the edges are well coated with glue.
The edges coated with glue are the most important. Otherwise, later when worn, the lining may peel off.
Place the top of the pattern onto the lining starting from the back end. When we reach the middle - where the bend should be (when the bag closes) - we place this bend on our hand and continue to carefully connect the lining to the upper part (simply lower the upper part onto the hanging lining). We try not to create air bubbles inside. Now we put it on the table and if the upper part is too bent and swollen, then we peel it off and repeat again, but now we hold the hand directly above the table so that the skin lies partly on the arm and partly on the table and the bend angle is smaller. It sounds complicated but it's actually simple. We do this so that the lining is slightly stretched compared to the top of the bag, and then when the bag is closed, there will be no wrinkles on the lining at the fold.
leave to dry in a folded form.
Here in the photo you can see how much we “reduced” the lining - you can see the outline of the pattern on the lining, they do not match the top part. Now, after drying, the bag will seem to close on its own, the lid will not stick straight up, but will itself fall where it is supposed to. The same principle is used when sewing wallets - the lining is made smaller and, after gluing, it tightens the wallet and keeps it half-closed.
We glue the remaining parts of the bag onto the lining without any special secrets. We spread glue on the lining beyond the outlined edges - it is very important that all edges stick together firmly.
After the glue has dried, cut the lining with scissors close to the main skin.
Now we punch holes - they are marked with awl injections on the pattern. We use a piece of wax to make the punches easier to enter and exit the leather.
If you sew not with braid but with thread, you may leave holes for the stitches or later you will punch them with an awl when sewing.
Here are the prepared parts of the bag.
If you plan to use accessories, we install them right now.
To sew with braid, you need a special needle - it is large and the braid is “screwed” into it so that it holds tightly - there is a thread inside the needle. If there is no such needle, then it will be difficult to sew, especially where you need to secure the seam. You will have to push it with the tip of scissors or something suitable.
We start backing a little from the edge - a few stitches. You can immediately secure the tip of the braid, or you can leave 10-15 centimeters and secure it later
If the braid has a front and back side, place the front side up. If both sides are the same, then choose one side and make sure that the braid does not twist, otherwise it will be ugly.
We choose how we will sew the bag. You can put the sides under the main parts (front and back), or you can put them on top of them. In each case, the bag will look different.
Usually the side parts are sewn first and then the whole bag is sewn. I like it better if you don’t sew the sides at the bottom initially, but do it as you assemble the entire bag. I first stitch half of the bag to the middle of the bottom, then the middle of the sides, and then I move to the other half of the bag, but from the other side. I hope the photo explains what I mean. Then I sew the other side in the same way.
When we reach the edge of the seam, we insert the needle into the last hole and then again into the previous one, but we do not take the needle out through the other side, but thread it between the layers of skin. The seam should be pulled tight and the needle will be difficult to thread. Don’t relax, otherwise the seams will look sloppy.
This is the moment where it will be difficult for you to do without a needle; you will have to push the braid with an awl with a blunt end.
Then we take the needle into the next hole and again thread it inside between the layers in the next hole.
After three or four stitches, we bring the needle out between the layers and cut the braid. If your seam is tight, the braid will hold firmly.
We do the same on the other side after stitching.
The length of the braid should be one and a half times greater than the length of the intended seam. We connect the ends of the braid in the same way as when finishing the stitching or simply tie it inside the bag if it is difficult to turn around with the needle. If the knot looks unreliable, drop a little glue on it.
Now you need to put the lining in order. It differs in color and the yellow color does not decorate our handbag in any way.
Take paint (to match the color of the handbag) and paint over all the edges. According to technology, you probably need to paint all the edges before you start stitching the parts. But I do it at the end... for no particular reason.
Now we make the strap. If we plan to use a buckle then measure the inner distance between the edges of the buckle
We measure the same distance from the edge of the leather and put a point with an awl. We do the same on the other end of the leather (for the length of the strap).
Place a ruler (connect two points) and cut off the strip with a sharp knife. CAREFULLY!! DON'T CUT OFF YOUR FINGERS!!!
We cut off two pieces of the strap - long and short (if we use a buckle).
If there is not a lot of leather and there is a small piece left, then we cut this piece into strips of the required thickness and then connect them using a creative approach.
The strap also needs lining. Draw a couple of lines on the lining leather - they will serve as guides to glue the strap evenly without distortions.
Lubricate everything with glue and apply the pieces of the strap, following the lines.
Look VERY CAREFULLY at all edges. All blisters and delaminations must be removed and glued firmly. The strap will not be stitched along the length, so if it is not glued firmly, the lining will delaminate when worn.
Paint the cut black
You can paint it with any paint, but I have a special one for the edges. It dries and becomes like rubber and holds the edges of the two layers together - the top and the lining. But as I already said, you can use any paint.
Now we connect the parts of the strap. Here is our piece strap.
And here our handbag is ready!
Now it needs to be thoroughly cleaned of all drops of glue, dust and debris; if the leather is like this, you need to wipe it from fingerprints and other traces.
https://www.livemaster.ru/topic/265041-sumka-iz-tol...niya-shvejnoj-mashinki?msec=59
Option No. 2: author https://rpgear.ru/anturazh/sumki-i-tubusy/kak-sdelat-kozhanuyu-sumku-s-otdelkoj/
Here is a list of tools and consumables that we will need:
- a couple of sheets of checkered paper - a pen/pencil - scissors - a ruler and a sewing centimeter for cutting - a compass - an awl - instant glue - beeswax - a regular household hair dryer 9but a construction hair dryer is better, with its help you can wax the skin much faster and more conveniently) — a construction/stationery knife and replacement blades for it — glass for cutting leather (optional, but it’s really more convenient) — pliers for manually installing eyelets/blocks and the consumables themselves — a manual punch with replaceable attachments of different diameters — a lining for the punch made of thick leather — hammer — a tool for manual installation of rivets/rivets + consumables, or, in the absence of one, you can install rivets with a hammer, although this is not so neat and convenient — a set of hand stamps for embossing — pyrograph burner — leather 3-4 mm thick , preferably vegetable tanned (it lends itself better to embossing) - leather 1-2 mm, for braiding/lacing bag parts together
So let's get started. First we need to make a paper pattern. All marks and dimensions, as well as markings for holes can (and sometimes should) be made directly on it. The pattern cannot be made for all the details, but only for the most basic and necessary ones - this is the front wall of the bag (in the photo on the right) and the back wall, which goes into the front flap.
Now let’s attach our paper pattern to a sheet of leather, carefully outline and cut out the main details. After this, let's take the front part of the bag and measure two-thirds of its perimeter (we are interested in the sides and bottom), the most convenient way to do this is with a sewing tape measure. Next, mark and cut out a strip that will connect the front and back parts of the bag. The length of this strip will be equal to the length of three sides of the front part, which we just measured, and the width will be 4-5 cm. In addition, we must cut out the strap on which our bag will subsequently be fastened. Its width should be 5-10 mm larger than the width of the stamp for embossing, and the length should be equal to the sum of the lengths of the main parts of the bag + stripes between them, maybe even a little more, with a margin (in general, the strap should wrap around the future bag + margin for bending buckle installation). It remains to cut two more straps of arbitrary sizes - they will serve as fastenings for the bag to the belt. The dimensions of these straps are calculated experimentally depending on the width of the belt on which the bag will be worn, as well as on the weight carried in it. Here are the details we should get:
After all the above operations, we must mark the holes for lacing/braiding on the main parts of the bag, as well as on the strip that will fasten them together. The optimal distance between holes is 1 cm.
The distance between the holes on the strip that will fall on the “corners” of the main parts. You can make it a couple of millimeters larger. It is very important that the number of holes on all parts is the same. Next, mark the holes for rivets/holniten, eyelets/blocks and buckle on the corresponding parts. Carefully punch holes of the required diameters using a hand punch. Holes for lacing can be made 4-4.5 mm, and for holsters - 2 mm.
Now you can decorate the clasp strap with embossing. To do this, you first need to soak the part a little (literally a couple of minutes) in warm water, then shake it lightly and let it lie on a flat surface for a few minutes. After this, we apply the desired stamp and give it light blows with a hammer, while tilting the stamp slightly (by 5-10 degrees) in different directions in a circle so that the impression is uniform and pronounced.
Now you can wax all the parts (if you soaked the part for embossing, then it is better to let it dry before waxing). So how do you wax leather? To do this, lightly heat a piece of beeswax with a hair dryer and rub the part with it, then heat it with a hair dryer, in the process evenly rubbing the melted wax with a rag or other piece of wax, and warm it up again. Repeat the process until the desired shade is achieved. Waxing helps protect the skin from moisture, and also gives it more strength and attractiveness. Additional hardness can be given to the part by wire-wiring it on both sides. In this way we capture all the details.
In addition to waxing, in the largest part of the bag, we also punch holes on the flap to make it easier to sew on the fur.
And we decorate the second part with pyrography (burning). It’s better to do this before waxing, but it’s not critical. To make the pattern neat, you should first make a paper stencil for it (if you plan to use this stencil later, you can laminate it, for example with tape). Using a stencil, we apply a pattern to the workpiece with a pen or pencil, correct any unevenness (if any), and only then trace the pattern with a burner. It should look something like this:
Now we cut out and cut out a piece of fur to decorate the valve. It is very convenient to use sheared cow hide (it is very desirable that the hide is soft and not wrinkled on the underside). The length and width of the piece of fur should be a centimeter and a half larger than the size of the rectangle that the holes form (we punched them under the seam in the first main part).
Having marked the holes, we punch them. The diameter of the punch nozzle is 1-2 mm. Holes of this diameter are needed so that when sewing the thread does not “tighten” the fur behind it, this significantly saves energy, time and nerves.
This is what a fur piece with punched holes looks like from the front side:
Now we sew the fur to the valve of the main part. It is best to use a “two-needle” seam, or sew the parts with one needle first in one direction and then in the other, then the seam should turn out quite neat and durable. Having tied a knot, glue it with a small drop of second glue and rub it a little. This is what you should get:
Next, we rivet the straps for the belt attachment to the back of the main part of the bag, the buckle to the long strap, and the strap itself first also to the back, and then, bending it (as if the future bag is closed), we mark the hole in the valve and rivet it in the same way.
Now we need to cut two long narrow strips of 1-2 mm leather for lacing/fastening the bag parts together. The width of the strips should be a couple of millimeters larger than the diameter of the holes for lacing; in our case, you can cut strips 5-7 mm wide. Please note that the ends of the cords should be cut at an angle - this will make it easier for them to fit into the lacing holes.
Let's lace up one part first:
And then another:
Now we punch holes in the clasp strap:
And we install the eyelets/blocks there using special pliers. If they are not there, then you can install them with a hammer and a bearing, but this requires some preparation and accuracy.
That's it, our bag is ready! Let's look at it from all sides:
https://rpgear.ru/anturazh/sumki-i-tubusy/kak-sdelat-kozhanuyu-sumku-s-otdelkoj/
Option 3: author https://rukodeli.info/topics/kak-sshit-kozhanuyu-sumku-bez-igly-i-nitok/
For this method of sewing a bag, you will need strong, thick leather that can hold its shape on its own. Below are instructions for sewing a leather bag. Necessary materials: 1) leather, 2) lacing about 3 meters, 3) a special needle for leather, 4) a razor or knife (for cutting lacing), 5) a laser cutter or just an awl. Step 1: Cut out the template (dimensions are in inches, 1 inch = 2.54 cm)
Trim the lacing, sharpening the tip. Wet the edges to help the leather take shape more easily. Front lacing process
Step 7: Attach the clasp piece to the front, tighten the lacing tightly, leaving 2-3 inches as decoration.
Add a strap.
https://rukodeli.info/topics/kak-sshit-kozhanuyu-sumku-bez-igly-i-nitok/
Installation of accessories
To hide all the shortcomings that arose during sewing, or simply decorate the bag, install accessories. These can be buttons, sequins, snaps, etc.
If you don’t know how best to place the details, then you can look at photos of hand-sewn bags and use ready-made ideas.
Metal parts look best on leather products (you will need glue to secure them).
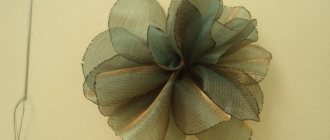
What can serve as decoration for a bag?
Decorating a bag is not limited to just installing accessories. If you have a rich imagination, you can use various applications. This solution will turn an ordinary bag into a bright element of your everyday look.
You can choose absolutely any applique design. Attach using a regular needle and thread.
- How to sew a shirt with your own hands? Sewing master class and recommendations for choosing designs for men's and women's models
- DIY blouse: how to sew a beautiful and elegant blouse. The simplest models, patterns and sewing tips (100 photos)
- DIY tunic - 75 photos of design ideas and tips for choosing material and cut for sewing a tunic
Stage three: “sew up” the bottom
At this stage of work, you need to cut a narrow strip from the material, the length corresponding to the “body” rectangle. This is a fastening strip; its presence greatly simplifies the task of sewing the “body” of the bag to the bottom.
If there is not enough material, you don’t have to make fastenings, but in this case the finished bag will not hold its shape well, and sewing on the “body” will be more difficult.
Before sewing the strip, you need to attach it to the bottom with clips, cut off the excess if necessary and mark the side seam. Then you need to connect the strip into a circle and then sew it to the bottom, along the edge of the circle.
“Rasputin” on bass guitar: the Italian’s video in Russia collected 8 million views
Apple does not leave the market in Russia, agreeing to install Russian software
They wanted to clear the roof of snow and almost ended up under it: video
If a sealant is used, it must be glued to the leather bottoms before you begin sewing the strip.
Skin selection
There are several factors that women rely on when choosing material:
- price;
- personal preferences;
- quality of material and selected bag model.
The most suitable is calfskin. It has a soft texture and is famous for its quality.
Suede is a material that is soft and elastic. This bag will look very elegant.
Buffalo (ox) leather has a durable texture, so the product will last a long time. This material is well suited for travel bags.
A budget option would be to purchase leatherette. It is inferior in quality to natural materials. But modern technologies are so developed that only a specialist can distinguish materials by appearance.
- DIY dress - step-by-step instructions on how to sew a dress. Design of modern models and sewing technology (95 photos)
- DIY swimsuit - how and from what to sew a stylish and modern women’s or children’s swimsuit (105 photos)
- How to sew a sundress with your own hands - the best patterns and a master class on sewing a stylish and modern sundress (95 photos)
The advantage of leatherette is the color palette that natural leather cannot boast of.
A women's bag made of genuine leather always looks expensive and gives the owner status. The service life is longer than that of leatherette, since their surface does not deteriorate due to temperature changes.
Model selection
Today there are dozens of models of leather bags. It is worth choosing a model depending on the purpose of the bag.
Those who love shopping should choose a shopping bag. It has a large capacity, and its versatility allows you to use the bag every day.
A hand-sewn belt bag is perfect for travelers or athletes. It is designed for the most valuable things (passport, money, keys). The main advantage is that you don’t need to carry it in your hands.
Stage seven: make a fastening strap and secure the ring
A short strap can be cut out completely arbitrarily from leftover material. You can show your imagination, take a sharp knife and cut a star at its base; it will look impressive when using rivets. It is not required to be sheathed, but if you wish, you can make a couple of parts and sew them together.
The strap must be passed through the ring and sewn to the bag. If possible, secure it with a rivet, it is more reliable and beautiful. You can ask any shoe shop to make a rivet; as a rule, they have a riveting machine.
Aries - focus on work: forecast for the spring equinox
An attractive image is easy to maintain even after 50 years: 10 fashionable men's haircuts
“Fisherman’s” sandals and 4 more pairs of shoes without heels, in which your feet will not get tired