In this article we will touch on this type of needlework, and also help you understand the general concepts and find suitable prints, drawings, video lessons from YouTube, photos and much more. It is important to start with the very basics, and also to understand that many types of needlework are intertwined in one way or another. Therefore, if you want to become an experienced craftsman, you will need to study knitting, cross stitch, satin stitch and use their techniques perfectly. We will be happy to offer free examples of embroidery with ribbons of lilacs, lilies, irises, asters, peonies, step-by-step lessons and secrets for beginners in different techniques. First of all, the paintings will serve to decorate your home, and individually embroidered flowers and compositions with ribbons decorate clothes and interior items. We advise you to pay attention to diagrams of birds, animals, insects, hearts and other flower images, an amazing variety of which can be downloaded on the Internet, Instagram or other social network.
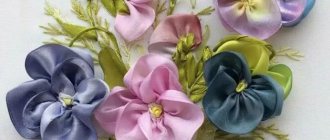
beautiful flowers embroidery
Surprisingly, every year more and more author’s recommendations appear, new techniques for making stitches and, of course, the layouts themselves. In addition to general concepts, our website also contains advice from professional needlewomen, their creative approach to creating unique masterpieces. Some also use knitting and weaving techniques. Please also note that it can be used in the decoration of objects and special events. Each girl, having patience and preparing floss threads, the required lengths of ribbons, needles, different types of hoops in diameter and outline, will be able to create masterpieces with poppies, sunflowers and other wild flowers, the main thing is to maintain the general atmosphere and mood of the composition in experiments and that’s all flowers should be combined, and not resemble the expression “tear your eyes out” in color scheme. Many people recommend marking the location of the stem and leaves on the fabric in advance; this allows you to better navigate and avoid mistakes.
Selection of fabric for the base of embroidery
Beginners are recommended to carry out their first works on Aida canvas No. 14. This material is rigid and holds its shape well. Simple ribbon compositions on such a canvas can be embroidered without a hoop. As your skill improves and your stitches become more accurate, you can use other fabrics.
The table below shows the names of fabrics suitable for ribbon embroidery:
| Cotton | Linen | Silk | Woolen |
| Gozhka | Harsh canvas | Chiffon | Crepe |
| Satin | Thin fabric | Silk tulle | Tweed |
| Muslin | Scrim | Chesucha | Jersey |
| Velvet | Linen uniform fabric | ||
| Batiste |
It is important that the color of the fabric or canvas matches the intended ribbon pattern.
When choosing a canvas, you need to pay attention to its density. If the material is too thin, it will show through and the reverse side of the embroidery with knots and hidden stitches will be visible.
To embroider on thick fabrics (drape, velvet, printed fabric), you will need an awl, which is used to make holes for the needle and ribbon in advance. If you do not pierce the fabric, the needle will enter very difficult. And the tape can stretch or become deformed.
Selection of tapes
Satin, silk and nylon ribbons are suitable for embroidery. These are synthetic materials that do not fade when washing finished work and can withstand heat treatment (ironing, steaming).
The width of ribbons suitable for embroidery varies from 2.5 to 16 mm. They drape well and are easily pulled through the fabric. Narrow ribbons are used for regular stitches, and wide ones for creating voluminous petals and leaves.
The most popular ribbons for embroidery are satin
Satin ribbons differ from others in that the texture of the front and back sides has a different weave. Sometimes you come across hard ribbons that can also be used for embroidery. Before starting work, you need to cut the ribbon to the required length from the skein and stretch it with crayfish.
Silk ribbons are used to create designs with fine details or complex stitches. Their texture is the same on both sides. The material from which such tapes are made is soft and elastic.
Nylon ribbons are needed to give embroidery a special texture. They are stiffer than satin and silk, and also thinner. There are transparent veil ribbons that are used to decorate individual sections of embroidery. They can have a metallized insert on the edge or in the middle, as well as a printed pattern.
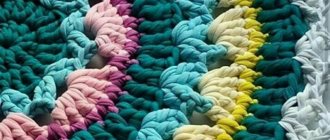
Weaving a three-color bracelet from ribbons
Weaving baubles from three ribbons is similar in technique to weaving from two parts, but the appearance of the bracelet is different. The accessory will be more interesting in color combinations, and the pattern on the front side and the back will be different.
Weaving of three ribbons
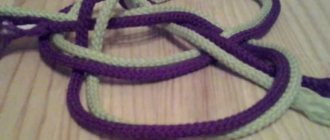
Let's look in more detail at how to weave baubles from 3 ribbons:
1) We fix the tapes to the surface in any convenient way (for example, tape or a pin).
2) We put 1 piece to the right, 2 to the left and then weave these two ribbons together.
3) Fold a loop from the first ribbon and wrap it with the other two, tie it.
4) We fold a loop from a pair of segments, thread it through the loop of the first tape and tighten it.
5) Then we repeat the weaving according to the same pattern, similar to a two-color bauble.
We weave a bauble from three ribbons
Markers
To carefully transfer the outline of the drawing onto the canvas, you can use simple pencils of hardness B, B2 or B3. For other fabrics it is better to use special water-soluble markers.
They can be purchased at craft stores. The design is transferred to the fabric, embroidered according to the markings, and when the product is completely ready, it is washed in cold water and all drawn lines are completely removed from the fabric.
Framework
Special frames are purchased to tension the fabric on which embroidery will be done. The device that holds the fabric is called a hoop. They can be round or square. When purchasing such frames, it is better to give preference to wooden products.
It is important to inspect and check the quality of the paint, and also make sure there are no defects (small chips and burrs). Poor quality painting can ruin the work, leaving stains on the canvas, and small flaws in the frame often damage the fabric and tapes.
Which needles are suitable for the job?
Simple needles are not suitable for ribbon embroidery. The eye of the needle should be wide and long, and the tip thin but rounded so that it can easily pass between the weave of the fabric without tearing it.
For ribbon embroidery, you should choose needles with a wide eye.
Most often, ribbon embroidery masters use needles with the following numbers:
- № 14.
- № 18.
- № 20.
- № 22.
- № 24.
- № 26.
The higher the number, the narrower and thinner the ear. It is important that the tape does not wrinkle in the needle, but also does not fall out. For example, a size 18 needle is suitable for 7mm wide ribbons.
Modeling a fashionable bauble
You are limited only by your imagination, because you can weave in anything - gems, decor for jewelry. It is only important to have convenient holes into which the fabric, braid or thread can be threaded. How to choose an interesting pattern?
Let's look at the most popular schemes in which the learned techniques will be useful to you. You can vary approaches and experiment to achieve a unique effect.
Intertwined ribbon and beaded patterns. The use of beads and different colors looks especially impressive.
New Year's baubles, weaving patterns for which are often published in magazines.Silhouettes of animals and plants, contours of landscapes. These are real mini-paintings that immediately captivate.
Inscriptions, slogans, names. You may need some help from a pro at first, but it's a really fun and personal solution.
Hearts and other symbols of love. This is a simple but very significant element of the design, which is very popular.
You can endlessly list different patterns; this approach is reminiscent of knitting. Braid weaving is also interesting.
We recommend: you can use floss threads and leather laces. A useful tool is a ruler and a tablet; you can easily fasten threads and silk with tape on tables.
How to insert ribbon into a needle
The ribbon must be properly fixed so that it does not slip out of the needle, and it must also be securely attached to the wrong side of the embroidery. Beginners need to practice on small pieces of tape of different widths.
Step-by-step instruction:
- The edge of the tape must be cut obliquely.
- Using the resulting angle, it is inserted into the eye of the needle.
- Stretch the tape so that the figurative edge stretches 3-4 cm.
- The needle must be inserted into the center of the tape, departing 5 mm from the oblique cut.
- The fingers of your left hand hold the needle, and with your right hand you tighten the free edge of the tape.
This way the tape will be securely fastened and will not jump out during operation.
Methods for processing the edge of a canvas in 1 minute
The canvas can be carefully stitched by hand or processed using an overlocker. But there are 3 ways that won’t take more than 1 minute.
Methods for processing canvas:
- Coat with PVA glue.
- Apply clear nail polish.
- Cover with masking tape or tape.
Such methods of processing the edge of the canvas are suitable only for small jobs or for those products that are not planned to be washed. In other cases, it is necessary to stitch the edges.
Master class on 3D embroidery of peonies for beginners
Embroidering with ribbons (for beginners, the stages of work are described step by step later in the article) of a voluminous flower may seem difficult for beginners, but if you follow the instructions, the peony bud will turn out beautiful and lush.
For embroidery you will need:
- Dense (preferably starched) canvas.
- Bud ribbons with widths of 3, 6, 10, 25 and 40 mm.
- Needles of different sizes.
- Lighter.
- Scissors.
- Pencil or marker.
- Hoop.
Procedure:
- Finish the edges of the canvas and stretch it onto the hoop.
- Decide on the location of the flower and draw a circle with a diameter of 1-2 cm. This will be the center of the bud.
- The needle with the thinnest tape is inserted from the inside out, from the center of the circle.
- The circle must be completely filled with elongated loops. Their length should be the same 1-1.5 cm.
- Having secured the thread on the reverse side, you can carefully cut some of the loops in the middle and singe the ends with a lighter. This item is optional.
- Now you need to sheathe the middle with loops in a circle with a wider ribbon.
- A 10 mm wide tape must be cut in the shape of a semicircle (edge) and singed.
- The tape is brought in from the front side and stitched through the fabric, pulling it out again to the front side.
- These actions are repeated in a circle.
- You need to cut petals from 25 mm wide tape. Their edge is shaped into a heart and set on fire.
https://www.youtube.com/watch?v=4cMECufOfMI
- In order for the petals to acquire a curved shape, you need to slightly bend them in the middle towards you and hold them over the fire for a few seconds.
- Now you need to carefully sew the petals to the bottom of the flower, passing the thread through the fabric. It is important that the leaves bend towards the center of the flower.
- Several large petals are cut from a 40 mm tape, making their edges 3-toothed. Then they are singed and given an oblong shape.
- Just like the last petals, large ones are sewn to the bottom of the flower with threads, but the bend of the petals should be directed from the center of the bud.
- The knots are tightened on the wrong side and the long ends are cut off. All that remains is to burn the cuts.
It turns out a lush bud from the ribbon. The color of the satin can be monochrome and smoothly transition from light to dark. Some craftsmen embroider peonies from white ribbons, and then tint the flower using a brush and batik paint.
Creating a simple accessory
Before making a bauble from ribbons, you need to understand the diagram with which the craftswoman will create her decoration.
A simple scheme is suitable for beginners. Before work, it is necessary to prepare in advance the material and tools that will be needed during work. These are two satin ribbons 1 centimeter wide; experienced craftswomen can use wider material.
You need to weave baubles from ribbons according to the following pattern:
- Initially, you need to tie the ribbons together, and the knot should be at the ends of these ribbons.
- Then you need to make a loop on each of the strips, moreover, they should be located parallel to each other.
- After this, you need to take one loop and pull it through the other, and then tighten it slightly. It should be taken into account that the color of the loop depends on which ribbon is being tightened.
- Repeat the actions. If several ribbons of different colors are woven into the accessory, then the tightening of the loops is alternated. First tighten the tape of one color, and then another.
- Perform manipulations to the desired length of the bracelet.
See also: Pictures of DIY crafts
Homemade jewelry, which is created from two satin strips, serves as the basis for any weaving technique. Experienced craftswomen are able to perform such manipulations in a matter of minutes. The main thing is to understand how these simple actions are performed, and then you can weave more complex patterns, using more ribbons and cords when making bracelets and additionally decorating the product with decorative elements.
Combined embroidery method
This is an interesting way to combine several types of embroidery. Experienced craftsmen often make paintings with three-dimensional elements embroidered from ribbons. For example, a picture depicting a flower field and a forest is cross-stitched. From above in the field area, the master embroiders flowers from ribbons.
For thread embroidery, select ribbons that match the overall tone, and mark the location of the flowers in small pieces. Embroider in the same way as on an empty canvas. The results are beautiful panels and paintings with three-dimensional patterns.
Making a braid
We will need:
- beads of different tones and sizes;
- bracelet clasp;
- 3 fishing lines or satins, 70 cm each.
Execution method:
- Fold the pieces of fishing line in half and fasten the clasp rings.
- Secure the ends to the 2nd ring.
- Place beads on all sections to the full length (approximately 35 cm).
- As a result, you will have a three-row base - up, down and in the middle. Place the top row on top of the middle row. Then the bottom row goes to the top.
- Place the top row on the bottom again and so on, the procedure must be repeated 4-6 times until the product is ready.
See also: Crafts from dry leaves
Advice: if you want to get not only a bracelet, but also a necklace, then increase the length of the fishing line.
Ornaments on clothes and jewelry
Ribbon embroidery is used to decorate clothes or make individual accessories. For example, a peony bud, the master class for making which is described above, can be decorated in the form of a brooch. To do this, the flower is embroidered in the usual way.
And then they carefully cut the canvas in a circle, leaving 1-2 cm to fix the flower on the clasp. The cut edges are processed and a suitable fastener is selected where the bud will be attached.
When embroidering clothes, it is important to pay attention to the fabric of the product. It should be dense and have a wide weave. On thin and smooth fabrics, for example, raincoat fabric, the embroidery will turn out stretched and unattractive.
Schemes and descriptions of embroidery with ribbons
Beginners can practice embroidering simple flowers. Below are step-by-step instructions for the simplest ribbon embroidery options.
To create these flowers you will need:
- Canvas.
- Scissors.
- Lighter.
- Needles.
- Markers.
Ribbon embroidery (diagrams, photo confirmation) involves choosing ribbons and floss threads by color and width, depending on the design.
Sunflower
To embroider a sunflower you will need yellow (12 mm) and green (6 mm and 25 mm) ribbons.
How to embroider:
- On the canvas you need to schematically draw the silhouette of a flower.
- From the center of the bud, the petals are embroidered in a circle with a yellow ribbon using a ribbon stitch.
- The flower stem is made from twisted tape 6 mm wide. The needle and tape are inserted from below. The tape is pulled out. Twist it into a tourniquet and insert the needle under the bud.
- The leaves are embroidered with 25 mm green ribbon using a ribbon stitch.
Ribbon embroidery: diagrams, photos of sunflower embroidery
The middle of the flower can be filled with embroidery from floss threads. To do this, embroider tight French knots closer to the center, and tighten them looser towards the edges.
Butterflies
The easiest way to embroider a butterfly is to depict its flight from the side. You will need 5 mm and 10 mm ribbons, as well as brown floss threads.
Step-by-step production:
- You need to embroider the body of the butterfly with threads using a “forward needle” stitch.
- Then the antennae are embroidered, making French knots at the ends.
- The front wings are embroidered with a narrow ribbon using a “loop with a tack” stitch. You need to make 2 loops, the top one is slightly longer than the bottom one.
- The lower wing is embroidered with a wider ribbon using a ribbon stitch.
If you take ribbons 10mm and 20mm wide, the embroidery will be more voluminous.
Daisies
Embroidering a chamomile is very simple. You will need white tape 5 mm wide and green tape 5 and 10 mm wide.
Step-by-step production:
- The center of the flower is marked on the canvas.
- The petals are embroidered in a circle using a white ribbon using a ribbon stitch.
- The stems are embroidered from a narrow green ribbon using a “needle forward” stitch.
- The leaves need to be embroidered using a ribbon stitch from a wide green ribbon.
The middle of the flower is filled with yellow floss embroidery, filling the void with French knots.
Orchids
To embroider an orchid flower, you will need white ribbons 10 mm and 40 mm, as well as red ribbon 5 mm and yellow ribbon 3 mm.
All embroidery is done using a ribbon stitch:
- First, three petals are embroidered from a thin white ribbon. The leaves should face in different directions.
- Large petals are embroidered from a wide ribbon. They should come out from the center of the flower and be placed on the sides of the top small petal.
- The middle is embroidered with a red ribbon between the 2 lower thin petals.
- A small stitch is added to the stamen in the center, sewing the ribbon seam through the red ribbon.
White petals can be tinted with batik paints.
Heart
Embroidering a small heart is very simple. You need to use 10mm tape. The heart consists of 2 ribbon seams that come out from one point , and the edges look to the sides. Forming the top.
Tulips
Tulip buds are embroidered with straight stitches:
- The first stitch should be the center stitch.
- The second one comes out from the same point as the first one. The needle comes out inside out a little to the left and lower than the top of the previous stitch. The tape should be placed so that it covers part of the central petal.
- The third petal is embroidered similarly to step 2, on the other side.
It turns out to be a flower bud, all that remains is to embroider the stem and leaves using a ribbon stitch.
poppies
The poppy head is most often collected from individual parts. You will need a wide red ribbon, dark brown and red floss threads, and a wide green ribbon.
Step-by-step production:
- First you need to collect the flower. To do this, the red ribbon is cut into pieces of 10 cm.
- The ends are singed and the corners are folded on each side, and then stitched so that they do not unbend.
- The result is curved petals. They need to be sewn together to form a bud, which is sewn to the canvas.
- A small ball of cotton wool is wrapped in a wide green ribbon and the ribbon is tied. The excess ends are removed.
- Using brown floss threads, the resulting ball is pulled crosswise several times. Tie a knot.
- The upper layers of threads are trimmed. They should disintegrate and form stamens.
- The middle is sewn into the center of the bud.
Poppy leaves can be cut from green ribbon. They should be jagged and narrow. The sections are singed with a lighter and the leaves are sewn to the canvas.
Lilac
Individual lilac flowers are embroidered with secured loops. The flower consists of 3 petals.
Therefore, the stitches should come from 1 point, but have different tops. To embroider a lilac branch, you need to place a group of flowers closely in several rows.
Bouquet of cosmos
To make such a bouquet you will need ribbons 5-6 mm wide, batik paints and green ribbons 3 mm wide:
- The fabric is stretched onto a hoop and a bouquet is drawn schematically.
- The centers of the flowers are painted with yellow and brown paint.
- The ribbons are cut into strips 6 cm long. The edges are made semicircular.
- Insert the ribbons into the needle and thread them under the middle of the flower so that 3 cm ends remain on both sides.
- One bud will require 4-5 pieces.
- From the wrong side, ribbons are sewn to the fabric using floss threads.
- The petals are singed, bending away from the center of the flower.
To get a bouquet, you need to embroider several flowers. The stems are embroidered with green ribbon using a needle-forward stitch.
Tree
You will need green tape 5 mm wide and brown tape 10 mm and 5 mm:
- The trunk and branches are schematically drawn on the fabric.
- Use a wide brown ribbon to embroider the trunk using a straight stitch, and a narrow ribbon to embroider the branches.
- The foliage must be embroidered using a ribbon stitch. Green leaves fill all empty spaces, forming a crown.
You can use yellow and orange ribbons to create an autumn tree.
Scenery
Beginners are recommended to start embroidering landscapes with combined embroideries. Handicraft stores sell cross stitch kits with various landscapes.
You need to embroider the main picture with floss threads, and add only a few voluminous details with ribbons. For example, decorate tree crowns or embroider flowers on a field.
Basic Rules
A bauble is a handmade homemade decoration. Most often, such a bracelet is made of beads or satin ribbons. Before you start making ribbon baubles, you need to familiarize yourself with some needlework rules.
During work you need to consider:
- Any pattern that a needlewoman uses to weave a bauble from ribbons is also suitable for creating other products, for example, homemade bookmarks, beautiful keychains or headbands. You can even make a woman’s handbag using these patterns.
- To make simple accessories, ribbons of the same color are woven; for more complex products, two, three or even four colored ribbons are used. In addition, accessories are additionally decorated with beads, multi-colored beads and various kinds of appliqués.
- For convenience, it is recommended for beginning craftswomen to secure the base of the weave to a soft cushion using pins or tailor’s needles.
- Satin material tends to fray, which can complicate the work. Therefore, the ends of the ribbons are scorched with a regular candle before work. Having carried out these manipulations, you can be sure that the bauble will not unravel or become disheveled in the future.
- What color the homemade bracelet will be and how many ribbons will be woven into it is decided by the craftswoman herself. It all depends on the wishes, preferences and skill level of the needlewoman.
- When working with satin ribbons, do not tighten the knots too much, as this will ruin the appearance of the decoration. The weaving should be loose, this will give the pattern the desired symmetry and volume.
- The satin material that is woven into the bauble must be of sufficient length, no shorter than 100 millimeters. The fact is that if the ribbon ends in the middle of weaving, then weaving in new material will be problematic and after weaving, an ugly knot will remain on the bracelet.
By following these simple rules, you can make any decoration you like. And the weaving technique itself is quite simple . The main thing is to understand the basics.
For beginners, to weave baubles from ribbons, it is better to use simple patterns, and only then weave more complex patterns.
Straight knot
In short, it is a combination of two left nodes. Pay attention to the fashionable patterns of baubles: a straight knot is indicated by an arrow, the tip of which points to the lower right corner. This is where the working thread will go. The finished knot will be the same color as the working thread.
Reverse knot
It is tied in the same way as a straight knot, but in the opposite direction, combining two right knots. In the diagram it is indicated by an arrow that points down and to the left, and shows the direction of travel of the working thread.
Left tatting
Don't let the name of this macramé knot scare you away: there's nothing complicated here. Under the left tatting lies a combination of left and right basic knots.
Tie it as follows:
- the first is a simple left knot, after which the working thread will be on the right;
- Using the same thread we tie a simple right knot, swapping the threads.
It is thanks to the direction of the working thread that such a symbolic designation of the knot appeared: the arrow goes down, to the right, but then changes direction in the opposite direction.
Right tatting
The technique of execution of this knot is absolutely mirror of the previous one.
First we knit the right loop with the working thread on the right, and then the left one. The thread eventually returns to the original side. This can also be seen on the symbolic icon that is used to indicate the right tatting in the diagram.
Try tying the knots listed above: practice will help you choose the appropriate thread tension and weave a smooth, beautiful fabric. In addition, having mastered these knots, you will read the product diagram and can learn how to weave baubles easily and quickly, even from ordinary threads.
Templates for embroidery with ribbons
Ribbon embroidery (for beginners, different patterns are presented step by step) is carried out according to the instructions. The drawing is first drawn up on paper using symbols. This is necessary in order to imagine where and what kind of flower will be placed. The templates also indicate the color of the ribbon that needs to be used to embroider any detail.
Embroidering with ribbons is easy. For beginners, it is important to learn the basics of embroidery and practice doing your first work using templates and step-by-step instructions. At first, 1 small job will take 30 minutes, gradually the skill will be honed and embroidery will be easier to do.
Video
Do you want to learn how to embroider a lilac picture with ribbons? What you will need for this and where to start in detail, see this video.
What you need for ribbon embroidery, how to choose them correctly and what techniques exist. Embroidery pictures with ribbons with a master class for beginners in this video.
Ribbon embroidery of peonies in a new style is presented in the following video. Together with the master, you can step by step create a composition pleasing to the eye, which will be a worthy interior decoration.
We talked about the basic stitches in ribbon embroidery, once mastered, you can surprise everyone and embroider a picture with wildflowers or a landscape with ribbons. Don't worry if something doesn't work out the first time - everything comes with experience. Write to us about your successes and share photos of your finished paintings, embroidered with ribbons.