Natural flowers are wonderful, but they have one small drawback: they cannot please a person with their flowering all year round. An excellent alternative is to make a flower from beads.
It does not require constant care and, in principle, is not whimsical. There are a large number of flower weaving patterns on the Internet. In this article we will talk about making an orchid from beads with your own hands.
Materials
To do this, you should ensure that you have:
- beads of desired colors;
- pearl beads in the amount of 6 pieces - 10 mm, 7 pieces - 6 mm;
- wire 0.3-0.4 mm;
- floss thread;
- gypsum;
- Moment glue;
- rulers;
- pliers, wire cutters;
- pot;
- small decorative items.
All materials are not expensive or rare; they can be found in every home or store nearby.
Beads
For flowers, you can use beads made in China, but Czech beads look better due to the same size of beads. Before weaving, the material must be checked for abrasion and exposure to sunlight. If the beads survive rubbing and soaking in water, then they can be safely used.
Sometimes Japanese beads are used, but weaving requires a large amount of material, and it is not cheap.
Beautiful plants will come out of gasoline, brocade, and pearl beads. It is better to buy in reserve, because you will have to postpone the work until it is found.
Wire
You can purchase it at craft stores or use copper wire from electrical wires, after cleaning it.
The main thing is that the diameter allows you to pass through the beads many times, and for this you should take into account the size. If you plan to use 10, then you need a thin one, if 8 or 6, then the wire can be thicker.
How to weave
An orchid is made using French weaving. It consists of putting a certain number of beads on a piece of wire, and then making an arc. Therefore, the technique is called arc.
Weaving different petals and leaves involves using a standard method; it differs slightly for different species.
Materials needed to make an orchid
Standard set of materials required for weaving:
- Beads, different colors.
- Decorations.
- Thread for weaving from beads.
- Beading needle.
- Regular threads.
- Glue.
- Scissors.
- Pot.
- Alabaster or plaster.
It is worth remembering that a properly designed place to work will significantly speed up the process.
Round leaf
The master class will help you make such a leaf without much difficulty. It is important to follow the procedure:
- Take a piece of wire of the required diameter of about 70 cm.
- Make a loop.
- String 5 beads onto the free end.
- Secure the string with a small loop.
- For the remaining segment, enough beads are collected so that only 5 cm of unfilled material remains.
- 7 beads are strung on the arc on the right side.
- Wrap around the axis.
- Form a meadow on the left side.
- It is necessary to make 6 arcs on each side to make a leaf.
Decorative elements
Beaded orchids themselves are very beautiful, but to complete the look you can add a few decorative elements:
- decorate the pot with glass marbles, coffee beans or artificial grass;
- add a decorative butterfly to one flower;
- decorate the pot with a ladybug;
- The flower pots can be wrapped with twine.
We hope our master class on beaded orchids will help you create your own masterpieces, and you will remain in the magical world of beadwork for a long time.
Irina Vyshivaikina
Professional skills: Clothing designer; Artist
Brief biography and personal achievements: “I am inspired by the things that are around us.” Since childhood, I was interested in art and crafts, so I decided to devote my life to it. She received a higher education in design and released a collection of designer jewelry made from simple materials that can be found at home from any needlewoman. Afterwards, I decided to conduct master classes on creating similar accessories for everyone. She became a blogger and the author of the website domigolki.ru.
Serrated petal
Beautiful, but difficult to create.
- Start weaving like a leaf with a sharp tip.
- A right return arc is performed, that is, it is fixed on top of the previous arc, retreating 5-9 beads from the top edge. The wire is inserted from the inside out and brought out onto the face.
- Fix the arc from below, the second half bends around for a tight fit.
- The arc is returned from the left side, as well as from the right, and the fastening of the first half of the arc should be at the same level, the first part of the arc as the right.
- The completion of the arc on the left is similar to the one on the right.
- The arc going to the right is fixed to the previous one.
- The left one weaves the same way.
- Make the required number of arcs. For final fixation, the wire is twisted around the rod.
- Bend the end of the axle going from above inside out, cut it to the top bead, pressing it tightly against the axle.
- The leaf is ready.
Preparation Tips
- Beads for the product can be of any color;
- The accuracy of the product depends on the quality and size of the source material;
- The wire is matched to the shades of colors. For light ones, silver wire is needed. Dark ones require copper or colored ones.
- For the base of the flower stem, you need a wire rod (1.5 mm or more) or a tree branch. You don't have to worry about the color; the trunk will be covered with floral tape.
- A large number of beads affects the weight of the product, so that they do not bend; a large diameter wire (1 mm) is used as an axis.
- Working with beads affects vision, so a well-lit work area is necessary for preservation. The beads are placed in containers or boxes.
Fastening in a pot
A beaded orchid turns out to be quite heavy, so simply placing it in a vase or flowerpot will not work. It is necessary to secure the “roots” with a solution. Alabaster, a type of finishing material, is suitable for this purpose.
Stages of work:
- secure stones and a branch at the bottom of the pot;
- fill with the prepared solution;
- wait for it to dry completely:
- You can move the pot without fear that the flower may fall.
White and pink orchid
To own a pink and white beauty that can liven up your interior, you should take care of the following accessories:
- beads of green, white, pink, yellow, red shades;
- large beads, 5-6 mm and 10 mm in diameter;
- tea tape or floss threads for decorating the trunk;
- wires 0.3 mm, 1 mm, 1.5 mm;
- plaster or alabaster;
- a pot for planting a flower;
- glue;
- sea, glass pebbles, beads for soil;
- round pliers, side cutters;
- rulers;
- containers for mixing gypsum.
Material selection
Before you start crafting, it is worth purchasing high-quality materials so that the work proceeds easily and simply, and the finished craft does not deform over time and does not lose color.
Modern technologies for the production of beads from glass and plastic have allowed manufacturers to send to the market a large number of different types of beads, of all kinds of colors and sizes. Thanks to the wide range of similar products in handicraft stores, craftswomen have the opportunity to select high-quality materials and create products for every taste.
Beads of three main forms are most often used in work:
- Regular beads are small square and round beads with melted edges.
- Cutting - short tubular beads 2 mm in length, with chopped edges.
- Bugles are elongated tubes 3-25 mm long, having a round, twisted or faceted shape.
Today you can find beads of different sizes, which are indicated by special numbers.
Each material is assigned a specific number, it shows how many of these beads are required to, when laid out in one row, make a line one inch long. So, to create such a segment you need to take 6 beads of size 6/0 or 10 beads numbered 10/0. Knowing the number of the required material, you can calculate its approximate amount in a regular 10-gram package. For example, there will be about 2 thousand Czech beads No. 12/0 in such a bag, and beads No. 10/0 - only 800-850.
Taiwanese and Chinese
The most inexpensive beads are brought from India, China and Taiwan, but they are not of good quality and are made of plastic. Beads from the same package may differ from each other in shape, size, and may also have chips and unevenness. Because of their fragility, they often break during work and even in the finished product, so experienced craftswomen prefer to bypass Chinese material and purchase more expensive raw materials.
Cutting and bugles from China usually have poorly finished sharp edges near the holes, which can damage the thread on which they are picked. In bags with Indian raw materials, beads are occasionally found without one hole or without them at all.
The materials from these manufacturers cannot boast a wide range of colors. Most of them have silver-plated holes and are made of opaque or transparent plastic. Unfortunately, Chinese beads have an unstable color, so they noticeably peel off during needlework.
Such beads are usually chosen by beginning needlewomen to practice before performing complex crafts, or for children's creativity.
Czech beads
Today, products from Czech manufacturers are especially popular among experienced and beginning craftswomen. It is of much higher quality than beads from India and China, and can also please you with a large assortment. Materials from the Czech Republic come in a variety of sizes, shapes and colors.
Leaves
Plant parts can be large, medium, small. To create them:
Wire with a diameter of 1 mm is cut into twenty-centimeter pieces. The number is equal to the number of leaves.
Create a loop at one of the ends, and place the required number of beads on the resulting central part.
Wire 0.3. mm is filled with all the beads that are needed for weaving. To maintain the shape, they use firmware; for this, two pieces of wire are made, the length is 20-22 cm.
The tail of the acting wire is screwed to the axial element. Move in the required number of beads. Carry out the first longitudinal row, turning the axis of the leaf once using a top-down movement, bringing the beads closer to form the second half of the 1st row. Where the base of the sheet is, wrap the wire around the axial center.
From the inside, two pieces of wire are placed perpendicular to the axial part to secure the rows.
The first and subsequent rows are fixed using one turn of wire from the top down. So the firmware becomes invisible. Next, weave the required number of rows: large leaves - 7, medium - 6, small - 5.
In the row, which is the final one, the stitching wire is masked using this method: the beads are moved at the stitching point, one turn of the wire is made, which serves for stitching before the current one, they are connected, and the next number of beads is moved forward by two sections at the same time.
The axial element is shifted in such a way as to mask the loop from the inside. They relax it a little, move the axial part, and compress it again. The active wire is fixed to the axis using a winding and removed.
The remaining leaves are created in a similar way.
How to do it right
To weave an orchid beads of different colors and sizes are used , wire to match the color of the beads, beads, floss threads or floral ribbons for wrapping the wire.
Beaded orchid weaving pattern
To create an orchid you will need beads of five colors, white beads, multi-colored wire, wire cutters, glue, plaster and a pot. The bead weaving pattern for beginners contains detailed photos and descriptions of this creation.
We weave leaves
- Take the leaf wire and bend the end so that the beads do not “run away”.
- Place green beads on the axle. Adjust the axle length yourself.
- Then bend the wire at the other end.
- Place the remaining green beads on a thin wire.
- Wrap the beaded wire once around the base of the axle. Move the beads along the entire axis, making a turn at the top, and go down. Make one more turn.
- Visually divide the leaf into three parts and place two thin wires on top.
- We wrap each arc with wire and move them tightly towards each other.
- We also sew all subsequent arcs with beads.
- We sew five rows.
- When you make the last circle, you need to cut the end of the wire.
- And we collect the next beads on two wires at once.
- We fasten the wire on both sides.
- Then open the ring at the top of the sheet and gently pull the wire down to hide it under the weave.
- Thus, make several leaves of the desired length and width.
buds
- Using the same wire that was used to make the arches of the leaf, we create a loop and collect 3 beads.
- We make 2 arcs on each side.
- Then we put a bead on both axes.
- We hide the bead inside and fold the leaves.
- We twist the wire around the axis. We make several of these buds.
We weave multi-colored large buds
We use beads of different colors.
- For each bud, 3 arcs are made. For each bud, collect at least 5 beads along the axis.
- Fold the petals and twist the wire.
- We lower the bead inside and give the bud a rounded shape. Close and twist the wire.
We make flowers
- We weave round petals. Make a loop 7 cm long, twist it and collect 6 beads.
- We put beads on the other edge of the wire and secure it at the end.
- We make the next 5 arcs.
- We pass the remaining wire along the axis and cut it off.
- Now we make sharp petals. Mix several shades of beads and place any 8 pieces on the base of the wire.
- We string the required amount of beads and make arcs, not forgetting to add an additional bead before making each row. This will make the petal sharp.
- Make 2 of these leaves for each flower.
- We place the round leaf on the sharp one at an angle of 45 degrees and fold the second part of the flower in a mirror image.
- To make a stamen, string beads onto a wire and move them to the edge.
- We put a bead on the wire and fasten it.
- We move several beads closer to the bead. Then we move the beads further, make a loop and bend it to the bead.
- Fix by twisting.
- We connect two wires together.
- There will be two “ears” on each side of the pestle. To make them, collect 4 beads and twist them. We make one more arc.
- We make the tongue of the bud. Make a loop, twist and collect 3 beads. Let's make a circle.
- Raise the axes and make several rows, obtaining a rounded shape.
- You will need one reed for each flower.
- Now we attach the pestle to the tongue so that the bead is in the middle.
- We frame it with “ears”.
- We attach a leaf above the core.
- We attach the side double petals.
- We wrap the wire on all the flowers with green floss threads. Apply a drop of glue to the thread on both sides.
- We wrap all the details of the flower.
- Imagine what your beaded orchid will look like, or look at the picture. We begin to attach the buds to a thick wire.
- Add leaves to the bottom.
- When the flowers are collected, make a gypsum solution according to the instructions and pour it into the pot. We place flowers.
- Decorate with decorative soil.
Photo and diagram of weaving a pink orchid flower from beads
To make a relief pink orchid flower, you will need beads of two colors - pink and white. For the middle, beads of a different color and slightly larger are suitable. We offer an option for weaving an orchid flower from beads with manufacturing patterns.
- First, we string 10 beads and use the mosaic technique to make 3 narrow elements.
Weave first one half, then the other. The additional element is woven through small beads.
- We pull together the finished petal. Try to pull the beads tightly, then the leaves will be embossed.
- Wide leaf – 3 pcs. – weave according to the pattern, collecting 14 beads. We sew the edges into a tube.
- The finished flower is decorated with pistils, which can be made from threads and beads. Wide petals are sewn on top of the narrow parts.
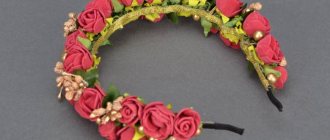
According to the pattern, you can weave a full-color orchid of any color. The blue orchid made of beads looks impressive. You can use flower elements when weaving beaded jewelry in the form of a hairpin or making a beaded rope with your own hands that will decorate any outfit. And for special occasions, you can make a necklace made of beads and beads, which will highlight your image.
White beaded phalaenopsis orchid
To make a white phalaenopsis orchid flower you will need white beads, red beads for weaving the center, and white beads.
- First we weave 3 sharp petals from 8 arcs. We collect 8 beads on the central axis. We secure each arc with a turn of wire.
- Then we make 2 large semicircular white petals from 12 arcs with an axis of 3 beads.
- We weave a central tongue from two small red leaves. We collect 4 beads on the axis and make 4 arcs.
- Next, we make a triangular petal from red beads with an axis of 3 beads. We weave 8 arcs.
- From the wrong side we attach a wire to the top of the petal. We string the beads onto the antennae and secure the end of the wire, passing it down along the beads.
- Curl the resulting mustache.
- We attach small petals to triangular leaves.
- We twist the largest white petals.
- We connect the petals with the core.
- Screw on the pointed petals.
- Insert a bead strung on a wire into the middle.
Master class on making cymbidium orchids from beads
The beaded cymbidium orchid looks very interesting. We will show a master class with step-by-step photos on making orchid flowers.
The blossoming flower consists of 5 green petals and 2 pink-yellow ones in the middle.
- Using the French technique we make 3 petals. We collect 20 beads per axis and weave 5 arcs.
- We weave two side petals from an axis of 20 beads and 5 arcs, and end with 2 incomplete arcs.
- We make a small central petal from 18 beads and 3 arcs. We make an addition on top.
- Now we weave a large central petal from beads. 20 beads – 12 arcs.
- Let's make two leaves for a small bud. We tighten the wire to make cups.
- And 5 petals for a large bud.
- Twist a loop and make pistils for each bud.
- We collect buds.
- Then we connect the large flowers.
- We collect the orchid itself. You can make a small bud at the end of the wire. Then attach the remaining buds and flowers.
- We arrange the flower in a pot.
Bead embroidery "orchid"
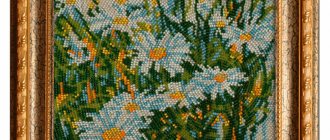
You can use floral motifs for embroidering landscapes. A variety of daisies, peonies, lilacs, and beaded roses are popular in this type of needlework. You can take orchid bead embroidery as a basis and transfer the beauty of the flower to the picture. Orchids can be embroidered either as full branches or as individual flowers. Orchid flowers, embroidered on several canvases that make up the overall picture, look original.
For beginners, it is better to purchase embroidery kits, which describe in detail how to embroider with beads and contain the necessary materials.
Stamens
- For the stamens, 1 large pearl bead and 25 yellow beads are collected onto the existing wire tail.
- One piece of wire about 6 cm is left unoccupied. The pearl is attached in the middle with a twist.
- They fasten both segments and move 5 beads closer.
- They move the beads that remain in the amount of 21 beads and form a loop - a pestle.
- Both segments are twisted together.
- Two ears are performed. 4 yellow beads are collected onto the wire, fastened into a ring, and another 1 circle is made around the loop in the center, twisting both tails.
Weaving
This section will discuss a step-by-step master class on weaving an orchid from beads.
Leaves
You need to weave 10 leaves: 4 small leaves, 7 centimeters long, 3 medium leaves, 9 centimeters long, 3 large leaves, 9 centimeters long. The increase occurs due to the addition of arcs.
- A 20 centimeter wire is taken and a small ring is made at one end.
- 20, 25 and 30 green beads are strung on a wire.
- Then the remaining beads are collected onto the working end. Turns are made from it around the main axis, in total there should be 6 turns on each leaf.
- After completing each revolution, it is necessary to connect the row with the main axis using a wire. The connecting wire should be smaller than the main wire.
- After turning and securing the last row to the axis, the end of the remaining wire is hidden, and its excess is cut off.
- The rest of the leaves are made in the same way.
Little bud
- A thin wire is taken and three green beads are placed on it. The other end is wrapped around the wire to secure them. Then we make two turns around with 10 and 18 beads.
- The second petal is made in the same way.
- The bead is placed on the wire of both petals and hidden in the middle between the petals.
- You need to weave 2 more buds.
Big bud
The large bud is made of green, white and pink beads. Colors are taken randomly.
- According to the algorithm described above, only with three turns, not two, petals are made. The proportion of different colors of beads is at the discretion of the master.
- From the upper end of the petals you need to leave 5-7 centimeters of wire and connect the petals to each other using them.
- A bead is placed on the resulting axis of 3 petals and covered with petals.
- The petals curl together.
- You need to weave 2 more of these buds.
Stamen
- A large bead and 26 yellow beads are placed on the wire.
- The ends of the wire must be wound together 3 times at the base of the bead.
- Then 5 beads are placed on both ends.
- Then 21 beads are placed on them and a loop is made. The pestle is ready.
- 4 yellow beads are placed on the wire and a round loop is made from them. Then you need to make another turn around. The ear is ready.
- In total you need to make 7 pestles and 14 ears.
Flowers
- 6 white beads are strung on a wire.
- The working thread makes one turn around 17 white beads. Then another 4 turns are made with a constant increase in the number of beads. The excess wire is cut off and the ends are hidden. The round leaf is ready.
- 8 beads are placed on the base (you need to take beads of several red and pink shades).
- The first turn of 23 beads is made. Then 1 more bead is placed on the main end. In total, you need to make 4 such turns with a constant increase in the number of beads. With these extra beads you can create a sharp petal.
- To make the tongue you will need two shades of red. 3 beads are placed on the wire. One turn of 7 beads is made. Then 3 more circles with increasing intensity.
- The center is slightly pressed inward to give the shape of a petal.
- In total, you need to make 7 reeds, 14 sharp and 21 round petals.
- 2 round and 2 sharp petals are combined from a pair and connected to each other.
Assembly
After all the details are completed, the product is assembled.
The steps include the following:
- The column and tongue are twisted, and ears are placed on the sides.
- The elements that make up the middle part are turned to face the pearl bead.
- On the upper side, in the middle, 1 round petal is fixed.
- Having connected one petal of a round and a sharp shape at 45 degrees, twist them.
- Two mirror elements are made for each flower.
- All parts are collected.
- When twisting, you should ensure that the side petals are placed in front of the middle one. Having completed the assembly, they form a flower, give a concavity to the wide petals, and bend the tips of the narrow ones.
- The assembled product is wrapped with tape or floss. The ends are secured with glue.
- The stem is made of thick one and a half millimeter wire. Assemble the product starting from the top. Fix a small bud, then going down while winding, attach the remaining parts. For better fastening, the stem is treated with glue. The winding should be smooth and tight.
- Having combined all the components, the bottom of the stem is covered with floss for another 10-15 cm.
- Leaves are included close to each other.
- The wire bundles that remain at the ends are bent in different directions so that they are better attached to the plaster.
- Prepare plaster by diluting 0.6 ml of liquid per 1 kg of powder. Pour the resulting mixture 2/3 full, immersing the plant stems in it. Wait for it to dry, leaving it for a day.
- After waiting for it to harden, coat it with glue, decorating it with a special primer.
- The exotic miracle is ready.
How to collect a flower
At the next stage of the beaded orchid weaving scheme, you will have to assemble the blanks into a single composition. The basis of the peduncle becomes a thick wire. First, the buds are screwed to its end, and then the blossoming flowers, imitating the inflorescence of an orchid.
To make it more natural, it is wrapped with green ribbon or yarn, and also given characteristic curves.
- It is worth considering that the weight of flowers and buds is quite large. And if the thickness is insufficient, the base will begin to deform, disrupting the composition. Therefore, part of the peduncle is supplemented with a metal rod. To make the insert look organic, it is attached to the back of the composition.
- The stem of the plant is quite short. To make it, you can use thicker wire or electrical cable. Moreover, it is more correct to attach the peduncle to the bottom of the stem, and not to the top. The junction is masked by leaves.
- To secure the composition well in the pot, the container is filled with gypsum mixture. To do this, the dry component is mixed with water in a ratio of 600 ml per kilogram. Filling is done to 2/3 of the depth of the pot. After installing the orchid stem into the blank, the composition is left alone for a day to dry.
- Then the surface of the plaster is covered with glue, which fixes the decorative elements. “Earth” can be made with beads or small pebbles. To more accurately imitate soil for orchids, you can buy a special decorative substrate in craft stores. At the end, all that remains is to straighten all the elements of the flower, and the composition is ready.
Orchid Cymbidium
Such an orchid will look original. Thanks to the master class, the question of how to make an orchid from beads will not arise. The flower is distinguished by the presence of five green petals and two pink ones in the center.
Progress
- Using French technology, three petals are created. String 20 beads onto the axial element and make five arcs.
- The two side petals are woven using an axis of 20 beads and five arcs, ending with two unfinished arcs.
- The small petal in the center requires 18 beads and three arcs. An addition is made from above.
- They are engaged in weaving a large central petal of 20 beads and 12 arcs.
- Create two leaves for a small bud. To obtain cups, the wire is pulled together.
- For a larger bud - five petals.
- Twist the loop, making a pestle.
- The buds are assembled.
- Large flowers are connected.
- The plant itself is collected. The end of the wire can be decorated with one small bud. The remaining elements are attached in the form of buds and flowers.
- Plant a flower in a pot.
If it is difficult to understand the execution of an orchid from the description, you can watch the video and repeat, then you will get the desired result.
Beads are the material that will allow you to create magnificent flowers from beads. With proper care, an orchid will live forever. It is enough to simply wipe it from dust, protect it from the sun, and its beauty will always delight you.
Orchid flower diagram
A blooming orchid flower contains several rows of petals and a stamen. All these elements are performed one by one.
- To make the petals of the first row, you will need to take a piece of thin wire, as well as white and pink beads. Its middle should form a loop of 8 cm. At the same time, the length of the ends cannot be less than 7-9 cm.
- 13 beads are collected on one side, which form the middle. The other end will wrap around the center. First, 14 beads are collected, which are attached parallel to the first row on one side. The next 14 will be next to each other on the other side.
- The process continues until 5 beads are formed in a row around the middle. In this case, it is necessary that the petal gradually acquires an oval shape. For 1 flower you need 5 such blanks.
- The second row of petals is made of lilac beads. The execution pattern is similar, but the central row consists of only beads, and the number of rows on each side is reduced to four. You need 3 such elements.
- The oval center of the flower is made of yellow beads. To make it elongated, the central row is made of 14 beads, and only 3 rows are added on each side. The stamen is a bead attached to a piece of wire.
- The flower is assembled according to the following scheme. First, the petals of the first row are collected in groups of 3 and 2. The bead is connected to the yellow middle petal. The second row of petals are attached to the remaining four sides.
At the final stage, the lower level of petals is added to the composition. By attaching several flowers to a rigid base, you can get an orchid bead brooch that will decorate a dress or suit.