DIY tile kitchen countertop (39 photos): step-by-step instructions
There are quite a few options for making countertops for the kitchen, mainly plastic or acrylic products. But what can you say if the countertop for the kitchen unit is made of tiles? It is quite possible to do this yourself; to do this, you just need to follow all the recommendations indicated in this article.
Obviously, this countertop option wins in many respects: appearance, practicality and durability.
Advantages
If you decide to install a structure covered with ceramic tiles in your kitchen, you will experience the following advantages of such a design. She:
- Easy to clean. Any dirt can be removed from such a countertop without any problems.
- Heat resistant. You can safely place a hot kettle or frying pan on the surface.
- Moisture resistant. It is not afraid of water, does not become stained by spilled liquids, and does not even absorb odors.
The tile table is easy to clean and very durable
- Resistant to mechanical stress. A tiled table is not scratched by tableware and cutlery, so you can do without using a tablecloth and napkins.
- Immune to household chemicals. You can wash it with regular water or detergents.
Household chemicals are not dangerous for ceramics
Despite the fact that the surface of the tile is quite resistant to abrasion, it is still not recommended to often use abrasive products to care for it.
Flaws
Despite the impressive list of advantages, ceramics as a coating is not without its drawbacks. Among them:
- Heavy weight. The ceramic countertop makes the weight of the structure much more significant. In everyday life this does not interfere much, but in the process of moving or remodeling you will have to work hard.
- Presence of tile joints. If the seams between the tiles are wide enough, dirt will constantly accumulate in them. This in turn will greatly deteriorate the appearance of the structure.
Small debris can get stuck in the seams between the tiles.
- Formation of chips. If ceramics are not installed correctly, they may crack due to heavy loads in the future.
- Price. The cost of a ceramic table is quite high. But at the same time, you can save money by finishing a conventional structure with your own hands.
The price for ready-made models is higher than for standard wooden tables
Table preparation
Before making a table with tiles, you should prepare its frame. For these actions, the old version may be quite suitable, but outwardly it is no longer suitable for use in everyday life. Remember that when covering a countertop with ceramic tiles with your own hands, its condition should be higher than satisfactory. If this is not the case, you should replace it with a new one, otherwise the tile may soon come off. The legs and those parts that will not be covered with tiles should be decorated in a different way, but first sand off the old coating and apply at least two layers of varnish.
You can decorate your table with your own hands using any type of ceramics. It could be:
- floor tiles – ceramics;
- porcelain stoneware;
- mosaic.
Table decor can be done using any of the presented types.
But remember that decorating the surface with floor tiles should be based on the assumption that the table will support its weight. Having a fairly dense construction, this table decoration will serve you for many years.
A table with mosaics looks very harmonious in bright kitchens or living rooms. It is important that this type of tile is very economical and there are practically no damaged elements left during assembly. The mosaic is laid out evenly along the edges of the table and does not cause problems. It is very convenient to work with tiles with your own hands; you do not need to trim or level them.
Article on the topic: DIY desk organizer
If you choose porcelain stoneware, be sure that it will serve you for a long time. At the same time, it is not as thick as ceramics and with it, a DIY table model turns out lighter and more accurate. It also has a very long service life, it does not fade in the sun and easily withstands mechanical damage.
Below you will find a large number of different photos on this topic, which can be used as an example and supplemented with your own original details.
How to choose the style of the room?
The tabletop cannot be called a “capricious lady”. The surface of the table can effectively emphasize the sophistication of the kitchen set or “dissolve” against its background. It seems that the simplest solution would be to choose a countertop that matches the color of the facades. But it's not entirely simple. It is not always possible to find materials of the same shades .
There are no difficulties when installing monochrome furniture. But black will be sad, and white will be impractical. In this case, the set will visually look large and “monolithic”. To destroy these feelings, you will need bright decorative elements.
The choice of contrasting materials should be thoughtful and determined by the style of the room. A high-tech or minimalist interior can be decorated in black and white. A soft rustic mood will be better emphasized by a range of similar shades (sand/brown, white/blue, light green/green).
To create a harmonious environment, it is advisable to “link” the tiled countertop with other surfaces in the interior. A win-win way is to have the same finish on the table and window sill.
Rustic style
An excellent design move is to decorate the apron and tabletop with the same material. This duet in the kitchen can become one compositional solution.
The combination of floor finishing and work surface made of the same material looks original. Moreover, manufacturers often offer tile collections united by one shade or pattern. A stone union (squares of the same color on the floor and on the table) will give the kitchen a noble look. We must admit that such materials are not cheap.
Decoration with snow-white tiles
Mosaic table
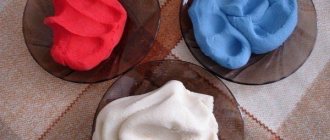
There is no need to be upset if you accidentally break your favorite cup or plate. Don't worry and don't rush to throw it away. It’s better to take the opportunity to perpetuate the color and original design of your favorite dishes by making a table from ceramic tiles with your own hands. True, for this you will have to break something else...
When decorating a table or any other item with pieces of broken ceramic, first of all think about the combination of patterns and colors. In this project, bright, saturated colors and a black background were chosen as companion colors that can set off the black and white pattern of the plates. Perhaps if the plate were with delicate pink flowers, it would be better to combine them with pastel colors: beige, light green, lilac. And make the background light. To imagine what the product will look like, draw it with colored pencils.
Preparing for work
Think about the fact that broken glass, tiles, and ceramics can be dangerous—you can get hurt when working with them. Be sure to use protective equipment: gloves (fabric, rubber) and goggles. When chopping material, wrap it in a cloth or rag to prevent the fragments from scattering.
To work, you will need a stable old table made of metal or wood. You can make a table from an old stool or small bedside table, installing a tabletop-lid on them using self-tapping screws. Also prepare:
- Several ceramic tiles or a sufficient number of their fragments.
- Coarse and fine grain sandpaper.
- Tile adhesive.
- Cement.
- Dye for cement.
- Hammer.
- An ordinary saw.
- Paint.
- A brush.
- Grout in a color that suits your design.
- Spatula for glue and grout.
- Tile nippers.
- Sponge, rags.
Article on the topic: DIY Kazakh table
Step-by-step instruction
- Start by preparing the countertop. The surface must be clean and dry. In addition, you need good grip, so our task is not to polish it, but to make it as rough as possible. To do this, you can use coarse sandpaper (about 80% grit) and a regular saw. Scratch the table at an angle with the saw, gradually moving it.
- Now get to the fun part of the project - breaking the ceramic tiles, plates and whatever else you have planned. Wrap the tile in a rag and hit it lightly in several places with a hammer. Do not try to make the elements of the future mosaic too small.
If you want to get fragments of a certain shape, use a glass cutter. Draw it along the marked lines, and then wrap it in a rag and lightly tap where the cutting lines are. You can correct the shape of the fragments using special forceps. Clamp the fragment with tongs in the desired place, cover with a rag and squeeze.
- Prepare tile adhesive according to instructions. Wear rubber gloves.
- Using a spatula, apply the adhesive onto the surface of the table and a little onto the fragments of the mosaic pattern. Using the approximate diagram, create a pattern on the surface of the table. Work carefully so that the adhesive does not get on the front side of the ceramic elements. If this still fails, immediately wipe the glue from the mosaic with a damp sponge. Don't place the pieces too close. The distance between the fragments can be from 0.25″ to 1″ (0.6-2.5 cm).
- Thus, continue laying out the desired pattern.
If the mosaic fragments have different thicknesses, the evenness of the layer can be adjusted by applying more glue to the thinner ones.
- Use a damp sponge to wipe off excess glue from the surface. Leave the mosaic to dry for 24 hours.
- The space between the pieces of ceramic must be empty for filling with decorative cement mortar, so remove any excess sticking out pieces of glue.
- Mix the cement mortar as required by the manufacturer. The substance must not flow or contain dry fragments. Add pigment to achieve the desired uniform color (black in our project).
- Using a spatula, apply the cement mortar to the mosaic. Distribute, filling the voids between pieces of ceramic.
- Form the ends of the cement using your hands and any available tools that are convenient for you. Attach small fragments of the remaining mosaic to the ends.
- Using light circular movements, remove the cement from the mosaic without destroying the space filled with it. Leave the table to dry.
- Remove the remaining black cement after drying. When the ceramic surface of the table is completely ready, you can begin finishing the base.
- Sand the legs with fine-grit sandpaper. Wipe them down.
- Paint the wood (or metal) black (or another color). Leave the product until completely dry.
Article on the topic: DIY plasterboard table
You have made a unique piece of furniture, there is no other like it. Enjoy using your new table as a coffee table, dressing table or a beautiful stand for a vase or lamp.
3 simple options from which you can make a decorative mosaic on the table
How to decoupage a table in Provence style with your own hands
How to make a good-quality wooden round table with your own hands
What tools will you need?
To lay ceramics in this case, you will need the following tools:
- Grinder with a diamond wheel - for cutting tiles. A grinder will cope better with dense porcelain stoneware or thick floor tiles, as well as with shaped trimming.
- The tile cutter will cut straight strips and will not produce much noise or dust.
- You will need a jigsaw to update the countertop and cut the wood boards to the desired size.
- A set of spatulas: rubber for grouting joints and regular metal for applying glue to the base.
- Level: the cladding must be in the same plane. You can't do without a level.
What glue to use
Using standard cement-based tile adhesive is not advisable. Cement mortar has poor adhesion to wood. It is better to use acrylic or epoxy based glue.
It is more flexible and does not crack upon impact. It does not peel off when the wood gets wet, it is easy to apply and dries quickly. Holds ceramic countertop tiles well.
A very good option is to use Liquid Nails glue in syringe tubes, which is squeezed out with a special gun.
The glue layer should not exceed 2-3 mm. A thicker layer takes longer to dry and does not improve the strength of the connection between the ceramics and the countertop. In addition, if you lay the tiles on a thick layer of glue (mortar), you will have to use a level to give it a strictly horizontal position. Otherwise, moisture may accumulate in the recesses, and the tile may burst under mechanical stress.
The glue must be leveled with a comb spatula over the entire surface. You cannot glue tiles by applying adhesive in stripes or dots.
Where to start
The first thing you will ask yourself is where to start the whole workflow. And this is correct, because everything must be divided into several stages and performed in the specified sequence. And the first section we will introduce you to will be the choice of finishing material.
It’s possible to do this, but the cost of curved tiles may scare you
Choosing tiles for countertops
To limit (save time) the widest range of materials, you should immediately say that a kitchen countertop made of tiles should only be made of porcelain stoneware.
Here's what it has to do with:
- Porcelain tiles for the kitchen are not inferior in strength to natural stones. That is, by laying such tiles on the countertop, you will avoid the appearance of cracks and chips even when in contact with heavy pots and pans. It can only be broken with a hammer, but this is far from a kitchen tool.
- High wear resistance. No matter how much you rub it, the surface will remain in its original form. Manufacturers provide a 10-15 year warranty. Tell me, what other material can be used so much?
- Very low water absorption compared to tiles and ceramic tiles. The indicator fluctuates around 0.05%, which allows the use of porcelain stoneware even in rooms with a humidity of 95%.
- Resistant to fats, oils, various acidic and alkaline reagents. Therefore, you can safely use household detergents without harming the surface.
Types of surfaces
However, you still have to choose, not the composition of the material, but its surface, since there are several options:
- The relief (textured) surface - its disadvantage is that dirt accumulates in the pores very quickly, which is not so easy to clean. On the other hand, the kitchen creates a unique design that is difficult to recreate with smooth materials.
- Polished (semi-polished) – easy to clean, pleasant to the touch. But, as we said earlier, the charm is lost.
Advice! Choose whatever you like. Because if the wavy texture suits you, it’s okay - you can clean it with a brush once a week.
There is porcelain tile in the form of a mosaic, but we do not recommend it for those who are laying tiles for the first time. A harmonious combination of apron and countertop will benefit the kitchen. This option will decorate the room.
For lovers of large sizes, there are tiles with dimensions of 60x60 cm, so if you want to simplify the installation workflow, this option is for you. Look at the photo to see what it looks like.
Porcelain tiles for the kitchen are not inferior in strength to natural stones. That is, by laying such tiles on the countertop, you will avoid the appearance of cracks and chips even when in contact with heavy pots and pans. It can only be broken with a hammer, but this is far from a kitchen tool.
High wear resistance. No matter how much you rub it, the surface will remain in its original form. Manufacturers provide a 10-15 year warranty. Tell me, what other material can be used so much? Very low water absorption compared to tiles and ceramic tiles. The indicator fluctuates around 0.05%, which allows the use of porcelain stoneware even in rooms with a humidity of 95%. Resistant to fats, oils, various acidic and alkaline reagents. Therefore, you can safely use household detergents without harming the surface.
Types of surfaces
However, you still have to choose, not the composition of the material, but its surface, since there are several options:
- The relief (textured) surface - its disadvantage is that dirt accumulates in the pores very quickly, which is not so easy to clean. On the other hand, the kitchen creates a unique design that is difficult to recreate with smooth materials.
- Polished (semi-polished) – easy to clean, pleasant to the touch. But, as we said earlier, the charm is lost.
Advice! Choose whatever you like. Because if the wavy texture suits you, it’s okay - you can clean it with a brush once a week.
There is porcelain tile in the form of a mosaic, but we do not recommend it for those who are laying tiles for the first time. A harmonious combination of apron and countertop will benefit the kitchen. This option will decorate the room.
For lovers of large sizes, there are tiles with dimensions of 60x60 cm, so if you want to simplify the installation workflow, this option is for you. Look at the photo to see what it looks like.
Tiles are very bulky and therefore rarely used as finishing materials for countertops
Manufacturing
The decision to make a table from ceramic tiles with your own hands may come due to the considerable cost of this finished piece of furniture. It is quite possible to bring such an idea to life and even non-professionals can do it (as evidenced by their reviews). The main thing: knowledge of design features, assembly technology and the process of laying tiles, accuracy of execution and a little design imagination.
Article on the topic: DIY concrete table
Materials
The first step in creating a table with ceramic tiles is the selection of materials. In this case, one should focus on both their aesthetic and functional qualities.
Base
An important element that ensures the reliability of the structure is the frame. It must be strong enough and reliably hold the heavy weight of the countertop, separated by tiles. The most suitable materials for the frame are solid wood or metal. For minimalist high-tech interiors, you can use a laconic design made of chromed steel. Luxurious historical or cozy rustic styles will be perfectly complemented by wood. For the former, they choose expensive types of wood or their imitation, the shape of the legs is pretentious or strict classic, while for the latter, a simpler option is suitable? rough shape, simplicity of finishing and material itself. You can also opt for a forged frame, which can fit into almost any interior style.
Choose a more powerful base; before covering the table with ceramic tiles with your own hands, check the strength of soldering and connections. If something confuses you, redo it or change it. Only after this can you begin subsequent work.
Tile
Tiles for countertop decoration are selected not only based on personal aesthetic preferences. It is also important to take into account the characteristics of the material and how well they will meet the requirements.
The first thing you need to pay attention to is the dimensions of the tiles. To prevent the design from looking bulky, it is advisable to choose elegant wall tiles about 5 mm thick. The size of the cladding elements is directly dependent on the area of the countertop. Tiles of 10×10, 20×20, 30×30, etc. formats are laid on a small surface. If the table has impressive parameters, then it is quite acceptable to use ceramics measuring 50x50 and larger.
Material characteristics such as slip resistance, increased strength or wear resistance can be neglected, but depending on the operating conditions, the following properties may become mandatory:
- waterproof;
- resistance to household chemicals;
- degree of surface hardness;
- frost resistance.
Article on the topic: DIY tablecloth for a wedding table
A kitchen table with ceramic tiles should have the first three, because its surface is often exposed to moisture and detergents. And in the case when you plan to cut products directly on the countertop (without using a cutting board), it is necessary to take into account the surface hardness of the tile on the Mohs scale.
A wooden table with ceramic tiles can be decorated in any way you like, there are no restrictions, you can cover the tiles with special paint to create craquelure, and then fill them with varnish or resin
The type of ceramic surface also plays a significant role. In places where high hygiene of the coating is required, it is not advisable to use unglazed or embossed tiles, since it will be problematic to completely clean them of dirt. This is especially true for the kitchen, where food residues can become deeply embedded in the heterogeneous texture of the tile. Glossy and polished surface? bright decor even with a restrained color scheme, but a dining table with ceramic tiles of this type is not the best solution, unless constantly eliminating stains does not make it difficult for the buyer. The optimal choice for this case is tile with a matte glaze, which protects the body of the tile from moisture and grease, and also does not require additional means and effort for cleaning.
A kitchen table with ceramic tiles can most often be found on open verandas; in this case, the base is forged
Among the aesthetic properties of ceramic table cladding, important points are color, texture, pattern and general composition of elements. The correctness of their choice is determined only by subjective ideas about beauty, but there are some recommendations. For example, when selecting shades and motifs for tiles, it is advisable to focus on the design of the table frame and the room where it will be located.
The most common finishing options:
- tiles with a repeating pattern;
- imitation of wood, stone, cement, metal, leather or textiles;
- expressive drawing on a plain background;
- panel;
- mosaic (including from tile scraps).
Article on the topic: Do-it-yourself table for a woodworking machine
More design ideas? on the picture.
Finishing
The next step in creating a table with ceramic tiles? laying tiles. Before starting work, you need to check the condition of the countertop - it must be strong, smooth, without cracks or chips. If the element is in unsatisfactory condition, it should be replaced. The new countertop should ideally be made from the same material as its predecessor. But sometimes this can be problematic, so it is possible to install OSB boards or laminated chipboard. Their thickness should be at least 16 mm, but preferably? 25 mm.
The slabs can be laid directly onto the old table top, thereby reducing costs and increasing the strength of the structure.
To cover the tabletop, you must perform the following steps:
- Surface preparation (cleaning, priming).
- Applying adhesive to tiles and laying them.
- Grouting joints.
- Processing the ends of the table using special decorative strips or tile scraps.
When laying tiles on a folding table, avoid getting adhesive on the joints of the elements.
Of course, the simplest solution would be to go and buy a ready-made table finished with beautiful ceramic tiles, but the reliability of such a product cannot be determined from reviews on the Internet, since everyone has different operating conditions, different installation locations and different craftsmen from the same company. If you have the time and funds, then making a table from ceramic tiles with your own hands will not only allow you to get a product that will last for many years, but will also allow you to choose materials to suit your taste, with the desired characteristics (for example, tile adhesive can be frost-resistant, which will allow you to use the table outside in winter) and other important points. You can also keep up with the times and order not individual tiles, but large-format tiles that will cover the entire surface of the table, or choose ready-made broken ceramics from a famous designer and create an antique piece that you can pass on as a family heirloom to your children. The choice is of course yours, just evaluate what you expect from a table with ceramic tiles.
Article on the topic: DIY table with infinity effect
Romantic interior in Provencal style
The mild and sunny climate of the southern regions of France is associated with calm, pastel colors. Several characteristic features will emphasize the originality of the interior in a rustic style:
- the color scheme is formed by light pastel shades (sand, cream, white, beige, lilac, light green);
- you can lay out an interesting pattern on the work surface, but any combination of shades should not look provocative;
- Provence style assumes the presence of a variety of textile decor (curtains, tablecloths, pillows, upholstery). The shades of textile patterns should be reflected in the palette of the tabletop.
As an option mosaic tiles
Ceramics with plant motifs will be an excellent decoration for the kitchen countertop. Motifs depicting fruits and vegetables look interesting as decor.
To prevent such surfaces from looking too patterned, you can use this material to decorate a small area of the countertop near the sink.
Advice To create a homely atmosphere, it is better to choose products of small sizes - 10x10 cm or 15x15 cm. Discreet and cozy interior: white and blue kitchen.
The work surface is laid out with blue tiles. A kitchen apron, decorated with pale blue squares with small plant patterns, will harmoniously complement the work surface. The role of the plinth will be played by a strip lined with the same blue tiles as the table.
The blue frieze will elegantly border the ceramic plinth. A milky kitchen set will visually soften the coolness of the blue tones. White grout will give the countertop an elegant look and make it visually lighter.
Porcelain tiles are a more budget option
An easy option for creating a cozy interior is to lay out identical squares on the kitchen apron and work table. Choose contrasting shades or to match the color scheme of the interior.
An original option for finishing a desktop is rectangular products that imitate a wooden surface . In the manufacture of ceramic elements, clay, special additives to improve the structure, and quartz sand are used. Which material to choose, glazed (with single/double firing) or matte, is up to the residents to decide individually.
The wooden surface is easily imitated by tiles of different shades. For a soft, calm Provencal style, light-colored material (oak, maple, birch) would be a win-win option. Patterned textiles with floral designs will bring a play of colors to the interior.
In calm beige color
A fashion trend is to use it with a worn effect. The material imitating aged wood looks elegant and noble.
Selection of tools and materials
To make a table with ceramic tiles with your own hands, the first step is to prepare all the materials required for the work, as well as tools. If you don’t have a tool, you can easily replace it with an analogue one, or ask your friends for it.
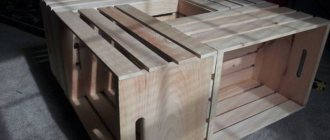
Table selection
The table frame can be made of metal or wood. Metal frames are very reliable, but heavy and susceptible to rust. To bring such a frame to normal condition, it must be cleaned and painted.
As a basis for the future table, you can use some old dining or coffee table made of wood. If there is already a countertop on it, and it is in good condition, has no delaminations or cracks, then a new slab does not need to be made. If it has defects, unevenness, bends or springs, it is recommended to lay a new table top on top of it. Or remove the old stove and put a new countertop in its place.
If there is no frame, you need to make it yourself from wooden blocks or chipboards.
The tabletop is made of chipboard (preferably laminated), multi-layer moisture-resistant plywood or OSB. OSB board is definitely the best option as it is moisture resistant and does not require impregnation. The same can be said about laminated chipboard. Conventional chipboards can be used, but it is not advisable, since, despite the impregnation, over time they will collapse from moisture that gets on them. The thickness of the slab for the countertop is selected to be at least 16 mm. The most optimal thickness is 20-25 mm. This will ensure the reliability of the table even when using heavy porcelain stoneware.
DIY table with ceramic tiles (photo)
Choosing ceramic tiles
To decorate a table with tiles yourself, almost any wall or floor tile with a thickness of more than 5 mm, as well as mosaic, is suitable. Porcelain tiles have proven themselves to be quite good in this regard. The size of the tiles, in principle, does not matter. But it should be borne in mind that small tiles are easier to lay, and there is less waste. A small tile is easy to calculate without leaving any residue. The advantage of large tiles is that the countertop will have fewer seams.
Article on the topic: DIY table with infinity effect
You can choose any tile pattern. It’s not just plain tiles that look great, but ones that have a specific pattern or structural composition. There may be a drawing or a decorated insert on a uniform background.
Assortment of ceramic tiles
Other materials and tools
As additional materials we will need:
- Silicone balloon and syringe for it.
- Impregnation for wood (if chipboard is used).
- Cement-based adhesive for wooden surfaces.
- Grout based on epoxy resin.
The following tools will be used:
- Grinder for cutting tiles. In a pinch, a tile cutter will do. Prepare a diamond wheel as well.
- Jigsaw for cutting wood boards.
- Spatula for applying tile adhesive.
- Rubber spatula, which will be used to rub joints between tiles.
- Tape measure and pencil.
- Level.
- Self-tapping screws for wood, 55 mm long.
- Decorative strips for decorating the border of the table top.
How to make a table from tiles with your own hands (video):
Sunny Mediterranean flavor
A kitchen decorated in a bright mood looks summery and joyful at any time of the year. Natural materials (wood, stone, metal) are used to decorate the kitchen. The range of natural shades (cream-yellow, greenish-sand, white-blue) evokes only positive emotions. The Mediterranean interior can be given a different character:
- in the Italian direction stone dominates. The material is used for finishing literally all surfaces (floor, walls, ceiling). Stone squares are incredibly convenient in everyday life and look very colorful. You can decorate the work surface with textured material. Suitable colors – gray, brown;
Stylish kitchen in dark colors
- The Spanish interior will be decorated with bright azulejo tiles. This unique material will refresh a wall near the work area or an apron in an unusual way. To prevent the kitchen from looking provocative or colorful, choose a plain, dark-colored material for the tabletop decor;
- Greek-style kitchens are characterized by the use of rough-finished wooden surfaces. White plastered/painted walls will highlight the natural grain of the wood. The kitchen decor looks somewhat laconic, but at the same time fresh and light.
When decorating a kitchen in a Mediterranean style, it is not necessary to create the decor in perfect condition.
On the contrary, some irregularities, chips, cracks will emphasize the naturalness of the situation.
Classic style
An excellent option for an Italian-style kitchen: the walls are plastered and painted with matte sand-colored paint. The kitchen apron is lined with decorative rectangular red brick tiles imitating brickwork. The tabletop is decorated with squares of sand-colored porcelain stoneware (to match the walls).
Appliances with chrome surfaces will dilute the brown color. The hood is made of the same metal. Light sand-colored kitchen facades will visually make the room lighter and more spacious.
Small square azulejo products will add unusual brightness to a Mediterranean interior with Spanish notes. Each square can be an independent picture or part of a national ornament. In order not to distract attention from the bright decor, single-color tiles are selected for the desktop.
To maintain the glossy shine of the wall surface, choose glazed ceramic squares or shiny porcelain tiles for the table.
When everything is in the same style and in the same color
The ascetic Greek Mediterranean style is distinguished by simple forms. The interior is strictly decorated, monochromatic light shades, combined with wooden elements, give the atmosphere coziness and tranquility . In such a kitchen it is pleasant to welcome guests and chat leisurely. The countertop, lined with square ceramic tiles, is easy to care for.
Making a countertop
You will need three square ceramic tiles measuring 80x80 cm, 60x60 cm and 40x40 cm. First you will need to make markings.
After that, cut a square hole in the center of each of the three tiles. We insert a 60x60 cm tile into the large tile, and a small tile into it. Insert another tile into the hole in the small tile. In general, everything is clearly visible in the photo below.
We make the formwork and then fill it with cement mortar. Be sure to use reinforcing metal mesh.
Tile countertop
Table top made of tiles (porcelain stoneware)
One day, when I arrived to measure another bathroom, I was offered an interesting thing. Make a countertop from tiles . At that time I had never encountered anything like this, but I was very interested in trying it. Nowadays, tile countertops are gaining more and more popularity; it has become fashionable thanks to the entry of large-format tiles into the market.
Article on the topic: Do-it-yourself table for a woodworking machine
Preparation for countertop installation
The first step was to decide what to make the countertop for laying the tiles from. I had two options:
- This is pouring a monolithic countertop.
- Make from gypsum boards.
The customer chose the second option because it saved money. We approved the designs and dimensions and I began to implement this project.
Tabletop size 120 cm length, 50 cm width, height 80 cm.
Frame and tabletop assembly
I assembled a tabletop from Knauf profile 60x27, 27x28. and GKLV 12.5 mm. First of all, I started with markings and calculations.
I made a cake like this: two layers of gypsum board, frame, one layer of gypsum board. This pie gave me the size to fit two mosaic chips.
This is how the tabletop should have turned out. But later they abandoned the rounding of the tile countertops.
I screwed a 27x28 profile around the perimeter and inserted a 60x27 profile twisted into two into the spacer.
Then I began to set up two support legs, also from a 27x28 profile around the perimeter and a double 60x27 for rigidity.
I sewed up all the gypsum boards, the top part in two layers and the bottom part in one layer.
I was faced with the task of avoiding the sharp edge of the tabletop. We decided to remove the mosaic width edge.
To create such a bevel, I screwed two layers of plasterboard from the end of the tabletop. And I started cutting according to the rules that I screwed on the sides.
The entire frame was ready, but after measuring again I realized that the thickness was not enough for me. You will have to make a thick layer of glue, but this is not advisable because with a thick layer it is difficult to fill the maximum amount of the slab with glue. In places where there is emptiness, the impact can cause the tiles to break during use. I decided to add a high-quality self-leveling floor.
I left the countertop to dry while laying out the tiles in other places. A week later I began further work with the tile countertop.
I covered everything with waterproofing with tape in the inner corners.
Installation of tiles and washed down at 45 degrees
It's time to lay the tiles. I needed to prepare the mosaic and tiles to fit my countertop. The tiles were 120x60 cm in size, and the mosaic was 5x5 cm.
Article on the topic: DIY concrete table
I cut the tiles to size, then sawed all the corners at 45 degrees, you can read how to do this here. The hardest part was cutting down the mosaic.
I screwed a guide under the mosaic so that the chips would not move out.
The next day I began laying out the lintels on the countertop and the difficult corner.
After the hard work of adjusting all the elements, I exhaled with joy, the tile countertop was finished, all that was left was to grout.
The tile countertop is ready!
It is better to grout with an epoxy fugue. But the customer saved money and had to do the grouting with regular cement grout.
Do not forget that all internal corners and junctions with other walls must be filled with sealant that matches the color of the grout. Otherwise, cracks will appear over time.
The next day I washed everything thoroughly and started cutting a hole for the washbasin. Having previously marked how it should stand.
Next I installed the sink and trim. There were no problems with this.
OK it's all over Now. Now all that remains is to hang the mirror and hand over the object to the customer. He was delighted!